While our browser can render complex styles, visual effects, and animations, all of those apply basically just to text. Yet web pages contain a variety of non-text embedded content, from images to other web pages. Support for embedded content has powerful implications for browser architecture, performance, security, and open information access, and has played a key role throughout the web’s history.
Images are certainly the most popular kind of embedded content on the
web,So it’s a little
ironic that images only make their appearance in Chapter 15 of this
book! It’s because Tkinter doesn’t support many image formats or proper
sizing and clipping, so I had to wait for the introduction of
Skia. dating back to early
1993.This history is
also the
reason behind a lot of inconsistencies, like src versus
href or img versus
image. They’re included on web pages via the
<img> tag, which looks like this:
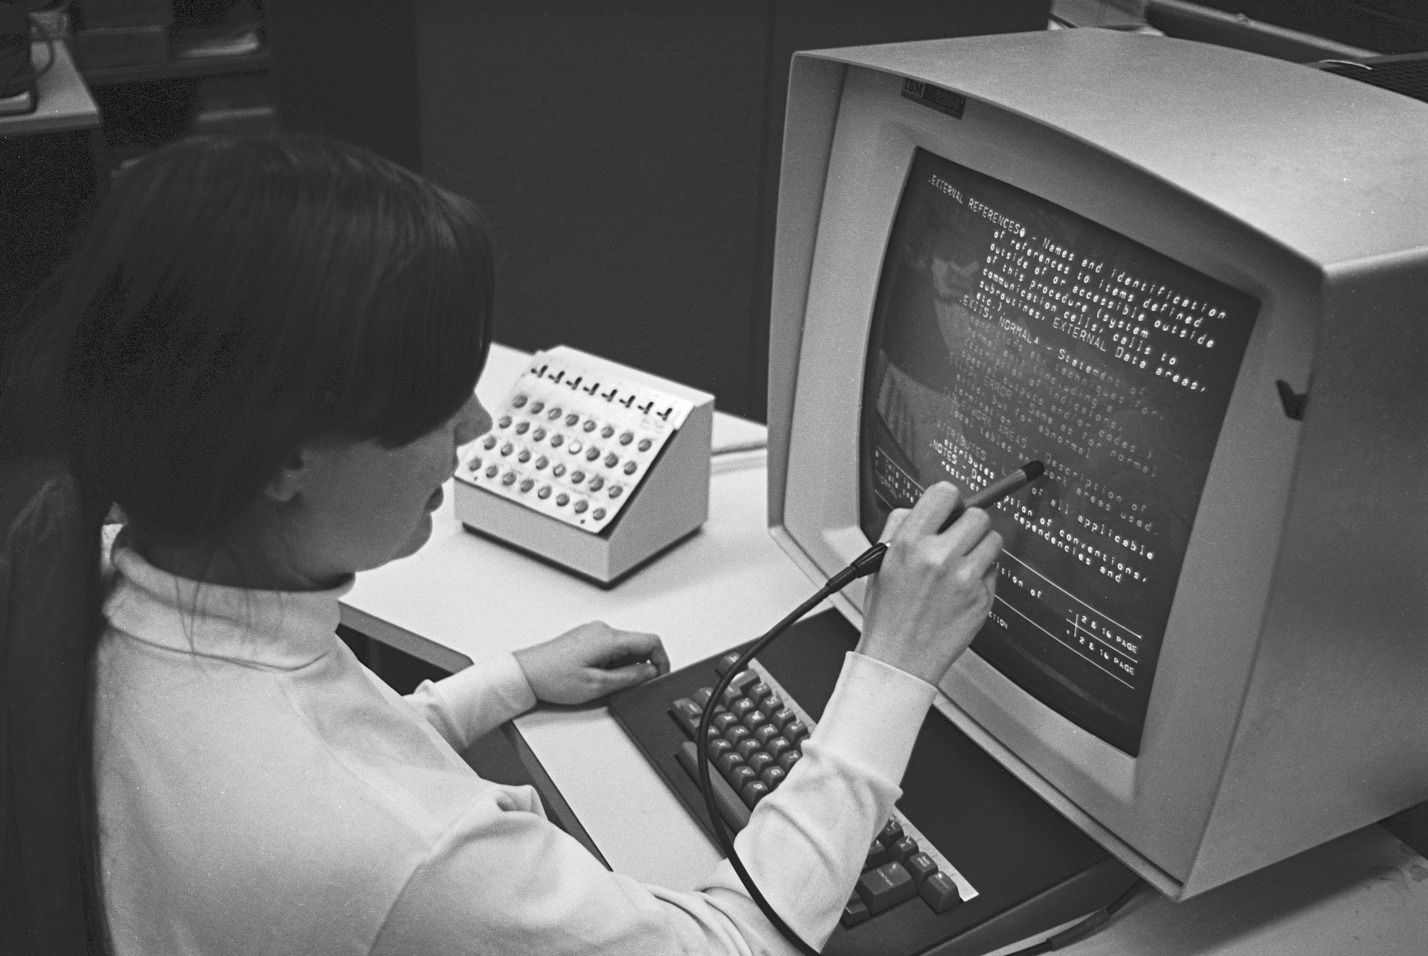
<img src="https://browser.engineering/im/hes.jpg">This particular example renders as shown in Figure 1.
Luckily, implementing images isn’t too hard, so let’s just get started. There are four steps to displaying images in our browser:
Let’s start with downloading images from a URL. Naturally, that
happens over HTTP, which we already have a request function
for. However, while all of the content we’ve downloaded so far—HTML,
CSS, and JavaScript—has been textual, images typically use binary data
formats. We’ll need to extend request to support binary
data.
The change is pretty minimal: instead of passing the "r"
flag to makefile, pass a "b" flag indicating
binary mode:
class URL:
    def request(self, referrer, payload=None):
        # ...
        response = s.makefile("b")
        # ...
Now every time we read from response, we will get
bytes of binary data, not a str with textual
data, so we’ll need to change some HTTP parser code to explicitly
decode the data:
class URL:
    def request(self, referrer, payload=None):
        # ...
        statusline = response.readline().decode("utf8")
        # ...
        while True:
            line = response.readline().decode("utf8")
            # ...
        # ...
Note that I didn’t add a decode call when we
read the body; that’s because the body might actually be binary data,
and we want to return that binary data directly to the browser. Now,
every existing call to request, which wants textual data,
needs to decode the response. For example, in
load, you’ll want to do something like this:
class Tab:
    def load(self, url, payload=None):
        # ...
        headers, body = url.request(self.url, payload)
        body = body.decode("utf8", "replace")
        # ...
By passing replace as the second argument to
decode, I tell Python to replace any invalid characters by
a special � character instead of throwing an exception.
Make sure to make this change everywhere in your browser that you
call request, including inside
XMLHttpRequest_send and in several other places in
load.
When we download images, however, we won’t call
decode; we’ll just use the binary data directly.
class Tab:
    def load(self, url, payload=None):
        # ...
        images = [node
            for node in tree_to_list(self.nodes, [])
            if isinstance(node, Element)
            and node.tag == "img"]
        for img in images:
            src = img.attributes.get("src", "")
            image_url = url.resolve(src)
            assert self.allowed_request(image_url), \
                "Blocked load of " + str(image_url) + " due to CSP"
            header, body = image_url.request(url)
Once we’ve downloaded the image, we need to turn it into a Skia
Image object. That requires the following code:
class Tab:
    def load(self, url, payload=None):
        for img in images:
            # ...
            img.encoded_data = body
            data = skia.Data.MakeWithoutCopy(body)
            img.image = skia.Image.MakeFromEncoded(data)
There are two tricky steps here: the requested data is turned into a
Skia Data object using the MakeWithoutCopy
method, and then into an image with MakeFromEncoded.
Because we used MakeWithoutCopy, the Data
object just stores a reference to the existing body and
doesn’t own that data. That’s essential, because encoded image data can
be large—maybe megabytes—and copying that data wastes memory and time.
But that also means that the data will become invalid if
body is ever garbage-collected; that’s why I save the
body in an encoded_data field.This is a bit of a hack.
Perhaps a better solution would be to write the response directly into a
Skia Data object using the writable_data API.
That would require some refactoring of the rest of the browser which is
why I’m choosing to avoid it.
These download and decode steps can both fail; if that happens we’ll load a “broken image” placeholder (I used one from Wikipedia):
BROKEN_IMAGE = skia.Image.open("Broken_Image.png")

class Tab:
    def load(self, url, payload=None):
        for img in images:
            try:
                # ...
            except Exception as e:
                print("Image", img.attributes.get("src", ""),
                    "crashed", e)
                img.image = BROKEN_IMAGE
Now that we’ve downloaded and saved the image, we need to use it.
That just requires calling Skia’s drawImageRect
function:
class DrawImage(PaintCommand):
    def __init__(self, image, rect):
        super().__init__(rect)
        self.image = image

    def execute(self, canvas):
        canvas.drawImageRect(self.image, self.rect)
The internals of drawImageRect, however, are a little
complicated and worth expanding on. Recall that the Image
object is created using a MakeFromEncoded method. That name
reminds us that the image we’ve downloaded isn’t raw image bytes. In
fact, all of the image formats you know—JPG, PNG, and the many more
obscure ones—encode the image data using various sophisticated
algorithms. The image therefore needs to be decoded before it
can be used.And with
much more complicated algorithms than just utf8
conversion.
Skia applies a variety of clever optimizations to decoding, such as directly decoding the image to its eventual size and caching the decoded image as long as possible.There’s also an HTML API to control decoding, so that the web page author can indicate when to pay that cost. That’s because raw image data can be quite large:Decoding costs both a lot of memory and also a lot of time, since just writing out all of those bytes can take a big chunk of our render budget. Optimizing image handling is essential to a performant browser. a pixel is usually stored as 4 bytes, so a 12 megapixel camera (as you can find on phones these days) produces 48 megabytes of raw data for a single image.
Because image decoding can be so expensive, Skia also has several algorithms available for decoding, some of which are faster but result in a worse-looking image.Image formats like JPEG are also lossy, meaning that they don’t faithfully represent all of the information in the original picture, so there’s a time/quality trade-off going on before the file is saved. Typically these formats try to drop “noisy details” that a human is unlikely to notice, just like different resizing algorithms might. For example, there’s the fast, simple “nearest neighbor” algorithm and the slower but higher-quality “bilinear” or even “Lanczos” algorithms.Specifically, these algorithms decide how to decode an image when the image size and the destination size are different and the image therefore needs to be resized. The faster algorithms tend to result in choppier, more jagged images.
To give web page authors control over this performance bottleneck,
there’s an image-rendering
CSS property that indicates which algorithm to use. Let’s add that as an
argument to DrawImage:
def parse_image_rendering(quality):
   if quality == "high-quality":
       return skia.FilterQuality.kHigh_FilterQuality
   elif quality == "crisp-edges":
       return skia.FilterQuality.kLow_FilterQuality
   else:
       return skia.FilterQuality.kMedium_FilterQuality

class DrawImage(PaintCommand):
    def __init__(self, image, rect, quality):
        # ...
        self.quality = parse_image_rendering(quality)

    def execute(self, canvas):
        paint = skia.Paint(
            FilterQuality=self.quality,
        )
        canvas.drawImageRect(self.image, self.rect, paint)
But to talk about where this argument comes from, or more generally to actually see downloaded images in our browser, we first need to add images into our browser’s layout tree.
The HTTP Content-Type header lets the web server tell
the browser whether a document contains text or binary data. The header
contains a value called a MIME
type, such as text/html, text/css, and
text/javascript for HTML, CSS, and JavaScript;
image/png and image/jpeg for PNG and JPEG
images; and many
others for various font, video, audio, and data formats.“MIME” stands for Multipurpose
Internet Mail Extensions, and was originally intended for enumerating
all of the acceptable data formats for email attachments. These days the
loop has basically closed: most email clients are now “webmail” clients,
accessed through your browser, and most emails are now HTML, encoded
with the text/html MIME type, though typically there is
still a plain-text option. Interestingly, we didn’t need
to specify the image format in the code above. That’s because many image
formats start with “magic
bytes”; for example, PNG files always start with byte 137 followed
by the letters “PNG”. These magic bytes are often more reliable than
web-server-provided MIME types, so such “format sniffing” is common
inside browsers and their supporting libraries.
Based on your experience with prior chapters, you can probably guess
how to add images to our browser’s layout and paint process. We’ll need
to create an ImageLayout class; add a new
image case to BlockLayout’s
recurse method; and generate a DrawImage
command from ImageLayout’s paint method.
As we do this, you might recall doing something very similar for
<input> elements. In fact, text areas and buttons are
very similar to images: both are leaf nodes of the DOM, placed into
lines, affected by text baselines, and painting custom content.Images aren’t quite like
text because a text node is potentially an entire run of text,
split across multiple lines, while an image is an atomic
inline. The other types of embedded content in this chapter are also
atomic inlines. Since they are so similar, let’s try to
reuse the same code for both.
Let’s split the existing InputLayout into a superclass
called EmbedLayout, containing most of the existing code,
and a new subclass with the input-specific code,
InputLayout:In a real browser, input elements are usually called
widgets because they have a lot of special
rendering rules that sometimes involve CSS.
class EmbedLayout:
    def __init__(self, node, parent, previous, frame):
        # ...

    def layout(self):
        self.zoom = self.parent.zoom
        self.font = font(self.node.style, self.zoom)
        if self.previous:
            space = self.previous.font.measureText(" ")
            self.x = \
                self.previous.x + space + self.previous.width
        else:
            self.x = self.parent.x
class InputLayout(EmbedLayout):
def __init__(self, node, parent, previous):
super().__init__(node, parent, previous)
def layout(self):
super().layout()The idea is that EmbedLayout should provide common
layout code for all kinds of embedded content, while its subclasses like
InputLayout should provide the custom code for that type of
content. Different types of embedded content might have different widths
and heights, so that should happen in each subclass, as should the
definition of paint:
class InputLayout(EmbedLayout):
    def layout(self):
        # ...
        self.width = dpx(INPUT_WIDTH_PX, self.zoom)
        self.height = linespace(self.font)
        self.ascent = -self.height
        self.descent = 0

    def paint(self):
        # ...
ImageLayout can now inherit most of its behavior from
EmbedLayout, but take its width and height from the image
itself:
class ImageLayout(EmbedLayout):
    def __init__(self, node, parent, previous):
        super().__init__(node, parent, previous)

    def layout(self):
        super().layout()
        self.width = dpx(self.node.image.width(), self.zoom)
        self.img_height = dpx(self.node.image.height(), self.zoom)
        self.height = max(self.img_height, linespace(self.font))
        self.ascent = -self.height
        self.descent = 0
Notice that the height of the image depends on the font size of the
element. Though odd, this is how image layout actually works: a line
with a single, very small, image on it will still be tall enough to
contain text.In fact, a
page with only a single image and no text or CSS at all still has its
layout affected by a font—the default font. This is a common source of
confusion for web developers. In a real browser, it can be avoided by
forcing an image into a block or other layout mode via the
display CSS property. The underlying reason
for this is because, as a type of inline layout, images are designed to
flow along with related text, which means the bottom of the image should
line up with the text
baseline. That’s also why we save img_height in the
code above.
Also, in the code above I introduced new ascent and
descent fields on EmbedLayout subclasses. This
is meant to be used in LineLayout layout in place of the
existing layout code for ascent and descent. It also requires
introducing those fields on TextLayout:
class LineLayout:
    def layout(self):
        # ...
        max_ascent = max([-child.ascent
                          for child in self.children])
        baseline = self.y + max_ascent

        for child in self.children:
            if isinstance(child, TextLayout):
                child.y = baseline + child.ascent / 1.25
            else:
                child.y = baseline + child.ascent
        max_descent = max([child.descent
                           for child in self.children])
        self.height = max_ascent + max_descent

class TextLayout:
    def layout(self):
        # ...
        self.ascent = self.font.getMetrics().fAscent * 1.25
        self.descent = self.font.getMetrics().fDescent * 1.25
Painting an image is also straightforward:
class ImageLayout(EmbedLayout):
    def paint(self):
        cmds = []
        rect = skia.Rect.MakeLTRB(
            self.x, self.y + self.height - self.img_height,
            self.x + self.width, self.y + self.height)
        quality = self.node.style.get("image-rendering", "auto")
        cmds.append(DrawImage(self.node.image, rect, quality))
        return cmds
Now we need to create ImageLayouts in
BlockLayout. Input elements are created in an
input method, so we create a largely similar
image method. But input is itself largely a
duplicate of word, so this would be a lot of duplication.
The only part of these methods that differs is the part that computes
the width of the new inline child; most of the rest of the logic is
shared.
Let’s instead refactor the shared code into new methods which
text, image, and input can call.
First, all of these methods need a font to determine how much spaceYes, this is how real browsers
do it too. to leave after the inline; let’s make a
function for that:
def font(style, zoom):
    weight = style["font-weight"]
    variant = style["font-style"]
    size = float(style["font-size"][:-2]) * 0.75
    font_size = dpx(size, zoom)
    return get_font(font_size, weight, variant)
There’s also shared code that handles line layout; let’s put that
into a new add_inline_child method. We’ll need to pass in
the HTML node, the element, and the layout class to instantiate (plus a
word parameter that’s just for
TextLayouts):
class BlockLayout:
    def add_inline_child(self, node, w, child_class, word=None):
        if self.cursor_x + w > self.x + self.width:
            self.new_line()
        line = self.children[-1]
        previous_word = line.children[-1] if line.children else None
        if word:
            child = child_class(node, word, line, previous_word)
        else:
            child = child_class(node, line, previous_word)
        line.children.append(child)
        self.cursor_x += w + \
            font(node.style, self.zoom).measureText(" ")
We can redefine word and input in a
satisfying way now:
class BlockLayout:
    def word(self, node, word):
        node_font = font(node.style, self.zoom)
        w = node_font.measureText(word)
        self.add_inline_child(node, w, TextLayout, word)

    def input(self, node):
        w = dpx(INPUT_WIDTH_PX, self.zoom)
        self.add_inline_child(node, w, InputLayout)
Adding image is easy:
class BlockLayout:
    def recurse(self, node):
            # ...
            elif node.tag == "img":
                self.image(node)

    def image(self, node):
        w = dpx(node.image.width(), self.zoom)
        self.add_inline_child(node, w, ImageLayout)
And of course, images also get the same inline layout mode as input elements:
class BlockLayout:
    def layout_mode(self):
        # ...
        elif self.node.tag in ["input", "img"]:
            return "inline"

    def should_paint(self):
        return isinstance(self.node, Text) or \
            (self.node.tag not in \
                ["input", "button", "img"])
Now that we have ImageLayout nodes in our layout tree,
we’ll be painting DrawImage commands to our display list
and showing the image on the screen!
But what about our second output modality, screen readers? That’s
what the alt attribute is for. It works like this:
<img src="https://browser.engineering/im/hes.jpg"
  alt="An operator using the Hypertext Editing System in 1969">
Implementing this in AccessibilityNode is very easy:
class AccessibilityNode:
    def __init__(self, node):
        else:
            # ...
            elif node.tag == "img":
                self.role = "image"

    def build(self):
        # ...
        elif self.role == "image":
            if "alt" in self.node.attributes:
                self.text = "Image: " + self.node.attributes["alt"]
            else:
                self.text = "Image"
As we continue to implement new features for the web platform, we’ll always need to think about how to make features work in multiple modalities.
Videos are similar to images, but demand more bandwidth, time, and
memory; they also have complications like digital
rights management (DRM). The <video> tag
addresses some of that, with built-in support for advanced video codecs,In video, it’s called a
“codec”, but in images it’s called a “format”–go figure.
DRM, and hardware acceleration. It also provides media controls like a
play/pause button and volume controls.
So far, an image’s size on the screen is its size in pixels, possibly
zoomed.Note that zoom
already may cause an image to render at a size different than its
regular size, even before introducing the features in this
section. But in fact it’s generally valuable for authors
to control the size of embedded content. There are a number of ways to
do this,For example, the
width and height CSS properties (not to be
confused with the width and height
attributes!), which we met in Exercise 6-2. but one way is
the special width and height attributes.Images have these mostly for
historical reasons: they were invented before CSS
existed.
If both those attributes are present, things are pretty
easy: we just read from them when laying out the element, both in
image:
class BlockLayout:
    def image(self, node):
        if "width" in node.attributes:
            w = dpx(int(node.attributes["width"]), self.zoom)
        else:
            w = dpx(node.image.width(), self.zoom)
        # ...
And in ImageLayout:
class ImageLayout(EmbedLayout):
    def layout(self):
        # ...
        width_attr = self.node.attributes.get("width")
        height_attr = self.node.attributes.get("height")
        image_width = self.node.image.width()
        image_height = self.node.image.height()

        if width_attr and height_attr:
            self.width = dpx(int(width_attr), self.zoom)
            self.img_height = dpx(int(height_attr), self.zoom)
        else:
            self.width = dpx(image_width, self.zoom)
            self.img_height = dpx(image_height, self.zoom)
        # ...
This works great, but it has a major flaw: if the ratio of
width to height isn’t the same as the
underlying image size, the image ends up stretched in weird ways.
Sometimes that’s on purpose but usually it’s a mistake. So browsers let
authors specify just one of width and
height, and compute the other using the image’s aspect
ratio.Despite it
being easy to implement, this feature of real web browsers only reached
all of them in 2021. Before that, developers resorted to things like the
padding-top
hack. Sometimes design oversights take a long time to
fix.
Implementing this aspect ratio tweak is easy:
class ImageLayout(EmbedLayout):
    # ...
    def layout(self):
        # ...
        aspect_ratio = image_width / image_height

        if width_attr and height_attr:
            # ...
        elif width_attr:
            self.width = dpx(int(width_attr), self.zoom)
            self.img_height = self.width / aspect_ratio
        elif height_attr:
            self.img_height = dpx(int(height_attr), self.zoom)
            self.width = self.img_height * aspect_ratio
        else:
            # ...
        # ...
Your browser should now be able to render the following example page correctly, as shown in Figure 2. When it’s scrolled down a bit you should see what’s shown in Figure 3 (notice the different aspect ratios). And scrolling to the end will show what appears in Figure 4, including the “broken image” icon.
Original size:  <img src="/im/hes.jpg" alt="A computer operator ...">
<br>
Smaller: <img width=50 height=50 src="/im/hes.jpg">
<br>
Different aspect ratio:
<img width=50 height=100 src="/im/hes.jpg">
<br>
Larger:
<img width=1000 height=1000 src="/im/hes.jpg">
<br>
Larger with only width:
<img width=1000 src="/im/hes.jpg">
<br>
Smaller with only height:
<img height=50 src="/im/hes.jpg">
Broken image:
<img src="non-existent-image">
<script src="example15-img.js"></script>
<link rel="stylesheet" href="example15-img.css">


Our browser computes an aspect ratio from the loaded image
dimensions, but that’s not available before an image loads, which is a
problem in real browsers where images are loaded asynchronously and
where the image size can respond
to layout parameters. Not knowing the aspect ratio can cause the layout to shift when the image loads,
which can be frustrating for users. The aspect-ratio
property is one way web pages can address this issue.
So far, our browser has two kinds of embedded content: images and
input elements. While both are important and widely used,As are variations like the <canvas>
element. Instead of loading an image from the network, JavaScript can
draw on a <canvas> element via an API. Unlike images,
<canvas> elements don’t have intrinsic sizes, but
besides that they are pretty similar in terms of layout.
they don’t offer quite the customizabilityThere’s actually ongoing work aimed at allowing web pages
to customize what input elements look like, and it builds on earlier
work supporting custom
elements and forms.
This problem is quite challenging, interacting with platform
independence, accessibility, scripting, and styling. and
flexibility that complex embedded content use cases like maps, PDFs,
ads, and social media controls require. So in modern browsers, these are
handled by embedding one web page within another using the
<iframe> element.Or via the embed and object tags,
for cases like PDFs. I won’t discuss those here.
Semantically, an <iframe> is similar to a
Tab inside a Tab—it has its own HTML document,
CSS, and scripts. And layout-wise, an <iframe> is a
lot like the <img> tag, with width and
height attributes. So implementing basic iframes just
requires handling these three significant differences:
Iframes have no browser chrome. So any page navigation
has to happen from within the page (either through an
<a> element or a script), or as a side effect of
navigation on the web page that contains the
<iframe> element. Clicking on a link in an iframe
also navigates the iframe, not the top-level page.
Iframes can share a rendering event loop.For example, if an iframe has the same origin as the web page that embeds it, then scripts in the iframe can synchronously access the parent DOM. That means that it’d be basically impossible to put that iframe in a different thread or CPU process, and in practice it ends up in the same rendering event loop. In real browsers, cross-origin iframes are often “site isolated”, meaning that the iframe has its own CPU process for security reasons. In our browser we’ll just make all iframes (even nested ones—yes, iframes can include iframes!) use the same rendering event loop.
Cross-origin iframes are script-isolated from the containing page. That means that a script in the iframe can’t access the containing page’s variables or DOM, nor can scripts in the containing page access the iframe’s variables or DOM. Same-origin iframes, however, can.
We’ll get to these differences, but for now, let’s start working on
the idea of a Tab within a Tab. What we’re
going to do is split the Tab class into two pieces:
Tab will own the event loop and script environments,
Frames will do the rest.
It’s good to plan out complicated refactors like this in some detail.
A Tab will:
Browser and the
Frames to handle events;And the new Frame class will:
Create these two classes and split the methods between them accordingly.
Naturally, every Frame will need a reference to its
Tab; it’s also convenient to have access to the parent
frame and the corresponding <iframe> element:
class Frame:
    def __init__(self, tab, parent_frame, frame_element):
        self.tab = tab
        self.parent_frame = parent_frame
        self.frame_element = frame_element
        # ...
Now let’s look at how Frames are created. The first
place is in Tab’s load method, which needs to
create the root frame:
class Tab:
    def __init__(self, browser, tab_height):
        # ...
        self.root_frame = None

    def load(self, url, payload=None):
        self.history.append(url)
        # ...
        self.root_frame = Frame(self, None, None)
        self.root_frame.load(url, payload)
Note that the guts of load now live in the
Frame, because the Frame owns the HTML tree.
The Frame can also construct child
Frames, for <iframe> elements:
class Frame:
    def load(self, url, payload=None):
        # ...
        iframes = [node
                   for node in tree_to_list(self.nodes, [])
                   if isinstance(node, Element)
                   and node.tag == "iframe"
                   and "src" in node.attributes]
        for iframe in iframes:
            document_url = url.resolve(iframe.attributes["src"])
            if not self.allowed_request(document_url):
                print("Blocked iframe", document_url, "due to CSP")
                iframe.frame = None
                continue
            iframe.frame = Frame(self.tab, self, iframe)
        # ...
Since iframes can have subresources (and subframes!) and therefore be slow to load, we should load them asynchronously, just like scripts:
class Frame:
    def load(self, url, payload=None):
        for iframe in iframes:
            # ...
            task = Task(iframe.frame.load, document_url)
            self.tab.task_runner.schedule_task(task)
And since they are asynchronous, we need to record whether they have loaded yet, to avoid trying to render an unloaded iframe:
class Frame:
    def __init__(self, tab, parent_frame, frame_element):
        # ...
        self.loaded = False

    def load(self, url, payload=None):
        self.loaded = False
        ...
        self.loaded = True
So we’ve now got a tree of frames inside a single tab. But because we will sometimes need direct access to an arbitrary frame, let’s also give each frame an identifier, which I’m calling a window ID:
class Tab:
    def __init__(self, browser, tab_height):
        # ...
        self.window_id_to_frame = {}
class Frame:
def __init__(self, tab, parent_frame, frame_element):
# ...
self.window_id = len(self.tab.window_id_to_frame)
self.tab.window_id_to_frame[self.window_id] = selfNow that we have frames being created, let’s work on rendering those frames to the screen.
For quite a while, browsers also supported embedded content in the
form of plugins like Java applets or Flash. But there
were performance,
security, and accessibility problems because plugins typically
implemented their own rendering, sandboxing, and UI primitives. Over
time, new APIs have closed the gap between web-native content and
“non-web” plugins,For
example, in the last decade the <canvas> element has
gained support for hardware-accelerated 3D content, while WebAssembly can run
at near-native speed. and plugins have therefore become
less common. Personally, I think that’s a good thing: the web is about
making information accessible to everyone, and that requires open
standards, including for embedded content.
Rendering is split between the Tab and its
Frames: the Frame does style and layout, while
the Tab does accessibility and paint.Why split the rendering
pipeline this way? Because the accessibility tree and display list are
ultimately transferred from the main thread to the browser thread, so
they get combined anyway. DOM, style, and layout trees, meanwhile, don’t
get passed between threads so don’t intermingle. We’ll
need to implement that split, and also add code to trigger each
Frame’s rendering from the Tab.
Let’s start with splitting the rendering pipeline. The main methods
here are still the Tab’s run_animation_frame
and render, which iterate over all loaded iframes:
class Tab:
    def run_animation_frame(self, scroll):
        # ...
        for (window_id, frame) in self.window_id_to_frame.items():
            if not frame.loaded:
                continue
            frame.js.dispatch_RAF(frame.window_id)
            # ...

    def render(self):
        self.browser.measure.time('render')

        for id, frame in self.window_id_to_frame.items():
            if frame.loaded:
                frame.render()

        if self.needs_accessibility:
            # ...

        if self.needs_paint:
            # ...

        # ...
In this code I used a new dispatch_RAF method:
class JSContext:
    def dispatch_RAF(self):
        self.interp.evaljs("window.__runRAFHandlers()")
Note that the needs_accessibility,
pending_hover, and other flags are all still on the
Tab, because they relate to the Tab’s part of
rendering. Meanwhile, style and layout happen in the Frame
now:
class Frame:
    def __init__(self, tab, parent_frame, frame_element):
        # ...
        self.needs_style = False
        self.needs_layout = False

    def set_needs_render(self):
        self.needs_style = True
        self.tab.set_needs_accessibility()
        self.tab.set_needs_paint()

    def set_needs_layout(self):
        self.needs_layout = True
        self.tab.set_needs_accessibility()
        self.tab.set_needs_paint()

    def render(self):
        if self.needs_style:
            # ...

        if self.needs_layout:
            # ...
Again, these dirty bits move to the Frame because they
relate to the frame’s part of rendering.
Unlike images, iframes have no intrinsic
size: the layout size of an <iframe> element
does not depend on its content.There was an attempt to provide iframes with intrinsic
sizing in the past, but it was removed from the
HTML specification when no browser implemented it. This may change in the
future, as there are good use cases for a “seamless” iframe whose
layout is coordinated with its parent frame. That means
there’s a crucial extra bit of communication that needs to happen
between the parent and child frames: how wide and tall should a frame be
laid out? This is defined by the attributes and CSS of the
iframe element:
class BlockLayout:
    def layout_mode(self):
        # ...
        elif self.node.tag in ["input", "img", "iframe"]:
            return "inline"

    def recurse(self, node):
        else:
            # ...
            elif node.tag == "iframe" and \
                 "src" in node.attributes:
                self.iframe(node)
            # ...

    def iframe(self, node):
        if "width" in self.node.attributes:
            w = dpx(int(self.node.attributes["width"]),
                    self.zoom)
        else:
            w = IFRAME_WIDTH_PX + dpx(2, self.zoom)
        self.add_inline_child(node, w, IframeLayout, self.frame)

    def should_paint(self):
        return isinstance(self.node, Text) or \
            (self.node.tag not in \
                ["input", "button", "img", "iframe"])
The IframeLayout layout code is similar, inheriting from
EmbedLayout, but without the aspect ratio code:
class IframeLayout(EmbedLayout):
    def __init__(self, node, parent, previous, parent_frame):
        super().__init__(node, parent, previous, parent_frame)

    def layout(self):
        # ...
        if width_attr:
            self.width = dpx(int(width_attr) + 2, self.zoom)
        else:
            self.width = dpx(IFRAME_WIDTH_PX + 2, self.zoom)

        if height_attr:
            self.height = dpx(int(height_attr) + 2, self.zoom)
        else:
            self.height = dpx(IFRAME_HEIGHT_PX + 2, self.zoom)
        self.ascent = -self.height
        self.descent = 0
The extra two pixels provide room for a border, one pixel on each side, later on.
Note that if its width isn’t specified, an iframe uses a
default
value, chosen a long time ago based on the average screen sizes of
the day:
IFRAME_WIDTH_PX = 300
IFRAME_HEIGHT_PX = 150
Now, this code is run in the parent frame. We need to get this width and height over to the child frame, so that it can know its width and height during layout. So let’s add a field for that in the child frame:
class Frame:
    def __init__(self, tab, parent_frame, frame_element):
        # ...
        self.frame_width = 0
        self.frame_height = 0
And we can set those when the parent frame is laid out:
class IframeLayout(EmbedLayout):
    def layout(self):
        # ...
        if self.node.frame and self.node.frame.loaded:
            self.node.frame.frame_height = \
                self.height - dpx(2, self.zoom)
            self.node.frame.frame_width = \
                self.width - dpx(2, self.zoom)
The conditional is only there to handle the (unusual) case of an iframe blocked by CSP.
You might be surprised that I’m not calling
set_needs_render on the child frame here. That’s a
shortcut: the width and height attributes can
only change through setAttribute, while zoom
can only change in zoom_by and reset_zoom. All
of those handlers, however, need to invalidate all frames, via a new
method to do so, instead of the old set_needs_render on
Tab which is now gone. Update all of these call sites to
call it (plus changes to dark mode, which affects style for all
frames):
class Tab:
    def set_needs_render_all_frames(self):
        for id, frame in self.window_id_to_frame.items():
            frame.set_needs_render()
The root frame, of course, fills the whole window:
class Tab:
    def load(self, url, payload=None):
        # ...
        self.root_frame.frame_width = WIDTH
        self.root_frame.frame_height = self.tab_height
Note that there’s a tricky dependency order here. We need the parent frame to do layout before the child frame, so the child frame has an up-to-date width and height when it does layout. That order is guaranteed for us by Python (3.7 or later), where dictionaries are sorted by insertion order, but if you’re following along in another language, you might need to sort frames before rendering them.
We’ve now got frames styled and laid out, and just need to paint
them. Unlike layout and style, all the frames in a tab produce a single,
unified display list, so we’re going to need to work recursively. We’ll
have the Tab paint the root Frame:
class Tab:
    def render(self):
        if self.needs_paint:
            self.display_list = []
            paint_tree(self.root_frame.document, self.display_list)
            self.needs_paint = False
Most of the layout tree’s paint methods don’t need to
change, but to paint an IframeLayout, we’ll need to paint
the child frame in paint_tree:
def paint_tree(layout_object, display_list):
    cmds = layout_object.paint()

    if isinstance(layout_object, IframeLayout) and \
        layout_object.node.frame and \
        layout_object.node.frame.loaded:
        paint_tree(layout_object.node.frame.document, cmds)
    else:
        for child in layout_object.children:
            paint_tree(child, cmds)

    cmds = layout_object.paint_effects(cmds)
    display_list.extend(cmds)
Before putting those commands in the display list, though, we need to add a border, clip iframe content that exceeds the visual area available, and transform the coordinate system:
class IframeLayout(EmbedLayout):
    def paint_effects(self, cmds):
        # ...

        diff = dpx(1, self.zoom)
        offset = (self.x + diff, self.y + diff)
        cmds = [Transform(offset, rect, self.node, cmds)]
        inner_rect = skia.Rect.MakeLTRB(
            self.x + diff, self.y + diff,
            self.x + self.width - diff, self.y + self.height - diff)
        internal_cmds = cmds
        internal_cmds.append(Blend(1.0, "destination-in", None, [
                          DrawRRect(inner_rect, 0, "white")]))
        cmds = [Blend(1.0, "source-over", self.node, internal_cmds)]
        paint_outline(self.node, cmds, rect, self.zoom)
        cmds = paint_visual_effects(self.node, cmds, rect)
        return cmds
The Transform shifts over the child frame contents so
that its top-left corner starts in the right place,This book doesn’t go into the
details of the CSS
box model, but the width and height
attributes of an iframe refer to the content box, and adding
the border width yields the border box. As a result, what we’ve
implemented is somewhat incorrect. ClipRRect
clips the contents of the iframe to the inside of the border, and
paint_outline adds the border. To trigger the outline, just
add this to the browser CSS file:
iframe { outline: 1px solid black; }Finally, let’s also add iframes to the accessibility tree. Like the
display list, the accessibility tree is global across all frames. We can
have iframes create iframe nodes:
class AccessibilityNode:
    def __init__(self, node):
        else:
            elif node.tag == "iframe":
                self.role = "iframe"
To build such a node, we just recurse into the
frame:
class AccessibilityNode:
   def build_internal(self, child_node):
        if isinstance(child_node, Element) \
            and child_node.tag == "iframe" and child_node.frame \
            and child_node.frame.loaded:
            child = AccessibilityNode(child_node.frame.nodes)
        # ...
So we’ve now got iframes showing up on the screen. The next step is interacting with them.
Before iframes, there were the <frameset>
and <frame> elements. A
<frameset> replaces the <body> tag
and splits the browser window among multiple
<frame>s; this was an early alternative layout system
to the one presented in this book. Frames had confusing navigation and
accessibility, and lacked the flexibility of
<iframe>s, so aren’t used much these days. The name
“iframe” references these elements in a way—it’s short for “inline
frame”.
Now that we’ve got iframes rendering to the screen, let’s close the loop with user input. We want to add support for clicking on things inside an iframe, and also for tabbing around or scrolling inside one.
At a high level, event handlers just delegate to the root frame:
class Tab:
    def click(self, x, y):
        self.render()
        self.root_frame.click(x, y)
When an iframe is clicked, it passes the click through to the child frame, and immediately returns afterward, because iframes capture click events. Note how I subtracted the absolute x and y offsets of the iframe from the (absolute) x and y click positions when recursing into the child frame:
class Frame:
    def click(self, x, y):
        # ...
        while elt:
            # ...
            elif elt.tag == "iframe":
                abs_bounds = \
                    absolute_bounds_for_obj(elt.layout_object)
                border = dpx(1, elt.layout_object.zoom)
                new_x = x - abs_bounds.left() - border
                new_y = y - abs_bounds.top() - border
                elt.frame.click(new_x, new_y)
                return
Now, clicking on <a> elements will work, which
means that you can now cause a frame to navigate to a new page. And
because a Frame has all the loading and navigation logic
that Tab used to have, it just works without any more
changes!
You should now be able to load an iframe example. It should look like the image shown in Figure 5.

Repeatedly clicking on the link on that page will add another recursive iframe. After clicking twice it should look like Figure 6.

Let’s get the other interactions working as well, starting with
focusing an element. You can focus on only one element per tab,
so we will still store the focus on the Tab,
but we’ll need to store the iframe the focused element is on too:
class Tab:
    def __init__(self, browser, tab_height):
        self.focus = None
        self.focused_frame = None
When an iframe tries to focus on an element, it sets itself as the focused iframe, but before it does that, it needs to un-focus the previously focused iframe:
class Frame:
    def focus_element(self, node):
        # ...
        if self.tab.focused_frame and self.tab.focused_frame != self:
            self.tab.focused_frame.set_needs_render()
        self.tab.focused_frame = self
        # ...
We need to re-render the previously focused iframe so that it stops drawing the focus outline.
Another interaction is pressing Tab to cycle through
focusable elements in the current frame. Let’s move the
advance_tab logic into Frame and just dispatch
to it from the Tab:This is not a particularly user-friendly implementation of
tab cycling when multiple frames are involved; see Exercise 15-9 for a
better version.
class Tab:
    def advance_tab(self):
        frame = self.focused_frame or self.root_frame
        frame.advance_tab()
Do the same thing for keypress and enter,
which are used for interacting with text inputs and buttons.
Another big interaction we need to support is scrolling. We’ll store
the scroll offset in each Frame:
class Frame:
    def __init__(self, tab, parent_frame, frame_element):
        self.scroll = 0
Now, as you might recall from Chapter
13, scrolling happens both inside Browser and inside
Tab, to improve responsiveness. That was already quite
complicated, so to keep things simple we’ll only support threaded
scrolling on the root frame. We’ll need a new commit parameter so the
browser thread knows whether the root frame is focused:
class CommitData:
    def __init__(self, url, scroll, root_frame_focused, height,
        display_list, composited_updates, accessibility_tree, focus):
        # ...
        self.root_frame_focused = root_frame_focused

class Tab:
    def run_animation_frame(self, scroll):
        root_frame_focused = not self.focused_frame or \
                self.focused_frame == self.root_frame
        # ...
        commit_data = CommitData(
            # ...
            root_frame_focused,
            # ...
        )
        # ...
The Browser thread will save this information in
commit and use it when the user requests a scroll:
class Browser:
    def commit(self, tab, data):
        # ...
            self.root_frame_focused = data.root_frame_focused

    def handle_down(self):
        self.lock.acquire(blocking=True)
        if self.root_frame_focused:
            # ...
        task = Task(self.active_tab.scrolldown)
        self.active_tab.task_runner.schedule_task(task)
        self.lock.release()
When a tab is asked to scroll, it then scrolls the focused frame:
class Tab:
    def scrolldown(self):
        frame = self.focused_frame or self.root_frame
        frame.scrolldown()
        self.set_needs_paint()
If a frame other than the root frame is scrolled, we’ll just set
needs_composite so the browser has to re-raster from
scratch:
class Tab:
    def run_animation_frame(self, scroll):
        # ...
        for (window_id, frame) in self.window_id_to_frame.items():
            if frame == self.root_frame: continue
            if frame.scroll_changed_in_frame:
                needs_composite = True
                frame.scroll_changed_in_frame = False
        # ...
There’s one more subtlety to scrolling. After we scroll, we want to
clamp the scroll position, to prevent the user scrolling past
the last thing on the page. Right now clamp_scroll uses the
window height to determine the maximum scroll amount; let’s move that
function inside Frame so it can use the current frame’s
height:
class Frame:
    def scrolldown(self):
        self.scroll = self.clamp_scroll(self.scroll + SCROLL_STEP)

    def clamp_scroll(self, scroll):
        height = math.ceil(self.document.height + 2*VSTEP)
        maxscroll = height - self.frame_height
        return max(0, min(scroll, maxscroll))
Make sure to use the clamp_scroll method everywhere. For
example, in scroll_to:
class Frame:
    def scroll_to(self, elt):
        # ...
        self.scroll = self.clamp_scroll(new_scroll)
There are also a number of accessibility hover interactions that we need to support. This is hard, because the accessibility interactions happen in the browser thread, which has limited information:
The accessibility tree doesn’t know where the iframe is, so it doesn’t know how to transform the hover coordinates when it goes into a frame.
It also doesn’t know how big the iframe is, so it doesn’t ignore
things that are clipped outside an iframe’s bounds.Observe that frame-based
click already works correctly, because we don’t recurse
into iframes unless the click intersects the iframe
element’s bounds. And before iframes, we didn’t need to do that, because
the SDL window system already did it for us.
It also doesn’t know how far a frame has scrolled, so it doesn’t adjust for scrolled frames.
We’ll make a subclass of AccessibilityNode to store this
information:
class FrameAccessibilityNode(AccessibilityNode):
    pass
We’ll create one of those below each iframe node:
class AccessibilityNode:
    def build_internal(self, child_node):
        if isinstance(child_node, Element) \
            and child_node.tag == "iframe" and child_node.frame \
            and child_node.frame.loaded:
            child = FrameAccessibilityNode(child_node)
Hit testing FrameAccessibilityNodes will use the frame’s
bounds to ignore clicks outside the frame bounds, and adjust clicks
against the frame’s coordinates (note how we subtract off the zoomed
border of the frame):
class FrameAccessibilityNode(AccessibilityNode):
    def __init__(self, node, parent=None):
        super().__init__(node, parent)
        self.scroll = self.node.frame.scroll
        self.zoom = self.node.layout_object.zoom

    def hit_test(self, x, y):
        bounds = self.bounds[0]
        if not bounds.contains(x, y): return
        new_x = x - bounds.left() - dpx(1, self.zoom)
        new_y = y - bounds.top() - dpx(1, self.zoom) + self.scroll
        node = self
        for child in self.children:
            res = child.hit_test(new_x, new_y)
            if res: node = res
        return node
Hit testing should now work, but the bounds of the hovered node when
drawn to the screen are still wrong. For that, we’ll need a method that
returns the absolute screen rect of an AccessibilityNode.
And that method in turn needs parent pointers to walk up the
accessibility tree, so let’s add that first:
class AccessibilityNode:
    def __init__(self, node, parent=None):
        # ...
        self.parent = parent

    def build_internal(self, child_node):
        if isinstance(child_node, Element) \
            and child_node.tag == "iframe" and child_node.frame \
            and child_node.frame.loaded:
            child = FrameAccessibilityNode(child_node, self)
        else:
            child = AccessibilityNode(child_node, self)
        # ...
And now we’re ready for the method to map to absolute coordinates.
This loops over all bounds Rects and maps them up to the
root. Note that there is a special case for
FrameAccessibilityNode, because its self-bounds are in the
coordinate space of the frame containing the iframe.
class AccessibilityNode:
    def absolute_bounds(self):
        abs_bounds = []
        for bound in self.bounds:
            abs_bound = bound.makeOffset(0.0, 0.0)
            if isinstance(self, FrameAccessibilityNode):
                obj = self.parent
            else:
                obj = self
            while obj:
                obj.map_to_parent(abs_bound)
                obj = obj.parent
            abs_bounds.append(abs_bound)
        return abs_bounds
This method calls map_to_parent to adjust the bounds.
For most accessibility nodes we don’t need to do anything, because they
are in the same coordinate space as their parent:
class AccessibilityNode:
    def map_to_parent(self, rect):
        pass
A FrameAccessibilityNode, on the other hand, adjusts for
the iframe’s postion and clipping:
class FrameAccessibilityNode(AccessibilityNode):
    def map_to_parent(self, rect):
        bounds = self.bounds[0]
        rect.offset(bounds.left(), bounds.top() - self.scroll)
        rect.intersect(bounds)
You should now be able to hover on nodes and have them read out by our accessibility subsystem.
Alright, we’ve now got all of our browser’s forms of user interaction properly recursing through the frame tree. It’s time to add more capabilities to iframes.
Our browser can only scroll the root frame on the browser thread, but real browsers have put in a lot of work to make scrolling happen on the browser thread as much as possible, including for iframes. The hard part is handling the many obscure combinations of containing blocks, stacking orders, scroll bars, transforms, and iframes: with scrolling on the browser thread, all of these complex interactions have to be communicated from the main thread to the browser thread, and correctly interpreted by both sides.
We’ve now got users interacting with iframes—but what about scripts
interacting with them? Of course, each frame can already run
scripts—but right now, each Frame has its own
JSContext, so these scripts can’t really interact with each
other. Instead same-origin iframes should run in the same
JavaScript context and should be able to access each other’s globals,
call each other’s functions, and modify each other’s DOMs, as shown in
Figure 7. Let’s implement that.
For two frames’ JavaScript environments to interact, we’ll need to
put them in the same JSContext. So, instead of each
Frame having a JSContext of its own, we’ll
want to store JSContexts on the Tab, in a
dictionary that maps origins to JavaScript contexts:
class Tab:
    def __init__(self, browser, tab_height):
        # ...
        self.origin_to_js = {}

    def get_js(self, url):
        origin = url.origin()
        if origin not in self.origin_to_js:
            self.origin_to_js[origin] = JSContext(self, origin)
        return self.origin_to_js[origin]
Each Frame will then ask the Tab for its
JavaScript context:
class Frame:
    def load(self, url, payload=None):
        # ...
        self.js = self.tab.get_js(url)
        # ...
So we’ve got multiple pages’ scripts using one JavaScript context.
But now we’ve got to keep their variables in their own namespaces
somehow. The key is going to be the window global, of type
Window. In the browser, this refers to the global
object, and instead of writing a global variable like
a, you can always write window.a instead.There are various
proposals to expose multiple global namespaces as a JavaScript API.
It would definitely be convenient to have that capability in this
chapter, to avoid having to write window
everywhere! To keep our implementation simple, in our
browser, scripts will always need to reference variable and functions
via window.This also means that all global variables in a script need
to do the same, even if they are not browser APIs. We’ll
need to do the same in our runtime:
window.console = { log: function(x) { call_python("log", x); } }

// ...

window.Node = function(handle) { this.handle = handle; }

// ...
Do the same for every function or variable in the
runtime.js file. If you miss one, you’ll get errors like
this:
dukpy.JSRuntimeError: ReferenceError: identifier 'Node'
    undefined
    duk_js_var.c:1258
    eval src/pyduktape.c:1 preventsyield
If you see this error, it means you need to find where you need to
write window.Node instead of Node. You’ll also
need to modify EVENT_DISPATCH_JS to prefix classes with
window:
EVENT_DISPATCH_JS = \
    "new window.Node(dukpy.handle)" + \
    ".dispatchEvent(new window.Event(dukpy.type))"
Demos from previous chapters will need to be similarly fixed up
before they work. For example, setTimeout might need to
change to window.setTimeout.
To get multiple frames’ scripts to play nice inside one JavaScript
context, we’ll create multiple Window objects:
window_1, window_2, and so on. Before running
a frame’s scripts, we’ll set window to that frame’s
Window object, so that the script uses the correct
Window.Some
JavaScript engines support an API for changing the global object, but
the DukPy library that we’re using isn’t one of them. There is
a standard JavaScript operator called with which sort of
does this, but the rules are complicated and not quite what we need
here. It’s also not recommended these days.
So to begin with, let’s define the Window class when we
create a JSContext:
class JSContext:
    def __init__(self, tab, url_origin):
        self.url_origin = url_origin
        # ...
        self.interp.evaljs("function Window(id) { this._id = id };")
Now, when a frame is created and wants to use a
JSContext, it needs to ask for a window object
to be created first:
class JSContext:
    def add_window(self, frame):
        code = "var window_{} = new Window({});".format(
            frame.window_id, frame.window_id)
        self.interp.evaljs(code)

class Frame:
    def load(self, url, payload=None):
        # ...
        self.js = self.tab.get_js(url)
        self.js.add_window(self)
        # ...
Before running any JavaScript, we’ll want to change which window the
window global refers to:
class JSContext:
    def wrap(self, script, window_id):
        return "window = window_{}; {}".format(window_id, script)
We can use this to, for example, set up the initial runtime
environment for each Frame:
class JSContext:
    def add_window(self, frame):
        # ...
        self.interp.evaljs(self.wrap(RUNTIME_JS, frame.window_id))
We’ll need to call wrap any time we use
evaljs, which also means we’ll need to add a window ID
argument to a lot of methods. For example, in run we’ll add
a window_id parameter:
class JSContext:
    def run(self, script, code, window_id):
        try:
            code = self.wrap(code, window_id)
            self.interp.evaljs(code)
        except dukpy.JSRuntimeError as e:
            print("Script", script, "crashed", e)
And we’ll pass that argument from the load method:
class Frame:
    def load(self, url, payload=None):
        for script in scripts:
            # ...
            task = Task(self.js.run, script_url, body,
                self.window_id)
            # ...
The same holds for various dispatching APIs. For example, to dispatch
an event, we’ll need the window_id:
class JSContext:
    def dispatch_event(self, type, elt, window_id):
        # ...
        code = self.wrap(EVENT_DISPATCH_JS, window_id)
        do_default = self.interp.evaljs(code,
            type=type, handle=handle)
Likewise, we’ll need to pass a window ID argument in
click, submit_form, and keypress;
I’ve omitted those code fragments. Note that you should have modified
your runtime.js file to store the LISTENERS on
the window object, meaning each Frame will
have its own set of event listeners to dispatch to:
window.LISTENERS = {}

// ...


window.Node.prototype.dispatchEvent = function(evt) {
    var type = evt.type;
    var handle = this.handle
    var list = (window.LISTENERS[handle] &&
        window.LISTENERS[handle][type]) || [];
    for (var i = 0; i < list.length; i++) {
        list[i].call(this, evt);
    }
    return evt.do_default;
}
Do the same for requestAnimationFrame, passing around a
window ID and wrapping the code so that it correctly references
window.
For calls from JavaScript into the browser, we’ll need JavaScript to pass in the window ID it’s calling from:
window.document = { querySelectorAll: function(s) {
    var handles = call_python("querySelectorAll", s, window._id);
    return handles.map(function(h) { return new window.Node(h) });
}}
Then on the browser side we can use that window ID to get the
Frame object:
class JSContext:
    def querySelectorAll(self, selector_text, window_id):
        frame = self.tab.window_id_to_frame[window_id]
        selector = CSSParser(selector_text).selector()
        nodes = [node for node
                 in tree_to_list(frame.nodes, [])
                 if selector.matches(node)]
        return [self.get_handle(node) for node in nodes]
We’ll need something similar in innerHTML and
style because we need to call set_needs_render
on the relevant Frame.
Finally, for setTimeout and XMLHttpRequest,
which involve a call from JavaScript into the browser and later a call
from the browser into JavaScript, we’ll likewise need to pass in a
window ID from JavaScript, and use that window ID when calling back into
JavaScript. I’ve omitted many of the code changes in this section
because they are quite repetitive. You can find all of the needed
locations by searching your codebase for evaljs.
So now we’ve isolated different frames. Next, let’s let them interact.
Same-origin iframes can access each other’s state, but cross-origin
ones can’t. But the obscure domain
property lets an iframe change its origin, moving itself in or out of
same-origin status in some cases. I personally think it’s a misfeature:
it’s hard to implement securely, and interferes with various sandboxing
techniques; I hope it is eventually removed from the web. Instead, there
are various
headers where an iframe can opt into less sharing in order to get
better security and performance.
We’ve now managed to run multiple Frames’ worth of
JavaScript in a single JSContext, and isolated them
somewhat so that they don’t mess with each others’ state. But the whole
point of this exercise is to allow some interaction between
same-origin frames. Let’s do that now.
The simplest way two frames can interact is that they can get access
to each other’s state via the parent attribute on the
Window object. If the two frames have the same origin, that
lets one frame call methods, access variables, and modify browser state
for the other frame. Because we’ve had these same-origin frames share a
JSContext, this isn’t too hard to implement. Basically,
we’ll need a way to go from a window ID to its parent frame’s window
ID:
class JSContext:
    # ...
    def parent(self, window_id):
        parent_frame = \
            self.tab.window_id_to_frame[window_id].parent_frame
        if not parent_frame:
            return None
        return parent_frame.window_id
On the JavaScript side, we now need to look up the
Window object given its window ID. There are lots of ways
you could do this, but the easiest is to have a global map:
class JSContext:
    def __init__(self, tab, url_origin):
        # ...
        self.interp.evaljs("WINDOWS = {}")
We’ll add each window to the global map as it’s created:
class JSContext:
    def add_window(self, frame):
        # ...
        self.interp.evaljs("WINDOWS[{}] = window_{};".format(
            frame.window_id, frame.window_id))
Now window.parent can look up the correct
Window object in this global map:
Object.defineProperty(Window.prototype, 'parent', {
  configurable: true,
  get: function() {
    var parent_id = call_python('parent', window._id);
    if (parent_id != undefined) {
        var parent = WINDOWS[parent_id];
        if (parent === undefined) parent = new Window(parent_id);
        return parent;
    }
  }
});
Note that it’s possible for the lookup in WINDOWS to
fail, if the parent frame is not in the same origin as the current one
and therefore isn’t running in the same JSContext. In that
case, this code returns a fresh Window object with that id.
But iframes are not allowed to access each others’ documents across
origins (or call various other APIs that are unsafe), so add a method
that checks for this situation and raises an exception:
class JSContext:
    def throw_if_cross_origin(self, frame):
        if frame.url.origin() != self.url_origin:
            raise Exception(
                "Cross-origin access disallowed from script")
Then use this method in all JSContext methods that
access documents:Note
that in a real browser this is woefully inadequate security. A real
browser would need to very carefully lock down the entire
runtime.js code and audit every single JavaScript API with
a fine-toothed comb.
class JSContext:
    def querySelectorAll(self, selector_text, window_id):
        frame = self.tab.window_id_to_frame[window_id]
        self.throw_if_cross_origin(frame)
        # ...

    def setAttribute(self, handle, attr, value, window_id):
        frame = self.tab.window_id_to_frame[window_id]
        self.throw_if_cross_origin(frame)
        # ...

    def innerHTML_set(self, handle, s, window_id):
        frame = self.tab.window_id_to_frame[window_id]
        self.throw_if_cross_origin(frame)
        # ...

    def style_set(self, handle, s, window_id):
        frame = self.tab.window_id_to_frame[window_id]
        self.throw_if_cross_origin(frame)
        # ...
So same-origin iframes can communicate via parent. But
what about cross-origin iframes? It would be insecure to let them access
each other’s variables or call each other’s methods, so instead browsers
allow a form of message
passing, a technique for structured communication between two
different event loops that doesn’t require any shared state or
locks.
Message-passing in JavaScript works like this: you call the postMessage
API on the Window object you’d like to talk to, with
the message itself as the first parameter and * as the
second:The second
parameter has to do with origin restrictions; see Exercise
15-8.
window.parent.postMessage("...", '*')This will send the first argumentIn a real browser, you can also pass data that is not a
string, such as numbers and objects. This works via a
serialization algorithm called structured
cloning, which converts most JavaScript objects (though not, for
example, DOM nodes) to a sequence of bytes that the receiver frame can
convert back into a JavaScript object. DukPy doesn’t support structured
cloning natively for objects, so our browser won’t support this
either. to the parent frame, which can receive the message
by handling the message event on its Window
object:
window.addEventListener("message", function(e) {
    console.log(e.data);
});
Note that in this second code snippet, window is the
receiving Window, a different Window from the
window in the first snippet.
Let’s implement postMessage, starting on the
receiver side. Since this event happens on the
Window, not on a Node, we’ll need a new
WINDOW_LISTENERS array:
window.WINDOW_LISTENERS = {}Each listener will be called with a MessageEvent
object:
window.MessageEvent = function(data) {
    this.type = "message";
    this.data = data;
}
The event listener and dispatching code is the same as for
Node, except it’s on Window and uses
WINDOW_LISTENERS. You can just duplicate those methods:
Window.prototype.addEventListener = function(type, listener) {
    // ...
}

Window.prototype.dispatchEvent = function(evt) {
    // ...
}
That’s everything on the receiver side; now let’s do the sender side.
First, let’s implement the postMessage API itself. Note
that this is the receiver or target window:
Window.prototype.postMessage = function(message, origin) {
    call_python("postMessage", this._id, message, origin)
}
In the browser, postMessage schedules a task on the
Tab:
class JSContext:
    def postMessage(self, target_window_id, message, origin):
        task = Task(self.tab.post_message,
            message, target_window_id)
        self.tab.task_runner.schedule_task(task)
Scheduling the task is necessary because postMessage is
an asynchronous API; sending a synchronous message might involve
synchronizing multiple JSContexts or even multiple
processes, which would add a lot of overhead and probably result in
deadlocks.
The task finds the target frame and calls a dispatch method:
class Tab:
    def post_message(self, message, target_window_id):
        frame = self.window_id_to_frame[target_window_id]
        frame.js.dispatch_post_message(
            message, target_window_id)
Which then calls into the JavaScript dispatchEvent
method we just wrote:
POST_MESSAGE_DISPATCH_JS = \
    "window.dispatchEvent(new window.MessageEvent(dukpy.data))"

class JSContext:
    def dispatch_post_message(self, message, window_id):
        self.interp.evaljs(
            self.wrap(POST_MESSAGE_DISPATCH_JS, window_id),
            data=message)
You should now be able to use postMessage to send
messages between frames,In the
iframe demo, for example, you should see “Message received from
iframe: This is the contents of postMessage.” printed to the console.
(This particular example uses a same-origin postMessage.
You can test cross-origin locally by starting two local HTTP servers on
different ports, then changing the URL of the
example15-img.html iframe document to point to the second
port.) including cross-origin frames running in different
JSContexts, in a secure way.
Ads are commonly served with iframes and are big users of the web’s sandboxing, embedding, and animation primitives. This means they are a challenging source of performance and user experience problems. For example, ad analytics are important to the ad economy, but involve running a lot of code and measuring lots of data. Some web APIs, such as Intersection Observer, basically exist to make analytics computations more efficient. And, of course, ad blockers are probably the most popular browser extensions.
Iframes add a whole new layer of security challenges atop what we
discussed in Chapter 10. The power to embed
one web page into another creates a commensurate security risk when the
two pages don’t trust each other—both in the case of embedding an
untrusted page into your own page, and the reverse, where an attacker
embeds your page into their own, malicious one. In both cases, we want
to protect your page from any security or privacy risks caused by the
other frame.Websites can
protect themselves from being iframed via the
X-Frame-Options header.
The starting point is that cross-origin iframes can’t access each other directly through JavaScript. That’s good—but what if a bug in the JavaScript engine, like a buffer overrun, lets an iframe circumvent those protections? Unfortunately, bugs like this are common enough that browsers have to defend against them. For example, browsers these days run frames from different origins in different operating system processes, and use operating system features to limit how much access those processes have.
Other parts of the browser mix content from multiple frames, like our
browser’s Tab-wide display list. That means that a bug in
the rasterizer could allow one frame to take over the rasterizer and
then read data that ultimately came from another frame. This might seem
like a rather complex attack, but it has happened before, so modern
browsers use sandboxing
techniques to prevent it. For example, Chromium can place the rasterizer
in its own process and use a Linux feature called seccomp
to limit what system calls that process can make. Even if a bug
compromised the rasterizer, that rasterizer wouldn’t be able to
exfiltrate data over the network, preventing private data from
leaking.
These isolation and sandboxing features may seem “straightforward”, in the same sense that the browser thread we added in Chapter 12 is “straightforward”. In practice, the many browser APIs mean the implementation is full of subtleties and ends up being extremely complex. Chromium, for example, took many years to ship the first implementation of site isolation.
Site isolation has become much more important in recent years, due to the CPU cache timing attacks called spectre and meltdown. In short, these attacks allow an attacker to read arbitrary locations in memory—including another frame’s data, if the two frames are in the same process—by measuring the time certain CPU operations take. Placing sensitive content in different CPU processes (which come with their own memory address spaces) is a good protection against these attacks.
That said, these kinds of timing attacks can be subtle, and
there are doubtless more that haven’t been discovered yet. To try to
dull this threat, browsers currently prevent access to
high-precision timers that can provide the accurate timing data
typically required for timing attacks. For example, browsers reduce the
accuracy of APIs like Date.now or
setTimeout.
Worse yet, there are browser APIs that don’t seem like timers but can
be used as such.For
example, the SharedArrayBuffer
API lets two JavaScript threads run concurrently and share memory, which
can be used to construct
a clock. These APIs are useful, so browsers don’t
quite want to remove them, but there is also no way to make them “less
accurate”, since they are not a clock to begin with. Browsers now
require certain
optional HTTP headers to be present in the parent and child
frames’ HTTP responses in order to allow use of
SharedArrayBuffer in particular, though this is not a
perfect solution.
The SharedArrayBuffer issue caused problems when I added
JavaScript support to the embedded browser widgets on the book’s website. I was using
SharedArrayBuffer to allow synchronous calls from a
JSContext to the browser, and that required APIs that
browsers restrict for security reasons. Setting the security headers
wouldn’t work, because Chapter 14 embeds a Youtube video, and as I’m
writing this YouTube doesn’t send those headers. In the end, I worked
around the issue by not embedding the browser widget and asking the
reader to open a new browser window.
This chapter introduced how the browser handles embedded content use cases like images and iframes. Reiterating the main points:
And, as we hope you saw in this chapter, none of these features are too difficult to implement, though—as you’ll see in the exercises—implementing them well requires a lot of attention to detail.
Click here to try this chapter’s browser.
The complete set of functions, classes, and methods in our browser should now look something like this:
COOKIE_JAR
class URL:
    def __init__(url)

    def request(referrer, payload)

    def resolve(url)

    def origin()

    def __str__()
class Text:
    def __init__(text, parent)

    def __repr__()
class Element:
    def __init__(tag, attributes, parent)

    def __repr__()
def print_tree(node, indent)
def tree_to_list(tree, list)
def is_focusable(node)
def get_tabindex(node)
class HTMLParser:
    SELF_CLOSING_TAGS

    HEAD_TAGS

    def __init__(body)

    def parse()

    def get_attributes(text)

    def add_text(text)

    def add_tag(tag)

    def implicit_tags(tag)

    def finish()
class CSSParser:
    def __init__(s)

    def whitespace()

    def literal(literal)

    def word()

    def ignore_until(chars)

    def pair(until)

    def selector()

    def body()

    def parse()

    def until_chars(chars)

    def simple_selector()

    def media_query()
class TagSelector:
    def __init__(tag)

    def matches(node)
class DescendantSelector:
    def __init__(ancestor, descendant)

    def matches(node)
class PseudoclassSelector:
    def __init__(pseudoclass, base)

    def matches(node)
FONTS
def get_font(size, weight, style)
def font(style, zoom)
def linespace(font)
NAMED_COLORS
def parse_color(color)
def parse_blend_mode(blend_mode_str)
def parse_transition(value)
def parse_transform(transform_str)
def parse_outline(outline_str)
def parse_image_rendering(quality)
REFRESH_RATE_SEC
class MeasureTime:
    def __init__()

    def time(name)

    def stop(name)

    def finish()
class Task:
    def __init__(task_code)

    def run()
class TaskRunner:
    def __init__(tab)

    def schedule_task(task)

    def set_needs_quit()

    def clear_pending_tasks()

    def start_thread()

    def run()

    def handle_quit()
DEFAULT_STYLE_SHEET
INHERITED_PROPERTIES
def style(node, rules, frame)
def cascade_priority(rule)
def diff_styles(old_style, new_style)
class NumericAnimation:
    def __init__(old_value, new_value, num_frames)

    def animate()
def dpx(css_px, zoom)
WIDTH, HEIGHT
HSTEP, VSTEP
INPUT_WIDTH_PX
IFRAME_WIDTH_PX, IFRAME_HEIGHT_PX
BLOCK_ELEMENTS
class DocumentLayout:
    def __init__(node, frame)

    def layout(width, zoom)

    def should_paint()

    def paint()

    def paint_effects(cmds)
class BlockLayout:
    def __init__(node, parent, previous, frame)

    def layout_mode()

    def layout()

    def recurse(node)

    def add_inline_child(node, w, child_class, frame, word)

    def new_line()

    def word(node, word)

    def input(node)

    def image(node)

    def iframe(node)

    def self_rect()

    def should_paint()

    def paint()

    def paint_effects(cmds)
class LineLayout:
    def __init__(node, parent, previous)

    def layout()

    def should_paint()

    def paint()

    def paint_effects(cmds)
class TextLayout:
    def __init__(node, word, parent, previous)

    def layout()

    def should_paint()

    def paint()

    def paint_effects(cmds)

    def self_rect()
class EmbedLayout:
    def __init__(node, parent, previous, frame)

    def layout()

    def should_paint()
class InputLayout:
    def __init__(node, parent, previous, frame)

    def layout()

    def paint()

    def paint_effects(cmds)

    def self_rect()
class ImageLayout:
    def __init__(node, parent, previous, frame)

    def layout()

    def paint()

    def paint_effects(cmds)
class IframeLayout:
    def __init__(node, parent, previous, parent_frame)

    def layout()

    def paint()

    def paint_effects(cmds)
BROKEN_IMAGE
class PaintCommand:
    def __init__(rect)
class DrawText:
    def __init__(x1, y1, text, font, color)

    def execute(canvas)
class DrawRect:
    def __init__(rect, color)

    def execute(canvas)
class DrawRRect:
    def __init__(rect, radius, color)

    def execute(canvas)
class DrawLine:
    def __init__(x1, y1, x2, y2, color, thickness)

    def execute(canvas)
class DrawOutline:
    def __init__(rect, color, thickness)

    def execute(canvas)
class DrawCompositedLayer:
    def __init__(composited_layer)

    def execute(canvas)
class DrawImage:
    def __init__(image, rect, quality)

    def execute(canvas)
class VisualEffect:
    def __init__(rect, children, node)
class Blend:
    def __init__(opacity, blend_mode, node, children)

    def execute(canvas)

    def map(rect)

    def unmap(rect)

    def clone(child)
class Transform:
    def __init__(translation, rect, node, children)

    def execute(canvas)

    def map(rect)

    def unmap(rect)

    def clone(child)
def local_to_absolute(display_item, rect)
def absolute_bounds_for_obj(obj)
def absolute_to_local(display_item, rect)
def map_translation(rect, translation, reversed)
def paint_tree(layout_object, display_list)
def paint_visual_effects(node, cmds, rect)
def paint_outline(node, cmds, rect, zoom)
def add_parent_pointers(nodes, parent)
class CompositedLayer:
    def __init__(skia_context, display_item)

    def can_merge(display_item)

    def add(display_item)

    def composited_bounds()

    def absolute_bounds()

    def raster()
SPEECH_FILE
class AccessibilityNode:
    def __init__(node, parent)

    def compute_bounds()

    def build()

    def build_internal(child_node)

    def contains_point(x, y)

    def hit_test(x, y)

    def map_to_parent(rect)

    def absolute_bounds()
class FrameAccessibilityNode:
    def __init__(node, parent)

    def build()

    def hit_test(x, y)

    def map_to_parent(rect)
def speak_text(text)
EVENT_DISPATCH_JS
SETTIMEOUT_JS
XHR_ONLOAD_JS
POST_MESSAGE_DISPATCH_JS
RUNTIME_JS
class JSContext:
    def __init__(tab, url_origin)

    def run(script, code, window_id)

    def add_window(frame)

    def wrap(script, window_id)

    def dispatch_event(type, elt, window_id)

    def dispatch_post_message(message, window_id)

    def dispatch_settimeout(handle, window_id)

    def dispatch_xhr_onload(out, handle, window_id)

    def dispatch_RAF(window_id)

    def throw_if_cross_origin(frame)

    def get_handle(elt)

    def querySelectorAll(selector_text, window_id)

    def getAttribute(handle, attr)

    def setAttribute(handle, attr, value, window_id)

    def innerHTML_set(handle, s, window_id)

    def style_set(handle, s, window_id)

    def XMLHttpRequest_send(...)

    def setTimeout(handle, time, window_id)

    def requestAnimationFrame()

    def parent(window_id)

    def postMessage(target_window_id, message, origin)
SCROLL_STEP
class Frame:
    def __init__(tab, parent_frame, frame_element)

    def allowed_request(url)

    def load(url, payload)

    def render()

    def clamp_scroll(scroll)

    def set_needs_render()

    def set_needs_layout()

    def advance_tab()

    def focus_element(node)

    def activate_element(elt)

    def submit_form(elt)

    def keypress(char)

    def scrolldown()

    def scroll_to(elt)

    def click(x, y)
class Tab:
    def __init__(browser, tab_height)

    def load(url, payload)

    def run_animation_frame(scroll)

    def render()

    def get_js(url)

    def allowed_request(url)

    def raster(canvas)

    def clamp_scroll(scroll)

    def set_needs_render()

    def set_needs_layout()

    def set_needs_paint()

    def set_needs_render_all_frames()

    def set_needs_accessibility()

    def scrolldown()

    def click(x, y)

    def go_back()

    def submit_form(elt)

    def keypress(char)

    def focus_element(node)

    def activate_element(elt)

    def scroll_to(elt)

    def enter()

    def advance_tab()

    def zoom_by(increment)

    def reset_zoom()

    def set_dark_mode(val)

    def post_message(message, target_window_id)
class Chrome:
    def __init__(browser)

    def tab_rect(i)

    def paint()

    def click(x, y)

    def keypress(char)

    def enter()

    def blur()

    def focus_addressbar()
class CommitData:
    def __init__(...)
class Browser:
    def __init__()

    def schedule_animation_frame()

    def commit(tab, data)

    def render()

    def composite_raster_and_draw()

    def composite()

    def get_latest(effect)

    def paint_draw_list()

    def raster_tab()

    def raster_chrome()

    def update_accessibility()

    def draw()

    def speak_node(node, text)

    def speak_document()

    def set_needs_accessibility()

    def set_needs_animation_frame(tab)

    def set_needs_raster_and_draw()

    def set_needs_raster()

    def set_needs_composite()

    def set_needs_draw()

    def clear_data()

    def new_tab(url)

    def new_tab_internal(url)

    def set_active_tab(tab)

    def schedule_load(url, body)

    def clamp_scroll(scroll)

    def handle_down()

    def handle_click(e)

    def handle_key(char)

    def handle_enter()

    def handle_tab()

    def handle_hover(event)

    def handle_quit()

    def toggle_dark_mode()

    def increment_zoom(increment)

    def reset_zoom()

    def focus_content()

    def focus_addressbar()

    def go_back()

    def cycle_tabs()

    def toggle_accessibility()
def mainloop(browser)
15-1 Canvas element. Implement the <canvas>
element, the 2D aspect of the getContext
API, and some of the drawing commands on CanvasRenderingContext2D.
Canvas layout is just like an iframe, including its default width and
height. You should allocate a Skia surface of an appropriate size when
getContext("2d") is called, and implement some of the APIs
that draw to the canvas.Note that the Canvas APIs raster each drawing command
immediately, instead of waiting until the rest of the page is rastered.
This is called immediate mode rendering—as opposed to the retained
mode used by HTML. Immediate mode means the web developer
decides when to incur the rasterization time. It should be
straightforward to translate most API methods to their Skia
equivalent.
15-2 Background images. Elements can have a background-image.
Implement the basics of this CSS property: a url(...) value
for the background-image property. Avoid loading the image
if the background-image property does not actually end up
used on any element. For a bigger challenge, also allow the web page to
set the size of the background image with the background-size
CSS property.
15-3 object-fit. Implement the object-fit
CSS property. It determines how the image within an
<img> element is sized relative to its container
element. This will require clipping images with a different aspect
ratio.
15-4 Lazy loading. Downloading images can use quite a bit of
data.In the early days
of the web, computer networks were slow enough that browsers had a user
setting to disable downloading of images until the user expressly asked
for them. While browsers default to downloading all images
on the page immediately, the loading
attribute on img elements can instruct a browser to
only download images if they are close to the visible area of the page.
This kind of optimization is generally called lazy
loading. Implement loading. Make sure the page is laid
out correctly both before and after the image finishes loading.
15-5 Iframe aspect ratio. Implement the aspect-ratio
CSS property and use it to provide an implicit sizing to iframes and
images when only one of width or height is
specified (or when the image is not yet loaded, if you do Exercise
15-4).
15-6 Image placeholders. Building on top of lazy loading,
implement placeholder styling of images that haven’t loaded yet. This is
done by setting a 0×0 sizing, unless width or
height is specified. Also add support for hiding the
“broken image” if the alt attribute is missing or
empty.That’s because if
alt text is provided, the browser can assume the image is
important to the meaning of the website, and so it should tell the user
that they are missing out on some of the content if it fails to load.
But otherwise, the broken image icon is probably just ugly
clutter.
15-7 Media queries. Implement the width
media query. Make sure it works inside iframes. Also make sure it works
even when the width of an iframe is changed by its parent frame.
15-8 Target origin for postMessage. Implement
the targetOrigin parameter to postMessage.
This parameter is a string which indicates the frame origins that are
allowed to receive the message.
15-9 Multi-frame focus. In our browser, pressing
Tab cycles through the elements in the focused frame. But
this means it’s impossible to access focusable elements in other frames
by keyboard alone. Fix it to move between frames after iterating through
all focusable elements in one frame.
15-10 Iframe history. Ensure that iframes affect browser history. For example, if you click on a link inside an iframe, and then hit the back button, it should go back inside the iframe. Make sure that this works even when the user clicks links in multiple frames in various orders.It’s debatable whether this is a good feature of iframes, as it causes a lot of confusion for web developers who embed iframes they don’t plan on navigating.
15-11 Iframes added or removed by script. The
innerHTML API can cause iframes to be added or removed, but
our browser doesn’t load or unload them when this happens. Fix this: new
iframes should be loaded and old ones unloaded.
15-12 X-Frame-Options. Implement this
header, which disallows a web page from appearing in an iframe.
Did you find this chapter useful?