So far, our browser has seen the web as read-only—but when you post on Facebook, fill out a survey, or search Google, you’re sending information to servers as well as receiving information from them. In this chapter, we’ll start to transform our browser into a platform for web applications by building out support for HTML forms, the simplest way for a browser to send information to a server.
HTML forms have a couple of moving parts.
First, in HTML there is a form element, which contains
input elements,There are other elements similar to input,
such as select and textarea. They work
similarly enough; they just represent different kinds of user controls,
like dropdowns and multi-line inputs. which in turn can be
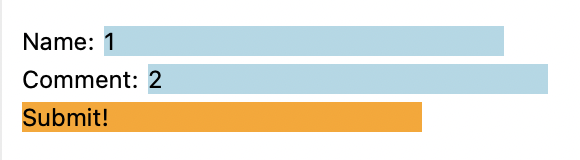
edited by the user. So a form might be written like this (see results in
Figure 1):
<form action="/submit" method="post">
    <p>Name: <input name=name value=1></p>
    <p>Comment: <input name=comment value=2></p>
    <p><button>Submit!</button></p>
</form>This form contains two text entry boxes called name and
comment. When the user goes to this page, they can click on
those boxes to edit their values. Then, when they click the button at
the end of the form, the browser collects all of the name–value pairs
and bundles them into an HTTP POST request (as indicated by
the method attribute), sent to the URL given by the
form element’s action attribute, with the
usual rules of relative URLs—so in this case, /submit. The
POST request looks like this:
POST /submit HTTP/1.0
Host: example.org
Content-Length: 16

name=1&comment=2
In other words, it’s a lot like the regular GET requests
we’ve already seen, except that it has a body—you’ve already seen HTTP
responses with bodies, but requests can have them too. Note the
Content-Length header; it’s mandatory for POST
requests. The server responds to this request with a web page, just like
normal, and the browser then does everything it normally does.
Implementing forms requires extending many parts of the browser, from
implementing HTTP POST through new layout objects that draw
input elements to handling buttons clicks. That makes it a
great starting point for transforming our browser into an application
platform, our goal for the next few chapters. Let’s get started
implementing it all!
HTML forms were first standardized in HTML+, which also proposed tables, mathematical equations, and text that wraps around images. Amazingly, all three of these technologies survive, but in totally different standards: tables in RFC 1942, equations in MathML, and floating images in CSS 1.0.
First, let’s draw the input areas that the user will type into.Most applications use OS
libraries to draw input areas, so that those input areas look like other
applications on that OS. But browsers need a lot of control over
application styling, so they often draw their own input
areas. Input areas are inline content, laid out in lines
next to text. So to support inputs we’ll need a new kind of layout
object, which I’ll call InputLayout. We can copy
TextLayout and use it as a template, though we’ll need to
make some quick edits.
First, there’s no word argument to
InputLayouts:
class InputLayout:
    def __init__(self, node, parent, previous):
        self.node = node
        self.children = []
        self.parent = parent
        self.previous = previous
Second, input elements usually have a fixed width:
INPUT_WIDTH_PX = 200

class InputLayout:
    def layout(self):
        # ...
        self.width = INPUT_WIDTH_PX
        # ...
The input and button elements need to be
visually distinct so the user can find them easily. Our browser’s
styling capabilities are limited, so let’s use background color to do
that:
input {
    font-size: 16px; font-weight: normal; font-style: normal;
    background-color: lightblue;
}
button {
    font-size: 16px; font-weight: normal; font-style: normal;
    background-color: orange;
}
When the browser paints an InputLayout it needs to draw
the background:
class InputLayout:
    def paint(self):
        cmds = []
        bgcolor = self.node.style.get("background-color",
                                      "transparent")
        if bgcolor != "transparent":
            rect = DrawRect(self.self_rect(), bgcolor)
            cmds.append(rect)
        return cmds
It then needs to get the input element’s text contents:
class InputLayout:
    def paint(self):
        # ...
        if self.node.tag == "input":
            text = self.node.attributes.get("value", "")
        elif self.node.tag == "button":
            if len(self.node.children) == 1 and \
               isinstance(self.node.children[0], Text):
                text = self.node.children[0].text
            else:
                print("Ignoring HTML contents inside button")
                text = ""
        # ...
Note that <button> elements can in principle
contain complex HTML, not just a text node. That’s too complicated for
this chapter, so I’m having the browser print a warning and skip the
text in that case.See
Exercise 8-8. Finally, we draw that text:
class InputLayout:
    def paint(self):
        # ...
        color = self.node.style["color"]
        cmds.append(
            DrawText(self.x, self.y, text, self.font, color))
        return cmds
By this point in the book, you’ve seen many layout objects, so I’m glossing over these changes. The point is that new layout objects are one common way to extend the browser.
We now need to create some InputLayouts, which we can do
in BlockLayout:
class BlockLayout:
    def recurse(self, node):
        if isinstance(node, Text):
            # ...
        else:
            if node.tag == "br":
                self.new_line()
            elif node.tag == "input" or node.tag == "button":
                self.input(node)
            else:
                for child in node.children:
                    self.recurse(child)
Finally, this new input method is similar to the
text method, creating a new layout object and adding it to
the current line:It’s so
similar in fact that they only differ in how they compute
w. I’ll resist the temptation to refactor this code until
we get to Chapter 15.
class BlockLayout:
    def input(self, node):
        w = INPUT_WIDTH_PX
        if self.cursor_x + w > self.width:
            self.new_line()
        line = self.children[-1]
        previous_word = line.children[-1] if line.children else None
        input = InputLayout(node, line, previous_word)
        line.children.append(input)

        weight = node.style["font-weight"]
        style = node.style["font-style"]
        if style == "normal": style = "roman"
        size = int(float(node.style["font-size"][:-2]) * .75)
        font = get_font(size, weight, style)

        self.cursor_x += w + font.measure(" ")
But actually, there are a couple more complications due to the way we
decided to resolve the block-mixed-with-inline-siblings problem (see Chapter 5). One is that if there are
no children for a node, we assume it’s a block element. But
<input> elements don’t have children, yet must have
inline layout or else they won’t draw correctly. Likewise, a
<button> does have children, but they are treated
specially.This situation
is specific to these elements in our browser, but only because they are
the only elements with special painting behavior within an inline
context. These are also two examples of atomic
inlines.
We can fix that with this change to layout_mode to add a
second condition for returning “inline”:
class BlockLayout:
    def layout_mode(self):
        # ...
        elif self.node.children or self.node.tag == "input":
            return "inline"
        # ...
The second problem is that, again due to having block siblings,
sometimes an <input> or <button>
element will create a BlockLayout (which will then create
an InputLayout inside). In this case we don’t want to paint
the background twice, so let’s add some simple logic to skip painting it
in BlockLayout in this case, via a new
should_paint method:Recall (see Chapter
5) that we only get into this situation due to the presence of
anonymous block boxes. Also, it’s worth noting that there are various
other ways that our browser does not fully implement all the
complexities of inline painting—one example is that it does not
correctly paint nested inlines with different background colors. Inline
layout and paint are very complicated in real
browsers.
class BlockLayout:
    # ...
    def should_paint(self):
        return isinstance(self.node, Text) or \
            (self.node.tag != "input" and self.node.tag !=  "button")
Add a trivial should_paint method that just returns
True to all of the other layout object types. Now we can
skip painting objects based on should_paint:
def paint_tree(layout_object, display_list):
    if layout_object.should_paint():
        display_list.extend(layout_object.paint())
    # ...
With these changes the browser should now draw input and
button elements as blue and orange rectangles.
The reason buttons surround their contents but input areas don’t is
that a button can contain images, styled text, or other content. In a
real browser, that relies on the inline-block
display mode: a way of putting a block element into a line of text.
There’s also an older <input type=button> syntax more
similar to text inputs.
We’ve got input elements rendering, but you can’t edit
their contents yet. But of course that’s the whole point! So let’s make
input elements work like the address bar does—clicking on
one will clear it and let you type into it.
Clearing is easy, another case inside Tab’s
click method:
class Tab:
    def click(self, x, y):
        while elt:
            # ...
            elif elt.tag == "input":
                elt.attributes["value"] = ""
            # ...
However, if you try this, you’ll notice that clicking does not
actually clear the input element. That’s because the code
above updates the HTML tree—but we need to update the layout tree and
then the display list for the change to appear on the screen.
Right now, the layout tree and display list are computed in
load, but we don’t want to reload the whole page; we just
want to redo the styling, layout, paint and draw phases. Together these
are called rendering. So let’s extract these phases into a new
Tab method, render:
class Tab:
    def load(self, url, payload=None):
        # ...
        self.render()

    def render(self):
        style(self.nodes, sorted(self.rules, key=cascade_priority))
        self.document = DocumentLayout(self.nodes)
        self.document.layout()
        self.display_list = []
        paint_tree(self.document, self.display_list)
For this code to work, you’ll also need to change nodes
and rules from local variables in the load
method to new fields on a Tab. Note that styling moved from
load to render, but downloading the style
sheets didn’t—we don’t re-download the style sheetsActually, some changes to the
web page could delete existing link nodes or create new
ones. Real browsers respond to this correctly, either removing the rules
corresponding to deleted link nodes or downloading new
style sheets when new link nodes are created. This is
tricky to get right, and typing into an input area definitely can’t make
such changes, so let’s skip this in our browser. every
time you type!
Now when we click an input element and clear its
contents, we should call render to redraw the page with the
input cleared. We also need to call render if
we clicked off an input element, since we might have unfocused an input
element in the process:
class Tab:
    def click(self, x, y):
        while elt:
            elif elt.tag == "input":
                elt.attributes["value"] = ""
                return self.render()
        self.render()
So that’s clicking in an input area. But typing is
harder. Think back to how we implemented the
address bar in Chapter 7: we added a focus field that
remembered what we clicked on so we could later send it our key presses.
We need something like that focus field for input areas,
but it’s going to be more complex because the input areas live inside a
Tab, not inside the Browser.
Naturally, we will need a focus field on each
Tab, to remember which text entry (if any) we’ve recently
clicked on:
class Tab:
    def __init__(self):
        # ...
        self.focus = None
Now when we click on an input element, we need to set
focus (and clear focus if nothing was found to focus
on):
class Tab:
    def click(self, x, y):
        self.focus = None
        # ...
        while elt:
            elif elt.tag == "input":
                self.focus = elt
                # ...
But remember that keyboard input isn’t handled by the
Tab—it’s handled by the Browser. So how does
the Browser even know when keyboard events should be sent
to the Tab? The Browser has to remember that
in its own focus field!
In other words, when you click on the web page, the
Browser updates its focus field to remember
that the user is interacting with the page, not the browser chrome. And
if so, it should unfocus (“blur”) the browser chrome:
class Chrome:
    def blur(self):
        self.focus = None
class Browser:
def handle_click(self, e):
if e.y < self.chrome.bottom:
self.focus = None
# ...
else:
self.focus = "content"
self.chrome.blur()
# ...
self.draw()The if branch that corresponds to clicks in the browser
chrome unsets focus, meaning focus is no longer on the page
contents, and key presses will thus be sent to the
Chrome.
When a key press happens, the Browser either sends it to
the address bar or calls the active tab’s keypress method
(or neither, if nothing is focused):
class Browser:
    def handle_key(self, e):
        # ...
        if self.chrome.keypress(e.char):
            self.draw()
        elif self.focus == "content":
            self.active_tab.keypress(e.char)
            self.draw()
Here I’ve changed keypress to return true if the browser
chrome consumed the key:
class Chrome:
    def keypress(self, char):
        if self.focus == "address bar":
            self.address_bar += char
            return True
        return False
That keypress method then uses the tab’s
focus field to put the character in the right text
entry:
class Tab:
    def keypress(self, char):
        if self.focus:
            self.focus.attributes["value"] += char
            self.render()
Note that here we call render instead of
draw, because we’ve modified the web page and thus need to
regenerate the display list instead of just redrawing it to the
screen.
Hierarchical focus handling is an important pattern for combining
graphical widgets; in a real browser, where web pages can be embedded
into one another with iframes,The iframe
element allows you to embed one web page into another as a little
window. We’ll talk about this more in Chapter
15. the focus tree can be arbitrarily deep.
So now we have user input working with input elements.
Before we move on, there is one last tweak that we need to make: drawing
the text cursor in the Tab’s render method.
This turns out to be harder than expected: the cursor should be drawn by
the InputLayout of the focused node, and that means that
each node has to know whether or not it’s focused:
class Element:
    def __init__(self, tag, attributes, parent):
        # ...
        self.is_focused = False
Add the same field to Text nodes; they’ll never be
focused and never draw cursors, but it’s more convenient if
Text and Element have the same fields. We’ll
set this when we move focus to an input element:
class Tab:
    def click(self, x, y):
        if self.focus:
            self.focus.is_focused = False
        while elt:
            elif elt.tag == "input":
                elt.attributes["value"] = ""
                self.focus = elt
                elt.is_focused = True
                return self.render()
Note that we have to un-focus the currently focused element, lest it
keep drawing its cursor. Anyway, now we can draw a cursor if an
input element is focused:
class InputLayout:
    def paint(self):
        # ...
        if self.node.is_focused:
            cx = self.x + self.font.measure(text)
            cmds.append(DrawLine(
                cx, self.y, cx, self.y + self.height, "black", 1))
        # ...
Now you can click on a text entry, type into it, and modify its value. The next step is submitting the now-filled-out form.
This approach to drawing the text cursor—having the
InputLayout draw it—allows visual effects to apply to the
cursor, as we’ll see in Chapter 11.
But not every browser does it this way. Chrome, for example, keeps track
of a global focused
element to make sure the cursor can be globally
styled.
You submit a form by clicking on a button. So let’s add
another condition to the big while loop in
click:
class Tab:
    def click(self, x, y):
        while elt:
            # ...
            elif elt.tag == "button":
                # ...
            # ...
Once we’ve found the button, we need to find the form that it’s in by walking up the HTML tree:
elif elt.tag == "button":
    while elt:
        if elt.tag == "form" and "action" in elt.attributes:
            return self.submit_form(elt)
        elt = elt.parent
The submit_form method is then in charge of finding all
of the input elements, encoding them in the right way, and sending the
POST request. First, we look through all the descendents of
the form to find input elements:
class Tab:
    def submit_form(self, elt):
        inputs = [node for node in tree_to_list(elt, [])
                  if isinstance(node, Element)
                  and node.tag == "input"
                  and "name" in node.attributes]
For each of those input elements, we need to extract the
name attribute and the value attribute, and
form encode both of them. Form encoding is how the name–value
pairs are formatted in the HTTP POST request. Basically, it
is: name, then equal sign, then value; and name–value pairs are
separated by ampersands:
class Tab:
    def submit_form(self, elt):
        # ...
        body = ""
        for input in inputs:
            name = input.attributes["name"]
            value = input.attributes.get("value", "")
            body += "&" + name + "=" + value
        body = body[1:]
Here, body initially has an extra &
tacked on to the front, which is removed on the last line.
Now, any time you see special syntax like this, you’ve got to ask:
what if the name or the value has an equal sign or an ampersand in it?
So in fact, “percent encoding” replaces all special characters with a
percent sign followed by those characters’ hex codes. For example, a
space becomes %20 and a period becomes %2e.
Python provides a percent-encoding function as quote in the
urllib.parse module:You can write your own percent_encode function
using Python’s ord and hex functions if you
like. I’m using the standard function for expediency. In Chapter 1, using these library functions would
have obscured key concepts, but by this point percent encoding is
necessary but not conceptually interesting.
for input in inputs:
    # ...
    name = urllib.parse.quote(name)
    value = urllib.parse.quote(value)
    # ...
Now that submit_form has built a request body, it needs
to make a POST request. I’m going to defer that
responsibility to the load function, which handles making
requests:
def submit_form(self, elt):
    # ...
    url = self.url.resolve(elt.attributes["action"])
    self.load(url, body)
The new payload argument to load is then
passed through to request:
def load(self, url, payload=None):
    # ...
    body = url.request(payload)
    # ...
In request, this new argument is used to decide between
a GET and a POST request:
class URL:
    def request(self, payload=None):
        # ...
        method = "POST" if payload else "GET"
        # ...
        request = "{} {} HTTP/1.0\r\n".format(method, self.path)
        # ...
If it’s a POST request, the Content-Length
header is mandatory:
class URL:
    def request(self, payload=None):
        # ...
        if payload:
            length = len(payload.encode("utf8"))
            request += "Content-Length: {}\r\n".format(length)
        # ...
Note that the Content-Length is the length of the
payload in bytes, which might not be equal to its length in
letters.Because
characters from many languages take up multiple bytes.
Finally, after the headers, we send the payload itself:
class URL:
    def request(self, payload=None):
        # ...
        if payload: request += payload
        s.send(request.encode("utf8"))
        # ...
So that’s how the POST request gets sent. Then the
server responds with an HTML page and the browser will render it in the
totally normal way.Actually, because browsers treat going “back” to a
POST-requested page specially (see Exercise 8-5), it’s
common to respond to a POST request with a
redirect. That’s basically it for forms!
While most form submissions use the form encoding described here,
forms with file uploads (using <input type=file>) use
a different
encoding that includes metadata for each key–value pair (like the
file name or file type). There’s also an obscure text/plain
encoding option, which uses no escaping and which even the standard
warns against using.
So … how do web applications (web apps) use forms? When you use an application from your browser—whether you are registering to vote, looking at pictures of your baby cousin, or checking your email—there are typicallyHere I’m talking in general terms. There are some browser applications without a server, and others where the client code is exceptionally simple and almost all the code is on the server. two programs involved: client code that runs in the browser, and server code that runs on the server. When you click on things or take actions in the application, that runs client code, which then sends data to the server via HTTP requests.
For example, imagine a simple message board application. The server stores the state of the message board—who has posted what—and has logic for updating that state. But all the actual interaction with the page—drawing the posts, letting the user enter new ones—happens in the browser. Both components are necessary.
The browser and the server interact over HTTP. The browser first
makes a GET request to the server to load the current
message board. The user interacts with the browser to type a new post,
and submits it to the server (say, via a form). That causes the browser
to make a POST request to the server, which instructs the
server to update the message board state. The server then needs the
browser to update what the user sees; with forms, the server sends a new
HTML page in its response to the POST request. This process
is shown in Figure 2.
Forms are a simple, minimal introduction to this cycle of request and
response and make a good introduction to how browser applications work.
They’re also implemented in every browser and have been around for
decades. These days many web applications use the form elements, but
replace synchronous POST requests with asynchronous ones
driven by Javascript,In
the early 2000s, the adoption of asynchronous HTTP requests sparked the
wave of innovative new web applications called Web 2.0.
which makes applications snappier by hiding the time to make the HTTP
request. In return for that snappiness, that JavaScript code must now
handle errors, validate inputs, and indicate loading time. In any case,
both synchronous and asynchronous uses of forms are based on the same
principles of client and server code.
There are request types besides GET and
POST, like PUT
(create if non-existent) and DELETE,
or the more obscure CONNECT and TRACE. In 2010
the PATCH
method was standardized in RFC 5789. New
methods were intended as a standard extension mechanism for HTTP, and
some protocols were built this way (like WebDav’s
PROPFIND, MOVE, and LOCK
methods), but this did not become an enduring way to extend the web
itself, and HTTP 2.0 and 3.0 did not add any new methods.
To better understand the request/response cycle, let’s write a simple web server. It’ll implement an online guest book,They were very hip in the 1990s—comment threads from before there was anything to comment on. kind of like an open, anonymous comment thread. Now, this is a book on web browser engineering, so I won’t discuss web server implementation that thoroughly. But I want you to see how the server side of an application works.
A web server is a separate program from the web browser, so let’s start a new file. The server will need to:
Let’s start by opening a socket. Like for the browser, we need to create an internet streaming socket using TCP:
import socket
s = socket.socket(
    family=socket.AF_INET,
    type=socket.SOCK_STREAM,
    proto=socket.IPPROTO_TCP)
s.setsockopt(socket.SOL_SOCKET, socket.SO_REUSEADDR, 1)
The setsockopt call is optional. Normally, when a
program has a socket open and it crashes, your OS prevents that port
from being reusedWhen
your process crashes, the computer on the end of the connection won’t be
informed immediately; if some other process opens the same port, it
could receive data meant for the old, now-dead process.
for a short period. That’s annoying when developing a server; calling
setsockopt with the SO_REUSEADDR option allows
the OS to immediately reuse the port.
Now, with this socket, instead of calling connect (to
connect to some other server), we’ll call bind, which waits
for other computers to connect:
s.bind(('', 8000))
s.listen()
Let’s look at the bind call first. Its first argument
says who should be allowed to make connections to the server;
the empty string means that anyone can connect. The second argument is
the port others must use to talk to our server; I’ve chosen
8000. I can’t use 80, because ports below 1024 require
administrator privileges, but you can pick something other than 8000 if,
for whatever reason, port 8000 is taken on your machine.
Finally, after the bind call, the listen
call tells the OS that we’re ready to accept connections.
To actually accept those connections, we enter a loop that runs once
per connection. At the top of the loop we call s.accept to
wait for a new connection:
while True:
    conx, addr = s.accept()
    handle_connection(conx)
That connection object is, confusingly, also a socket: it is the socket corresponding to that one connection. We know what to do with those: we read the contents and parse the HTTP message. But it’s a little trickier in the server than in the browser, because the server can’t just read from the socket until the connection closes—the browser is waiting for the server and won’t close the connection.
So, we’ve got to read from the socket line by line. First, we read the request line:
def handle_connection(conx):
    req = conx.makefile("b")
    reqline = req.readline().decode('utf8')
    method, url, version = reqline.split(" ", 2)
    assert method in ["GET", "POST"]
Then we read the headers until we get to a blank line, accumulating the headers in a dictionary:
def handle_connection(conx):
    # ...
    headers = {}
    while True:
        line = req.readline().decode('utf8')
        if line == '\r\n': break
        header, value = line.split(":", 1)
        headers[header.casefold()] = value.strip()
Finally we read the body, but only when the
Content-Length header tells us how much of it to read
(that’s why that header is mandatory on POST requests):
def handle_connection(conx):
    # ...
    if 'content-length' in headers:
        length = int(headers['content-length'])
        body = req.read(length).decode('utf8')
    else:
        body = None
Now the server needs to generate a web page in response. We’ll get to
that later; for now, just abstract that away behind a
do_request call:
def handle_connection(conx):
    # ...
    status, body = do_request(method, url, headers, body)
The server then sends this page back to the browser:
def handle_connection(conx):
    # ...
    response = "HTTP/1.0 {}\r\n".format(status)
    response += "Content-Length: {}\r\n".format(
        len(body.encode("utf8")))
    response += "\r\n" + body
    conx.send(response.encode('utf8'))
    conx.close()
The architecture is summarized in Figure 3. Our implementation is all
pretty bare-bones: our server doesn’t check that the browser is using
HTTP 1.0 to talk to it, it doesn’t send back any headers at all except
Content-Length, it doesn’t support TLS, and so on. Again:
this is a web browser book—it’ll do.
Ilya Grigorik’s High Performance Browser Networking is an excellent deep dive into networking and how to optimize for it in a web application. There are things the client can do (make fewer requests, avoid polling, reuse connections) and things the server can do (compression, protocol support, sharing domains).
So far, all of this server code is “boilerplate”—any web application
will have similar code. What makes our server a guest book, on the other
hand, depends on what happens inside do_request. It needs
to store the guest book state, generate HTML pages, and respond to
POST requests.
Let’s store guest book entries in a Python list. Usually web applications use persistent state, like a database, so that the server can be restarted without losing state, but our guest book need not be that resilient.
ENTRIES = [ 'Pavel was here' ]Next, do_request has to output HTML that shows those
entries:
def do_request(method, url, headers, body):
    out = "<!doctype html>"
    for entry in ENTRIES:
        out += "<p>" + entry + "</p>"
    return "200 OK", out
This is definitely “minimal” HTML, so it’s a good thing our browser
will insert implicit tags and has some default styles! You can test it
out by running this minimal web server and, while it’s running, direct
your browser to http://localhost:8000/, where
localhost is what your computer calls itself and
8000 is the port we chose earlier. You should see one guest
book entry.
By the way, while you’re debugging this web server, it’s probably better to use a real web browser, instead of this book’s browser, to interact with it. That way you don’t have to worry about browser bugs while you work on server bugs. But this server does support both real and toy browsers.
We’ll use forms to let visitors write in the guest book:
def do_request(method, url, headers, body):
    # ...
    out += "<form action=add method=post>"
    out +=   "<p><input name=guest></p>"
    out +=   "<p><button>Sign the book!</button></p>"
    out += "</form>"
    # ...
When this form is submitted, the browser will send a
POST request to http://localhost:8000/add. So
the server needs to react to these submissions. That means
do_request will field two kinds of requests: regular
browsing and form submissions. Let’s separate the two kinds of requests
into different functions.
First rename the current do_request to
show_comments:
def show_comments():
    # ...
    return out
This then frees up the do_request function to figure out
which function to call for which request:
def do_request(method, url, headers, body):
    if method == "GET" and url == "/":
        return "200 OK", show_comments()
    elif method == "POST" and url == "/add":
        params = form_decode(body)
        return "200 OK", add_entry(params)
    else:
        return "404 Not Found", not_found(url, method)
When a POST request to /add comes in, the
first step is to decode the request body:
def form_decode(body):
    params = {}
    for field in body.split("&"):
        name, value = field.split("=", 1)
        name = urllib.parse.unquote_plus(name)
        value = urllib.parse.unquote_plus(value)
        params[name] = value
    return params
Note that I use unquote_plus instead of
unquote, because browsers may also use a plus sign to
encode a space. The add_entry function then looks up the
guest parameter and adds its content as a new guest book
entry:
def add_entry(params):
    if 'guest' in params:
        ENTRIES.append(params['guest'])
    return show_comments()
I’ve also added a “404” response. Fitting the austere stylings of our guest book, here’s the 404 page:
def not_found(url, method):
    out = "<!doctype html>"
    out += "<h1>{} {} not found!</h1>".format(method, url)
    return out
Try it! You should be able to restart the server, open it in your browser, and update the guest book a few times. You should also be able to use the guest book from a real web browser.
Typically, connection handling and request routing is handled by a web framework; this book’s website, for example uses bottle.py. Frameworks parse requests into convenient data structures, route requests to the right handler, and can also provide tools like HTML templates, session handling, database access, input validation, and API generation.
With this chapter we’re starting to transform our browser into an application platform. We’ve added:
POST.Plus, our browser now has a little web server friend. That’s going to be handy as we add more interactive features to the browser.
Since this chapter introduces a server, I’ve also added support for that in the browser widget below, by cross-compiling this chapter’s server code to JavaScript. Try submitting a comment through the form, it should work!
The complete set of functions, classes, and methods in our browser should now look something like this:
class URL:
    def __init__(url)

    def request(payload)

    def resolve(url)

    def __str__()
class Text:
    def __init__(text, parent)

    def __repr__()
class Element:
    def __init__(tag, attributes, parent)

    def __repr__()
def print_tree(node, indent)
def tree_to_list(tree, list)
class HTMLParser:
    SELF_CLOSING_TAGS

    HEAD_TAGS

    def __init__(body)

    def parse()

    def get_attributes(text)

    def add_text(text)

    def add_tag(tag)

    def implicit_tags(tag)

    def finish()
class CSSParser:
    def __init__(s)

    def whitespace()

    def literal(literal)

    def word()

    def ignore_until(chars)

    def pair()

    def selector()

    def body()

    def parse()
class TagSelector:
    def __init__(tag)

    def matches(node)
class DescendantSelector:
    def __init__(ancestor, descendant)

    def matches(node)
FONTS
def get_font(size, weight, style)
DEFAULT_STYLE_SHEET
INHERITED_PROPERTIES
def style(node, rules)
def cascade_priority(rule)
WIDTH, HEIGHT
HSTEP, VSTEP
class Rect:
    def __init__(left, top, right, bottom)

    def contains_point(x, y)
INPUT_WIDTH_PX
BLOCK_ELEMENTS
class DocumentLayout:
    def __init__(node)

    def layout()

    def should_paint()

    def paint()
class BlockLayout:
    def __init__(node, parent, previous)

    def layout_mode()

    def layout()

    def recurse(node)

    def new_line()

    def word(node, word)

    def input(node)

    def self_rect()

    def should_paint()

    def paint()
class LineLayout:
    def __init__(node, parent, previous)

    def layout()

    def should_paint()

    def paint()
class TextLayout:
    def __init__(node, word, parent, previous)

    def layout()

    def should_paint()

    def paint()
class InputLayout:
    def __init__(node, parent, previous)

    def layout()

    def should_paint()

    def paint()

    def self_rect()
class DrawText:
    def __init__(x1, y1, text, font, color)

    def execute(scroll, canvas)
class DrawRect:
    def __init__(rect, color)

    def execute(scroll, canvas)
class DrawLine:
    def __init__(x1, y1, x2, y2, color, thickness)

    def execute(scroll, canvas)
class DrawOutline:
    def __init__(rect, color, thickness)

    def execute(scroll, canvas)
def paint_tree(layout_object, display_list)
SCROLL_STEP
class Tab:
    def __init__(tab_height)

    def load(url, payload)

    def render()

    def draw(canvas, offset)

    def scrolldown()

    def click(x, y)

    def go_back()

    def submit_form(elt)

    def keypress(char)
class Chrome:
    def __init__(browser)

    def tab_rect(i)

    def paint()

    def click(x, y)

    def keypress(char)

    def enter()

    def blur()
class Browser:
    def __init__()

    def draw()

    def new_tab(url)

    def handle_down(e)

    def handle_click(e)

    def handle_key(e)

    def handle_enter(e)
There’s also a server now, but it’s much simpler:
def handle_connection(conx)
def do_request(method, url, headers, body)
def form_decode(body)
ENTRIES
def show_comments()
def not_found(url, method)
def add_entry(params)
If you run it, it should look something like this:
8-1 Enter key. In most browsers, if you hit the “Enter” or “Return” key while inside a text entry, that submits the form that the text entry was in. Add this feature to your browser.
8-2 GET forms. Forms can be submitted via
GET requests as well as POST requests. In
GET requests, the form-encoded data is pasted onto the end
of the URL, separated from the path by a question mark, like
/search?q=hi; GET form submissions have no
body. Implement GET form submissions.
8-3 Blurring. Right now, if you click inside a text entry,
and then inside the address bar, two cursors will appear on the screen.
To fix this, add a blur method to each Tab
which unfocuses anything that is focused, and call it before changing
focus.
8-4 Check boxes. In HTML, input elements have a
type attribute. When set to checkbox, the
input element looks like a checkbox; it’s checked if the
checked attribute is set, and unchecked otherwise.Technically, the
checked attribute only
affects the state of the checkbox when the page loads; checking and
unchecking a checkbox does not affect this attribute but instead
manipulates internal state. When the form is submitted, a
checkbox’s name=value pair is included only if the checkbox
is checked. (If the checkbox has no value attribute, the
default is the string on.)
8-5 Resubmit requests. One reason to separate
GET and POST requests is that GET
requests are supposed to be idempotent (read-only, basically)
while POST requests are assumed to change the web server
state. That means that going “back” to a GET request
(making the request again) is safe, while going “back” to a
POST request is a bad idea. Change the browser history to
record what method was used to access each URL, and the
POST body if one was used. When you go back to a
POST-ed URL, ask the user if they want to resubmit the
form. Don’t go back if they say no; if they say yes, submit a
POST request with the same body as before.
8-6 Message board. Right now our web server is a simple
guest book. Extend it into a simple message board by adding support for
topics. Each topic should have its own URL and its own list of messages.
So, for example, /cooking should be a page of posts (about
cooking) and comments submitted through the form on that page should
only show up when you go to /cooking, not when you go to
/cars. Make the home page, at /, list the
available topics with a link to each topic’s page. Make it possible for
users to add new topics.
8-7 Persistence. Back the server’s list of guest book entries with a file, so that when the server is restarted it doesn’t lose data.
8-8 Rich buttons. Make it possible for a button to contain arbitrary elements as children, and render them correctly. The children should be contained inside the button instead of spilling out—this can make a button really tall. Think about edge cases, like a button that contains another button, an input area, or a link, and test real browsers to see what they do.
8-9 HTML chrome. Browser chrome is quite complicated in real
browsers, with tricky details such as font sizes, padding, outlines,
shadows, icons and so on. This makes it tempting to try to reuse our
layout engine for it. Implement this, using <button>
elements for the new tab and back buttons, an <input>
element for the address bar, and <a> elements for the
tab names. It won’t look exactly the same as the current chrome—outline
will have to wait for Chapter 14, for
example—but if you adjust the default CSS you should be able to make it
look passable.Real
browsers have in fact gone down this implementation path multiple times,
building layout engines for the browser chrome that are heavily inspired
by or reuse pieces of the main web layout engine. Firefox had one, and Chrome has one.
However, because it’s so important for the browser chrome to be very
fast and responsive to draw, such approaches have had mixed
success.
Did you find this chapter useful?