Preface
A computer science degree traditionally includes courses in operating systems, compilers, and databases that replace mystery with code. These courses transform Linux, Postgres, and LLVM into improvements, additions, and optimizations of an understandable core architecture. The lesson transcends the specific system studied: all computer systems, no matter how big and seemingly complex, can be studied and understood.
But web browsers are still opaque, not just to students but to industry programmers and even to researchers. This book dissipates that mystery by systematically explaining all major components of a modern web browser.
Reading This Book
Parts 1–3 of this book construct a basic browser weighing in at around 1000 lines of code, twice that after exercises. The average chapter takes 4–6 hours to read, implement, and debug for someone with a few years’ programming experience. Part 4 of this book covers advanced topics; those chapters are longer and have more code. The final browser weighs in at about 3000 lines.
Your browserThis book assumes that you will be building a web browser along the way while reading it. However, it does present nearly all the code—inlined into the book—for a working browser for every chapter. So most of the time, the book uses the term “our browser”, which refers to the conceptual browser we (you and us, the authors) have built so far. In cases where the book is referring specifically to the implementation you have built, the book says “your browser”. will “work” at each step of the way, and every chapter will build upon the last.This idea is from J. R. Wilcox, inspired in turn by S. Zdancewic’s course on compilers. That way, you will also practice growing and improving complex software. If you feel particularly interested in some component, please do flesh it out, complete the exercises, and add missing features. We’ve tried to arrange it so that this doesn’t make later chapters more difficult.
The code in this book uses Python 3, and
we recommend you follow along in the same. When the book shows Python
command lines, it calls the Python binary python3.This is for clarity. On some
operating systems, python means Python 3, but on others
that means Python 2. Check which version you have! That
said, the text avoids dependencies where possible and you can try to
follow along in another language. Make sure your language has libraries
for TLS connections (Python has one built in), graphics (the text uses
Tk, Skia, and SDL), and JavaScript evaluation (the text uses DukPy).
This book’s browser is irreverent toward standards: it handles only a sliver of the full HTML, CSS, and JavaScript languages, mishandles errors, and isn’t resilient to malicious inputs. It is also quite slow. Despite that, its architecture matches that of real browsers, providing insight into those 10 million line of code behemoths.
That said, we’ve tried to explicitly note when the book’s browser simplifies or diverges from standards. If you’re not sure how your browser should behave in some edge case, fire up your favorite web browser and try it out.
Acknowledgments
We’d like to recognize the countless people who built the web and the various web browsers. They are wonders of the modern world. Thank you! We learned a lot from the books and articles listed in this book’s bibliography—thank you to their authors. And we’re especially grateful to the many contributors to articles on Wikipedia (especially those on historic software, formats, and protocols). We are grateful for this amazing resource, one which in turn was made possible by the very thing this book is about.
Pavel: James R. Wilcox and I dreamed up this book during a late-night chat at ICFP 2018. Max Willsey proofread and helped sequence the chapters. Zach Tatlock encouraged me to develop the book into a course. And the students of CS 6968, CS 4962, and CS 4560 at the University of Utah found countless errors and suggested important simplifications. I am thankful to all of them. Most of all, I am thankful to my wife Sara, who supported my writing and gave me the strength to finish this many-year-long project.
Chris: I am eternally grateful to my wife Sara for patiently listening to my endless musings about the web, and encouraging me to turn my idea for a browser book into reality. I am also grateful to Dan Gildea for providing feedback on my browser-book concept on multiple occasions. Finally, I’m grateful to Pavel for doing the hard work of getting this project off the ground and allowing me to join the adventure. (Turns out Pavel and I had the same idea!)
A final note
This book is, and will remain, a work in progress. Please leave
comments and mark typos; the book has built-in feedback tools, which you
can enable with Ctrl-E (or Cmd-E on a Mac).
The full source code is also available on GitHub, though
we prefer to receive comments through the built-in tools.
Browsers and the Web
I—this is Chris speaking—have known the webBroadly defined, the web is the interlinked network (“web”) of web pages on the internet. If you’ve never made a web page, I recommend MDN’s Learn Web Development series, especially the Getting Started guide. This book will be easier to read if you’re familiar with the core technologies. for all of my adult life. The web for me is something of a technological companion, and I’ve never been far from it in my studies or my work. Perhaps it’s been the same for you. And using the web means using a browser. I hope, as you read this book, that you fall in love with web browsers, just like I did.
The Browser and Me
Since I first encountered the web and its predecessors,For me, bulletin board systems (BBSs) over a dial-up modem connection. A BBS, like a browser, is a window into dynamic content somewhere else on the internet. in the early 1990s, I’ve been fascinated by browsers and the concept of networked user interfaces. When I surfed the web, even in its earliest form, I felt I was seeing the future of computing. In some ways, the web and I grew together—for example, 1994, the year the web went commercial, was the same year I started college; while there I spent a fair amount of time surfing the web, and by the time I graduated in 1999, the browser had fueled the famous dot-com speculation gold rush. Not only that, but the company for which I now work, Google, is a child of the web and was founded during that time.
In my freshman year at college, I attended a presentation by a RedHat salesman. The presentation was of course aimed at selling RedHat Linux, probably calling it the “operating system of the future” and speculating about the “year of the Linux desktop”. But when asked about challenges RedHat faced, the salesman mentioned not Linux but the web: he said that someone “needs to make a good browser for Linux”.Netscape Navigator was available for Linux at that time, but it wasn’t viewed as especially fast or featureful compared to its implementation on other operating systems. Even back then, in the first years of the web, the browser was already a necessary component of every computer. He even threw out a challenge: “How hard could it be to build a better browser?” Indeed, how hard could it be? What makes it so hard? That question stuck with me for a long time.Meanwhile, the “better Linux browser than Netscape” took a long time to appear…
How hard indeed! After eleven years in the trenches working on Chrome, I now know the answer to his question: building a browser is both easy and incredibly hard, both intentional and accidental. And everywhere you look, you see the evolution and history of the web wrapped up in one codebase. It’s fun and endlessly interesting.
So that’s how I fell in love with web browsers. Now let me tell you why you will, too.
The Web in History
The web is a grand, crazy experiment. It’s natural, nowadays, to watch videos, read news, and connect with friends on the web. That can make the web seem simple and obvious, finished, already built. But the web is neither simple nor obvious (and is certainly not finished). It is the result of experiments and research, reaching back to nearly the beginning of computing,And the web also needed rich computer displays, powerful user-interface-building libraries, fast networks, and sufficient computing power and information storage capacity. As so often happens with technology, the web had many similar predecessors, but only took its modern form once all the pieces came together. about how to help people connect and learn from each other.
In the early days, the internet was a world-wide network of computers, largely at universities, labs, and major corporations, linked by physical cables and communicating over application-specific protocols. The (very) early web mostly built on this foundation. Web pages were files in a specific format stored on specific computers. The addresses for web pages named the computer and the file, and early servers did little besides read files from a disk. The logical structure of the web mirrored its physical structure.
A lot has changed. The HyperText Markup Language (HTML) for web pages is now usually dynamically assembled on the fly“Server-side rendering” is the process of assembling HTML on the server when loading a web page. Server-side rendering can use web technologies like JavaScript and even headless browsers. Yet one more place browsers are taking over! and sent on demand to your browser. The pieces being assembled are themselves filled with dynamic content—news, inbox contents, and advertisements adjusted to your particular tastes. Even the addresses no longer identify a specific computer—content distribution networks route requests to any of thousands of computers all around the world. At a higher level, most web pages are served not from someone’s home computerPeople actually did this! And when their website became popular, it often ran out of bandwidth or computing power and became inaccessible. but from a major corporation’s social media platform or cloud computing service.
With all that’s changed, some things have stayed the same, the core building blocks that are the essence of the web:
- The web is a network of information linked by hyperlinks.
- The user uses a user agent, called a browser, to navigate the web.
- Information is requested with the HyperText Transfer Protocol (HTTP) and structured with the HTML document format.
- Documents are identified by Uniform Resource Locators (URLs), not by their content, and may be dynamically generated.
- Web pages can link to auxiliary assets in different formats, including images, videos, Cascading Style Sheets (CSS), and JavaScript.
- All these building blocks are open, standardized, and free to use or reuse.
As a philosophical matter, perhaps one or another of these principles is secondary. One could try to distinguish between the networking and rendering aspects of the web. One could abstract linking and networking from the particular choice of protocol and data format. One could ask whether the browser is necessary in theory, or argue that HTTP, URLs, and hyperlinking are the only truly essential parts of the web.
Perhaps.It is indeed true that one or more of the implementation choices could be replaced, and perhaps that will happen over time. For example, JavaScript might eventually be replaced by another language or technology, HTTP by some other protocol, or HTML by a successor. Yet the web will stay the web, because any successor format is sure to support a superset of functionality, and have the same fundamental structure. The web is, after all, an experiment; the core technologies evolve and grow. But the web is not an accident; its original design reflects truths not just about computing, but about how human beings can connect and interact. The web not only survived but thrived during the virtualization of hosting and content, specifically due to the elegance and effectiveness of this original design.
The key thing to understand is that this grand experiment is not over. The essence of the web will stay, but by building web browsers you have the chance to shape its future.
Real Browser Codebases
So let me tell you what it’s like to contribute to a browser. Some
time during my first few months of working on Chrome, I came across the
code implementing the<br>
tag—look at that, the good old <br> tag, which I’ve
used many times to insert newlines into web pages! And the
implementation turns out to be barely any code at all, both in Chrome
and in this book’s simple browser.
But Chrome as a whole—its features, speed, security, reliability—wow. Thousands of person-years went into it. There is constant pressure to do more—to add more features, to improve performance, to keep up with the “web ecosystem”—for the thousands of businesses, millions of developers,I usually prefer “engineer”—hence the title of this book—but “developer” or “web developer” is much more common on the web. One important reason is that anyone can build a web page—not just trained software engineers and computer scientists. “Web developer” also is more inclusive of additional, critical roles like designers, authors, editors, and photographers. A web developer is anyone who makes web pages, regardless of how. and billions of users on the web.
Working on such a codebase can feel daunting. I often find lines of code last touched 15 years ago by someone I’ve never met; or even now discover files and classes that I never knew existed; or see lines of code that don’t look necessary, yet turn out to be important. What does that 15-year-old code do? What is the purpose of these new-to-me files? Is that code there for a reason?
Every browser has thousands of unfixed bugs, from the smallest of mistakes to myriad mix ups and mismatches. Every browser must be endlessly tuned and optimized to squeeze out that last bit of performance. Every browser requires painstaking work to continuously refactor the code to reduce its complexity, often through the carefulBrowsers are so performance-sensitive that, in many places, merely the introduction of an abstraction—a function call or branching overhead—can have an unacceptable performance cost! introduction of modularization and abstraction.
What makes a browser different from most massive code bases is their urgency. Browsers are nearly as old as any “legacy” codebase, but are not legacy, not abandoned or half-deprecated, not slated for replacement. On the contrary, they are vital to the world’s economy. Browser engineers must therefore fix and improve rather than abandon and replace. And since the character of the web itself is highly decentralized, the use cases met by browsers are to a significant extent not determined by the companies “owning” or “controlling” a particular browser. Other people—including you—can and do contribute ideas, proposals, and implementations.
What’s amazing is that, despite the scale and the pace and the complexity, there is still plenty of room to contribute. Every browser today is open source, which opens up its implementation to the whole community of web developers. Browsers evolve like giant research projects, where new ideas are constantly being proposed and tested out. As you would expect, some features fail and some succeed. The ones that succeed end up in specifications and are implemented by other browsers. Every web browser is open to contributions—whether fixing bugs or proposing new features or implementing promising optimizations.
And it’s worth contributing, because working on web browsers is a lot of fun.
Browser Code Concepts
HTML and CSS are meant to be black boxes—declarative application programming interfaces (APIs)—where one specifies what outcome to achieve, and the browser itself is responsible for figuring out how to achieve it. Web developers don’t, and mostly can’t, draw their web pages’ pixels on their own.
That can make the browser magical or frustrating—depending on whether it is doing the right thing! But that also makes a browser a pretty unusual piece of software, with unique challenges, interesting algorithms, and clever optimizations. Browsers are worth studying for the pure pleasure of it.
What makes that all work is the web browser’s implementations of inversion of control, constraint programming, and declarative programming. The web inverts control, with an intermediary—the browser—handling most of the rendering, and the web developer specifying rendering parameters and content to this intermediary. For example, in HTML there are many built-in form control elements that take care of the various ways the user of a web page can provide input. The developer need only specify parameters such as button names, sizing, and look-and-feel, or JavaScript extension points to handle form submission to the server. The rest of the implementation is taken care of by the browser. Further, these parameters usually take the form of constraints between the relative sizes and positions of on-screen elements instead of specifying their values directly;Constraint programming is clearest during web page layout, where font and window sizes, desired positions and sizes, and the relative arrangement of widgets is rarely specified directly. the browser solves the constraints to find those values. The same idea applies for actions: web pages mostly require that actions take place without specifying when they do. This declarative style means that from the point of view of a developer, changes “apply immediately”, but under the hood, the browser can be lazy and delay applying the changes until they become externally visible, either due to subsequent API calls or because the page has to be displayed to the user.For example, when exactly does the browser compute HTML element styles? Any change to the styles is visible to all subsequent API calls, so in that sense it applies “immediately”. But it is better for the browser to delay style recalculation, avoiding redundant work if styles change twice in quick succession. Maximally exploiting the opportunities afforded by declarative programming makes real-world browsers very complex.
There are practical reasons for the unusual design of a browser. Yes, developers lose some control and agency—when pixels are wrong, developers cannot fix them directly.Loss of control is not necessarily specific to the web—much of computing these days relies on mountains of other people’s code. But they gain the ability to deploy content on the web without worrying about the details, to make that content instantly available on almost every computing device in existence, and to keep it accessible in the future, mostly avoiding software’s inevitable obsolescence.
To me, browsers are where algorithms come to life. A browser contains a rendering engine more complex and powerful than any computer game; a full networking stack; clever data structures and parallel programming techniques; a virtual machine, an interpreted language, and a just-in-time compiler; a world-class security sandbox; and a uniquely dynamic system for storing data.
And the truth is—you use a browser all the time, maybe for reading this book! That makes the algorithms more approachable in a browser than almost anywhere else, because the web is already familiar.
The Role of the Browser
The web is at the center of modern computing. Every year the web expands its reach to more and more of what we do with computers. It now goes far beyond its original use for document-based information sharing: many people now spend their entire day in a browser, not using a single other application! Moreover, desktop applications are now often built and delivered as web apps: web pages loaded by a browser but used like installed applications.Related to the notion of a web app is a Progressive Web App, which is a web app that becomes indistinguishable from a native app through progressive enhancement. Even on mobile devices, apps often embed a browser to render parts of the application user interface (UI).The fraction of such “hybrid” apps that are shown via a “web view” is likely increasing over time. In some markets like China, “super-apps” act like a mobile web browser for web-view-based games and widgets. Perhaps in the future both desktop and mobile devices will largely be containers for web apps. Already, browsers are a critical and indispensable part of computing.
So given this centrality, it’s worth knowing how the web works. And in particular, it’s worth focusing on the browser, which is the user agentThe user agent concept views a computer, or software within the computer, as a trusted assistant and advocate of the human user. and the mediator of the web’s interactions, which ultimately is what makes the web’s principles real. The browser is also the implementer of the web: its sandbox keeps web browsing safe; its algorithms implement the declarative document model; its UI navigates links. Web pages load fast and react smoothly only when the browser is hyper-efficient.
Browsers and You
This book explains how to build a simple browser, one that can—despite its simplicity—display interesting-looking web pages and support many interesting behaviors. As you’ll see, it’s surprisingly easy, and it demonstrates all the core concepts you need to understand a real-world browser. The browser stops being a mystery when it becomes code.
The intention is for you to build your own browser as you work through the early chapters. Once it is up and running, there are endless opportunities to improve performance or add features, some of which are suggested as exercises. Many of these exercises are features implemented in real browsers, and I encourage you to try them—adding features is one of the best parts of browser development!
The book then moves on to details and advanced features that flesh out the architecture of a real browser’s rendering engine, based on my experiences with Chrome. After finishing the book, you should be able to dig into the source code of Chromium, Gecko, or WebKit and understand it without too much trouble.
I hope the book lets you appreciate a browser’s depth, complexity, and power. I hope the book passes along a browser’s beauty—its clever algorithms and data structures, its co-evolution with the culture and history of computing, its centrality in our world. But most of all, I hope the book lets you see in yourself someone building the browser of the future.
History of the Web
This chapter dives into the history of the web itself: where it came from, and how the web and browsers have evolved to date. This history is not exhaustive;For example, there is nothing much about Standard Generalized Markup Language ( SGML) or other predecessors to HTML. (Except in this footnote!) the focus is the key events and ideas that led to the web, and the goals and motivations of its inventors.
The Memex Concept

.jpg)
An influential early exploration of how computers might revolutionize information is a 1945 essay by Vannevar Bush entitled “As We May Think”. This essay envisioned a machine called a memex that helps an individual human see and explore all the information in the world (see Figure 1). It was described in terms of the microfilm screen technology of the time, but its purpose and concept has some clear similarities to the web as we know it today, even if the user interface and technology details differ.
The web is, at its core, organized around the Memex-like goal of representing and displaying information, providing a way for humans to effectively learn and explore. The collective knowledge and wisdom of the species long ago exceeded the capacity of a single mind, organization, library, country, culture, group or language. However, while we as humans cannot possibly know even a tiny fraction of what it is possible to know, we can use technology to learn more efficiently than before, and, in particular, to quickly access information we need to learn, remember, or recall. Consider this imagined research session described by Vannevar Bush—one that is remarkably similar to how we sometimes use the web:
The owner of the memex, let us say, is interested in the origin and properties of the bow and arrow. […] He has dozens of possibly pertinent books and articles in his memex. First he runs through an encyclopedia, finds an interesting but sketchy article, leaves it projected. Next, in a history, he finds another pertinent item, and ties the two together. Thus he goes, building a trail of many items.
Computers, and the internet, allow us to process and store the information we want. But it is the web that helps us organize and find that information, that knowledge, making it useful.Google’s well-known mission statement to “organize the world’s information and make it universally accessible and useful” is almost exactly the same. This is not a coincidence—the search engine concept is inherently connected to the web, and was inspired by the design of the web and its antecedents.
“As We May Think” highlighted two features of the memex: information record lookup, and associations between related records. In fact, the essay emphasizes the importance of the latter—we learn by making previously unknown connections between known things:
When data of any sort are placed in storage, they are filed alphabetically or numerically. […] The human mind does not work that way. It operates by association.
By “association”, Bush meant a trail of thought leading from one record to the next via a human-curated link. He imagined not just a universal library, but a universal way to record the results of what we learn.
The Web Emerges
The concept of hypertext documents linked by hyperlinks was invented in 1964–65 by Project Xanadu, led by Ted Nelson.He was inspired by the long tradition of citation and criticism in academic and literary communities. The Project Xanadu research papers were heavily motivated by this use case. Hypertext is text that is marked up with hyperlinks to other text.A successor called the Hypertext Editing System was the first to introduce the back button, which all browsers now have. Since the system only had text, the “button” was itself text. Sound familiar? A web page is hypertext, and links between web pages are hyperlinks. The format for writing web pages is HTML and the protocol for loading web pages is HTTP, both of which abbreviations contain “HyperText”. See Figure 2 for an example of the early Hypertext Editing System.

Independently of Project Xanadu, the first hyperlink system appeared
for scrolling within a single document; it was later generalized to
linking between multiple documents. And just like those original
systems, the web has linking within documents as well as between them.
For example, the URL
http://browser.engineering/history.html#the-web-emerges
refers to a document called “history.html”, and
specifically to the element in it with the name
“the-web-emerges”: this section. Visiting that URL will
load this chapter and scroll to this section.
This work also formed and inspired one of the key parts of Douglas Engelbart’s mother of all demos, perhaps the most influential technology demonstration in the history of computing (see Figure 3). That demo not only showcased the key concepts of the web, but also introduced the computer mouse and graphical user interface, both of which are central components of a browser UI.That demo went beyond even this. There are some parts of it that have not yet been realized in any computer system. Watch it!

There is of course a very direct connection between this research and the document–URL–hyperlink setup of the web, which built on the hypertext idea and applied it in practice. The HyperTIES system, for example, had highlighted hyperlinks and was used to develop the world’s first electronically published academic journal, the 1988 issue of the Communications of the ACM. Tim Berners-Lee cites that 1988 issue as inspiration for the World Wide Web,Nowadays the World Wide Web is called just “the web”, or “the web ecosystem”—ecosystem being another way to capture the same concept as “World Wide”. The original wording lives on in the “www” in many website domain names. in which he joined the link concept with the availability of the internet, thus realizing many of the original goals of all this work from previous decades.Just as the web itself is a realization of previous ambitions and dreams, today we strive to realize the vision laid out by the web. (No, it’s not done yet!)
The word “hyperlink” may have been coined in 1987, in connection with the HyperCard system on Apple computers. This system was also one of the first, or perhaps the first, to introduce the concept of augmenting hypertext with scripts that handle user events like clicks and perform actions that enhance the UI—just like JavaScript on a web page! It also had graphical UI elements, not just text, unlike most predecessors.
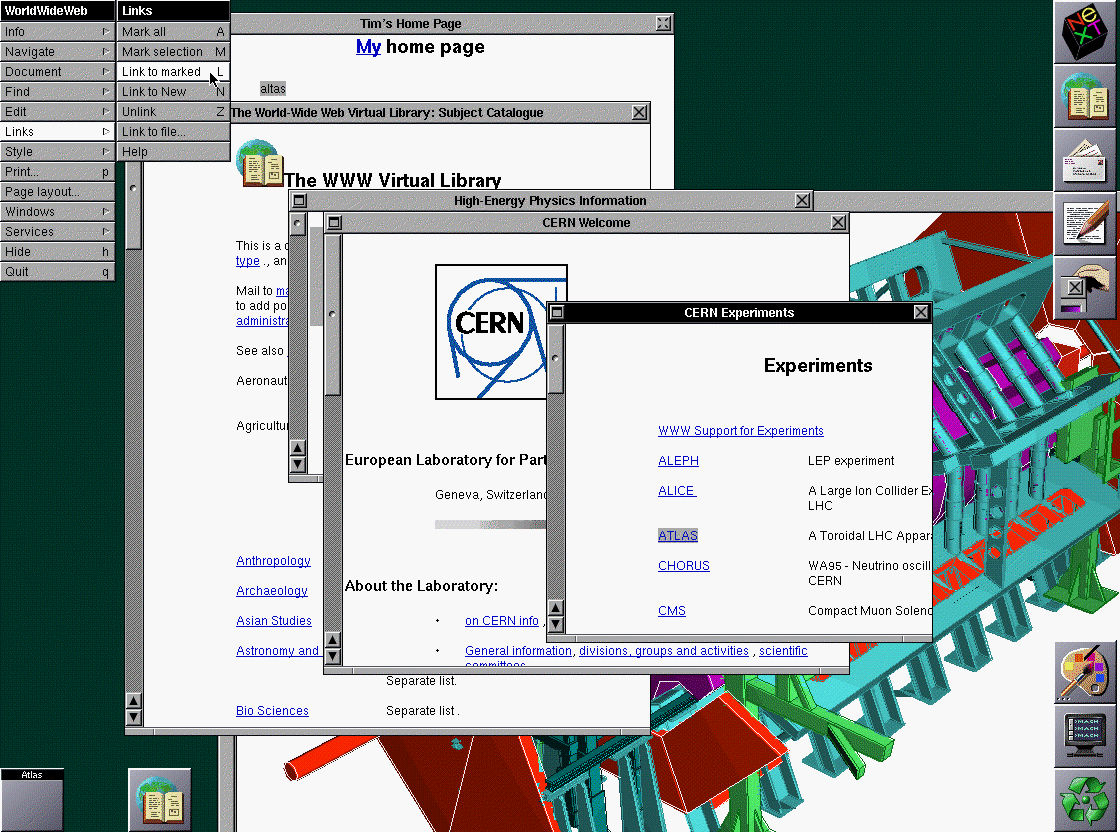
In 1989–1990, the first web browser (named WorldWideWeb, see Figure
4) and web server (named httpd, for HTTP Daemon, according
to UNIX naming conventions) were born, written by Tim Berners-Lee.
Interestingly, while that browser’s capabilities were in some ways
inferior to the browser you will implement in this book,No CSS! No JS! Not even
images! in other ways they go beyond the capabilities
available even in modern browsers.For example, the first browser included the concept of an
index page meant for searching within a site (vestiges of which exist
today in the “index.html” convention when a URL path ends in /”), and
had a WYSIWYG web page editor (the “contenteditable” HTML attribute on
DOM elements (see Chapter 16) have
similar semantic behavior, but built-in file saving is gone). Today, the
index is replaced with a search engine, and web page editors as a
concept are somewhat obsolete due to the highly dynamic nature of
today’s web page rendering. On December 20, 1990 the first web
page was created. The browser we will implement in this book is
easily able to render this web page, even today.Also, as you can see clearly,
that web page has not been updated in the meantime, and retains its
original aesthetics! In 1991, Berners-Lee advertised his
browser and the concept on the alt.hypertext
Usenet group.
Berners-Lee’s Brief History of the Web highlights a number of other key factors that led to the World Wide Web becoming the web we know today. One key factor was its decentralized nature, which he describes as arising from the academic culture of CERN, where he worked. The decentralized nature of the web is a key feature that distinguishes it from many systems that came before or after, and his explanation of it is worth quoting here (the italics are mine):
There was clearly a need for something like EnquireEnquire was a predecessor web-like database system, also written by Berners-Lee. but accessible to everyone. I wanted it to scale so that if two people started to use it independently, and later started to work together, they could start linking together their information without making any other changes. This was the concept of the web.
This quote captures one of the key value propositions of the web: its decentralized nature. The web was successful for several reasons, but they all had to do with decentralization:
Because there was no gatekeeper to doing anything, it was easy for anyone, even novices, to make simple web pages and publish them.
Because pages were identified simply by URLs, traffic could come to the web from outside sources like email, social networking, and search engines. Further, compatibility between sites and the power of hyperlinks created network effects that further strengthened the effect of hyperlinks from within the web.
Because the web was outside the control of any one entity—and kept that way via standards organizations—it avoided the problems of monopoly control and manipulation.
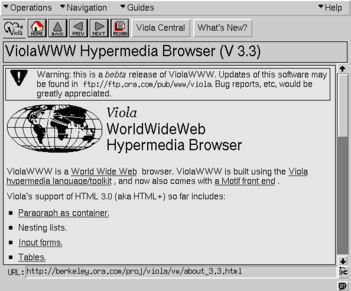
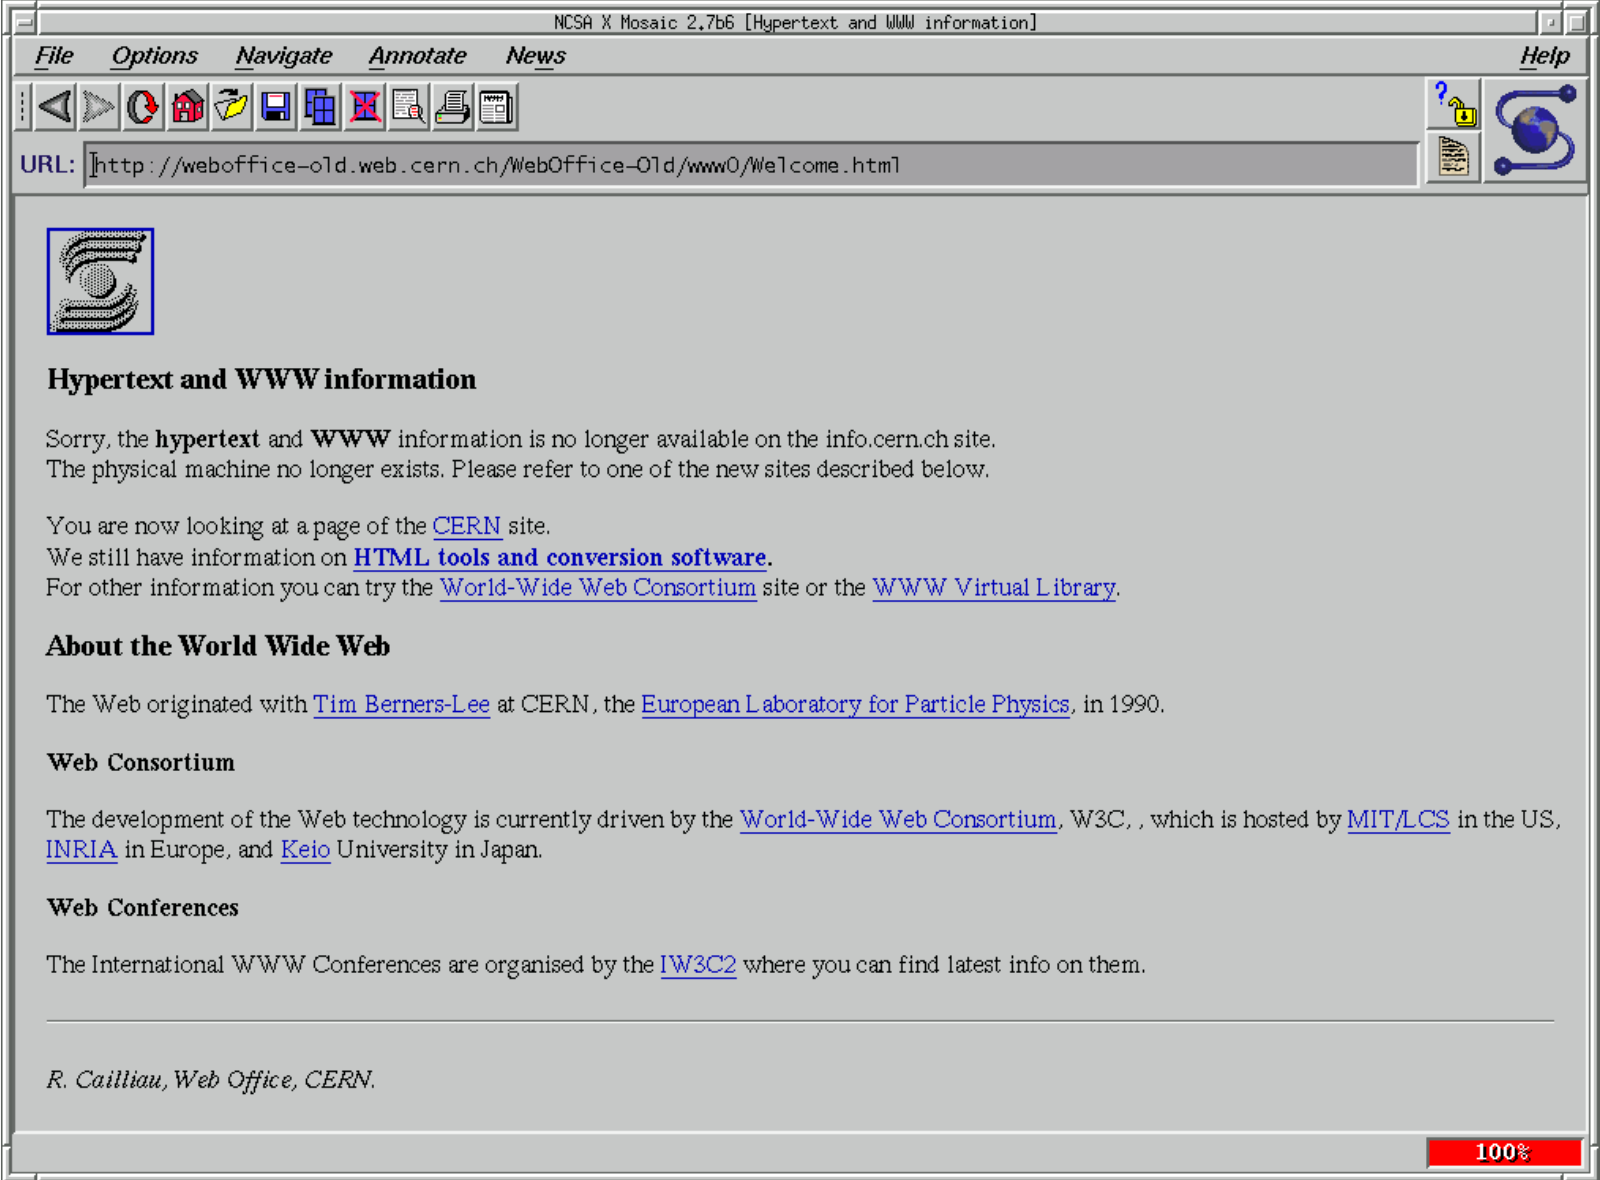
Browsers
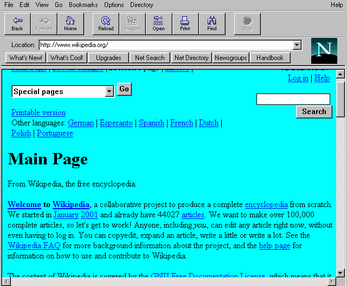
The first widely distributed browser may have been ViolaWWW (see Figure 5); this browser also pioneered multiple interesting features such as applets and images. It was in turn the inspiration for NCSA Mosaic (see Figure 6), which launched in 1993. One of the two original authors of Mosaic went on to co-found Netscape, which built Netscape Navigator (see Figure 7), the first commercial browser,By commercial I mean built by a for-profit entity. Netscape’s early versions were also not free software—you had to buy them from a store. They cost about $50. which launched in 1994. Feeling threatened, Microsoft launched Internet Explorer (see Figure 8) in 1995 and soon bundled it with Windows 95.
The era of the “first browser war” ensued: a competition between Netscape Navigator and Internet Explorer. There were also other browsers with smaller market shares; one notable example is Opera. The WebKit project began in 1999; Safari and Chromium-based browsers, such as Chrome and newer versions of Edge, descend from this codebase. Likewise, the Gecko rendering engine was originally developed by Netscape starting in 1997; the Firefox browser is descended from that codebase. During the first browser war, nearly all of the core features of this book’s simple browser were added, including CSS, DOM, and JavaScript.
The “second browser war”, which according to Wikipedia was 2004–2017,
was fought between a variety of browsers, in particular Internet
Explorer, Firefox, Safari, and Chrome. Initially, Safari and Chrome used
the same rendering engine, but Chrome forked into Blink in
2013, which Microsoft Edge adopted by 2020. The second browser war saw
the development of many features of the modern web, including widespread
use of AJAXAsynchronous
JavaScript and XML, where XML stands for eXtensible Markup
Language., HTML5 features like
<canvas>, and a huge explosion in third-party
JavaScript libraries and frameworks.
Web Standards
In parallel with these developments was another, equally important, one—the standardization of web APIs. In October 1994, the World Wide Web Consortium (W3C) was founded to provide oversight and standards for web features. Prior to this point, browsers would often introduce new HTML elements or APIs, and competing browsers would have to copy them. With a standards organization, those elements and APIs could subsequently be agreed upon and documented in specifications. (These days, an initial discussion, design, and specification precedes any new feature.) Later on, the HTML specification ended up moving to a different standards body called the WHATWG, but CSS and other features are still standardized at the W3C. JavaScript is standardized at yet another standards body, TC39 (Technical Committee 39) at ECMA. HTTP is standardized by the IETF. The important point is that the standards process set up in the mid-1990s is still with us.
In the first years of the web, it was not so clear that browsers would remain standard and that one browser might not end up “winning” and becoming another proprietary software platform. There are multiple reasons this didn’t happen, among them the egalitarian ethos of the computing community and the presence and strength of the W3C. Another important reason was the networked nature of the web, and therefore the necessity for web developers to make sure their pages worked correctly in most or all of the browsers (otherwise they would lose customers), leading them to avoid proprietary extensions. On the contrary, browsers worked hard to carefully reproduce each other’s undocumented behaviors—even bugs—to make sure they continued supporting the whole web.
There never really was a point where any browser openly attempted to break away from the standard, despite fears that that might happen.Perhaps the closest the web came to fragmenting was with the late-1990s introduction of features for DHTML—early versions of the Document Object Model you’ll learn about in this book. Netscape and Internet Explorer at first had incompatible implementations of these features, and it took years, the development of a common specification, and significant pressure campaigns on the browsers before standardization was achieved. You can read about this story in much more depth from Jay Hoffman. Instead, intense competition for market share was channeled into very fast innovation and an ever-expanding set of APIs and capabilities for the web, which we nowadays refer to as the web platform, not just the “World Wide Web”. This recognizes the fact that the web is no longer a document viewing mechanism, but has evolved into a fully realized computing platform and ecosystem.There have even been operating systems built around the web! Examples include webOS, which powered some Palm smartphones, Firefox OS (that today lives on in KaiOS-based phones), and ChromeOS, which is a desktop operating system. All of these operating systems are based on using the web as the UI layer for all applications, with some JavaScript-exposed APIs on top for system integration.
Given the outcomes—multiple competing browsers and well-developed standards—it is in retrospect not that relevant which browser “won” or “lost” each of the browser “wars”. In each case the web won, because it gained users and grew in capability.
Open Source
Another important and interesting outcome of the second browser war was that all mainstream browsers todayExamples of Chromium-based browsers include Chrome, Edge, Opera (which switched to Chromium from the Presto engine in 2013), Samsung Internet, Yandex Browser, UC Browser, and Brave. In addition, there are many “embedded” browsers, based on one or another of the three engines, for a wide variety of automobiles, phones, TVs, and other electronic devices. are based on three open-source web rendering / JavaScript engines: Chromium, Gecko, and WebKit.The JavaScript engines are actually in different repositories (as are various other subcomponents), and can and do get used outside the browser as JavaScript virtual machines. One important application is the use of V8 to power node.js. However, each of the three rendering engines does have a corresponding JavaScript implementation, so conflating the two is reasonable. Since Chromium and WebKit have a common ancestral codebase, while Gecko is an open-source descendant of Netscape, all three date back to the 1990s—almost to the beginning of the web.
This is not an accident, and in fact tells us something quite interesting about the most cost-effective way to implement a rendering engine based on a commodity set of platform APIs. For example, it’s common for independent developers, not paid by the company nominally controlling the browser, to contribute code and features. There are even companies and individuals that specialize in implementing browser features! It’s also common for features in one browser to copy code from another. And every major browser being open source feeds back into the standards process, reinforcing the web’s decentralized nature.
Summary
In summary, the history went like this:
Basic research was performed into ways to represent and explore information.
Once the necessary technology became mature enough, the web proper was proposed and implemented.
The web became popular quite quickly, and many browsers appeared in order to capitalize on the web’s opportunity.
Standards organizations were introduced in order to negotiate between the browsers and avoid proprietary control.
Competition between browsers grew their power and complexity at a rapid pace.
Browsers appeared on all devices and operating systems, from desktop to mobile to embedded.
Eventually, all web rendering engines became open source, as a recognition of their being a shared effort larger than any single entity.
The web has come a long way! But one thing seems clear: it isn’t done yet.
Exercises
iii-1 What comes next? Based on what you learned about how the web came about and took its current form, what trends do you predict for its future evolution? For example, do you think it’ll compete effectively against other non-web technologies and platforms?
iii-2 What became of the original ideas? The way the web works in practice is significantly different than the memex; one key difference is that there is no built-in way for the user of the web to add links between pages or notate them. Why do you think this is? Can you think of other goals from the original work that remain unrealized?
Downloading Web Pages
A web browser displays information identified by a URL. And the first step is to use that URL to connect to and download information from a server somewhere on the internet.
Connecting to a Server
Browsing the internet starts with a URL,“URL” stands for “uniform resource locator”, meaning that it is a portable (uniform) way to identify web pages (resources) and also that it describes how to access those files (locator). a short string that identifies a particular web page that the browser should visit.
http://example.org/index.html
Figure 1: The syntax of URLs.
A URL has three parts (see Figure 1): the scheme explains how to get the information; the host name explains where to get it; and the path explains what information to get. There are also optional parts to the URL, like ports, queries, and fragments, which we’ll see later.
From a URL, the browser can start the process of downloading the web
page. The browser first asks the local operating system (OS) to put it
in touch with the server described by the host name.
The OS then talks to a Domain Name System (DNS) server which
convertsYou can use a
DNS lookup tool like nslookup.io or
the dig command to do this conversion
yourself. a host name like example.org into a
destination IP address like 93.184.216.34.Today there are two versions
of IP (Internet Protocol): IPv4 and IPv6. IPv6 addresses are a lot
longer and are usually written in hexadecimal, but otherwise the
differences don’t matter here. Then the OS decides which
hardware is best for communicating with that destination IP address
(say, wireless or wired) using what is called a routing table,
and then uses device drivers to send signals over a wire or over the
air.I’m skipping steps
here. On wires you first have to wrap communications in ethernet frames,
on wireless you have to do even more. I’m trying to be
brief. Those signals are picked up and transmitted by a
series of routersOr a switch, or an access point; there are a lot of
possibilities, but eventually there is a router. which
each choose the best direction to send your message so that it
eventually gets to the destination.They may also record where the message came from so they
can forward the reply back. When the message reaches the
server, a connection is created. Anyway, the point of this is that the
browser tells the OS, “Hey, put me in touch with
example.org”, and it does.
On many systems, you can set up this kind of connection using the
telnet program, like this:The “80” is the port,
discussed below.
telnet example.org 80(Note: When you see a gray outline, it means that the code in question is an example only, and not actually part of our browser’s code.)
You might need to install telnet; it is often disabled
by default. On Windows, go to Programs
and Features / Turn Windows features on or off in the Control Panel;
you’ll need to reboot. When you run it, it’ll clear the screen instead
of printing something, but other than that works normally. On macOS, you
can use the nc -v command as a replacement for
telnet:
nc -v example.org 80The output is a little different but it works in the same way. On
most Linux systems, you can install telnet or
nc from the package manager, usually from packages called
telnet and netcat.
You’ll get output that looks like this:
Trying 93.184.216.34...
Connected to example.org.
Escape character is '^]'.
This means that the OS converted the host name
example.org into the IP address 93.184.216.34
and was able to connect to it.The line about escape characters is just instructions for
using obscure telnet features. You can now
talk to example.org.
The URL syntax is defined in RFC 3987, whose first author is Tim Berners-Lee—no surprise there! The second author is Roy Fielding, a key contributor to the design of HTTP and also well known for describing the Representational State Transfer (REST) architecture of the web in his Ph.D. thesis, which explains how REST allowed the web to grow in a decentralized way. Today, many services provide “RESTful APIs” that also follow these principles, though there does seem to be some confusion about it.
Requesting Information
Once it’s connected, the browser requests information from the server
by giving its path, the path being the part of a URL that comes
after the host name, like /index.html. The structure of the
request is shown in Figure 2. Type this into telnet to try
it.
GET /index.html HTTP/1.0 Host: example.org
Figure 2: An annotated HTTP GET request.
Here, the word GET means that the browser would like to
receive information,It
could say POST if it intended to send information, plus
there are some other, more obscure, options. then comes
the path, and finally there is the word HTTP/1.0 which
tells the host that the browser speaks version 1.0 of HTTP. There
are several versions of HTTP (0.9,
1.0, 1.1, 2.0, and 3.0). The HTTP 1.1 standard adds a variety of
useful features, like keep-alive, but in the interest of simplicity our
browser won’t use them. We’re also not implementing HTTP 2.0; it is much
more complex than the 1.x series, and is intended for large and
complex web applications, which our browser can’t run anyway.
After the first line, each line contains a header, which has
a name (like Host) and a value (like
example.org). Different headers mean different things; the
Host header, for example, tells the server who you think it
is.This is useful when
the same IP address corresponds to multiple host names and hosts
multiple websites (for example, example.com and
example.org). The Host header tells the server
which of multiple websites you want. These websites basically require
the Host header to function properly. Hosting multiple
domains on a single computer is very common. There are
lots of other headers one could send, but let’s stick to just
Host for now.
Finally, after the headers comes a single blank line; that tells the
host that you are done with headers. So type a blank line into
telnet (hit Enter twice after typing the two lines of the
request) and you should get a response from
example.org.
HTTP/1.0 is standardized in RFC 1945, and HTTP/1.1 in
RFC 2616. HTTP was
designed to be simple to understand and implement, making it easy for
any kind of computer to adopt it. It’s no coincidence that you can type
HTTP directly into telnet! Nor is it an accident that HTTP
is a “line-based protocol”, using plain text and newlines, similar to
the Simple Mail Transfer Protocol (SMTP)
for email. Ultimately, the whole pattern derives from early computers
only having line-based text input. In fact, one of the first two
browsers had a line-mode
UI.
The Server’s Response
The server’s response starts with the line in Figure 3.
HTTP/1.0 200 OK
Figure 3: Annotated first line of an HTTP response.
This tells you that the host confirms that it, too, speaks
HTTP/1.0, and that it found your request to be “OK” (which
has a numeric code of 200). You may be familiar with
404 Not Found; that’s another numeric code and response, as
are 403 Forbidden or 500 Server Error. There
are lots of these codes, and they have a pretty neat organization
scheme:The status text
like OK can actually be anything and is just there for
humans, not for machines.
- the 100s are informational messages;
- the 200s mean you were successful;
- the 300s request follow-up action (usually a redirect);
- the 400s mean you sent a bad request;
- the 500s mean the server handled the request badly.
Note the genius of having two sets of error codes (400s and 500s) to tell you who is at fault, the server or the browser.More precisely, who the server thinks is at fault. You can find a full list of the different codes on Wikipedia, and new ones do get added here and there.
After the 200 OK line, the server sends its own headers.
When I did this, I got these headers (but yours will differ):
Age: 545933
Cache-Control: max-age=604800
Content-Type: text/html; charset=UTF-8
Date: Mon, 25 Feb 2019 16:49:28 GMT
Etag: "1541025663+gzip+ident"
Expires: Mon, 04 Mar 2019 16:49:28 GMT
Last-Modified: Fri, 09 Aug 2013 23:54:35 GMT
Server: ECS (sec/96EC)
Vary: Accept-Encoding
X-Cache: HIT
Content-Length: 1270
Connection: close
There is a lot here, about the information you are
requesting (Content-Type, Content-Length, and
Last-Modified), about the server (Server,
X-Cache), about how long the browser should cache this
information (Cache-Control, Expires,
Etag), and about all sorts of other stuff. Let’s move on
for now.
After the headers there is a blank line followed by a bunch of HTML code.
This is called the body of the server’s response, and your
browser knows that it is HTML because of the Content-Type
header, which says that it is text/html. It’s this HTML
code that contains the content of the web page itself.
The HTTP request/response transaction is summarized in Figure 4. Let’s now switch gears from making manual connections to Python.
Wikipedia has nice lists of HTTP headers and response codes. Some of the HTTP response codes are almost never used, like 402 “Payment Required”. This code was intended to be used for “digital cash or (micro) payment systems”. While e-commerce is alive and well without the response code 402, micropayments have not (yet?) gained much traction, even though many people (including me!) think they are a good idea.
Telnet in Python
So far we’ve communicated with another computer using
telnet. But it turns out that telnet is quite
a simple program, and we can do the same programmatically. It’ll require
extracting the host name and path from the URL, creating a
socket, sending a request, and receiving a response.In Python, there’s a library
called urllib.parse for parsing URLs, but I think
implementing our own will be good for learning. Plus, it makes this book
less Python-specific.
Let’s start with parsing the URL. I’m going to make parsing a URL
return a URL object, and I’ll put the parsing code into the
constructor:
class URL:
    def __init__(self, url):
        # ...
The __init__ method is Python’s peculiar syntax for
class constructors, and the self parameter, which you must
always make the first parameter of any method, is Python’s analog of
this in C++ or Java.
Let’s start with the scheme, which is separated from the rest of the
URL by ://. Our browser only supports http, so
let’s check that, too:
class URL:
    def __init__(self, url):
        self.scheme, url = url.split("://", 1)
        assert self.scheme == "http"
Now we must separate the host from the path. The host comes before
the first /, while the path is that slash and everything
after it:
class URL:
    def __init__(self, url):
        # ...
        if "/" not in url:
            url = url + "/"
        self.host, url = url.split("/", 1)
        self.path = "/" + url
(When you see a code block with a # ..., like this one,
that means you’re adding code to an existing method or block.) The
split(s, n) method splits a string at the first
n copies of s. Note that there’s some tricky
logic here for handling the slash between the host name and the path.
That (optional) slash is part of the path.
Now that the URL has the host and
path fields, we can download the web page at that URL.
We’ll do that in a new method, request:
class URL:
    def request(self):
        # ...
Note that you always need to write the self parameter
for methods in Python. In the future, I won’t always make such a big
deal out of defining a method—if you see a code block with code in a
method or function that doesn’t exist yet, that means we’re defining
it.
The first step to downloading a web page is connecting to the host. The operating system provides a feature called “sockets” for this. When you want to talk to other computers (either to tell them something, or to wait for them to tell you something), you create a socket, and then that socket can be used to send information back and forth. Sockets come in a few different kinds, because there are multiple ways to talk to other computers:
- A socket has an address family, which tells you how to find
the other computer. Address families have names that begin with
AF. We wantAF_INET, but for exampleAF_BLUETOOTHis another. - A socket has a type, which describes the sort of
conversation that’s going to happen. Types have names that begin with
SOCK. We wantSOCK_STREAM, which means each computer can send arbitrary amounts of data, but there’s alsoSOCK_DGRAM, in which case they send each other packets of some fixed size.DGRAMstands for “datagram”, which I imagine to be like a postcard. - A socket has a protocol, which describes the steps by which
the two computers will establish a connection. Protocols have names that
depend on the address family, but we want
IPPROTO_TCP.Newer versions of HTTP use something called QUIC instead of the Transmission Control Protocol (TCP), but our browser will stick to HTTP 1.0.
By picking all of these options, we can create a socket like so:While this code uses the
Python socket library, your favorite language likely
contains a very similar library; the API is basically standardized. In
Python, the flags we pass are defaults, so you can actually call
socket.socket(); I’m keeping the flags here in case you’re
following along in another language.
import socket

class URL:
    def request(self):
        s = socket.socket(
            family=socket.AF_INET,
            type=socket.SOCK_STREAM,
            proto=socket.IPPROTO_TCP,
        )
Once you have a socket, you need to tell it to connect to the other computer. For that, you need the host and a port. The port depends on the protocol you are using; for now it should be 80.
class URL:
    def request(self):
        # ...
        s.connect((self.host, 80))
This talks to example.org to set up the connection and
prepare both computers to exchange data.
Naturally this won’t work if you’re offline. It also might not work if you’re behind a proxy, or in a variety of more complex networking environments. The workaround will depend on your setup—it might be as simple as disabling your proxy, or it could be much more complex.
Note that there are two parentheses in the connect call:
connect takes a single argument, and that argument is a
pair of a host and a port. This is because different address families
have different numbers of arguments.
The “sockets” API, which Python more or less implements directly, derives from the original “Berkeley sockets” API design for 4.2 BSD Unix in 1983. Of course, Windows and Linux merely reimplement the API, but macOS and iOS actually do still use large amounts of code descended from BSD Unix.
Request and Response
Now that we have a connection, we make a request to the other server.
To do so, we send it some data using the send method:
class URL:
    def request(self):
        # ...
        request = "GET {} HTTP/1.0\r\n".format(self.path)
        request += "Host: {}\r\n".format(self.host)
        request += "\r\n"
        s.send(request.encode("utf8"))
The send method just sends the request to the
server.send
actually returns a number, in this case 47. That tells you
how many bytes of data you sent to the other computer; if, say, your
network connection failed midway through sending the data, you might
want to know how much you sent before the connection
failed. There are a few things in this code that have to
be exactly right. First, it’s very important to use \r\n
instead of \n for newlines. It’s also essential that you
put two \r\n newlines at the end, so that you send
that blank line at the end of the request. If you forget that, the other
computer will keep waiting on you to send that newline, and you’ll keep
waiting on its response.Computers are endlessly literal-minded.
Also note the encode call. When you send data, it’s
important to remember that you are sending raw bits and bytes; they
could form text or an image or video. But a Python string is
specifically for representing text. The encode method
converts text into bytes, and there’s a corresponding
decode method that goes the other way.When you call
encode and decode you need to tell the
computer what character encoding you want it to use. This is a
complicated topic. I’m using utf8 here, which is a common
character encoding and will work on many pages, but in the real world
you would need to be more careful. Python reminds you to
be careful by giving different types to text and to bytes:
>>> type("text")
<class 'str'>
>>> type("text".encode("utf8"))
<class 'bytes'>
If you see an error about str versus bytes,
it’s because you forgot to call encode or
decode somewhere.
To read the server’s response, you could use the read
function on sockets, which gives whatever bits of the response have
already arrived. Then you write a loop to collect those bits as they
arrive. However, in Python you can use the makefile helper
function, which hides the loop:If you’re in another language, you might only have
socket.read available. You’ll need to write the loop,
checking the socket status, yourself.
class URL:
    def request(self):
        # ...
        response = s.makefile("r", encoding="utf8", newline="\r\n")
Here, makefile returns a file-like object containing
every byte we receive from the server. I am instructing Python to turn
those bytes into a string using the utf8 encoding,
or method of associating bytes to letters.Hard-coding utf8
is not correct, but it’s a shortcut that will work alright on most
English-language websites. In fact, the Content-Type header
usually contains a charset declaration that specifies the
encoding of the body. If it’s absent, browsers still won’t default to
utf8; they’ll guess, based on letter frequencies, and you
will see ugly � strange áççêñ£ß when they guess wrong. I’m
also informing Python of HTTP’s weird line endings.
Let’s now split the response into pieces. The first line is the status line:I could have asserted that 200 is required, since that’s the only code our browser supports, but it’s better to just let the browser render the returned body, because servers will generally output a helpful and user-readable HTML error page even for error codes. This is another way in which the web is easy to implement incrementally.
class URL:
    def request(self):
        # ...
        statusline = response.readline()
        version, status, explanation = statusline.split(" ", 2)
Note that I do not check that the server’s version of HTTP is the same as mine; this might sound like a good idea, but there are a lot of misconfigured servers out there that respond in HTTP 1.1 even when you talk to them in HTTP 1.0.Luckily the protocols are similar enough to not cause confusion.
After the status line come the headers:
class URL:
    def request(self):
        # ...
        response_headers = {}
        while True:
            line = response.readline()
            if line == "\r\n": break
            header, value = line.split(":", 1)
            response_headers[header.casefold()] = value.strip()
For the headers, I split each line at the first colon and fill in a
map of header names to header values. Headers are case-insensitive, so I
normalize them to lower case.I used casefold
instead of lower, because it works better for more
languages. Also, whitespace is insignificant in HTTP
header values, so I strip off extra whitespace at the beginning and
end.
Headers can describe all sorts of information, but a couple of headers are especially important because they tell us that the data we’re trying to access is being sent in an unusual way. Let’s make sure none of those are present.Exercise 1-9 describes how your browser should handle these headers if they are present.
class URL:
    def request(self):
        # ...
        assert "transfer-encoding" not in response_headers
        assert "content-encoding" not in response_headers
The usual way to get the sent data, then, is everything after the headers:
class URL:
    def request(self):
        # ...
        content = response.read()
        s.close()
It’s the body that we’re going to display, so let’s return that:
class URL:
    def request(self):
        # ...
        return content
Now let’s actually display the text in the response body.
The Content-Encoding
header lets the server compress web pages before sending them. Large,
text-heavy web pages compress well, and as a result the page loads
faster. The browser needs to send an Accept-Encoding
header in its request to list the compression algorithms it
supports. Transfer-Encoding
is similar and also allows the data to be “chunked”, which many servers
seem to use together with compression.
Displaying the HTML
The HTML code in the response body defines the content you see in
your browser window when you go to
http://example.org/index.html. I’ll be talking much, much
more about HTML in future chapters, but for now let me keep it very
simple.
In HTML, there are tags and text. Each tag starts
with a < and ends with a >; generally
speaking, tags tell you what kind of thing some content is, while text
is the actual content.That said, some tags, like img, are content,
not information about it. Most tags come in pairs of a
start and an end tag; for example, the title of the page is enclosed in
a pair of tags: <title> and
</title>. Each tag, inside the angle brackets, has a
tag name (like title here), and then optionally a space
followed by attributes, and its pair has a /
followed by the tag name (and no attributes).
So, to create our very, very simple web browser, let’s take the page
HTML and print all the text, but not the tags, in it.If this example causes Python
to produce a SyntaxError pointing to the end
on the last line, it is likely because you are running Python 2 instead
of Python 3. Make sure you are using Python 3. I’ll do
this in a new function, show:Note that this is a global
function and not in the URL class.
def show(body):
    in_tag = False
    for c in body:
        if c == "<":
            in_tag = True
        elif c == ">":
            in_tag = False
        elif not in_tag:
            print(c, end="")
This code is pretty complex. It goes through the request body
character by character, and it has two states: in_tag, when
it is currently between a pair of angle brackets, and
not in_tag. When the current character is an angle bracket,
it changes between those states; normal characters, not inside a tag,
are printed.The
end argument tells Python not to print a newline after the
character, which it otherwise would.
We can now load a web page just by stringing together
request and show:Like show, this
is a global function.
def load(url):
    body = url.request()
    show(body)
Add the following code to run load from the command
line:
if __name__ == "__main__":
    import sys
    load(URL(sys.argv[1]))
The first line is Python’s version of a main function,
run only when executing this script from the command line. The code
reads the first argument (sys.argv[1]) from the command
line and uses it as a URL. Try running this code on the URL
http://example.org/:
python3 browser.py http://example.org/You should see some short text welcoming you to the official example web page. You can also try using it on this chapter!
HTML, just like URLs and HTTP, is designed to be very easy to parse and display at a basic level. And in the beginning there were very few features in HTML, so it was possible to code up something not so much more fancy than what you see here, yet still display the content in a usable way. Even our super simple and basic HTML parser can already print out the text of the browser.engineering website.
Encrypted Connections
So far, our browser supports the http scheme. That’s a
pretty common scheme. But more and more websites are migrating to the
https scheme, and many websites require it.
The difference between http and https is
that https is more secure—but let’s be a little more
specific. The https scheme, or more formally HTTP over TLS
(Transport Layer Security), is identical to the normal http
scheme, except that all communication between the browser and the host
is encrypted. There are quite a few details to how this works: which
encryption algorithms are used, how a common encryption key is agreed
to, and of course how to make sure that the browser is connecting to the
correct host. The difference in the protocol layers involved is shown in
Figure 5.
Luckily, the Python ssl library implements all of these
details for us, so making an encrypted connection is almost as easy as
making a regular connection. That ease of use comes with accepting some
default settings which could be inappropriate for some situations, but
for teaching purposes they are fine.
Making an encrypted connection with ssl is pretty easy.
Suppose you’ve already created a socket, s, and connected
it to example.org. To encrypt the connection, you use
ssl.create_default_context to create a context
ctx and use that context to wrap the socket
s:
import ssl
ctx = ssl.create_default_context()
s = ctx.wrap_socket(s, server_hostname=host)
Note that wrap_socket returns a new socket, which I save
back into the s variable. That’s because you don’t want to
send any data over the original socket; it would be unencrypted and also
confusing. The server_hostname argument is used to check
that you’ve connected to the right server. It should match the
Host header.
On macOS, you’ll need to run
a program called “Install Certificates” before you can use Python’s
ssl package on most websites.
Let’s try to take this code and add it to request.
First, we need to detect which scheme is being used:
import ssl

class URL:
    def __init__(self, url):
        self.scheme, url = url.split("://", 1)
        assert self.scheme in ["http", "https"]
        # ...
(Note that here you’re supposed to replace the existing scheme parsing code with this new code. It’s usually clear from context, and the code itself, what you need to replace.)
Encrypted HTTP connections usually use port 443 instead of port 80:
class URL:
    def __init__(self, url):
        # ...
        if self.scheme == "http":
            self.port = 80
        elif self.scheme == "https":
            self.port = 443
We can use that port when creating the socket:
class URL:
    def request(self):
        # ...
        s.connect((self.host, self.port))
        # ...
Next, we’ll wrap the socket with the ssl library:
class URL:
    def request(self):
        # ...
        s.connect((self.host, self.port))
        if self.scheme == "https":
            ctx = ssl.create_default_context()
            s = ctx.wrap_socket(s, server_hostname=self.host)
        # ...
Your browser should now be able to connect to HTTPS sites.
While we’re at it, let’s add support for custom ports, which are specified in a URL by putting a colon after the host name, as in Figure 6.
http://example.org:8080/index.html
Figure 6: Where the port goes in a URL.
If the URL has a port we can parse it out and use it:
class URL:
    def __init__(self, url):
        # ...
        if ":" in self.host:
            self.host, port = self.host.split(":", 1)
            self.port = int(port)
Custom ports are handy for debugging. Python has a built-in web server you can use to serve files on your computer. For example, if you run
python3 -m http.server 8000 -d /some/directorythen going to http://localhost:8000/ should show you all
the files in that directory. This is a good way to test your
browser.
TLS is pretty complicated. You can read the details in RFC 8446, but implementing your own is not recommended. It’s very difficult to write a custom TLS implementation that is not only correct but secure.
At this point you should be able to run your program on any web page. Here is what it should output for a simple example:
    This is a simple
    web page with some
    text in it.
Summary
This chapter went from an empty file to a rudimentary web browser that can:
- parse a URL into a scheme, host, port, and path;
- connect to that host using the
socketandssllibraries; - send an HTTP request to that host, including a
Hostheader; - split the HTTP response into a status line, headers, and a body;
- print the text (and not the tags) in the body.
Yes, this is still more of a command-line tool than a web browser, but it already has some of the core capabilities of a browser.
Outline
The complete set of functions, classes, and methods in our browser should look something like this:
class URL:
    def __init__(url)

    def request()
def show(body)
def load(url)
Exercises
1-1 HTTP/1.1. Along with Host, send the
Connection header in the request function with
the value close. Your browser can now declare that it is
using HTTP/1.1. Also add a User-Agent header.
Its value can be whatever you want—it identifies your browser to the
host. Make it easy to add further headers in the future.
1-2 File URLs. Add support for the file scheme,
which allows the browser to open local files. For example,
file:///path/goes/here should refer to the file on your
computer at location /path/goes/here. Also make it so that,
if your browser is started without a URL being given, some specific file
on your computer is opened. You can use that file for quick testing.
1-3 data. Yet another scheme is
data, which allows inlining HTML content into the URL
itself. Try navigating to data:text/html,Hello world! in a
real browser to see what happens. Add support for this scheme to your
browser. The data scheme is especially convenient for
making tests without having to put them in separate files.
1-4 Entities. Implement support for the less-than
(<) and greater-than (>)
entities. These should be printed as < and
>, respectively. For example, if the HTML response was
<div>, the show method of your
browser should print <div>. Entities allow web pages
to include these special characters without the browser interpreting
them as tags.
1-5 view-source. Add support for the
view-source scheme; navigating to
view-source:http://example.org/ should show the HTML source
instead of the rendered page. Add support for this scheme. Your browser
should print the entire HTML file as if it was text. You’ll want to have
also implemented Exercise 1-4.
1-6 Keep-alive. Implement Exercise 1-1; however, do not send
the Connection: close header (send
Connection: keep-alive instead). When reading the body from
the socket, only read as many bytes as given in the
Content-Length header and don’t close the socket afterward.
Instead, save the socket, and if another request is made to the same
server reuse the same socket instead of creating a new one. (You’ll also
need to pass the "rb" option to makefile or
the value reported by Content-Length might not match the
length of the string you’re reading.) This will speed up repeated
requests to the same server, which are common.
1-7 Redirects. Error codes in the 300 range request a
redirect. When your browser encounters one, it should make a new request
to the URL given in the Location header. Sometimes the
Location header is a full URL, but sometimes it skips the
host and scheme and just starts with a / (meaning the same
host and scheme as the original request). The new URL might itself be a
redirect, so make sure to handle that case. You don’t, however, want to
get stuck in a redirect loop, so make sure to limit how many redirects
your browser can follow in a row. You can test this with the URL http://browser.engineering/redirect, which redirects
back to this page, and its /redirect2 and /redirect3 cousins which
do more complicated redirect chains.
1-8 Caching. Typically, the same images, styles, and scripts
are used on multiple pages; downloading them repeatedly is a waste. It’s
generally valid to cache any HTTP response, as long as it was requested
with GET and received a 200 response.Some other status codes like
301 and 404 can also be cached.
Implement a cache in your browser and test it by requesting the same
file multiple times. Servers control caches using the
Cache-Control header. Add support for this header,
specifically for the no-store and max-age
values. If the Cache-Control header contains any value
other than these two, it’s best not to cache the response.
1-9 Compression. Add support for HTTP compression, in which
the browser informs
the server that compressed data is acceptable. Your browser must
send the Accept-Encoding header with the value
gzip. If the server supports compression, its response will
have a Content-Encoding header with value
gzip. The body is then compressed. Add support for this
case. To decompress the data, you can use the decompress
method in the gzip module. GZip data is not
utf8-encoded, so pass "rb" to
makefile to work with raw bytes instead. Most web servers
send compressed data in a Transfer-Encoding called chunked.There are also a couple of
Transfer-Encodings that compress the data. They aren’t
commonly used. You’ll need to add support for that,
too.
Drawing to the Screen
A web browser doesn’t just download a web page; it also has to show
that page to the user. In the twenty-first century, that means a
graphical application.There are some obscure text-based browsers: I used
w3m as my main browser for most of 2011. I don’t
anymore. So in this chapter we’ll equip our browser with a
graphical user interface.
Creating Windows
Desktop and laptop computers run operating systems that provide desktop environments: windows, buttons, and a mouse. So responsibility ends up split: programs control their windows, but the desktop environment controls the screen. Therefore:
- The program asks for a new window and the desktop environment actually displays it.
- The program draws to its window and the desktop environment puts that on the screen.
- The desktop environment tells the program about clicks and key presses, and the program responds and redraws its window.
Doing all of this by hand is a bit of a drag, so programs usually use
a graphical toolkit to simplify these steps. Python comes with
a graphical toolkit called Tk in the Python package
tkinter.The
library is called Tk, and it was originally written for a different
language called Tcl. Python contains an interface to it, hence the
name. Using it is quite simple:
import tkinter
window = tkinter.Tk()
tkinter.mainloop()
Here, tkinter.Tk() asks the desktop environment to
create a window and returns an object that you can use to draw to the
window. The tkinter.mainloop() call enters a loop that
looks like this:This
pseudocode may look like an infinite loop that locks up the computer,
but it’s not. Either the operating system will multitask among threads
and processes, or the pendingEvents call will sleep until
events are available, or both; in any case, other code will run and
create events for the loop to respond to.
while True:
    for evt in pendingEvents():
        handleEvent(evt)
    drawScreen()
Here, pendingEvents first asks the desktop environment
for recent mouse clicks or key presses, then handleEvent
calls your application to update state, and then drawScreen
redraws the window. This event loop pattern (see Figure 1) is
common in many applications, from web browsers to video games, because
in complex graphical applications it ensures that all events are
eventually handled and the screen is eventually updated.
Although you’re probably writing your browser on a desktop computer, many people access the web through mobile devices such as phones or tablets. On mobile devices there’s still a screen, a rendering loop, and most other things discussed in this book.For example, most real browsers have both desktop and mobile editions, and the rendering engine code is almost exactly the same for both.
But there are several differences worth noting. Applications are
usually full-screen, with only one application drawing to the screen at
a time. There’s no mouse and only a virtual keyboard, so the main form
of interaction is touch. There is the concept of a “visual viewport”
that is not present on a desktop, to accommodate “desktop-only” and
“mobile-ready” sites, as well as pinch zoom.Look at the source of this chapter’s
webpage. In the <head> you’ll see a “viewport”
<meta> tag. This tag tells the browser that the page
supports mobile devices; without it, the browser assumes that the site
is “desktop-only” and renders it differently, such as allowing the user
to use a pinch-zoom or double-tap gesture to focus in on one part of the
page. Once zoomed in, the part of the page visible on the screen is the
“visual viewport” and the whole documents’ bounds are the “layout
viewport”. This is kind of a mix between zooming and scrolling that’s
usually absent on desktop. And screen pixel density is
much higher, but the total screen resolution is usually lower.
Supporting all of these differences is doable, but quite a bit of work.
This book won’t go further into implementing them, except in some cases
as exercises.
Also, power efficiency is much more important, because the device runs on a battery, while at the same time the central processing unit (CPU) and memory are significantly slower and less capable. That makes it much more important to take advantage of any graphical processing unit (GPU)—the slow CPU makes good performance harder to achieve. Mobile browsers are challenging!
Drawing to the Window
Our browser will draw the web page text to a canvas, a
rectangular Tk widget that you can draw circles, lines, and text on. For
example, you can create a canvas with Tk like this:You may be familiar with the
HTML <canvas> element, which is a similar idea: a
two-dimensional rectangle in which you can draw
shapes.
window = tkinter.Tk()
canvas = tkinter.Canvas(window, width=800, height=600)
canvas.pack()
The first line creates the window, and the second creates the
Canvas inside that window. We pass the window as an
argument, so that Tk knows where to display the canvas. The other
arguments define the canvas’s size; I chose 800 × 600 because that was a
common old-timey monitor size.This size, called Super Video Graphics Array (SVGA), was
standardized in 1987, and probably did seem super back
then. The third line is a Tk peculiarity, which positions
the canvas inside the window. Tk also has widgets like buttons and
dialog boxes, but our browser won’t use them: we will need finer-grained
control over appearance, which a canvas provides.This is why desktop
applications are more uniform than web pages: desktop applications
generally use widgets provided by a common graphical toolkit, which
makes them look similar.
To keep it all organized let’s put this code in a class:
WIDTH, HEIGHT = 800, 600

class Browser:
    def __init__(self):
        self.window = tkinter.Tk()
        self.canvas = tkinter.Canvas(
            self.window,
            width=WIDTH,
            height=HEIGHT
        )
        self.canvas.pack()
Once you’ve made a canvas, you can call methods that draw shapes on
the canvas. Let’s do that inside load, which we’ll move
into the new Browser class:
class Browser:
    def load(self, url):
        # ...
        self.canvas.create_rectangle(10, 20, 400, 300)
        self.canvas.create_oval(100, 100, 150, 150)
        self.canvas.create_text(200, 150, text="Hi!")
To run this code, create a Browser, call
load, and then start the Tk mainloop:
if __name__ == "__main__":
    import sys
    Browser().load(URL(sys.argv[1]))
    tkinter.mainloop()
You ought to see: a rectangle, starting near the top-left corner of the canvas and ending at its center; then a circle inside that rectangle; and then the text “Hi!” next to the circle, as in Figure 2.
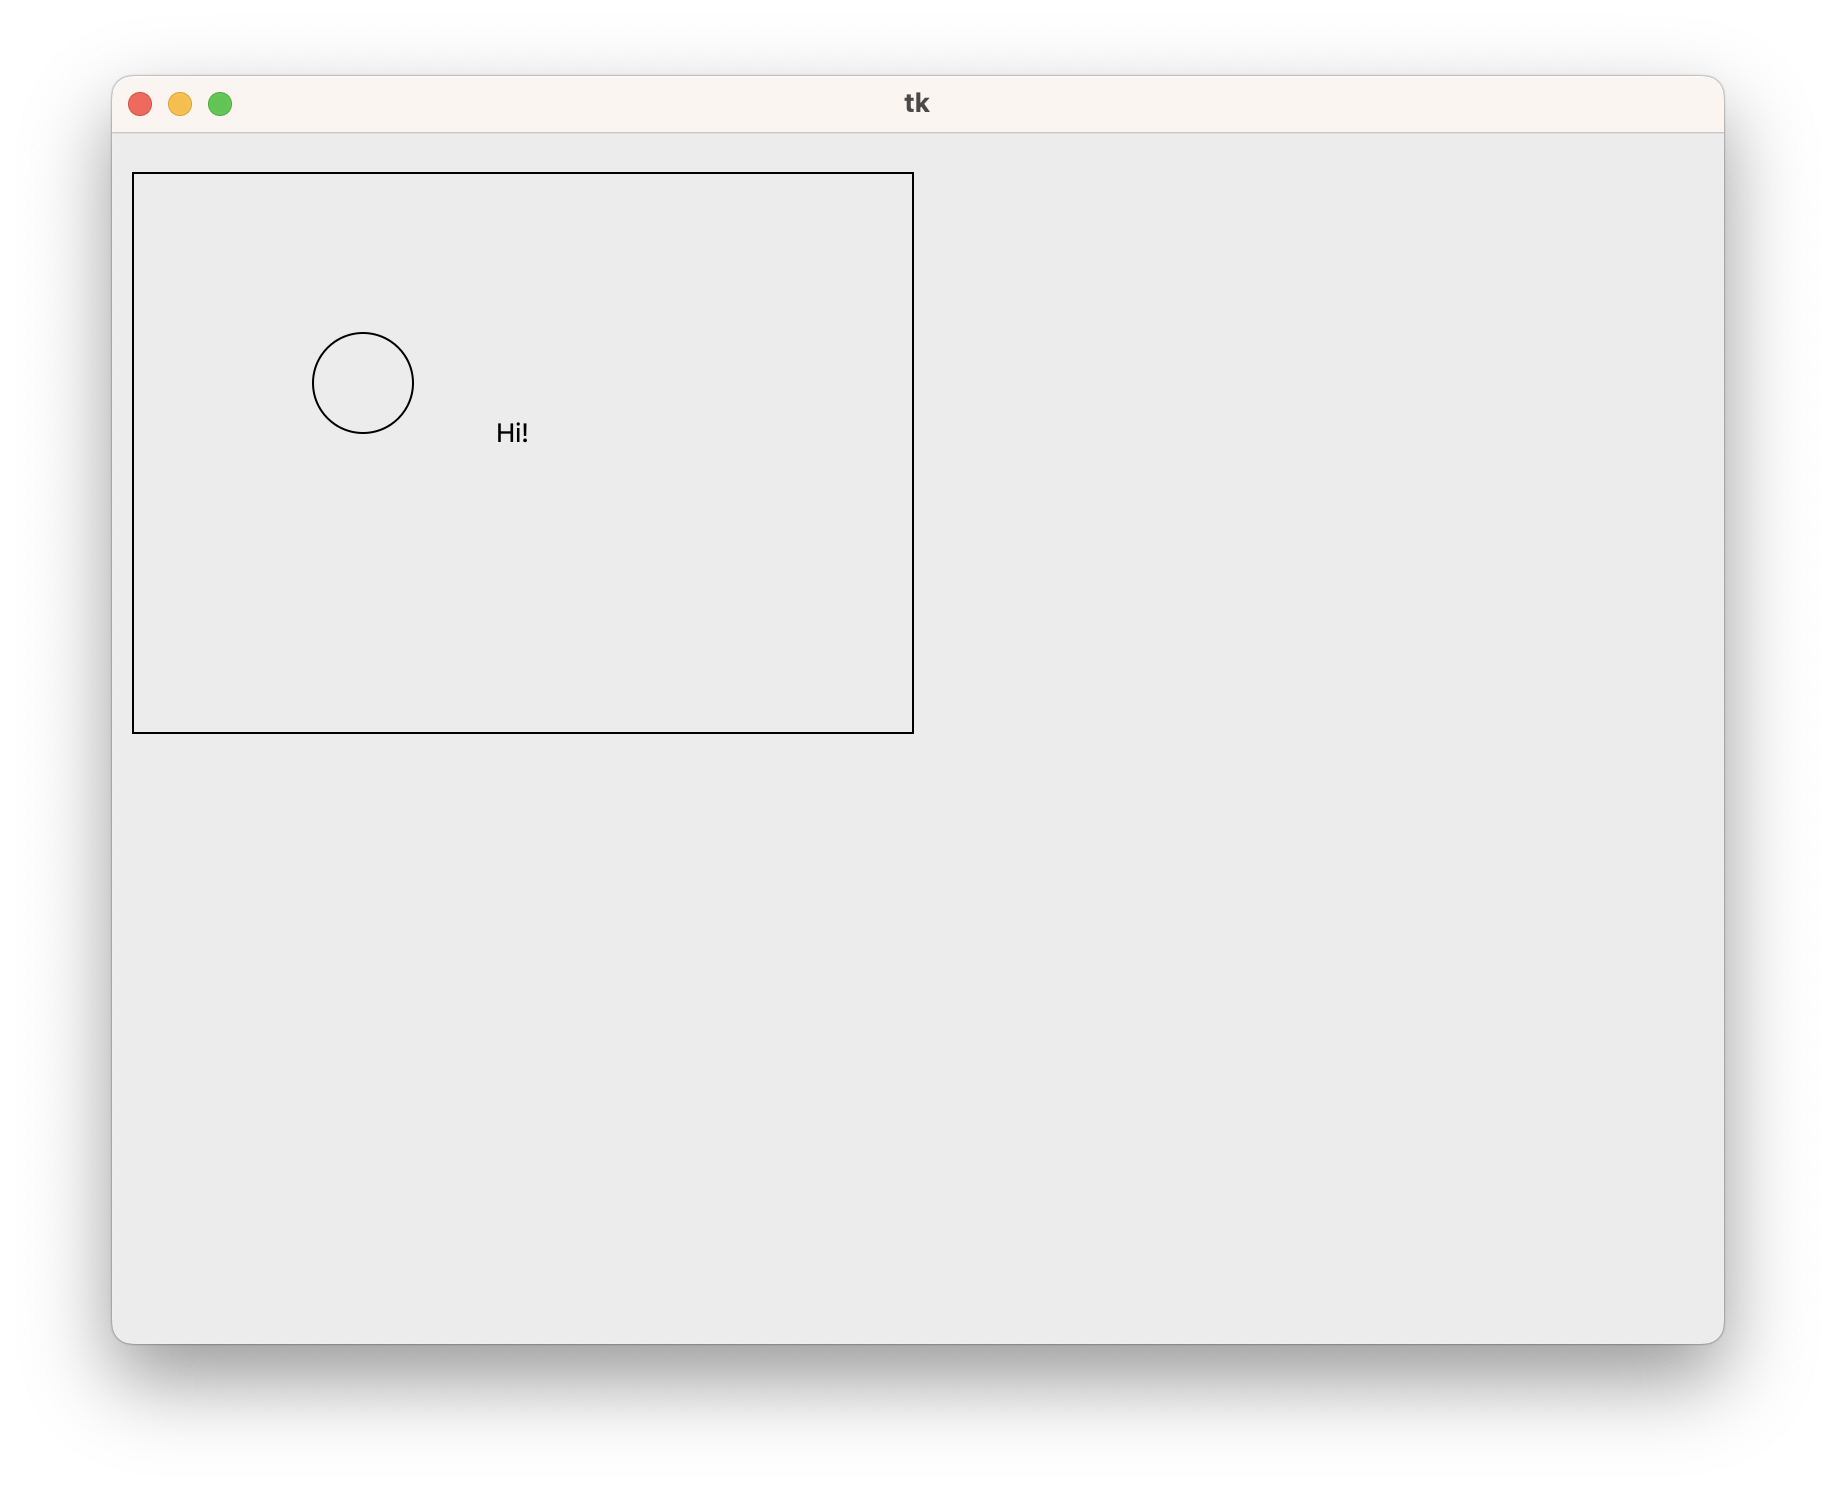
Coordinates in Tk refer to x positions from left to right and y positions from top to bottom. In other words, the bottom of the screen has larger y values, the opposite of what you might be used to from math. Play with the coordinates above to figure out what each argument refers to.The answers are in the online documentation.
The Tk canvas widget is quite a bit more powerful than what we’re using it for here. As you can see from the tutorial, you can move the individual things you’ve drawn to the canvas, listen to click events on each one, and so on. I’m not using those features in this book, because I want to teach you how to implement them yourself.
Laying Out Text
Let’s draw a simple web page on this canvas. So far, our browser steps through the web page source code character by character and prints the text (but not the tags) to the console window. Now we want to draw the characters on the canvas instead.
To start, let’s change the show function from the
previous chapter into a function that I’ll call lexForeshadowing future
developments… which just returns the textual
content of an HTML document without printing it:
def lex(body):
    text = ""
    # ...
    for c in body:
        # ...
        elif not in_tag:
            text += c
    return text
Then, load will draw that text, character by
character:
def load(self, url):
    # ...
    for c in text:
        self.canvas.create_text(100, 100, text=c)
Let’s test this code on a real web page. For reasons that might seem
inscrutable,It’s to
delay a discussion of basic typography to the next
chapter. let’s test it on the first chapter
of 西游记 or Journey to the West, a
classic Chinese novel about a monkey. Run this URLRight click on the link and "Copy URL".
through request, lex, and load.
You should see a window with a big blob of black pixels inset a little
from the top left corner of the window.
Why a blob instead of letters? Well, of course, because we are drawing every letter in the same place, so they all overlap! Let’s fix that:
HSTEP, VSTEP = 13, 18
cursor_x, cursor_y = HSTEP, VSTEP
for c in text:
    self.canvas.create_text(cursor_x, cursor_y, text=c)
    cursor_x += HSTEP
The variables cursor_x and cursor_y point
to where the next character will go, as if you were typing the text into
a word processor. I picked the magic numbers—13 and 18—by trying a few
different values and picking one that looked most readable.In Chapter
3, we’ll replace the magic numbers with font
metrics.
The text now forms a line from left to right. But with an 800-pixel-wide canvas and 13 pixels per character, one line only fits about 60 characters. You need more than that to read a novel, so we also need to wrap the text once we reach the edge of the screen:
for c in text:
    # ...
    if cursor_x >= WIDTH - HSTEP:
        cursor_y += VSTEP
        cursor_x = HSTEP
The code increases cursor_y and resets
cursor_xIn
the olden days of typewriters, increasing y meant
feeding in a new line, and resetting x meant
returning the carriage that printed letters to the
left edge of the page. So the American Standard Code for Information
Interchange (ASCII)
standardized two separate characters—“carriage return” and “line
feed”—for these operations, so that ASCII could be directly executed by
teletypewriters. That’s why headers in HTTP are separated by
\r\n, even though modern computers have no mechanical
carriage. once cursor_x goes past 787
pixels.Not 800, because
we started at pixel 13 and I want to leave an even gap on both
sides. The sequence is shown in Figure 3. Wrapping the
text this way makes it possible to read more than a single line.
Here’s a widget demonstrating that concept:
At this point you should be able to load up our example page in your browser and have it look something like Figure 4.

Now we can read a lot of text, but still not all of it: if there’s enough text, not all of the lines will fit on the screen. We want users to scroll the page to look at different parts of it.
In English text, you can’t wrap to the next line in the middle of a
word (without hyphenation at least), but in Chinese that’s the default,
even for words made up of multiple characters. For example, 开关 meaning “switch” is composed of 开 “on” and 关 “off”, but it’s
just fine to line-break after 开. You can change
the default with the word-break CSS property: break-all
allows line breaks anywhere, while auto-phrase prevents
them inside even inside Chinese or Japanese words or phrases such as
开关. The “auto” part here refers to the fact
that the words aren’t identified by the author but instead
auto-detected, often using
dynamic programming based on a word
frequency table.
Scrolling Text
Scrolling introduces a layer of indirection between page coordinates (this text is 132 pixels from the top of the page) and screen coordinates (since you’ve scrolled 60 pixels down, this text is 72 pixels from the top of the screen)—see Figure 5. Generally speaking, a browser lays out the page—determines where everything on the page goes—in terms of page coordinates and then rasters the page—draws everything—in terms of screen coordinates.Sort of. What actually happens is that the page is first drawn into a bitmap or GPU texture, then that bitmap/texture is shifted according to the scroll, and the result is rendered to the screen. Chapter 11 will have more on this topic.
Our browser will have the same split. Right now load
computes both the position of each character and draws it: layout and
rendering. Let’s instead have a layout function to compute
and store the position of each character, and a separate
draw function to then draw each character based on the
stored position. This way, layout can operate with page
coordinates and only draw needs to think about screen
coordinates.
Let’s start with layout. Instead of calling
canvas.create_text on each character, let’s add it to a
list, together with its position. Since layout doesn’t need
to access anything in Browser, it can be a standalone
function:
def layout(text):
    display_list = []
    cursor_x, cursor_y = HSTEP, VSTEP
    for c in text:
        display_list.append((cursor_x, cursor_y, c))
        # ...
    return display_list
The resulting list of things to display is called a display
list.The term
“display list” is standard. Since layout is
all about page coordinates, we don’t need to change anything else about
it to support scrolling.
Once the display list is computed, draw needs to loop
through it and draw each character. Since draw does need
access to the canvas, we make it a method on Browser:
class Browser:
    def draw(self):
        for x, y, c in self.display_list:
            self.canvas.create_text(x, y, text=c)
Now load just needs to call layout followed
by draw:
class Browser:
    def load(self, url):
        body = url.request()
        text = lex(body)
        self.display_list = layout(text)
        self.draw()
Now we can add scrolling. Let’s add a field for how far you’ve scrolled:
class Browser:
    def __init__(self):
        # ...
        self.scroll = 0
The page coordinate y then has screen coordinate
y - self.scroll:
def draw(self):
    for x, y, c in self.display_list:
        self.canvas.create_text(x, y - self.scroll, text=c)
If you change the value of scroll the page will now
scroll up and down. But how does the user change
scroll?
Most browsers scroll the page when you press the up and down keys, rotate the scroll wheel, drag the scroll bar, or apply a touch gesture to the screen. To keep things simple, let’s just implement the down key.
Tk allows you to bind a function to a key, which instructs Tk to call that function when the key is pressed. For example, to bind to the down arrow key, write:
def __init__(self):
    # ...
    self.window.bind("<Down>", self.scrolldown)
Here, self.scrolldown is an event handler, a
function that Tk will call whenever the down arrow key is pressed.scrolldown is
passed an event object as an argument by Tk, but since
scrolling down doesn’t require any information about the key press
besides the fact that it happened, scrolldown ignores that
event object. All it needs to do is increment
scroll and redraw the canvas:
SCROLL_STEP = 100

def scrolldown(self, e):
    self.scroll += SCROLL_STEP
    self.draw()
If you try this out, you’ll find that scrolling draws all the text a
second time. That’s because we didn’t erase the old text before drawing
the new text. Call canvas.delete to clear the old text:
def draw(self):
    self.canvas.delete("all")
    # ...
Scrolling should now work!
Storing the display list makes scrolling faster: the browser isn’t
doing layout every time you scroll. Modern browsers take
this further, retaining much of the display list even when the web
page changes due to JavaScript or user interaction.
In general, scrolling is the most common user interaction with web pages. Real browsers have accordingly invested a tremendous amount of time making it fast; we’ll get to some more of the ways they do this later in the book.
Faster Rendering
Applications have to redraw page contents quickly for interactions to feel fluid,On older systems, applications drew directly to the screen, and if they didn’t update, whatever was there last would stay in place, which is why in error conditions you’d often have one window leave “trails” on another. Modern systems use compositing, which avoids trails and also improves performance and isolation. Applications still redraw their window contents, though, to change what is displayed. Chapter 13 discusses compositing in more detail. and must respond quickly to clicks and key presses so the user doesn’t get frustrated. “Feel fluid” can be made more precise. Graphical applications such as browsers typically aim to redraw at a speed equal to the refresh rate, or frame rate, of the screen, and/or a fixed 60 Hz.Most screens today have a refresh rate of 60 Hz, and that is generally considered fast enough to look smooth. However, new hardware is increasingly appearing with higher refresh rates, such as 120 Hz. It’s not yet clear if browsers can be made that fast. Some rendering engines, games in particular, refresh at lower rates on purpose if they know the rendering speed can’t keep up. This means that the browser has to finish all its work in less than 1/60th of a second, or 16 ms, in order to keep up. For this reason, 16 ms is called the animation frame budget of the application.
But scrolling in our browser is pretty slow.How fast exactly seems to
depend a lot on your operating system and default font.
Why? It turns out that loading information about the shape of a
character, inside create_text, takes a while. To speed up
scrolling we need to make sure to do it only when necessary (while at
the same time ensuring the pixels on the screen are always correct).
Real browsers have a lot of quite tricky optimizations for this, but for our browser let’s limit ourselves to a simple improvement: skip drawing characters that are offscreen:
for x, y, c in self.display_list:
    if y > self.scroll + HEIGHT: continue
    if y + VSTEP < self.scroll: continue
    # ...
The first if statement skips characters below the
viewing window; the second skips characters above it. In that second
if statement, y + VSTEP is the bottom edge of
the character, because characters that are halfway inside the viewing
window still have to be drawn.
Scrolling should now be pleasantly fast, and hopefully close to the
16 ms animation frame budget.On my computer, it was still about double that budget, so
there is work to do—we’ll get to that in future chapters.
And because we split layout and draw, we don’t
need to change layout at all to implement this
optimization.
You should also keep in mind that not all web page interactions are animations—there are also discrete actions such as mouse clicks. Research has shown that it usually suffices to respond to a discrete action in [100 ms]—below that threshold, most humans are not sensitive to discrete action speed. This is very different from interactions such as scroll, where a speed of less than 60 Hz or so is quite noticeable. The difference between the two has to do with the way the human mind processes movement (animation) versus discrete action, and the time it takes for the brain to decide upon such an action, execute it, and understand its result.
Summary
This chapter went from a rudimentary command-line browser to a graphical user interface with text that can be scrolled. The browser now:
- talks to your operating system to create a window;
- lays out the text and draws it to that window;
- listens for keyboard commands;
- scrolls the window in response.
And here is our browser rendering this very web page (it’s fullly interactive—after clicking on it to focus, you should be able to scroll with the down arrow):This is the full browser source code, cross-compiled to JavaScript and running in an iframe. Click “restart” to choose a new web page to render, then “start” to render it. Subsequent chapters will include one of these at the end of the chapter so you can see how it improves.
Next, we’ll make this browser work on English text, handling complexities like variable-width characters, line layout, and formatting.
Outline
The complete set of functions, classes, and methods in our browser should look something like this:
class URL:
    def __init__(url)

    def request()
def lex(body)
WIDTH, HEIGHT
HSTEP, VSTEP
def layout(text)
SCROLL_STEP
class Browser:
    def __init__()

    def draw()

    def load(url)

    def scrolldown(e)
Exercises
2-1 Line breaks. Change layout to end the
current line and start a new one when it sees a newline character.
Increment y by more than VSTEP to give the
illusion of paragraph breaks. There are poems embedded in Journey to
the West; now you’ll be able to make them out.
2-2 Mouse wheel. Add support for scrolling up when you hit
the up arrow. Make sure you can’t scroll past the top of the page. Then
bind the <MouseWheel> event, which triggers when you
scroll with the mouse wheel.It will also trigger with touchpad gestures, if you don’t
have a mouse. The associated event object has an
event.delta value which tells you how far and in what
direction to scroll. Unfortunately, macOS and Windows give the
event.delta objects opposite sign and different scales, and
on Linux scrolling instead uses the <Button-4> and
<Button-5> events.The Tk
manual has more information about this. Cross-platform applications
are much harder to write than cross-browser ones!
2-3 Resizing. Make the browser resizable. To do so, pass
the fill and expand arguments to
canvas.pack, and call and bind to the
<Configure> event, which happens when the window is
resized. The window’s new width and height can be found in the
width and height fields on the event object.
Remember that when the window is resized, the line breaks must change,
so you will need to call layout again.
2-4 Scrollbar. Stop your browser from scrolling down past the last display list entry.This is not quite right in a real browser; the browser needs to account for extra whitespace at the bottom of the screen or the possibility of objects purposefully drawn offscreen. In Chapter 5, we’ll implement this correctly. At the right edge of the screen, draw a blue, rectangular scrollbar. Make sure the size and position of the scrollbar reflects what part of the full document the browser can see, as in Figure 5. Hide the scrollbar if the whole document fits onscreen.
2-5 Emoji. Add support for emoji to your browser 😀. Emoji
are characters, and you can call create_text to draw them,
but the results aren’t very good. Instead, head to the OpenMoji project, download the emoji
for “grinning
face” as a PNG file, resize it to 16 × 16 pixels, and save it to the
same folder as the browser. Use Tk’s PhotoImage class to
load the image and then the create_image method to draw it
to the canvas. In fact, download the whole OpenMoji library (look for
the “Get OpenMojis” button at the top right)—then your browser can look
up whatever emoji is used in the page.
2-6 about:blank. Currently, a malformed URL
causes the browser to crash. It would be much better to have error
recovery for that, and instead show a blank page, so that the user can
fix the error. To do this, add support for the special
about:blank URL, which should just render a blank page, and
cause malformed URLs to automatically render as if they were
about:blank.
2-7 Alternate text direction. Not all languages read and lay
out from left to right. Arabic, Persian, and Hebrew are good examples of
right-to-left languages. Implement basic support for this with a
command-line flag to your browser.Once we get to Chapter 4 you could
instead use the dir
attribute on the <body> element.
English sentences should still lay out left-to-right, but they should
grow from the right side of the screen (load this example in your favorite
browser to see what I mean).Sentences in an actual right-to-left language should do the
opposite. And then there is vertical writing mode for some East Asian
languages like Chinese and Japanese.
Formatting Text
In the last chapter, our browser created a graphical window and drew a grid of characters to it. That’s OK for Chinese, but English text features characters of different widths grouped into words that you can’t break across lines.There are lots of languages in the world, and lots of typographic conventions. A real web browser supports every language from Arabic to Zulu, but this book focuses on English. Text is near-infinitely complex, but this book cannot be infinitely long! In this chapter, we’ll add those capabilities. You’ll even be able to read this chapter in your browser!
What is a Font?
So far, we’ve called create_text with a character and
two coordinates to write text to the screen. But we never specified its
font, size, or style. To talk about those things, we need to create and
use font objects.
What is a font, exactly? Well, in the olden days, printers arranged little metal slugs on rails, covered them with ink, and pressed them to a sheet of paper, creating a printed page (see Figure 1). The metal shapes came in boxes, one per letter, so you’d have a (large) box of e’s, a (small) box of x’s, and so on. The boxes came in cases (see Figure 2), one for upper-case and one for lower-case letters. The set of cases was called a font.The word is related to foundry, which would create the little metal shapes. Naturally, if you wanted to print larger text, you needed different (bigger) shapes, so those were a different font; a collection of fonts was called a type, which is why we call it typing. Variations—like bold or italic letters—were called that type’s “faces”.
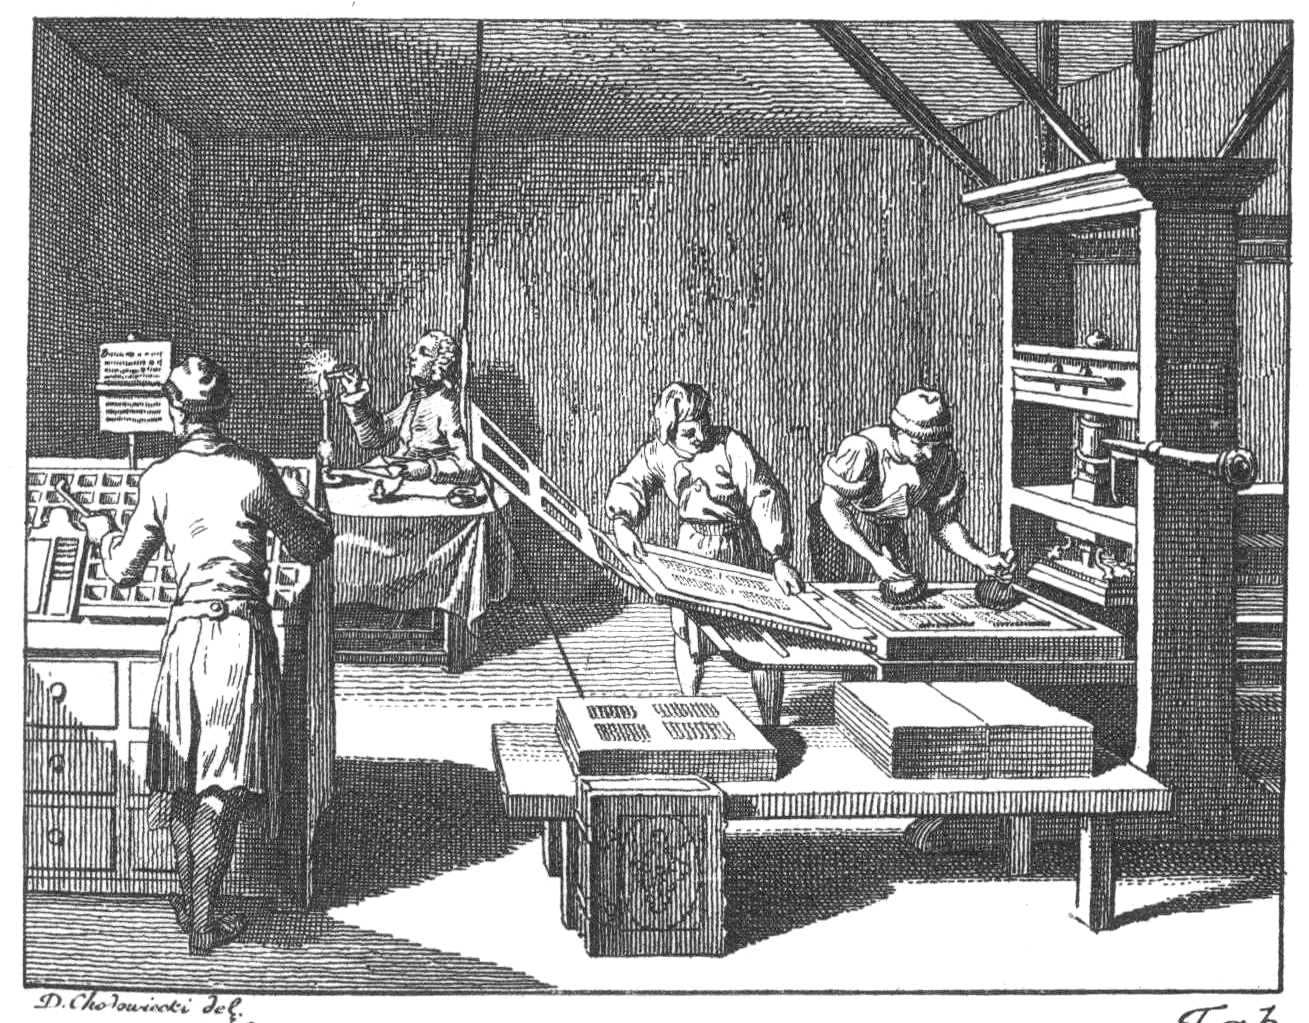
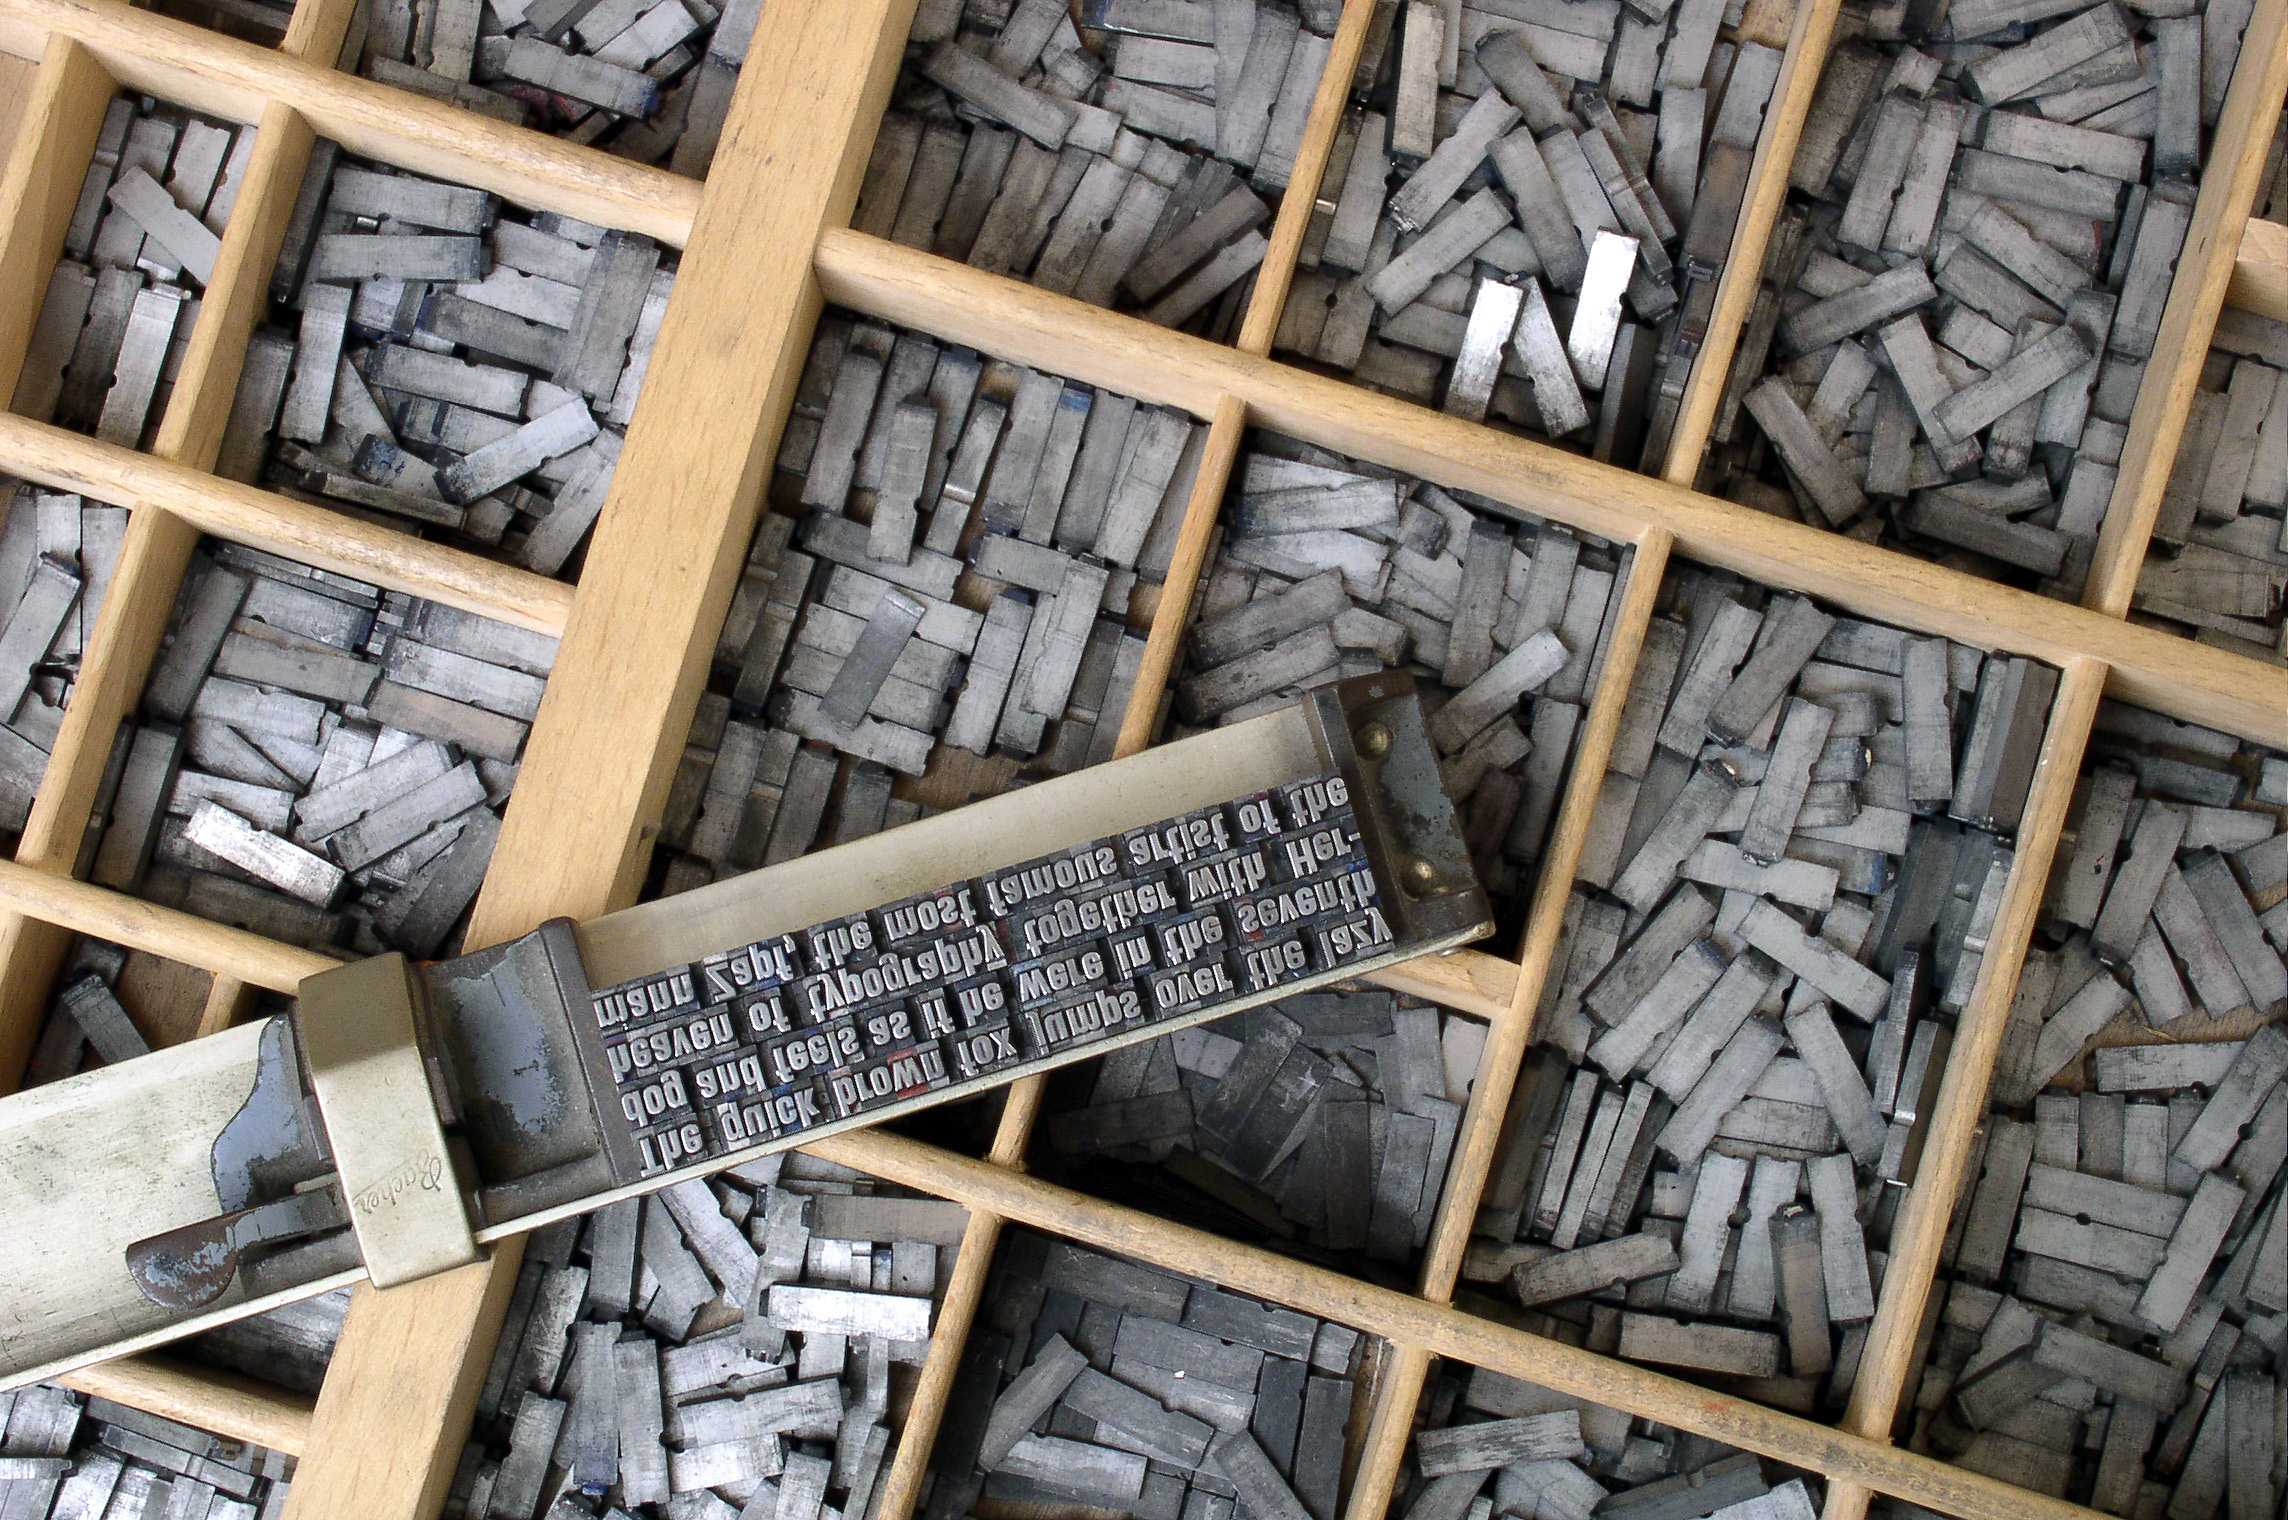
This nomenclature reflects the world of the printing press: metal shapes in boxes in cases from different foundries. Our modern world instead has dropdown menus, and the old words no longer match it. “Font” can now mean font, typeface, or type,Let alone “font family”, which can refer to larger or smaller collections of types. and we say a font contains several different weights (like “bold” and “normal”),But sometimes other weights as well, like “light”, “semibold”, “black”, and “condensed”. Good fonts tend to come in many weights. several different styles (like “italic” and “roman”, which is what not-italic is called),Sometimes there are other options as well, like maybe there’s a small-caps version; these are sometimes called options as well. And don’t get me started on automatic versus manual italics. and arbitrary sizes.A font looks especially good at certain sizes where hints tell the computer how best to align it to the pixel grid. Welcome to the world of magic ink.This term comes from an essay by Bret Victor that discusses how the graphical possibilities of computers can make for better and easier-to-use applications.
Yet Tk’s font objects correspond to the older meaning of
font: a type at a fixed size, style, and weight. For example:You can only create
Font objects, or any other kinds of Tk objects, after
calling tkinter.Tk(), and you need to import
tkinter.font separately.
import tkinter.font
window = tkinter.Tk()
bi_times = tkinter.font.Font(
    family="Times",
    size=16,
    weight="bold",
    slant="italic",
)
Your computer might not have “Times” installed; you can list the
available fonts with tkinter.font.families() and pick
something else.
Font objects can be passed to create_text’s
font argument:
canvas.create_text(200, 100, text="Hi!", font=bi_times)In the olden times, American typesetters kept their boxes of metal shapes arranged in a California job case, which combined lower- and upper-case letters side by side in one case, making typesetting easier. The upper-/lower-case nomenclature dates from centuries earlier.
Measuring Text
Text takes up space vertically and horizontally, and the font
object’s metrics and measure methods measure
that space:On your
computer, you might get different numbers. That’s right—text rendering
is OS-dependent, because it is complex enough that everyone uses one of
a few libraries to do it, usually libraries that ship with the OS.
That’s why macOS fonts tend to be “blurrier” than the same font on
Windows: different libraries make different
trade-offs.
>>> bi_times.metrics()
{'ascent': 15, 'descent': 4, 'linespace': 19, 'fixed': 0}
>>> bi_times.measure("Hi!")
24
The metrics call yields information about the vertical
dimensions of the text (see Figure 3): the linespace is how
tall the text is, which includes an ascent which goes
“above the line” and a descent that goes “below the
line”.The
fixed parameter is actually a boolean and tells you whether
all letters are the same width, so it doesn’t really fit
here. The ascent and descent
matter when words in different sizes sit on the same line: they ought to
line up “along the line”, not along their tops or bottoms.
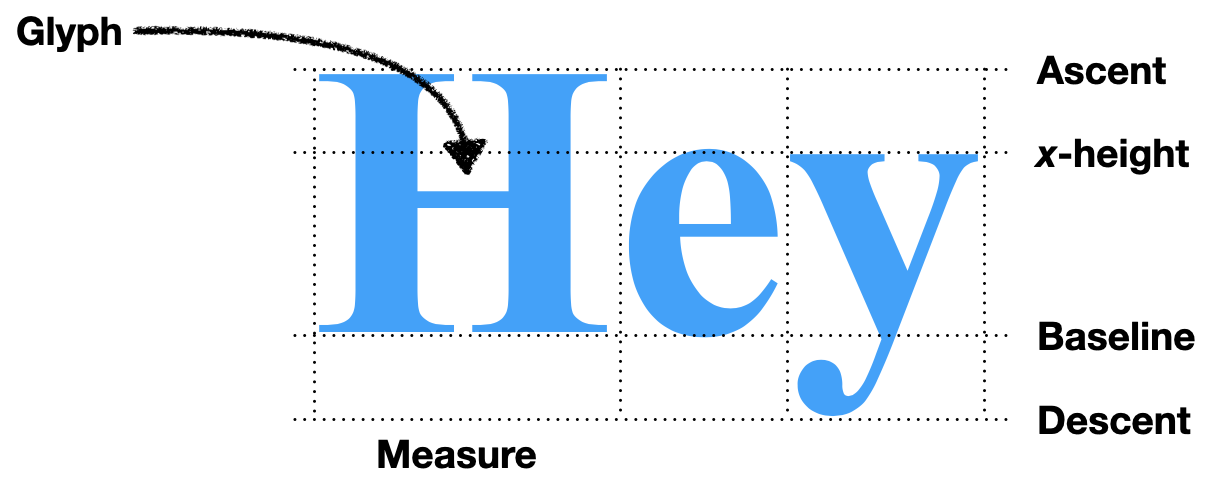
Let’s dig deeper. Remember that bi_times is size-16
Times: why does font.metrics report that it is actually 19
pixels tall? Well, first of all, a size of 16 means 16 points,
which are defined as 72nds of an inch, not 16 pixels,Actually, the definition of a
“point” is a total mess, with many different length units all called
“point” around the world. The Wikipedia
page has the details, but a traditional American/British point is
actually slightly less than 1/72 of an inch. The 1/72 standard comes
from PostScript, but some systems predate it; TeX , for example, hews
closer to the traditional point, approximating it as 1/72.27 of an
inch. which your monitor probably has around 100 of per
inch.Tk doesn’t use
points anywhere else in its API. It’s supposed to use pixels if you pass
it a negative number, but that doesn’t appear to work.
Those 16 points measure not the individual letters but the metal blocks
the letters were once carved from, so the letters themselves must be
less than 16 points. In fact, different size-16 fonts have
letters of varying heights:You might even notice that Times has different metrics in
this code block than in the earlier one where we specified a bold,
italic Times font. The bold, italic Times font is taller, at least on my
current macOS system!
>>> tkinter.font.Font(family="Courier", size=16).metrics()
{'fixed': 1, 'ascent': 13, 'descent': 4, 'linespace': 17}
>>> tkinter.font.Font(family="Times", size=16).metrics()
{'fixed': 0, 'ascent': 14, 'descent': 4, 'linespace': 18}
>>> tkinter.font.Font(family="Helvetica", size=16).metrics()
{'fixed': 0, 'ascent': 15, 'descent': 4, 'linespace': 19}
The measure() method is more direct: it tells you how
much horizontal space text takes up, in pixels. This depends on
the text, of course, since different letters have different widths:Note that the sum of the
individual letters’ lengths is not the length of the word. Tk uses
fractional pixels internally, but rounds up to return whole pixels in
the measure call. Plus, some fonts use something called
kerning to shift letters a little bit when particular pairs of
letters are next to one another, or even shaping to make two
letters look one glyph.
>>> bi_times.measure("Hi!")
24
>>> bi_times.measure("H")
13
>>> bi_times.measure("i")
5
>>> bi_times.measure("!")
7
>>> 13 + 5 + 7
25
You can use this information to lay text out on the page. For example, suppose you want to draw the text “Hello, world!” in two pieces, so that “world!” is italic. Let’s use two fonts:
font1 = tkinter.font.Font(family="Times", size=16)
font2 = tkinter.font.Font(family="Times", size=16, slant='italic')
We can now lay out the text, starting at (200, 200):
x, y = 200, 200
canvas.create_text(x, y, text="Hello, ", font=font1)
x += font1.measure("Hello, ")
canvas.create_text(x, y, text="world!", font=font2)
You should see “Hello,” and “world!”, correctly aligned and with the second word italicized.
Unfortunately, this code has a bug, though one masked by the choice
of example text: replace “world!” with “overlapping!” and the two words
will overlap. That’s because the coordinates x and
y that you pass to create_text tell Tk where
to put the center of the text. It only worked for “Hello,
world!” because “Hello,” and “world!” are the same length!
Luckily, the meaning of the coordinate you pass in is configurable.
We can instruct Tk to treat the coordinate we gave as the top-left
corner of the text by setting the anchor argument to
"nw", meaning the “northwest” corner of the text:
x, y = 200, 225
canvas.create_text(x, y, text="Hello, ", font=font1, anchor='nw')
x += font1.measure("Hello, ")
canvas.create_text(
    x, y, text="overlapping!", font=font2, anchor='nw')
Modify the draw function to set anchor to
"nw"; we didn’t need to do that in the previous chapter
because all Chinese characters are the same width.
If you find font metrics confusing, you’re not the only one! In 2012, the Michigan Supreme Court heard Stand Up for Democracy v. Secretary of State, a case ultimately about a ballot referendum’s validity that centered on the definition of font size. The court decided (correctly) that font size is the size of the metal blocks that letters were carved from and not the size of the letters themselves.
Word by Word
In Chapter 2, the layout
function looped over the text character by character and moved to the
next line whenever we ran out of space. That’s appropriate in Chinese,
where each character more or less is a word. But in English you
can’t move to the next line in the middle of a word. Instead, we need to
lay out the text one word at a time:This code splits words on whitespace. It’ll thus break on
Chinese, since there won’t be whitespace between words. Real browsers
use language-dependent rules for laying out text, including for
identifying word boundaries.
def layout(text):
    # ...
    for word in text.split():
        # ...
    return display_list
Unlike Chinese characters, words are different sizes, so we need to measure the width of each word:
import tkinter.font

def layout(text):
    font = tkinter.font.Font()
    # ...
    for word in text.split():
        w = font.measure(word)
    # ...
Here I’ve chosen to use Tk’s default font. Now, if we draw the text
at cursor_x, its right end would be at
cursor_x + w. That might be past the right edge of the
page, and in this case we need to make space by wrapping to the next
line:
def layout(text):
    for word in text.split():
        # ...
        if cursor_x + w > WIDTH - HSTEP:
            cursor_y += font.metrics("linespace") * 1.25
            cursor_x = HSTEP
Note that this code block only shows the insides of the
for loop. The rest of layout should be left
alone. Also, I call metrics with an argument; that just
returns the named metric directly. Finally, note that I multiply the
linespace by 1.25 when incrementing y. Try removing the
multiplier: you’ll see that the text is harder to read because the lines
are too close together.Designers say the text is too “tight”.
Instead, it is common to add “line spacing” or “leading”So named because in metal type
days, thin pieces of lead were placed between the lines to space them
out. Lead is a softer metal than what the actual letter pieces were made
of, so it could compress a little to keep pressure on the other pieces.
Pronounce it “led-ing” not “leed-ing”. between lines. The
25% line spacing is a typical amount.
So now cursor_x and cursor_y have the
location to the start of the word, so we add to the display
list and update cursor_x to point to the end of the
word:
def layout(text):
    for word in text.split():
        # ...
        display_list.append((cursor_x, cursor_y, word))
        cursor_x += w + font.measure(" ")
I increment cursor_x by
w + font.measure(" ") instead of w because I
want to have spaces between the words: the call to split()
removed all of the whitespace, and this adds it back. I don’t add the
space to w in the if condition, though,
because you don’t need a space after the last word on a line.
Breaking lines in the middle of a word is called hyphenation, and can
be turned on via the hyphens
CSS property. The state of the art is the Knuth–Liang
hyphenation algorithm, which uses a dictionary of word fragments to
prioritize possible hyphenation points. At first, the CSS specification
was
incompatible with this algorithm, but the recent text-wrap-style
property fixed that.
Styling Text
Right now, all of the text on the page is drawn with one font. But
web pages sometimes specify that text should be bold or
italic using the <b> and
<i> tags. It’d be nice to support that, but right
now, the code resists this: the layout function only
receives the text of the page as input, and so has no idea where the
bold and italics tags are.
Let’s change lex to return a list of tokens,
where a token is either a Text object (for a run of
characters outside a tag) or a Tag object (for the contents
of a tag). You’ll need to write the Text and
Tag classes:If you’re familiar with Python, you might want to use the
dataclass library, which makes it easier to define these
sorts of utility classes.
class Text:
    def __init__(self, text):
        self.text = text

class Tag:
    def __init__(self, tag):
        self.tag = tag
lex must now gather text into Text and
Tag objects:If you’ve done some or all of the exercises in prior
chapters, your code will look different. Code snippets in the book
always assume you haven’t done the exercises, so you’ll need to port
your modifications.
def lex(body):
    out = []
    buffer = ""
    in_tag = False
    for c in body:
        if c == "<":
            in_tag = True
            if buffer: out.append(Text(buffer))
            buffer = ""
        elif c == ">":
            in_tag = False
            out.append(Tag(buffer))
            buffer = ""
        else:
            buffer += c
    if not in_tag and buffer:
        out.append(Text(buffer))
    return out
Here I’ve renamed the text variable to
buffer, since it now stores either text or tag contents
before they can be used. The name also reminds us that, at the end of
the loop, we need to check whether there’s buffered text and what we
should do with it. Here, lex dumps any accumulated text as
a Text object. Otherwise, if you never saw an angle
bracket, you’d return an empty list of tokens. But unfinished tags, like
in Hi!<hr, are thrown out.This may strike you as an odd
decision: why not finish up the tag for the author? I don’t know, but
dropping the tag is what browsers do.
Note that Text and Tag are asymmetric:
lex avoids empty Text objects, but not empty
Tag objects. That’s because an empty Tag
object represents the HTML code <>, while an empty
Text object represents no content at all.
Since we’ve modified lex, we are now passing
layout not just the text of the page, but also the tags in
it. So layout must loop over tokens, not text:
def layout(tokens):
    # ...
    for tok in tokens:
        if isinstance(tok, Text):
            for word in tok.text.split():
                # ...
    # ...
layout can also examine tag tokens to change font when
directed by the page. Let’s start with support for weights and styles,
with two corresponding variables:
weight = "normal"
style = "roman"
Those variables must change when the bold and italics open and close tags are seen:
if isinstance(tok, Text):
    # ...
elif tok.tag == "i":
    style = "italic"
elif tok.tag == "/i":
    style = "roman"
elif tok.tag == "b":
    weight = "bold"
elif tok.tag == "/b":
    weight = "normal"
Note that this code correctly handles not only
<b>bold</b> and
<i>italic</i> text, but also
<b><i>bold italic</i></b>
text.It even handles
incorrectly nested tags like
<b>b<i>bi</b>i</i>, but it does not
handle <b><b>twice</b>bolded</b>
text. We’ll return to this in Chapter
6.
The style and weight variables are used to
select the font:
if isinstance(tok, Text):
    for word in tok.text.split():
        font = tkinter.font.Font(
            size=16,
            weight=weight,
            slant=style,
        )
        # ...
Since the font is computed in layout but used in
draw, we’ll need to add the font used to each entry in the
display list:
if isinstance(tok, Text):
    for word in tok.text.split():
        # ...
        display_list.append((cursor_x, cursor_y, word, font))
Make sure to update draw to expect and use this extra
font field in display list entries.
Italic fonts were developed in Italy (hence the name) to mimic a cursive handwriting style called “chancery hand”. Non-italic fonts are called roman because they mimic text on Roman monuments. There is an obscure third option: oblique fonts, which look like roman fonts but are slanted.
A Layout Object
With all of these tags, layout has become quite large,
with lots of local variables and some complicated control flow. That is
one sign that something deserves to be a class, not a function:
class Layout:
    def __init__(self, tokens):
        self.display_list = []
Every local variable in layout then becomes a field of
Layout:
self.cursor_x = HSTEP
self.cursor_y = VSTEP
self.weight = "normal"
self.style = "roman"
The core of the old layout is a loop over tokens, and we
can move the body of that loop to a method on Layout:
def __init__(self, tokens):
    # ...
    for tok in tokens:
        self.token(tok)

def token(self, tok):
    if isinstance(tok, Text):
        for word in tok.text.split():
            # ...
    elif tok.tag == "i":
        self.style = "italic"
    # ...
In fact, the body of the isinstance(tok, Text) branch
can be moved to its own method:
def word(self, word):
    font = tkinter.font.Font(
        size=16,
        weight=self.weight,
        slant=self.style,
    )
    w = font.measure(word)
    # ...
Now that everything has moved out of Browser’s old
layout function, it can be replaced with calls into
Layout:
class Browser:
    def load(self, url):
        body = url.request()
        tokens = lex(body)
        self.display_list = Layout(tokens).display_list
        self.draw()
When you do big refactors like this, it’s important to work incrementally. It might seem more efficient to change everything at once, but that efficiency brings with it a risk of failure: trying to do so much that you get confused and have to abandon the whole refactor. So take a moment to test that your browser still works before you move on.
Anyway, this refactor isolated all of the text-handling code into its
own method, with the main token function just branching on
the tag name. Let’s take advantage of the new, cleaner organization to
add more tags. With font weights and styles working, size is the next
frontier in typographic sophistication. One simple way to change font
size is the <small> tag and its deprecated sister tag
<big>.In your web design projects, use the CSS
font-size property to change text size instead of
<big> and <small>. But since we
haven’t yet implemented CSS for our browser (see Chapter 6), we’re stuck using tags
here.
Our experience with font styles and weights suggests a simple
approach that customizes the size field in
Layout. It starts out with:
self.size = 12That variable is used to create the font object:
font = tkinter.font.Font(
    size=self.size,
    weight=self.weight,
    slant=self.style,
)
And we can change the size in <big> and
<small> tags by updating this variable:
def token(self, tok):
    # ...
    elif tok.tag == "small":
        self.size -= 2
    elif tok.tag == "/small":
        self.size += 2
    elif tok.tag == "big":
        self.size += 4
    elif tok.tag == "/big":
        self.size -= 4
Try wrapping a whole paragraph in <small>, like
you would a bit of fine print, and enjoy your newfound typographical
freedom.
All of <b>, <i>,
<big>, and <small> date from an
earlier, pre-CSS era of the web. Nowadays, CSS can change how an element
appears, so visual tag names like <b> and
<small> are out of favor. That said,
<b>, <i>, and
<small> still have some appearance-independent
meanings.
Text of Different Sizes
Start mixing font sizes, like
<small>a</small><big>A</big>, and
you’ll quickly notice a problem with the font size code: the text is
aligned along its top, as if it’s hanging from a clothes line. But you
know that English text is typically written with all letters aligned at
an invisible baseline instead.
Let’s think through how to fix this. If the bigger text is moved up,
it would overlap with the previous line, so the smaller text has to be
moved down. That means its vertical position has to be computed later,
after the big text passes through token. But since
the small text comes through the loop first, we need a two-pass
algorithm for lines of text: the first pass identifies what words go in
the line and computes their x positions, while the second pass
vertically aligns the words and computes their y positions (see
Figure 4).
Let’s start with phase one. Since one line contains text from many
tags, we need a field on Layout to store the line-to-be.
That field, line, will be a list, and text
will add words to it instead of to the display list. Entries in
line will have x but not y positions,
since y positions aren’t computed in the first phase:
class Layout:
    def __init__(self, tokens):
        # ...
        self.line = []
        # ...

    def word(self, word):
        # ...
        self.line.append((self.cursor_x, word, font))
The new line field is essentially a buffer, where words
are held temporarily before they can be placed. The second phase is that
buffer being flushed when we’re finished with a line:
class Layout:
    def word(self, word):
        if self.cursor_x + w > WIDTH - HSTEP:
            self.flush()
As usual with buffers, we also need to make sure the buffer is flushed once all tokens are processed:
class Layout:
    def __init__(self, tokens):
        # ...
        self.flush()
This new flush function has three responsibilities:
- it must align the words along the baseline (see Figure 5);
- it must add all those words to the display list; and
- it must update the
cursor_xandcursor_yfields.
Here’s what it looks like, step by step:

Since we want words to line up “on the line”, let’s start by computing where that line should be. That depends on the tallest word on the line:
def flush(self):
    if not self.line: return
    metrics = [font.metrics() for x, word, font in self.line]
    max_ascent = max([metric["ascent"] for metric in metrics])
The baseline is then max_ascent below
self.y—or actually a little more to account for the
leading:Actually, 25%
leading doesn’t add 25% of the ascent above the ascender and 25% of the
descent below the descender. Instead, it adds 12.5% of the line
height in both places, which is subtly different when fonts are
mixed. But let’s skip that subtlety here.
baseline = self.cursor_y + 1.25 * max_ascentNow that we know where the line is, we can place each word relative to that line and add it to the display list:
for x, word, font in self.line:
    y = baseline - font.metrics("ascent")
    self.display_list.append((x, y, word, font))
Note how y starts at the baseline, and moves up
by just enough to accommodate that word’s ascent. Now
cursor_y must move far enough down below
baseline to account for the deepest descender:
max_descent = max([metric["descent"] for metric in metrics])
self.cursor_y = baseline + 1.25 * max_descent
Finally, flush must update the Layout’s
cursor_x and line fields:
self.cursor_x = HSTEP
self.line = []
Now all the text is aligned along the line, even when text sizes are
mixed. Plus, this new flush function is convenient for
other line-breaking jobs. For example, in HTML the
<br> tagWhich is a self-closing tag, so there’s no
</br>. Many tags that are content, instead
of annotating it, are like this. Some people like adding a final slash
to self-closing tags, as in <br/>, but this is not
required in HTML. ends the current line and starts a new
one:
def token(self, tok):
    # ...
    elif tok.tag == "br":
        self.flush()
Likewise, paragraphs are defined by the <p> and
</p> tags, so </p> also ends the
current line:
def token(self, tok):
    # ...
    elif tok.tag == "/p":
        self.flush()
        self.cursor_y += VSTEP
I add a bit extra to cursor_y here to create a little
gap between paragraphs.
By this point you should be able to load up your browser and display an example page, which should look something like Figure 6.

Actually, browsers support not only horizontal but also vertical writing systems, like some traditional East Asian writing styles. A particular challenge is Mongolian script, which is written in lines running top to bottom, left to right. Many Mongolian government websites use the script.
Font Caching
Now that you’ve implemented styled text, you’ve probably
noticed—unless you’re on macOSWhile we can’t confirm this in the documentation, it seems
that the macOS “Core Text” APIs cache fonts more aggressively than Linux
and Windows. The optimization described in this section won’t hurt any
on macOS, but also won’t improve speed as much as on Windows and
Linux.—that on a large web page like this chapter our browser
has slowed significantly from the previous
chapter. That’s because text layout, and specifically the part where
you measure each word, is quite slow.You can profile Python programs by replacing your
python3 command with python3 -m cProfile. Look
for the lines corresponding to the measure and
metrics calls to see how much time is spent measuring
text.
Unfortunately, it’s hard to make text measurement much faster. With proportional fonts and complex font features like hinting and kerning, measuring text can require pretty complex computations. But on a large web page, some words likely appear a lot—for example, this chapter includes the word “the” over 200 times. Instead of measuring these words over and over again, we could measure them once, and then cache the results. On normal English text, this usually results in a substantial speedup.
Caching is such a good idea that most text libraries already
implement it, typically caching text measurements in each
Font object. But since our text method creates
a new Font object for each word, the caching is
ineffective. To make caching work, we need to reuse Font
objects when possible instead of making new ones.
We’ll store our cache in a global FONTS dictionary:
FONTS = {}The keys to this dictionary will be size/weight/style triples, and
the values will be Font objects.Actually, the values are a
font object and a tkinter.Label object. This dramatically
improves the performance of metrics for some reason, and is
recommended by the Python
documentation. We can put the caching logic itself in
a new get_font function:
def get_font(size, weight, style):
    key = (size, weight, style)
    if key not in FONTS:
        font = tkinter.font.Font(size=size, weight=weight,
            slant=style)
        label = tkinter.Label(font=font)
        FONTS[key] = (font, label)
    return FONTS[key][0]
Then the word method can call get_font
instead of creating a Font object directly:
class Layout:
    def word(self, word):
        font = get_font(self.size, self.weight, self.style)
        # ...
Now identical words will use identical fonts and text measurements will hit the cache.
Fonts for scripts like Chinese can be megabytes in size, so they are generally stored on disk and only loaded into memory on demand. That makes font loading slow and caching even more important. Browsers also have extensive caches for measuring, shaping, and rendering text. Because web pages have a lot of text, these caches turn out to be one of the most important parts of speeding up rendering.
Summary
The previous chapter introduced a browser that laid out characters in a grid. Now it does standard English text layout, so:
- text is laid out word by word;
- lines are split at word boundaries;
- text can be bold or italic;
- text of different sizes can be mixed.
You can now use our browser to read an essay, a blog post, or even a book!
Outline
The complete set of functions, classes, and methods in our browser should look something like this:
class URL:
    def __init__(url)

    def request()
class Text:
    def __init__(text)
class Tag:
    def __init__(tag)
def lex(body)
FONTS
def get_font(size, weight, style)
WIDTH, HEIGHT
HSTEP, VSTEP
class Layout:
    def __init__(tokens)

    def token(tok)

    def flush()

    def word(word)
SCROLL_STEP
class Browser:
    def __init__()

    def draw()

    def load(url)

    def scrolldown(e)
Exercises
3-1 Centered text. The page titles on this book’s website are
centered; make your browser do the same for text between
<h1 class="title"> and </h1>. Each
line has to be centered individually, because different lines will have
different lengths.In
early HTML there was a <center> tag that did exactly
this, but nowadays centering is typically done in CSS, through the
text-align property. The approach in this exercise is of
course non-standard, and just for learning purposes.
3-2 Superscripts. Add support for the
<sup> tag. Text in this tag should be smaller
(perhaps half the normal text size) and be placed so that the top of a
superscript lines up with the top of a normal letter.
3-3 Soft hyphens. The soft hyphen character, written
\N{soft hyphen} in Python, represents a place where the
text renderer can, but doesn’t have to, insert a hyphen and break the
word across lines. Add support for it.If you’ve done Exercise
1-4 on HTML entities, you might also want to add support for the
­ entity, which expands to a soft
hyphen. If a word doesn’t fit at the end of a line, check
if it has soft hyphens, and if so break the word across lines. Remember
that a word can have multiple soft hyphens in it, and make sure to draw
a hyphen when you break a word. The word
“supercalifragilisticexpialidocious” is a good test case.
3-4 Small caps. Make the <abbr> element
render text in small caps, like this. Inside an
<abbr> tag, lower-case letters should be small,
capitalized, and bold, while all other characters (upper case, numbers,
etc.) should be drawn in the normal font.
3-5 Preformatted text. Add support for the
<pre> tag. Unlike normal paragraphs, text inside
<pre> tags doesn’t automatically break lines, and
whitespace like spaces and newlines are preserved. Use a fixed-width
font like Courier New or SFMono as well. Make
sure tags work normally inside <pre> tags: it should
be possible to bold some text inside a <pre>. The
results will look best if you also do Exercise 1-4.
Constructing an HTML Tree
So far, our browser sees web pages as a stream of open tags, close tags, and text. But HTML is actually a tree, and though the tree structure hasn’t been important yet, it will be central to later features like CSS, JavaScript, and visual effects. So this chapter adds a proper HTML parser and converts the layout engine to use it.
A Tree of Nodes
The HTML treeThis is
the tree that is usually called the DOM tree, for Document
Object Model. I’ll keep calling it the HTML tree for
now. has one node for each open and close tag pair and a
node for each span of text.In reality there are other types of nodes too, like
comments, doctypes, CDATA sections, and processing
instructions. There are even some deprecated types! A
simple HTML document showing the structure is shown in Figure 1.
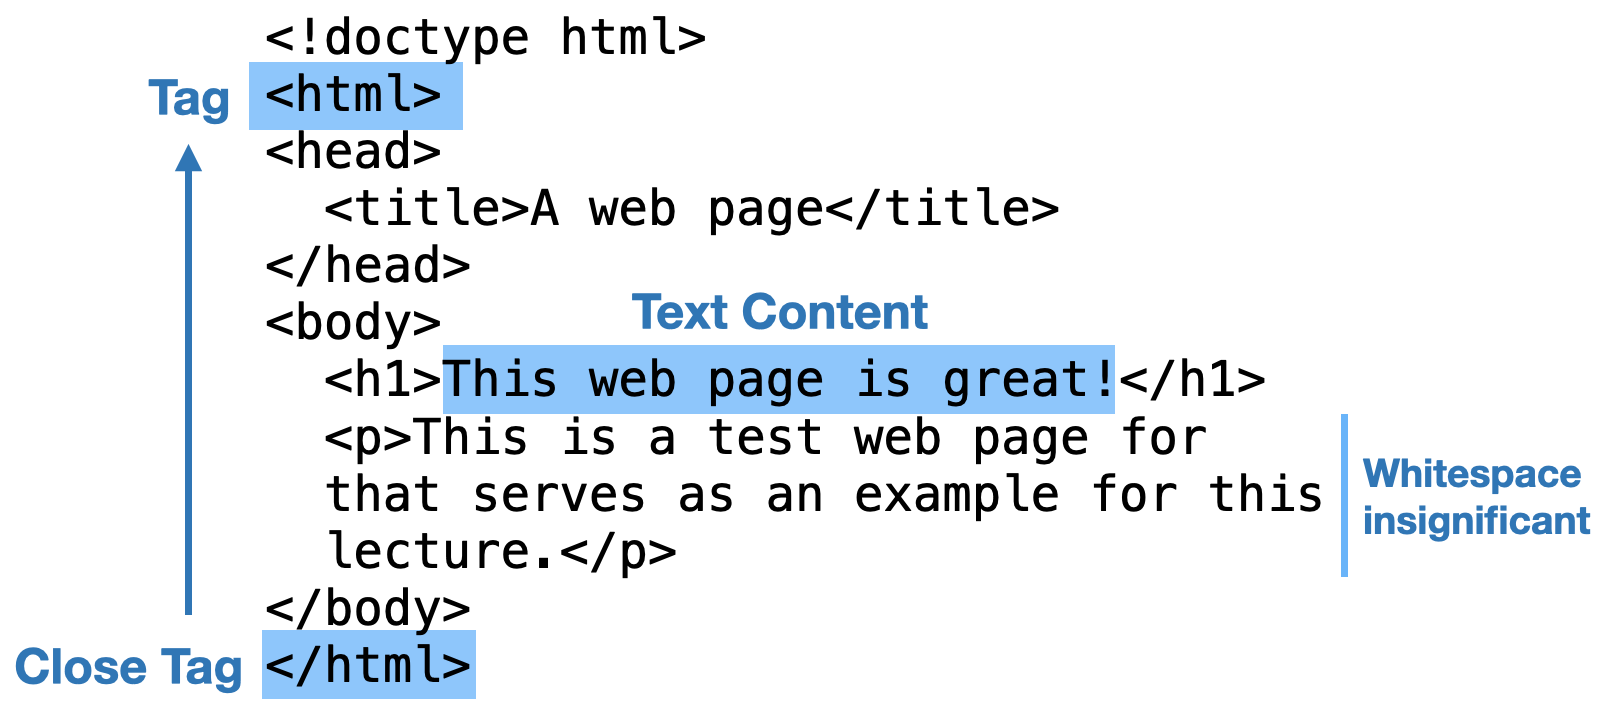
For our browser to use a tree, tokens need to evolve into nodes. That
means adding a list of children and a parent pointer to each one. Here’s
the new Text class, representing text at the leaf of the
tree:
class Text:
    def __init__(self, text, parent):
        self.text = text
        self.children = []
        self.parent = parent
Since it takes two tags (the open and the close tag) to make a node,
let’s rename the Tag class to Element, and
make it look like this:
class Element:
    def __init__(self, tag, parent):
        self.tag = tag
        self.children = []
        self.parent = parent
I added a children field to both Text and
Element, even though text nodes never have children, for
consistency.
Constructing a tree of nodes from source code is called parsing. A parser builds a tree one element or text node at a time. But that means the parser needs to store an incomplete tree as it goes. For example, suppose the parser has so far read this bit of HTML:
<html><video></video><section><h1>This is my webpageThe parser has seen five tags (and one text node). The rest of the
HTML will contain more open tags, close tags, and text, but no matter
which tokens it sees, no new nodes will be added to the
<video> tag, which has already been closed. So that
node is “finished”. But the other nodes are unfinished: more children
can be added to the <html>,
<section>, and <h1> nodes,
depending on what HTML comes next—see Figure 2.
Since the parser reads the HTML file from beginning to end, these unfinished tags are always in a certain part of the tree. The unfinished tags have always been opened but not yet closed; they are always later in the source than the finished nodes; and they are always children of other unfinished tags. To leverage these facts, let’s represent an incomplete tree by storing a list of unfinished tags, ordered with parents before children. The first node in the list is the root of the HTML tree; the last node in the list is the most recent unfinished tag.In Python, and most other languages, it’s faster to add and remove from the end of a list, instead of the beginning.
Parsing is a little more complex than lex, so we’re
going to want to break it into several functions, organized in a new
HTMLParser class. That class can also store the source code
it’s analyzing and the incomplete tree:
class HTMLParser:
    def __init__(self, body):
        self.body = body
        self.unfinished = []
Before the parser starts, it hasn’t seen any tags at all, so the
unfinished list storing the tree starts empty. But as the
parser reads tokens, that list fills up. Let’s start that by
aspirationally renaming the lex function we have now to
parse:
class HTMLParser:
    def parse(self):
        # ...
We’ll need to do a bit of surgery on parse. Right now
parse creates Tag and Text
objects and appends them to the out array. We need it to
create Element and Text objects and add them
to the unfinished tree. Since a tree is a bit more complex
than a list, I’ll move the adding-to-a-tree logic to two new methods,
add_text and add_tag.
def parse(self):
    text = ""
    in_tag = False
    for c in self.body:
        if c == "<":
            in_tag = True
            if text: self.add_text(text)
            text = ""
        elif c == ">":
            in_tag = False
            self.add_tag(text)
            text = ""
        else:
            text += c
    if not in_tag and text:
        self.add_text(text)
    return self.finish()
The out variable is gone, and note that I’ve also moved
the return value to a new finish method, which converts the
incomplete tree to the final, complete tree. So: how do we add things to
the tree?
HTML derives from a long line of document processing systems. Its
predecessor, SGML,
traces back to RUNOFF and is
a sibling to troff, now used for Linux
manual pages. The committee that
standardized SGML now works on the .odf,
.docx, and .epub formats.
Constructing the Tree
Let’s talk about adding nodes to a tree. To add a text node we add it as a child of the last unfinished node:
class HTMLParser:
    def add_text(self, text):
        parent = self.unfinished[-1]
        node = Text(text, parent)
        parent.children.append(node)
On the other hand, tags are a little more complex since they might be an open or a close tag:
class HTMLParser:
    def add_tag(self, tag):
        if tag.startswith("/"):
            # ...
        else:
            # ...
An open tag adds an unfinished node to the end of the list:
def add_tag(self, tag):
    # ...
    else:
        parent = self.unfinished[-1]
        node = Element(tag, parent)
        self.unfinished.append(node)
A close tag instead finishes the last unfinished node by adding it to the previous unfinished node in the list:
def add_tag(self, tag):
    if tag.startswith("/"):
        node = self.unfinished.pop()
        parent = self.unfinished[-1]
        parent.children.append(node)
    # ...
Once the parser is done, it turns our incomplete tree into a complete tree by just finishing any unfinished nodes:
class HTMLParser:
    def finish(self):
        while len(self.unfinished) > 1:
            node = self.unfinished.pop()
            parent = self.unfinished[-1]
            parent.children.append(node)
        return self.unfinished.pop()
This is almost a complete parser, but it doesn’t quite work at the beginning and end of the document. The very first open tag is an edge case without a parent:
def add_tag(self, tag):
    # ...
    else:
        parent = self.unfinished[-1] if self.unfinished else None
        # ...
The very last tag is also an edge case, because there’s no unfinished node to add it to:
def add_tag(self, tag):
    if tag.startswith("/"):
        if len(self.unfinished) == 1: return
        # ...
Ok, that’s all done. Let’s test our parser out and see how well it works!
The ill-considered JavaScript document.write method
allows JavaScript to modify the HTML source code while it’s being
parsed! This is actually a bad
idea. An implementation of document.write must have the
HTML parser stop to execute JavaScript, but that slows down requests for
images, CSS, and JavaScript used later in the page. To solve this,
modern browsers use speculative
parsing to start loading additional resources even before parsing is
done.
Debugging a Parser
How do we know our parser does the right thing—that it builds the right tree? Well the place to start is seeing the tree it produces. We can do that with a quick, recursive pretty-printer:
def print_tree(node, indent=0):
    print(" " * indent, node)
    for child in node.children:
        print_tree(child, indent + 2)
Here we’re printing each node in the tree, and using indentation to
show the tree structure. Since we need to print each node, it’s worth
taking the time to give them a nice printed form, which in Python means
defining the __repr__ function:
class Text:
    def __repr__(self):
        return repr(self.text)

class Element:
    def __repr__(self):
        return "<" + self.tag + ">"
In general it’s a good idea to define __repr__ methods
for any data objects, and to have those __repr__ methods
print all the relevant fields.
Try this out on the
web page corresponding to this chapter, parsing the HTML source code
and then calling print_tree to visualize it:
body = URL(sys.argv[1]).request()
nodes = HTMLParser(body).parse()
print_tree(nodes)
You’ll see something like this at the beginning:
 <!doctype html>
   '\n'
   <html lang="en-US" xml:lang="en-US">
     '\n'
     <head>
       '\n  '
       <meta charset="utf-8" />
Immediately a couple of things stand out. Let’s start at the top,
with the <!doctype html> tag.
This special tag, called a doctype, is always the very first thing in an HTML document. But it’s not really an element at all, nor is it supposed to have a close tag. Our browser won’t be using the doctype for anything, so it’s best to throw it away:Real browsers use doctypes to switch between standards-compliant and legacy parsing and layout modes.
def add_tag(self, tag):
    if tag.startswith("!"): return
    # ...
This ignores all tags that start with an exclamation mark, which not
only throws out doctype declarations but also comments, which in HTML
are written <!-- comment text -->.
Just throwing out doctypes isn’t quite enough though—if you run your
parser now, it will crash. That’s because after the doctype comes a
newline, which our parser treats as text and tries to insert into the
tree. Except there isn’t a tree, since the parser hasn’t seen any open
tags. For simplicity, let’s just have our browser skip whitespace-only
text nodes to side-step the problem:Real browsers retain whitespace to correctly render
make<span></span>up as one word and
make<span> </span>up as two. Our browser won’t.
Plus, ignoring whitespace simplifies later chapters by avoiding a
special case for whitespace-only text tags.
def add_text(self, text):
    if text.isspace(): return
    # ...
The first part of the parsed HTML tree for the
browser.engineering home page now looks something like
this:
 <html lang="en-US" xml:lang="en-US">
   <head>
     <meta charset="utf-8" /="">
       <link rel="prefetch" ...>
         <link rel="prefetch" ...>
Our next problem: why’s everything so deeply indented? Why aren’t these open elements ever closed?
In SGML, document type declarations contained a URL which defined the
valid tags, and in older versions of HTML that was also recommended.
Browsers do use the absence of a document type declaration to identify
very old, pre-SGML versions of HTML,There’s also this crazy thing called “almost standards” or “limited
quirks” mode, due to a backward-incompatible change in table cell
vertical layout. Yes. I don’t need to make these up! but
don’t use the URL, so <!doctype html> is the best
document type declaration for modern HTML.
Self-closing Tags
Elements like <meta> and <link>
are what are called self-closing: these tags don’t surround content, so
you don’t ever write </meta> or
</link>. Our parser needs special support for them.
In HTML, there’s a specific
list of these self-closing tags (the specification calls them “void”
tags):A lot of these
tags are obscure. Browsers also support some additional, obsolete
self-closing tags not listed here, like
keygen.
SELF_CLOSING_TAGS = [
    "area", "base", "br", "col", "embed", "hr", "img", "input",
    "link", "meta", "param", "source", "track", "wbr",
]
Our parser needs to auto-close tags from this list:
def add_tag(self, tag):
    # ...
    elif tag in self.SELF_CLOSING_TAGS:
        parent = self.unfinished[-1]
        node = Element(tag, parent)
        parent.children.append(node)
This code looks right, but it doesn’t quite work right. Why not?
Because our parser is looking for a tag named meta, but
it’s finding a tag named “meta name=...”. The self-closing
code isn’t triggered because the <meta> tag has
attributes.
HTML attributes add information about an element; open tags can have any number of attributes. Attribute values can be quoted, unquoted, or omitted entirely. Let’s focus on basic attribute support, ignoring values that contain whitespace, which are a little complicated.
Since we’re not handling whitespace in values, we can split on whitespace to get the tag name and the attribute–value pairs:
class HTMLParser:
    def get_attributes(self, text):
        parts = text.split()
        tag = parts[0].casefold()
        attributes = {}
        for attrpair in parts[1:]:
            # ...
        return tag, attributes
HTML tag names are case insensitive, as by the way are attribute
names, so I case-fold them.Lower-casing text is the wrong way to
do case-insensitive comparisons in languages like Cherokee. In HTML
specifically, tag names only use the ASCII characters so lower-casing
them would be sufficient, but I’m using Python’s casefold
function because it’s a good habit to get into. Then,
inside the loop, I split each attribute–value pair into a name and a
value. The easiest case is an unquoted attribute, where an equal sign
separates the two:
def get_attributes(self, text):
    # ...
    for attrpair in parts[1:]:
        if "=" in attrpair:
            key, value = attrpair.split("=", 1)
            attributes[key.casefold()] = value
    # ...
The value can also be omitted, like in
<input disabled>, in which case the attribute value
defaults to the empty string:
for attrpair in parts[1:]:
    # ...
    else:
        attributes[attrpair.casefold()] = ""
Finally, the value can be quoted, in which case the quotes have to be stripped out:Quoted attributes allow whitespace between the quotes. Parsing that properly requires something like a finite state machine instead of just splitting on whitespace.
if "=" in attrpair:
    # ...
    if len(value) > 2 and value[0] in ["'", "\""]:
        value = value[1:-1]
    # ...
We’ll store these attributes inside Elements:
class Element:
    def __init__(self, tag, attributes, parent):
        self.tag = tag
        self.attributes = attributes
        # ...
That means we’ll need to call get_attributes at the top
of add_tag to get the attributes we need to
construct an Element.
def add_tag(self, tag):
    tag, attributes = self.get_attributes(tag)
    # ...
Remember to use tag and attribute instead
of text in add_tag, and try your parser
again:
 <html>
    <head>
      <meta>
      <link>
      <link>
      <link>
      <link>
      <link>
      <meta>
It’s close! Yes, if you print the attributes, you’ll see that
attributes with whitespace (like author on one of the
meta tags) are mis-parsed as multiple attributes, and the
final slash on the self-closing tags is incorrectly treated as an extra
attribute. A better parser would fix these issues. But let’s instead
leave our parser as is—these issues aren’t going to be a problem for the
browser we’re building—and move on to integrating it with our
browser.
Putting a slash at the end of self-closing tags, like
<br/>, became fashionable when XHTML looked like it might
replace HTML, and old-timers like me never broke the habit. But unlike
in XML, in HTML
self-closing tags are identified by name, not by some special syntax, so
the slash is optional.
Using the Node Tree
Right now, the Layout class works token by token; we now
want it to go node by node instead. So let’s separate the old
token method into two parts: all the cases for open tags
will go into a new open_tag method and all the cases for
close tags will go into a new close_tag method:The case for text tokens is no
longer needed because our browser can just call the existing
add_text method directly.
class Layout:
    def open_tag(self, tag):
        if tag == "i":
            self.style = "italic"
        # ...

    def close_tag(self, tag):
        if tag == "i":
            self.style = "roman"
        # ...
Now we need the Layout object to walk the node tree,
calling open_tag, close_tag, and
text in the right order:
def recurse(self, tree):
    if isinstance(tree, Text):
        for word in tree.text.split():
            self.word(word)
    else:
        self.open_tag(tree.tag)
        for child in tree.children:
            self.recurse(child)
        self.close_tag(tree.tag)
The Layout constructor can now call recurse
instead of looping through the list of tokens. We’ll also need the
browser to construct the node tree, like this:
class Browser:
    def load(self, url):
        body = url.request()
        self.nodes = HTMLParser(body).parse()
        self.display_list = Layout(self.nodes).display_list
        self.draw()
Run it—the browser should now use the parsed HTML tree.
The doctype syntax is a form of versioning—declaring
which version of HTML the web page is using. But in fact, the
html value for doctype signals not just a
particular version of HTML, but more generally the HTML living
standard.It is
not expected that any new doctype version for HTML will
ever be added again. It’s called a “living standard”
because it changes all the time as features are added. The mechanism for
these changes is simply browsers shipping new features, not any change
to the “version” of HTML. In general, the web is an unversioned
platform—new features are often added as enhancements, but only so
long as they don’t break existing ones.Features can be removed, but
only if they stop being used by the vast majority of sites. This makes
it very hard to remove web features compared with other
platforms.
Handling Author Errors
The parser now handles HTML pages correctly—at least when the HTML is
written by the sorts of goody-two-shoes programmers who remember the
<head> tag, close every open tag, and make their bed
in the morning. Mere mortals lack such discipline and so browsers also
have to handle broken, confusing, headless HTML. In fact,
modern HTML parsers are capable of transforming any string of
characters into an HTML tree, no matter how confusing the markup.Yes, it’s crazy, and for a few
years in the early 2000s the W3C tried to do away with it. They
failed.
The full algorithm is, as you might expect, complicated beyond belief, with dozens of ever-more-special cases forming a taxonomy of human error, but one of its nicer features is implicit tags. Normally, an HTML document starts with a familiar boilerplate:
<!doctype html>
<html>
  <head>
  </head>
  <body>
  </body>
</html>
In reality, all six of these tags, except the doctype, are
optional: browsers insert them automatically when the web page omits
them. Let’s insert implicit tags in our browser via a new
implicit_tags function. We’ll want to call it in both
add_text and add_tag:
class HTMLParser:
    def add_text(self, text):
        if text.isspace(): return
        self.implicit_tags(None)
        # ...

    def add_tag(self, tag):
        tag, attributes = self.get_attributes(tag)
        if tag.startswith("!"): return
        self.implicit_tags(tag)
        # ...
Note that implicit_tags isn’t called for the ignored
whitespace and doctypes. Let’s also call it in finish, to
make sure that an <html> and
<body> tag are created even for empty strings:
class HTMLParser:
    def finish(self):
        if not self.unfinished:
            self.implicit_tags(None)
        # ...
The argument to implicit_tags is the tag name (or
None for text nodes), which we’ll compare to the list of
unfinished tags to determine what’s been omitted:
class HTMLParser:
    def implicit_tags(self, tag):
        while True:
            open_tags = [node.tag for node in self.unfinished]
            # ...
implicit_tags has a loop because more than one tag could
have been omitted in a row; every iteration around the loop will add
just one. To determine which implicit tag to add, if any, requires
examining the open tags and the tag being inserted.
Let’s start with the easiest case, the implicit
<html> tag. An implicit <html> tag
is necessary if the first tag in the document is something other than
<html>:
while True:
    # ...
    if open_tags == [] and tag != "html":
        self.add_tag("html")
Both <head> and <body> can also
be omitted, but to figure out which it is we need to look at which tag
is being added:
while True:
    # ...
    elif open_tags == ["html"] \
         and tag not in ["head", "body", "/html"]:
        if tag in self.HEAD_TAGS:
            self.add_tag("head")
        else:
            self.add_tag("body")
Here, HEAD_TAGS lists the tags that you’re supposed to
put into the <head> element:The
<script> tag can go in either the head or the body
section, but it goes into the head by default.
class HTMLParser:
    HEAD_TAGS = [
        "base", "basefont", "bgsound", "noscript",
        "link", "meta", "title", "style", "script",
    ]
Note that if both the <html> and
<head> tags are omitted, implicit_tags
is going to insert both of them by going around the loop twice. In the
first iteration open_tags is [], so the code
adds an <html> tag; then, in the second iteration,
open_tags is ["html"], so it adds a
<head> tag.These add_tag methods themselves call
implicit_tags, which means you can get into an infinite
loop if you forget a case. I’ve been careful to make sure that every tag
added by implicit_tags doesn’t itself trigger more implicit
tags.
Finally, the </head> tag can also be implicit if
the parser is inside the <head> and sees an element
that’s supposed to go in the <body>:
while True:
    # ...
    elif open_tags == ["html", "head"] and \
         tag not in ["/head"] + self.HEAD_TAGS:
        self.add_tag("/head")
Technically, the </body> and
</html> tags can also be implicit. But since our
finish function already closes any unfinished tags, that
doesn’t need any extra code. So all that’s left for
implicit_tags is to exit out of the loop:
while True:
    # ...
    else:
        break
Of course, there are more rules for handling malformed HTML: formatting tags, nested paragraphs, embedded Scalable Vector Graphics (SVG) and MathML, and all sorts of other complexity. Each has complicated rules abounding with edge cases. But let’s end our discussion of handling author errors here.
The rules for malformed HTML may seem arbitrary, and they are: they evolved over years of trying to guess what people “meant” when they wrote that HTML, and are now codified in the HTML parsing standard. Of course, sometimes these rules “guess” wrong—but as so often happens on the web, it’s more important that every browser does the same thing, rather than each trying to guess what the right thing is.
And now for the payoff! Figure 3 shows a screenshot of this book’s website, loaded in our own browser.To be fair, it actually looks about the same with the Chapter 3 browser.

Thanks to implicit tags, you can mostly skip the
<html>, <body>, and
<head> elements, and they’ll be implicitly added back
for you. In fact, the HTML parser’s many
states guarantee something stricter than that: every HTML document
has exactly one <head> and one
<body>, in the expected order.At least, per document. An
HTML file that uses frames or templates can have more than one
<head> and <body>, but they
correspond to different documents.
Summary
This chapter taught our browser that HTML is a tree, not just a flat list of tokens. We added:
- a parser to transform HTML tokens to a tree;
- code to recognize and handle attributes on elements;
- automatic fixes for some malformed HTML documents;
- a recursive layout algorithm to lay out an HTML tree.
The tree structure of HTML is essential to display visually complex web pages, as we will see in the next chapter.
Outline
The complete set of functions, classes, and methods in our browser should look something like this:
class URL:
    def __init__(url)

    def request()
class Text:
    def __init__(text, parent)

    def __repr__()
class Element:
    def __init__(tag, attributes, parent)

    def __repr__()
def print_tree(node, indent)
class HTMLParser:
    SELF_CLOSING_TAGS

    HEAD_TAGS

    def __init__(body)

    def parse()

    def get_attributes(text)

    def add_text(text)

    def add_tag(tag)

    def implicit_tags(tag)

    def finish()
FONTS
def get_font(size, weight, style)
WIDTH, HEIGHT
HSTEP, VSTEP
class Layout:
    def __init__(tree)

    def recurse(tree)

    def open_tag(tag)

    def close_tag(tag)

    def flush()

    def word(word)
SCROLL_STEP
class Browser:
    def __init__()

    def draw()

    def load(url)

    def scrolldown(e)
Exercises
4-1 Comments. Update the HTML lexer to support comments.
Comments in HTML begin with <!-- and end with
-->. However, comments aren’t the same as tags: they can
contain any text, including left and right angle brackets. The lexer
should skip comments, not generating any token at all. Check: is
<!--> a comment, or does it just start one?
4-2 Paragraphs. It’s not clear what it would mean for one
paragraph to contain another. Change the parser so that a document like
<p>hello<p>world</p> results in two
sibling paragraphs instead of one paragraph inside another; real
browsers do this too. Do the same for <li> elements,
but make sure nested lists are still possible.
4-3 Scripts. JavaScript code embedded in a
<script> tag uses the left angle bracket to mean
“less than”. Modify your lexer so that the contents of
<script> tags are treated specially: no tags are
allowed inside <script>, except the
</script> close tag.Technically it’s just
</script followed by a space,
tab, \v, \r, slash, or greater than sign.
If you need to talk about </script> tags inside
JavaScript code, you have to split it into multiple
strings.
4-4 Quoted attributes. Quoted attributes can contain spaces
and right angle brackets. Fix the lexer so that this is supported
properly. Hint: the current lexer is a finite state machine, with two
states (determined by in_tag). You’ll need more states.
4-5 Syntax highlighting. Implement the
view-source protocol as in Exercise 1-5, but make it
syntax-highlight the source code of HTML pages. Keep source code for
HTML tags in a normal font, but make text contents bold. If you’ve
implemented it, wrap text in <pre> tags as well to
preserve line breaks. Hint: subclass the HTML parser and use it to
implement your syntax highlighter.
4-6 Mis-nested formatting tags. Extend your HTML parser to
support markup like
<b>Bold <i>both</b> italic</i>.
This requires keeping track of the set of open text formatting elements
and inserting implicit open and close tags when text formatting elements
are closed in the wrong order. The bold/italic example, for example,
should insert an implicit </i> before the
</b> and an implicit <i> after
it.
Laying Out Pages
So far, layout has been a linear process that handles open tags and close tags independently. But web pages are trees, and look like them: borders and backgrounds visually nest inside one another. To support that, this chapter switches to tree-based layout, where the tree of elements is transformed into a tree of layout objects before drawing. In the process, we’ll make web pages more colorful with backgrounds.
The Layout Tree
Right now, our browser lays out an element’s open and close tags
separately. Both tags modify global state, like the
cursor_x and cursor_y variables, but they
aren’t otherwise connected, and information about the element as a
whole, like its width and height, is never computed. That makes it
pretty hard to draw a background behind an element, let alone more
complicated visual effects. So web browsers structure layout
differently.
In a browser, layout is about producing a layout tree, whose
nodes are layout objects, each associated with an HTML
elementElements like
<script> don’t generate layout objects, and some
elements generate multiple layout objects (<li>
elements have an extra one for the bullet point!), but mostly it’s one
layout object each. and each with a size and a position.
The browser walks the HTML tree to produce the layout tree, then
computes the size and position for each layout object, and finally draws
each layout object to the screen.
Let’s start by looking at how the existing Layout class
is used:
class Browser:
    def load(self, url):
        # ...
        self.display_list = Layout(self.nodes).display_list
        #...
Here, a Layout object is created briefly and then thrown
away. Let’s instead make it the beginning of our layout tree by storing
it in a Browser field:
class Browser:
    def load(self, url):
        # ...
        self.document = Layout(self.nodes)
        self.document.layout()
        #...
Note that I’ve renamed the Layout constructor to a
layout method, so that constructing a layout object and
actually laying it out can be different steps. The constructor now just
stores the node it was passed:
class Layout:
    def __init__(self, node):
        self.node = node
So far, we still don’t have a tree—we just have a single
Layout object. To make it into a tree, we’ll need to add
child and parent pointers. I’m also going to add a pointer to the
previous sibling, because that’ll be useful for computing sizes and
positions later:
class Layout:
    def __init__(self, node, parent, previous):
        self.node = node
        self.parent = parent
        self.previous = previous
        self.children = []
That said, requiring a parent and previous
object now makes it tricky to construct a Layout object in
Browser, since the root of the layout tree obviously can’t
have a parent. To rectify that, let me add a second kind of layout
object to serve as the root of the layout tree.I don’t want to just pass
None for the parent, because the root layout object also
computes its size and position differently, as we’ll see later in this
chapter. I think of that root as the document itself, so
let’s call it DocumentLayout:
class DocumentLayout:
    def __init__(self, node):
        self.node = node
        self.parent = None
        self.children = []

    def layout(self):
        child = Layout(self.node, self, None)
        self.children.append(child)
        child.layout()
Note an interesting thing about this new layout method:
its role is to create the child layout objects and then
recursively call their layout methods. This is a
common pattern for constructing trees; we’ll be seeing it a lot
throughout this book.
Now when we construct a DocumentLayout object inside
load, we’ll be building a tree; a very short tree, more of
a stump (just the “document” and the HTML element below it), but a tree
nonetheless!
By the way, since we now have DocumentLayout, let’s
rename Layout so it’s less ambiguous. I like
BlockLayout as a name, because we ultimately want it to
represent a block of text, like a paragraph or a heading:
class BlockLayout:
    # ...
Make sure to rename the Layout constructor call in
DocumentLayout as well. As always, test your browser and
make sure that after all of these refactors, everything still works.
The layout tree isn’t accessible to web developers, so it hasn’t been standardized, and its structure differs between browsers. Even the names don’t match! Chrome calls it a layout tree, Safari a render tree, and Firefox a frame tree.
Block Layout
So far, we’ve focused on text layout—and text is laid out horizontally in lines.In European languages, at least! But web pages are really constructed out of larger blocks, like headings, paragraphs, and menus, that stack vertically one after another. We need to add support for this kind of layout to our browser, and the way we’re going to do that involves expanding on the layout tree we’ve already built.
The core idea is that we’ll have a whole tree of
BlockLayout objects (with a DocumentLayout at
the root). Some will represent leaf blocks that contain text, and
they’ll lay out their contents the way we’ve already implemented. But
there will also be new, intermediate BlockLayouts with
BlockLayout children, and they will stack their children
vertically. (An example is shown in Figure 1. A widget above it lets you
play with how block layout leads to different visual output.)
To create these intermediate BlockLayout children, we
can use a loop like this:
class BlockLayout:
    def layout_intermediate(self):
        previous = None
        for child in self.node.children:
            next = BlockLayout(child, self, previous)
            self.children.append(next)
            previous = next
I’ve called this method layout_intermediate, but only so
you can add it to the code right away and then compare it with the
existing recurse method.
This code is tricky, so read it carefully. It involves two trees: the
HTML tree, which node and child point to; and
the layout tree, which self, previous, and
next point to. The two trees have similar structure, so
it’s easy to get confused. But remember that this code constructs the
layout tree from the HTML tree, so it reads from
node.children (in the HTML tree) and writes to
self.children (in the layout tree).
So we have two ways to lay out an element: either calling
recurse and flush, or this
layout_intermediate function. To determine which one a
layout object should use, we’ll need to know what kind of content its
HTML node contains: inline text and text-related tags like
<b>, or blocks like <p>
and <h1>. Let’s add a layout_mode method
that computes which is which:
class BlockLayout:
    def layout_mode(self):
        if isinstance(self.node, Text):
            return "inline"
        elif any([isinstance(child, Element) and \
                  child.tag in BLOCK_ELEMENTS
                  for child in self.node.children]):
            return "block"
        elif self.node.children:
            return "inline"
        else:
            return "block"
Here, the list of BLOCK_ELEMENTS is basically what you
expect, a list of all the tags that describe blocks and containers:Taken from the HTML living
standard.
BLOCK_ELEMENTS = [
    "html", "body", "article", "section", "nav", "aside",
    "h1", "h2", "h3", "h4", "h5", "h6", "hgroup", "header",
    "footer", "address", "p", "hr", "pre", "blockquote",
    "ol", "ul", "menu", "li", "dl", "dt", "dd", "figure",
    "figcaption", "main", "div", "table", "form", "fieldset",
    "legend", "details", "summary"
]
Our layout_mode method has to handle one tricky case,
where a node contains both block children like a <p>
element and also text children like a text node or a
<b> element. It’s probably best to think of this as a
kind of error on the part of the web developer. And just like with
implicit tags in Chapter 4, we need a repair
mechanism to make sense of the situation; I’ve chosen to use block mode
in this case.In real
browsers, that repair mechanism is called “anonymous
block boxes” and is more complex than what’s described here; see
Exercise 5-5.
So now BlockLayout can determine what kind of layout to
do based on the layout_mode of its HTML node:
class BlockLayout:
    def layout(self):
        mode = self.layout_mode()
        if mode == "block":
            previous = None
            for child in self.node.children:
                next = BlockLayout(child, self, previous)
                self.children.append(next)
                previous = next
        else:
            self.cursor_x = 0
            self.cursor_y = 0
            self.weight = "normal"
            self.style = "roman"
            self.size = 12

            self.line = []
            self.recurse(self.node)
            self.flush()
Finally, since BlockLayouts can now have children, the
layout method next needs to recursively call
layout so those children can construct their children, and
so on recursively:
class BlockLayout:
    def layout(self):
        # ...
        for child in self.children:
            child.layout()
Our browser is now constructing a whole tree of
BlockLayout objects; you can use print_tree to
see this tree in the Browser’s load method.
You’ll see that large web pages like this chapter produce large and
complex layout trees! Now we need each of these BlockLayout
objects to have a size and position somewhere on the page.
In CSS, the layout mode is set by the display
property. The oldest CSS layout modes, like inline and
block, are set on the children instead of the parent, which
leads to hiccups like anonymous
block boxes. Newer properties like inline-block,
flex, and grid are set on the parent, which
avoids this kind of error.
Size and Position
In the previous chapter, the
Layout object was responsible for the whole web page, so it
just laid out its content starting at the top of the page. Now that we
have multiple BlockLayout objects each containing a
different paragraph of text, we’re going to need to do things a little
differently, computing a size and position for each layout object
independently.
Let’s add x, y, width, and
height fields for each layout object type:
class BlockLayout:
    def __init__(self, node, parent, previous):
        # ...
        self.x = None
        self.y = None
        self.width = None
        self.height = None
Do the same for DocumentLayout. Now we need to update
the layout method to use these fields.
Let’s start with cursor_x and cursor_y.
Instead of having them denote absolute positions on the page, let’s make
them relative to the BlockLayout’s x and
y. So they now need to start from 0 instead of
HSTEP and VSTEP, in both layout
and flush:
class BlockLayout:
    def layout(self):
        else:
            self.cursor_x = 0
            self.cursor_y = 0

    def flush(self):
        # ...
        self.cursor_x = 0
        # ...
Since these fields are now relative, we’ll need to add the block’s
x and y position in flush when
computing the display list:
class BlockLayout:
    def flush(self):
        # ...
        for rel_x, word, font in self.line:
            x = self.x + rel_x
            y = self.y + baseline - font.metrics("ascent")
            self.display_list.append((x, y, word, font))
        # ...
Similarly, to wrap lines, we can’t compare cursor_x to
WIDTH, because cursor_x is a relative position
while WIDTH is an absolute position; instead, we’ll wrap
lines when cursor_x reaches the block’s
width:
class BlockLayout:
    def word(self, word):
        # ...
        if self.cursor_x + w > self.width:
            # ...
        # ...
So now that leaves us with the problem of computing these
x, y, and width fields. Let’s
recall that BlockLayouts represent blocks of text like
paragraphs or headings, and are stacked vertically one atop another.
That means each one starts at its parent’s left edge and goes all the
way across its parent:In
the next chapter, we’ll add support for
author-defined styles, which in real browsers modify these layout rules
by setting custom widths or changing how x and y
positions are computed.
class BlockLayout:
    def layout(self):
        self.x = self.parent.x
        self.width = self.parent.width
        # ...
A layout object’s vertical position depends on whether there’s a previous sibling. If there is one, the layout object starts right after it; otherwise, it starts at its parent’s top edge:
class BlockLayout:
    def layout(self):
        if self.previous:
            self.y = self.previous.y + self.previous.height
        else:
            self.y = self.parent.y
        # ...
Finally, height is a little tricky. A BlockLayout that
contains other blocks should be tall enough to contain all of its
children, so its height should be the sum of its children’s heights:
class BlockLayout:
    def layout(self):
        # ...
        if mode == "block":
            self.height = sum([
                child.height for child in self.children])
However, a BlockLayout that contains text doesn’t have
children; instead, it needs to be tall enough to contain all its text,
which we can conveniently read off from cursor_y:Since the height is just equal
to cursor_y, why not rename cursor_y to
height instead? You could, it would work fine, but I would
rather not. As you can see from, say, the y computation,
the height field is a public field, read by other layout
objects to compute their positions. As such, I’d rather make sure it
always has the right value, whereas cursor_y
changes as we lay out a paragraph of text and therefore sometimes has
the “wrong” value. Keeping these two fields separate avoids a whole
class of nasty bugs where the height field is read “too
soon” and therefore gets the wrong value.
class BlockLayout:
    def layout(self):
        # ...
        else:
            self.height = self.cursor_y
These rules seem simple enough, but there’s a subtlety here I have to
explain. Consider the x position. To compute a block’s
x position, the x position of its parent block
must already have been computed. So a block’s x
must therefore be computed before its children’s x. That
means the x computation has to go before the
recursive layout call.
On the other hand, an element’s height field depends on
its children’s heights. So while x must be computed
before the recursive call, height has to be
computed after. Similarly, since the y position of
a block depends on its previous sibling’s y position, the
recursive layout calls have to start at the first sibling
and iterate through the list forward.
That is, the layout method should perform its steps in
this order (see Figure 2):
- When
layoutis called, it first computes thewidth,x, andyfields, reading from theparentandpreviouslayout objects. - Next, it creates a child layout object for each child element.
- Then, the child layout nodes are recursively laid out by calling
their
layoutmethods. - Finally,
layoutcomputes theheightfield, reading from the child layout objects.
You can see these steps in action in this widget:
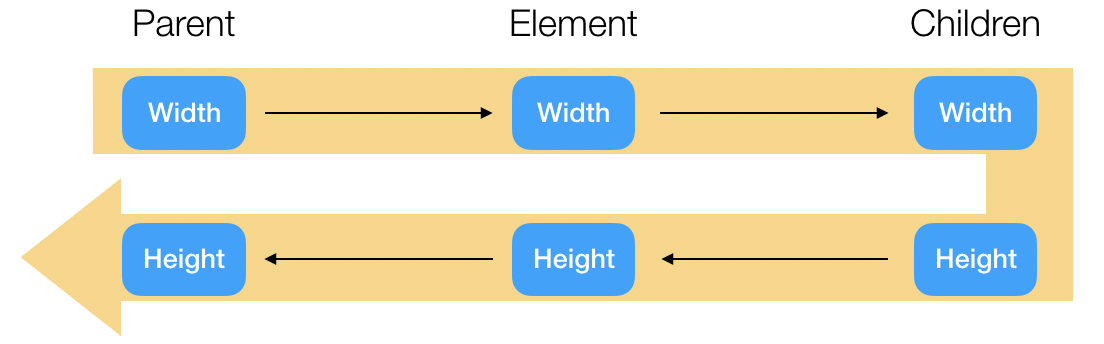
This kind of dependency reasoning is crucial to layout and more broadly to any kind of computation on trees. If you get the order of operations wrong, some layout object will try to read a value that hasn’t been computed yet, and the browser will have a bug. We’ll come back to this issue of dependencies in Chapter 16, where it will become even more important.
DocumentLayout needs some layout code too, though since
the document always starts in the same place it’s pretty simple:
class DocumentLayout:
    def layout(self):
        # ...
        self.width = WIDTH - 2*HSTEP
        self.x = HSTEP
        self.y = VSTEP
        child.layout()
        self.height = child.height
Note that there’s some padding around the contents—HSTEP
on the left and right, and VSTEP above and below. That’s so
the text won’t run into the very edge of the window and get cut off.
Anyway, with all of the sizes and positions now computed correctly, our browser should display all of the text on the page in the right places.
Formally, computations on a tree like this can be described by an attribute grammar. Attribute grammar engines analyze dependencies between different attributes to determine the right order to traverse the tree and calculate each attribute.
Recursive Painting
Our layout method is now doing quite a bit of work:
computing sizes and positions; creating child layout objects;
recursively laying out those child layout objects; and aggregating the
display lists so the text can be drawn to the screen. This is a bit
messy, so let’s take a moment to extract just one part of this, the
display list part. Along the way, we can stop copying the display list
contents over and over again as we go up the layout tree.
I think it’s most convenient to do that by adding a
paint function to each layout object, whose return value is
the display list entries for that object. Then there is a separate
function, paint_tree, that recursively calls
paint on all layout objects:
def paint_tree(layout_object, display_list):
    display_list.extend(layout_object.paint())

    for child in layout_object.children:
        paint_tree(child, display_list)
For DocumentLayout, there is nothing to paint:
class DocumentLayout:
    def paint(self):
        return []
You can now delete the line that computes a
DocumentLayout’s display_list field.
For a BlockLayout object, we need to copy over the
display_list field that it computes during
recurse and flush:And again, delete the line
that computes a BlockLayout’s display_list
field by copying from child layout objects.
class BlockLayout:
    def paint(self):
        return self.display_list
Now the browser can use paint_tree to collect its own
display_list variable:
class Browser:
    def load(self, url):
        # ...
        self.display_list = []
        paint_tree(self.document, self.display_list)
        self.draw()
Check it out: our browser is now using fancy tree-based layout! I recommend pausing to test and debug. Tree-based layout is powerful but complex, and we’re about to add more features. Stable foundations make for comfortable houses.
Layout trees are common in graphical user interface (GUI) frameworks, but there are other ways to structure layout, such as constraint-based layout. TeX’s boxes and glue and iOS’s auto-layout are two examples of this alternative paradigm.
Backgrounds
Browsers use the layout tree a lot,For example, in Chapter 7, we’ll use the size and position of each link to figure out which one the user clicked on. and one simple and visually compelling use case is drawing backgrounds.
Backgrounds are rectangles, so our first task is putting rectangles in the display list. Right now, the display list is a list of words to draw to the screen, but we can conceptualize it instead as a list of commands, of which there is currently only one type. We now want two types of commands:
class DrawText:
    def __init__(self, x1, y1, text, font):
        self.top = y1
        self.left = x1
        self.text = text
        self.font = font

class DrawRect:
    def __init__(self, x1, y1, x2, y2, color):
        self.top = y1
        self.left = x1
        self.bottom = y2
        self.right = x2
        self.color = color
Now BlockLayout must add DrawText objects
for each word it wants to draw, but only in inline mode:Why not change the
display_list field inside a BlockLayout to
contain DrawText commands directly? I suppose you could,
but I think it’s cleaner to create all of the draw commands in
paint.
class BlockLayout:
    def paint(self):
        cmds = []
        if self.layout_mode() == "inline":
            for x, y, word, font in self.display_list:
                cmds.append(DrawText(x, y, word, font))
        return cmds
But it can also add a DrawRect command to draw a
background. Let’s add a gray background to pre tags (which
are used for code examples):
class BlockLayout:
    def paint(self):
        # ...
        if isinstance(self.node, Element) and self.node.tag == "pre":
            x2, y2 = self.x + self.width, self.y + self.height
            rect = DrawRect(self.x, self.y, x2, y2, "gray")
            cmds.append(rect)
        # ...
Make sure this code comes before the loop that adds
DrawText objects: the background has to be drawn
below that text. Note also that paint_tree calls
paint before recursing into the subtree, so the subtree
also paints on top of this background, as desired.
With the display list filled out, we need to draw each graphics
command. Let’s add an execute method for this. On
DrawText it calls create_text:
class DrawText:
    def execute(self, scroll, canvas):
        canvas.create_text(
            self.left, self.top - scroll,
            text=self.text,
            font=self.font,
            anchor='nw')
Note that execute takes the scroll amount as a
parameter; this way, each graphics command does the relevant coordinate
conversion itself. DrawRect does the same with
create_rectangle:
class DrawRect:
    def execute(self, scroll, canvas):
        canvas.create_rectangle(
            self.left, self.top - scroll,
            self.right, self.bottom - scroll,
            width=0,
            fill=self.color)
By default, create_rectangle draws a one-pixel black
border, which we don’t want for backgrounds, so make sure to pass
width=0.
We still want to skip offscreen graphics commands, so let’s add a
bottom field to DrawText so we know when to
skip those:
def __init__(self, x1, y1, text, font):
    # ...
    self.bottom = y1 + font.metrics("linespace")
The browser’s draw method now just uses top
and bottom to decide which commands to
execute:
class Browser:
    def draw(self):
        self.canvas.delete("all")
        for cmd in self.display_list:
            if cmd.top > self.scroll + HEIGHT: continue
            if cmd.bottom < self.scroll: continue
            cmd.execute(self.scroll, self.canvas)
Try your browser on a page—maybe this chapter’s—with code snippets on it. You should see each code snippet set off with a gray background.
Here’s one more cute benefit of tree-based layout: we now record the height of the whole page. The browser can use that to avoid scrolling past the bottom:
def scrolldown(self, e):
    max_y = max(self.document.height + 2*VSTEP - HEIGHT, 0)
    self.scroll = min(self.scroll + SCROLL_STEP, max_y)
    self.draw()
Note the 2*VSTEP, to account for a VSTEP of
whitespace at the top and bottom of the page. With layout the browser.engineering homepage now
looks a bit better—see Figure 3.
So those are the basics of tree-based layout! In fact, as we’ll see in the next two chapters, this is just one part of the layout tree’s central role in the browser. But before we get to that, we need to add some styling capabilities to our browser.

The draft CSS Painting API allows pages to extend the display list with new types of commands, implemented in JavaScript. This makes it possible to use CSS for styling with visually complex styling provided by a library.
Summary
This chapter was a dramatic rewrite of our browser’s layout engine, so:
- layout is now tree-based and produces a layout tree;
- each node in the tree has one of two different layout modes;
- layout computes a size and position for each layout object;
- the display list now contains generic commands;
- source code snippets now have backgrounds.
Tree-based layout makes it possible to dramatically expand our browser’s styling capabilities. We’ll work on that in the next chapter.
Outline
The complete set of functions, classes, and methods in our browser should look something like this:
class URL:
    def __init__(url)

    def request()
class Text:
    def __init__(text, parent)

    def __repr__()
class Element:
    def __init__(tag, attributes, parent)

    def __repr__()
def print_tree(node, indent)
class HTMLParser:
    SELF_CLOSING_TAGS

    HEAD_TAGS

    def __init__(body)

    def parse()

    def get_attributes(text)

    def add_text(text)

    def add_tag(tag)

    def implicit_tags(tag)

    def finish()
FONTS
def get_font(size, weight, style)
WIDTH, HEIGHT
HSTEP, VSTEP
BLOCK_ELEMENTS
class DocumentLayout:
    def __init__(node)

    def layout()

    def paint()
class BlockLayout:
    def __init__(node, parent, previous)

    def layout_mode()

    def layout()

    def recurse(tree)

    def open_tag(tag)

    def close_tag(tag)

    def flush()

    def word(word)

    def paint()
class DrawText:
    def __init__(x1, y1, text, font)

    def execute(scroll, canvas)
class DrawRect:
    def __init__(x1, y1, x2, y2, color)

    def execute(scroll, canvas)
def paint_tree(layout_object, display_list)
SCROLL_STEP
class Browser:
    def __init__()

    def draw()

    def load(url)

    def scrolldown(e)
Exercises
5-1 Links bar. At the top and bottom of the web version of
each chapter of this book there is a gray bar naming the chapter and
offering back and forward links. It is enclosed in a
<nav class="links"> tag. Have your browser give this
links bar the light gray background a real browser would.
5-2 Hidden head. There’s a good chance your browser is still
showing scripts, styles, and page titles at the top of every page you
visit. Make it so that the <head> element and its
contents are never displayed. Those elements should still be in the HTML
tree, but not in the layout tree.
5-3 Bullets. Add bullets to list items, which in HTML are
<li> tags. You can make them little squares, located
to the left of the list item itself. Also indent <li>
elements so the text inside the element is to the right of the bullet
point.
5-4 Table of contents. The web version of this book has a
table of contents at the top of each chapter, enclosed in a
<nav id="toc"> tag, which contains a list of links.
Add the text “Table of Contents”, with a gray background, above that
list. Don’t modify the lexer or parser.
5-5 Anonymous block boxes. Sometimes, an element has a mix of text-like and container-like children. For example, in this HTML,
<div><i>Hello, </i><b>world!</b><p>So it began...</p></div>the <div> element has three children: the
<i>, <b>, and
<p> elements. The first two are text-like; the last
is container-like. This is supposed to look like two paragraphs, one for
the <i> and <b> and the second for
the <p>. Make your browser do that. Specifically,
modify BlockLayout so it can be passed a sequence of
sibling nodes, instead of a single node. Then, modify the algorithm that
constructs the layout tree so that any sequence of text-like elements
gets made into a single BlockLayout.
5-6 Run-ins. A “run-in heading” is a heading that is drawn
as part of the next paragraph’s text.The exercise names in this section could be considered
run-in headings. But since browser support for the
display: run-in property is poor, this book actually
doesn’t use it; the headings are actually embedded in the next
paragraph. Modify your browser to render
<h6> elements as run-in headings. You’ll need to
implement the previous exercise on anonymous block boxes, and then add a
special case for <h6> elements.
Applying Author Styles
In the previous chapter we gave each
pre element a gray background. It looks OK, and it
is good to have defaults, but sites want a say in how they
look. Websites do that with Cascading Style Sheets (CSS), which
allow web authors (and, as we’ll see, browser developers) to define how
a web page ought to look.
Parsing with Functions
One way a web page can change its appearance is with the
style attribute. For example, this changes an element’s
background color:
<div style="background-color:lightblue">Blue background</div>And it renders like this:
More generally, a style attribute contains
property–value pairs separated by semicolons. The browser looks at those
CSS property–value pairs to determine how an element looks, for example
to determine its background color.
To add this to our browser, we’ll need to start by parsing these
property–value pairs. I’ll use recursive parsing functions,
which are a good way to build a complex parser step by step. The idea is
that each parsing function advances through the text being parsed and
returns the data it parsed. We’ll have different functions for different
types of data, and organize them in a CSSParser class that
stores the text being parsed and the parser’s current position in
it:
class CSSParser:
    def __init__(self, s):
        self.s = s
        self.i = 0
Let’s start small and build up. A parsing function for whitespace
increments the index i past every whitespace character:
def whitespace(self):
    while self.i < len(self.s) and self.s[self.i].isspace():
        self.i += 1
Whitespace is meaningless, so there’s no parsed data to return. But when we parse property names, we’ll want to return them:
def word(self):
    start = self.i
    while self.i < len(self.s):
        if self.s[self.i].isalnum() or self.s[self.i] in "#-.%":
            self.i += 1
        else:
            break
    if not (self.i > start):
        raise Exception("Parsing error")
    return self.s[start:self.i]
This function increments i through any word
characters,I’ve chosen
the set of word characters here to cover property names (which use
letters and the dash), numbers (which use the minus sign, numbers,
periods), units (the percent sign), and colors (which use the hash
sign). Real CSS values have a more complex syntax but this is enough for
our browser. much like whitespace. But to
return the parsed data, it stores where it started and extracts the
substring it moved through.
Parsing functions can fail. The word function we just
wrote raises an exception if i hasn’t advanced through at
least one character—otherwise it didn’t point at a word to begin
with.You can add error
text to the exception-raising code, too; I recommend doing that to help
you debug problems. Likewise, to check for a literal colon
(or some other punctuation character) you’d do this:
def literal(self, literal):
    if not (self.i < len(self.s) and self.s[self.i] == literal):
        raise Exception("Parsing error")
    self.i += 1
The great thing about parsing functions is that they can build on one
another. For example, property–value pairs are a property, a colon, and
a value,In reality,
properties and values have different syntaxes, so using
word for both isn’t quite right, but for our browser’s
limited CSS implementation this simplification will do.
with whitespace in between:
def pair(self):
    prop = self.word()
    self.whitespace()
    self.literal(":")
    self.whitespace()
    val = self.word()
    return prop.casefold(), val
We can parse sequences by calling parsing functions in a loop. For
example, style attributes are a sequence of property–value
pairs:
def body(self):
    pairs = {}
    while self.i < len(self.s):
        prop, val = self.pair()
        pairs[prop.casefold()] = val
        self.whitespace()
        self.literal(";")
        self.whitespace()
    return pairs
Now, in a browser, we always have to think about handling errors. Sometimes a web page author makes a mistake; sometimes our browser doesn’t support a feature some other browser does. So we should skip property–value pairs that don’t parse, but keep the ones that do.
We can skip things with this little function; it stops at any one of
a set of characters and returns that character (or None if
it was stopped by the end of the file):
def ignore_until(self, chars):
    while self.i < len(self.s):
        if self.s[self.i] in chars:
            return self.s[self.i]
        else:
            self.i += 1
    return None
When we fail to parse a property–value pair, we skip either to the next semicolon or to the end of the string:
def body(self):
    # ...
    while self.i < len(self.s):
        try:
            # ...
        except Exception:
            why = self.ignore_until([";"])
            if why == ";":
                self.literal(";")
                self.whitespace()
            else:
                break
    # ...
Skipping parse errors is a double-edged sword. It hides error
messages, making it harder for authors to debug their style sheets; it
also makes it harder to debug your parser.I suggest removing the
try block when debugging. So in most
programming situations this “catch-all” error handling is a code
smell.
But “catch-all” error handling has an unusual benefit on the web. The
web is an ecosystem of many browsers,And an ecosystem of many browser versions, some of which
haven’t been written yet—but need to be supported as best we
can. which (for example) support different kinds of
property values.Our
browser does not support parentheses in property values, for example,
which real browsers use for things like the calc and
url functions. CSS that parses in one browser
might not parse in another. With silent parse errors, browsers just
ignore stuff they don’t understand, and web pages mostly work in all of
them. The principle (variously called “Postel’s Law”,After a line in the
specification of TCP, written by Jon Postel. the “Digital
Principle”,After a
similar idea in circuit design, where transistors must be non-linear to
reduce analog noise. or the “Robustness Principle”) is:
produce maximally conformant output but accept even minimally conformant
input.
This parsing method is formally called recursive descent parsing for an LL(1) language. Parsers that use this method can be really, really fast, at least if you put a lot of work into it. In a browser, faster parsing means pages load faster.
The style Attribute
Now that the style attribute is parsed, we can use that
parsed information in the rest of the browser. Let’s do that inside a
style function, which saves the parsed style
attribute in the node’s style field:
def style(node):
    node.style = {}
    if isinstance(node, Element) and "style" in node.attributes:
        pairs = CSSParser(node.attributes["style"]).body()
        for property, value in pairs.items():
            node.style[property] = value
The method can recurse through the HTML tree to make sure each element gets a style:
def style(node):
    # ...
    for child in node.children:
        style(child)
Call style in the browser’s load method,
after parsing the HTML but before doing layout. With the
style information stored on each element, the browser can
consult it for styling information during paint:
class BlockLayout:
    def paint(self):
        # ...
        bgcolor = self.node.style.get("background-color",
                                      "transparent")
        if bgcolor != "transparent":
            x2, y2 = self.x + self.width, self.y + self.height
            rect = DrawRect(self.x, self.y, x2, y2, bgcolor)
            cmds.append(rect)
        # ...
I’ve removed the default gray background from pre
elements for now, but we’ll put it back soon.
Open the web version of this chapter up in your browser to test your code: the code block at the start of the chapter should now have a light blue background.
So this is one way web pages can change their appearance. And in the
early days of the web,I’m talking Netscape 3. The late 1990s.
something like this was the only way. But honestly, it’s a
pain—you need to set a style attribute on each element, and
if you redesign the page, that’s a lot of attributes to edit. CSS was
invented to improve on this state of affairs:
- One CSS file can consistently style many web pages at once.
- One line of CSS can consistently style many elements at once.
- CSS is future-proof and supports browsers with different features.
To achieve these goals, CSS extends the style attribute
with two related ideas: selectors and cascading.
Selectors describe which HTML elements a list of property–value pairs
apply to.CSS rules can
also be guarded by “media queries”, which say that a rule should apply
only in certain browsing environments (like only on mobile or only in
landscape mode). Media queries are super-important for building sites
that work across many devices, like reading this book on a phone. We’ll
meet them in Chapter 14.
The combination of the two is called a rule, as shown in Figure
1.
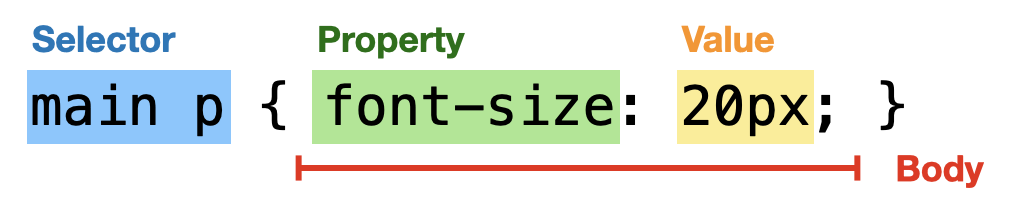
Let’s add support for CSS to our browser. We’ll need to parse CSS
files into selectors and property–value pairs, figure out which elements
on the page match each selector, and copy those property values to the
elements’ style fields.
Actually, before CSS, you’d style pages with custom
presentational tags like font
and center
(not to mention the <b> and <i>
tags that we’ve already seen). This was easy to implement but made it
hard to keep pages consistent. There were also properties on
<body> like text
and vlink that could consistently set text colors,
mainly for links.
Selectors
Selectors come in lots of types, but in our browser we’ll support
two: tag selectors (p selects all <p>
elements, ul selects all <ul> elements)
and descendant selectors (article div selects all
div elements with an article ancestor).The descendant selector
associates to the left; in other words, a b c means a
<c> that descends from a <b> that
descends from an <a>, which maybe you’d write
(a b) c if CSS had parentheses.
We’ll have a class for each type of selector to store the selector’s contents, like the tag name for a tag selector:
class TagSelector:
    def __init__(self, tag):
        self.tag = tag
Each selector class will also test whether the selector matches an element:
class TagSelector:
    def matches(self, node):
        return isinstance(node, Element) and self.tag == node.tag
A descendant selector works similarly. It has two parts, which are both themselves selectors:
class DescendantSelector:
    def __init__(self, ancestor, descendant):
        self.ancestor = ancestor
        self.descendant = descendant
Then the matches method is recursive:
class DescendantSelector:
    def matches(self, node):
        if not self.descendant.matches(node): return False
        while node.parent:
            if self.ancestor.matches(node.parent): return True
            node = node.parent
        return False
Now, to create these selector objects, we need a parser. In this
case, that’s just another parsing function:Once again, using
word here for tag names is actually not quite right, but
it’s close enough. One side effect of using word is that a
class name selector (like .main) or an identifier selector
(like #signup) is mis-parsed as a tag name selector. But,
luckily, that won’t cause any harm since there aren’t any elements with
those tags.
class CSSParser:
    def selector(self):
        out = TagSelector(self.word().casefold())
        self.whitespace()
        while self.i < len(self.s) and self.s[self.i] != "{":
            tag = self.word()
            descendant = TagSelector(tag.casefold())
            out = DescendantSelector(out, descendant)
            self.whitespace()
        return out
A CSS file is just a sequence of selectors and blocks:
def parse(self):
    rules = []
    while self.i < len(self.s):
        self.whitespace()
        selector = self.selector()
        self.literal("{")
        self.whitespace()
        body = self.body()
        self.literal("}")
        rules.append((selector, body))
    return rules
Once again, let’s pause to think about error handling. First, when we
call body while parsing CSS, we need it to stop when it
reaches a closing brace:
def body(self):
    # ...
    while self.i < len(self.s) and self.s[self.i] != "}":
        try:
            # ...
        except Exception:
            why = self.ignore_until([";", "}"])
            if why == ";":
                self.literal(";")
                self.whitespace()
            else:
                break
    # ...
Second, there might also be a parse error while parsing a selector. In that case, we want to skip the whole rule:
def parse(self):
    # ...
    while self.i < len(self.s):
        try:
            # ...
        except Exception:
            why = self.ignore_until(["}"])
            if why == "}":
                self.literal("}")
                self.whitespace()
            else:
                break
    # ...
Error handling is hard to get right, so make sure to test your parser, just like the HTML parser in Chapter 4. Here are some errors you might run into:
If the output is missing some rules or properties, it’s probably a bug being hidden by error handling. Remove some
tryblocks and see if the error in question can be fixed.If you’re seeing extra rules or properties that are mangled versions of the correct ones, you probably forgot to update
isomewhere.If you’re seeing an infinite loop, check whether the error-handling code always increases
i. Each parsing function (exceptwhitespace) should always incrementi.
You can also add a print statement to the start and
endIf you print an open
parenthesis at the start of the function and a close parenthesis at the
end, you can use your editor’s “jump to other parenthesis” feature to
skip through output quickly. of each parsing function with
the name of the parsing function,If you also add the right number of spaces to each line
it’ll be a lot easier to read. Don’t neglect debugging niceties like
this! the index i,It can be especially helpful
to print, say, the 20 characters around index i from the
string. and the parsed data. It’s a lot of output, but
it’s a sure-fire way to find really complicated bugs.
A parser receives arbitrary bytes as input, so parser bugs are usually easy for bad actors to exploit. Parser correctness is thus crucial to browser security, as many parser bugs have demonstrated. Nowadays browser developers use fuzzing to try to find and fix such bugs.
Applying Style Sheets
With the parser debugged, the next step is applying the parsed style sheet to the web page. Since each CSS rule can style many elements on the page, this will require looping over all elements and all rules. When a rule applies, its property–value pairs are copied to the element’s style information:
def style(node, rules):
    # ...
    for selector, body in rules:
        if not selector.matches(node): continue
        for property, value in body.items():
            node.style[property] = value
    # ...
Make sure to put this loop before the one that parses the
style attribute: the style attribute should
override style sheet values.
To try this out, we’ll need a style sheet. Every browser ships with a browser style sheet,Technically called a “user agent” style sheet. User agent, like the Memex. which defines its default styling for the various HTML elements. For our browser, it might look like this:
pre { background-color: gray; }Let’s store that in a new file, browser.css, and have
our browser read it when it starts:
DEFAULT_STYLE_SHEET = CSSParser(open("browser.css").read()).parse()Now, when the browser loads a web page, it can apply that default style sheet to set up its default styling for each element:
def load(self, url):
    # ...
    rules = DEFAULT_STYLE_SHEET.copy()
    style(self.nodes, rules)
    # ...
The browser style sheet is the default for the whole web. But each
web site can also use CSS to set a consistent style for the whole site
by referencing CSS files using link elements:
<link rel="stylesheet" href="/main.css">The mandatory rel attribute identifies this link as a
style sheetFor browsers,
stylesheet is the most important kind
of link, but there’s also preload for loading assets
that a page will use later and icon for identifying
favicons. Search engines also use these links; for example,
rel=canonical names the “true name” of a page and search
engines use it to track pages that appear at multiple
URLs. and the href attribute has the style
sheet URL. We need to find all these links, download their style sheets,
and apply them, as in Figure 2.
Since we’ll be doing similar tasks in the next few chapters, let’s generalize a bit and write a recursive function that turns a tree into a list of nodes:
def tree_to_list(tree, list):
    list.append(tree)
    for child in tree.children:
        tree_to_list(child, list)
    return list
I’ve written this helper to work on both HTML and layout trees, for
later. We can use tree_to_list with a Python list
comprehension to grab the URL of each linked style sheet:It’s kind of crazy, honestly,
that Python lets you write things like this—crazy, but very
convenient!
def load(self, url):
    # ...
    links = [node.attributes["href"]
             for node in tree_to_list(self.nodes, [])
             if isinstance(node, Element)
             and node.tag == "link"
             and node.attributes.get("rel") == "stylesheet"
             and "href" in node.attributes]
    # ...
Now, these style sheet URLs are usually not full URLs; they are something called relative URLs, which can be:There are other flavors, including query-relative, that I’m skipping.
- a normal URL, which specifies a scheme, host, path, and so on;
- a host-relative URL, which starts with a slash but reuses the existing scheme and host;
- a path-relative URL, which doesn’t start with a slash and is resolved like a file name would be;
- a scheme-relative URL that starts with “
//” followed by a full URL, which should use the existing scheme.
To download the style sheets, we’ll need to convert each relative URL into a full URL:
class URL:
def resolve(self, url):
if "://" in url: return URL(url)
if not url.startswith("/"):
dir, _ = self.path.rsplit("/", 1)
url = dir + "/" + url
if url.startswith("//"):
return URL(self.scheme + ":" + url)
else:
return URL(self.scheme + "://" + self.host + \
":" + str(self.port) + url)Also, because of the early web architecture, browsers are responsible
for resolving parent directories (..) in relative URLs:
class URL:
def resolve(self, url):
if not url.startswith("/"):
dir, _ = self.path.rsplit("/", 1)
while url.startswith("../"):
_, url = url.split("/", 1)
if "/" in dir:
dir, _ = dir.rsplit("/", 1)
url = dir + "/" + urlNow the browser can request each linked style sheet and add its rules
to the rules list:
def load(self, url):
# ...
for link in links:
style_url = url.resolve(link)
try:
body = style_url.request()
except:
continue
rules.extend(CSSParser(body).parse())The try/except ignores style sheets that
fail to download, but it can also hide bugs in your code, so if
something’s not right try removing it temporarily.
Each browser engine has its own browser style sheet (Chromium, WebKit, Gecko). Reset style sheets are often used to overcome any differences. This works because web page style sheets take precedence over the browser style sheet, just like in our browser, though real browsers fiddle with priorities to make that happen.Our browser style sheet only has tag selectors in it, so just putting them first works well enough. But if the browser style sheet had any descendant selectors, we’d encounter bugs.
Cascading
A web page can now have any number of style sheets applied to it. And since two rules can apply to the same element, rule order matters: it determines which rules take priority, and when one rule overrides another.
In CSS, the correct order is called cascade order, and it is based on the rule’s selector, with file order as a tie breaker. This system allows more specific rules to override more general ones, so that you can have a browser style sheet, a site-wide style sheet, and maybe a special style sheet for a specific web page, all co-existing.
Since our browser only has tag selectors, cascade order just counts them:
class TagSelector:
def __init__(self, tag):
# ...
self.priority = 1
class DescendantSelector:
def __init__(self, ancestor, descendant):
# ...
self.priority = ancestor.priority + descendant.priorityThen cascade order for rules is just those priorities:
def cascade_priority(rule):
selector, body = rule
return selector.priorityNow when we call style, we need to sort the rules, like
this:
def load(self, url):
# ...
style(self.nodes, sorted(rules, key=cascade_priority))
# ...Note that before sorting rules, it is in file order.
Python’s sorted function keeps the relative order of things
with equal priority, so file order acts as a tie breaker, as it
should.
That’s it: we’ve added CSS to our web browser! I mean—for background
colors. But there’s more to web design than that. For example, if you’re
changing background colors you might want to change foreground colors as
well—the CSS color property. But there’s a catch:
color affects text, and there’s no way to select a text
node. How can that work?
Web pages can also supply alternative style sheets, and some browsers provide (obscure) methods to switch from the default to an alternate style sheet. The CSS standard also allows for user styles that set custom style sheets for websites, with a priority between browser and website-provided style sheets.
Inherited styles
The way text styles work in CSS is called inheritance. Inheritance means that if some node doesn’t have a value for a certain property, it uses its parent’s value instead. That includes text nodes. Some properties are inherited and some aren’t; it depends on the property. Background color isn’t inherited, but text color and other font properties are.
Let’s implement inheritance for four font properties:
font-size, font-style (for
italic), font-weight (for bold),
and color:
INHERITED_PROPERTIES = {
"font-size": "16px",
"font-style": "normal",
"font-weight": "normal",
"color": "black",
}The values in this dictionary are each property’s defaults. We’ll
then add the actual inheritance code to the style function.
It has to come before the other loops, since explicit rules
should override inheritance:
def style(node, rules):
# ...
for property, default_value in INHERITED_PROPERTIES.items():
if node.parent:
node.style[property] = node.parent.style[property]
else:
node.style[property] = default_value
# ...Inheriting font size comes with a twist. Web pages can use
percentages as font sizes: h1 { font-size: 150% } makes
headings 50% bigger than the surrounding text. But what if you had, say,
a code element inside an h1 tag—would that
inherit the 150% value for font-size? Surely
it shouldn’t be another 50% bigger than the rest of the heading
text?
In fact, browsers resolve font size percentages to absolute pixel
units before those values are inherited; it’s called a “computed
style”.The full CSS
standard is a bit more confusing: there are specified,
computed, used, and actual values, and they affect lots of CSS
properties besides font-size. But we’re not implementing
those other properties in this book.
def style(node, rules):
# ...
if node.style["font-size"].endswith("%"):
# ...
for child in node.children:
style(child, rules)Resolving percentage sizes has just one tricky edge case: percentage
sizes for the root html element. In that case the
percentage is relative to the default font size:This code has to parse and
unparse font sizes because our style field stores strings;
in a real browser the computed style is stored parsed so this doesn’t
have to happen.
def style(node, rules):
# ...
if node.style["font-size"].endswith("%"):
if node.parent:
parent_font_size = node.parent.style["font-size"]
else:
parent_font_size = INHERITED_PROPERTIES["font-size"]
node_pct = float(node.style["font-size"][:-1]) / 100
parent_px = float(parent_font_size[:-2])
node.style["font-size"] = str(node_pct * parent_px) + "px"Note that this happens after all of the different sources of style
values are handled (so we are working with the final
font-size value) but before we recurse (so any children can
assume that their parent’s font-size has been resolved to a
pixel value).
Styling a page can be slow, so real browsers apply tricks like bloom filters for descendant selectors, indices for simple selectors, and various forms of sharing and parallelism. Some types of sharing are also important to reduce memory usage—computed style sheets can be huge!
Font Properties
So now with all these font properties implemented, let’s change layout to use them! That will let us move our default text styles to the browser style sheet:
a { color: blue; }
i { font-style: italic; }
b { font-weight: bold; }
small { font-size: 90%; }
big { font-size: 110%; }The browser looks up font information in BlockLayout’s
word method; we’ll need to change it to use the node’s
style field, and for that, we’ll need to pass in the node
itself:
class BlockLayout:
def recurse(self, node):
if isinstance(node, Text):
for word in node.text.split():
self.word(node, word)
else:
# ...
def word(self, node, word):
weight = node.style["font-weight"]
style = node.style["font-style"]
if style == "normal": style = "roman"
size = int(float(node.style["font-size"][:-2]) * .75)
font = get_font(size, weight, style)
# ...Note that for font-style we need to translate CSS
“normal” to Tk “roman” and for font-size we need to convert
CSS pixels to Tk points.
Text color requires a bit more plumbing. First, we have to read the
color and store it in the current line:
def word(self, node, word):
color = node.style["color"]
# ...
self.line.append((self.cursor_x, word, font, color))
# ...The flush method then copies it from line
to display_list:
def flush(self):
# ...
metrics = [font.metrics() for x, word, font, color in self.line]
# ...
for rel_x, word, font, color in self.line:
# ...
self.display_list.append((x, y, word, font, color))
# ...That display_list is converted to drawing commands in
paint:
def paint(self):
# ...
if self.layout_mode() == "inline":
for x, y, word, font, color in self.display_list:
cmds.append(DrawText(x, y, word, font, color))DrawText now needs a color argument, and
needs to pass it to create_text’s fill
parameter:
class DrawText:
def __init__(self, x1, y1, text, font, color):
# ...
self.color = color
def execute(self, scroll, canvas):
canvas.create_text(
# ...
fill=self.color)Phew! That was a lot of coordinated changes, so test everything and
make sure it works. You should now see links on the web version of this
chapter appear in blue—and you might also notice that the rest of
the text has become slightly lighter.The main body text on the web is colored #333,
or roughly 97% black after gamma
correction. Also, now that we’re explicitly setting
the text color, we should explicitly set the background color as
well:My Linux machine
sets the default background color to a light gray, while my macOS laptop
has a “Dark Mode” where the default background color becomes a dark
gray. Setting the background color explicitly avoids the browser looking
strange in these situations.
class Browser:
def __init__(self):
# ...
self.canvas = tkinter.Canvas(
# ...
bg="white",
)
# ...These changes obsolete all the code in BlockLayout that
handles specific tags, like the style, weight,
and size properties and the open_tag and
close_tag methods. Let’s refactor a bit to get rid of
them:
class BlockLayout:
def recurse(self, node):
if isinstance(node, Text):
for word in node.text.split():
self.word(node, word)
else:
if node.tag == "br":
self.flush()
for child in node.children:
self.recurse(child)Styling not only lets web page authors style their own web pages; it also moves browser code to a simple style sheet. And that’s a big improvement: the style sheet is simpler and easier to edit. Sometimes converting code to data like this means maintaining a new format, but browsers get to reuse a format, CSS, they need to support anyway.
But of course styling also has the nice benefit of nicely rendering this book’s homepage (Figure 3). Notice how the background is no longer gray, and the links have colors.

Usually a point is 1/72 of an inch while pixel size depends on the screen, but CSS instead defines an inch as 96 pixels, because that was once a common screen resolution. And these CSS pixels need not be physical pixels! Seem weird? This complexity is the result of changes in browsers (zooming) and hardware (high-DPIDots per inch. screens) plus the need to be compatible with older web pages meant for the time when all screens had 96 pixels per inch.
Summary
This chapter implemented a rudimentary but complete styling engine, including downloading, parsing, matching, sorting, and applying CSS files. That means we:
- wrote a CSS parser;
- added support for both
styleattributes andlinked CSS files; - implemented cascading and inheritance;
- refactored
BlockLayoutto move the font properties to CSS; - moved most tag-specific reasoning to a browser style sheet.
Our styling engine is also relatively easy to extend with properties and selectors.
Outline
The complete set of functions, classes, and methods in our browser should now look something like this:
class URL:
def __init__(url)
def request()
def resolve(url)
class Text:
def __init__(text, parent)
def __repr__()
class Element:
def __init__(tag, attributes, parent)
def __repr__()
def print_tree(node, indent)
def tree_to_list(tree, list)
class HTMLParser:
SELF_CLOSING_TAGS
HEAD_TAGS
def __init__(body)
def parse()
def get_attributes(text)
def add_text(text)
def add_tag(tag)
def implicit_tags(tag)
def finish()
class CSSParser:
def __init__(s)
def whitespace()
def literal(literal)
def word()
def ignore_until(chars)
def pair()
def selector()
def body()
def parse()
class TagSelector:
def __init__(tag)
def matches(node)
class DescendantSelector:
def __init__(ancestor, descendant)
def matches(node)
FONTS
def get_font(size, weight, style)
DEFAULT_STYLE_SHEET
INHERITED_PROPERTIES
def style(node, rules)
def cascade_priority(rule)
WIDTH, HEIGHT
HSTEP, VSTEP
BLOCK_ELEMENTS
class DocumentLayout:
def __init__(node)
def layout()
def paint()
class BlockLayout:
def __init__(node, parent, previous)
def layout_mode()
def layout()
def recurse(node)
def flush()
def word(node, word)
def paint()
class DrawText:
def __init__(x1, y1, text, font, color)
def execute(scroll, canvas)
class DrawRect:
def __init__(x1, y1, x2, y2, color)
def execute(scroll, canvas)
def paint_tree(layout_object, display_list)
SCROLL_STEP
class Browser:
def __init__()
def draw()
def load(url)
def scrolldown(e)
Exercises
6-1 Fonts. Implement the font-family property,
an inheritable property that names which font should be used in an
element. Make text inside <code> elements use a nice
monospaced font like Courier. Beware the font cache.
6-2 Width/height. Add support for the width and
height properties to block layout. These can either be a
pixel value, which directly sets the width or height of the layout
object, or the word auto, in which case the existing layout
algorithm is used.
6-3 Class selectors. Any HTML element can have a
class attribute, whose value is a space-separated list of
that element’s classes. A CSS class selector, like .main,
affects all elements with the main class. Implement class
selectors; they should take precedence over tag selectors. If you’ve
implemented them correctly, you should see syntax highlighting for the
code blocks in this book.
6-4 display. Right now, the
layout_mode function relies on a hard-coded list of block
elements. In a real browser, the display property controls
this. Implement display with a default value of
inline, and move the list of block elements to the browser
style sheet.
6-5 Shorthand properties CSS “shorthand properties” set
multiple related CSS properties at the same time; for example,
font: italic bold 100% Times sets the
font-style, font-weight,
font-size, and font-family properties all at
once. Add shorthand properties to your parser. (If you haven’t done
Exercise 6-1, just ignore the font-family.)
6-6 Inline style sheets. The
<link rel=stylesheet> syntax allows importing an
external style sheet (meaning one loaded via its own HTTP request).
There is also a way to provide a style sheet inline, as part of the
HTML, via the <style> tag—everything up to the
following </style> tag is interpreted as a style
sheet.Both inline and
external stylesheet apply in the order of their appearance in the HTML,
though it might be easier to first implement inline style sheets
applying after external ones. Inline style sheets are
useful for creating self-contained example web pages, but more
importantly are a way that websites can load faster by reducing the
number of round-trip network requests to the server. Since style sheets
typically don’t contain left angle brackets, you can implement this
feature without modifying the HTML parser.
6-7 Fast descendant selectors. Right now, matching a
selector like div div div div div can take a long time—it’s
*O(nd)* in the worst case, where n is the length of the
selector and d is the depth of the layout tree. Modify the
descendant-selector matching code to run in *O(n + d)* time. It may help
to have DescendantSelector store a list of base selectors
instead of just two.
6-8 Selector sequences. Sometimes you want to select an
element by tag and class. You do this by concatenating the
selectors without anything in between.Not even whitespace! For example,
span.announce selects elements that match both
span and .announce. Implement a new
SelectorSequence class to represent these and modify the
parser to parse them. Sum priorities.Priorities for SelectorSequences are supposed
to compare the number of ID, class, and tag selectors in lexicographic
order, but summing the priorities of the selectors in the sequence will
work fine as long as no one strings more than ten selectors
together.
6-9 !important. A CSS property–value pair can
be marked “important” using the !important syntax, like
this:
#banner a { color: black !important; }This gives that property–value pair (but not other pairs in the same
block!) a higher priority than any other selector (except for other
!important properties). Parse and implement
!important, giving any property–value pairs marked this way
a priority 10 000 higher than normal property–value pairs.
6-10 :has selectors. The :has
selector is the inverse of a descendant selector—it styles an
ancestor according to the presence of a descendant. Implement
:has selectors. Analyze the asymptotic speed of your
implementation. There is a clever implementation that is *O(1)*
amortized per element—can you find it?In fact, browsers have to do something even
more complex to implement :has
efficiently.
Handling Buttons and Links
Our browser is still missing the key insight of hypertext: documents linked together by hyperlinks. It lets us watch the waves, but not surf the web. So in this chapter, we’ll implement hyperlinks, an address bar, and the rest of the browser interface—the part of the browser that decides which page we are looking at.
Where Are the Links?
The core of the web is the link, so the most important part of the browser interface is clicking on links. But before we can quite get to clicking on links, we first need to answer a more fundamental question: where on the screen are the links? Though paragraphs and headings have their sizes and positions recorded in the layout tree, formatted text (like links) does not. We need to fix that.
The big idea is to introduce two new types of layout objects:
LineLayout and TextLayout. A
BlockLayout will now have a LineLayout child
for each line of text, which itself will contain a
TextLayout for each word in that line. These new classes
can make the layout tree look different from the HTML tree. So to avoid
surprises, let’s look at a simple example:
<html>
<body>
Here is some text that is
<br>
spread across multiple lines
</body>
</html>The text in the body element wraps across two lines
(because of the br element), so the layout tree will have
this structure:
DocumentLayout
BlockLayout[block] (html element)
BlockLayout[inline] (body element)
LineLayout (first line of text)
TextLayout ("Here")
TextLayout ("is")
TextLayout ("some")
TextLayout ("text")
TextLayout ("that")
TextLayout ("is")
LineLayout (second line of text)
TextLayout ("spread")
TextLayout ("across")
TextLayout ("multiple")
TextLayout ("lines")Note how one body element corresponds to a
BlockLayout with two LineLayouts inside, and
how two text nodes turn into a total of ten
TextLayouts!
Let’s get started. Defining LineLayout is
straightforward:
class LineLayout:
def __init__(self, node, parent, previous):
self.node = node
self.parent = parent
self.previous = previous
self.children = []TextLayout is only a little more tricky. A single
TextLayout refers not to a whole HTML node but to a
specific word. That means TextLayout needs an extra
argument to know which word that is:
class TextLayout:
def __init__(self, node, word, parent, previous):
self.node = node
self.word = word
self.children = []
self.parent = parent
self.previous = previousLike the other layout modes, LineLayout and
TextLayout will need their own layout and
paint methods, but before we get to those we need to think
about how the LineLayout and TextLayout
objects will be created. That has to happen during word wrapping.
Recall how word wrapping (see Chapter 3)
inside BlockLayout’s word method works. That
method updates a line field, which stores all the words in
the current line:
self.line.append((self.cursor_x, word, font, color))When it’s time to go to the next line, word calls
flush, which computes the location of the line and each
word in it, and adds all the words to a display_list field,
which stores all the words in the whole inline element. With
TextLayout and LineLayout, a lot of this
complexity goes away. The LineLayout can compute its own
location in its layout method, and instead of a
display_list field, each TextLayout can just
paint itself like normal. So let’s get started on this
refactor.
Let’s start with adding a word to a line. Instead of a
line field, we want to create TextLayout
objects and add them to LineLayout objects. The
LineLayouts are children of the BlockLayout,
so the current line can be found at the end of the children
array:
class BlockLayout:
def word(self, node, word):
line = self.children[-1]
previous_word = line.children[-1] if line.children else None
text = TextLayout(node, word, line, previous_word)
line.children.append(text)Now let’s think about what happens when we reach the end of the line.
The current code calls flush, which does stuff like
positioning text and clearing the line field. We don’t want
to do all that—we just want to create a new LineLayout
object. So let’s use a different method for that:
class BlockLayout:
def word(self, node, word):
# ...
if self.cursor_x + w > self.width:
self.new_line()This new_line method just creates a new line and resets
some fields:
class BlockLayout:
def new_line(self):
self.cursor_x = 0
last_line = self.children[-1] if self.children else None
new_line = LineLayout(self.node, self, last_line)
self.children.append(new_line)Now there are a lot of fields we’re not using. Let’s clean them up.
In the core layout method, we don’t need to initialize the
display_list, cursor_y or line
fields, since we won’t be using any of those any more. Instead, we just
need to call new_line and recurse:
class BlockLayout:
def layout(self):
# ...
else:
self.new_line()
self.recurse(self.node)The layout method already recurses into its children to
lay them out, so that part doesn’t need any change. And moreover, we can
now compute the height of a paragraph of text by summing the height of
its lines, so this part of the code no longer needs to be different
depending on the layout mode:
class BlockLayout:
def layout(self):
# ...
self.height = sum([child.height for child in self.children])You might also be tempted to delete the flush method,
since it’s no longer called from anywhere. But keep it around for just a
moment—we’ll need it to write the layout method for line
and text objects.
The layout objects generated by a text node need not even be consecutive. English containing a Farsi quotation, for example, can flip from left-to-right to right-to-left in the middle of a line. The text layout objects end up in a surprising order. And then there are languages laid out vertically…
Line Layout, Redux
We’re now creating line and text objects, but we still need to lay
them out. Let’s start with lines. Lines stack vertically and take up
their parent’s full width, so computing x and
y and width looks the same as for our other
boxes:You could reduce
the duplication with some helper methods (or even something more
elaborate, like mixin classes), but in a real browser different layout
modes support different kinds of extra features (like text direction or
margins) and the code looks quite different.
class LineLayout:
def layout(self):
self.width = self.parent.width
self.x = self.parent.x
if self.previous:
self.y = self.previous.y + self.previous.height
else:
self.y = self.parent.y
# ...Computing height, though, is different—this is where computing
maximum ascents, maximum descents, and so on comes in. Before we do
that, let’s look at laying out TextLayouts.
To lay out text we need font metrics, so let’s start by getting the
relevant font using the same font-construction code as
BlockLayout:
class TextLayout:
def layout(self):
weight = self.node.style["font-weight"]
style = self.node.style["font-style"]
if style == "normal": style = "roman"
size = int(float(self.node.style["font-size"][:-2]) * .75)
self.font = get_font(size, weight, style)Next, we need to compute the word’s size and x position.
We use the font metrics to compute size, and stack words left to right
to compute position.
class TextLayout:
def layout(self):
# ...
self.width = self.font.measure(self.word)
if self.previous:
space = self.previous.font.measure(" ")
self.x = self.previous.x + space + self.previous.width
else:
self.x = self.parent.x
self.height = self.font.metrics("linespace")There’s no code here to compute the y position, however.
The vertical position of one word depends on the other words in the same
line, so we’ll compute that y position inside
LineLayout’s layout method.The y position
could have been computed in TextLayout’s
layout method—but then that layout method would have to
come after the baseline computation, not before. Yet
font must be computed before the baseline
computation. A real browser might resolve this paradox with multi-phase
layout. There are many considerations and optimizations of this kind
that are needed to make text layout super fast.
That method will pilfer code from the old flush method.
First, let’s lay out each word:
class LineLayout:
def layout(self):
# ...
for word in self.children:
word.layout()Next, we need to compute the line’s baseline based on the maximum
ascent and descent, using basically the same code as the old
flush method:
# ...
max_ascent = max([word.font.metrics("ascent")
for word in self.children])
baseline = self.y + 1.25 * max_ascent
for word in self.children:
word.y = baseline - word.font.metrics("ascent")
max_descent = max([word.font.metrics("descent")
for word in self.children])Note that this code is reading from a font field on each
word and writing to each word’s y field. That means that
inside TextLayout’s layout method we need to
compute x, width, height , and
font, but not y, exactly how we did it.
Finally, since each line is now a standalone layout object, it needs to have a height. We compute it from the maximum ascent and descent:
# ...
self.height = 1.25 * (max_ascent + max_descent)So that’s layout for LineLayout and
TextLayout. All that’s left is painting. For
LineLayout there is nothing to paint:
class LineLayout:
def paint(self):
return []And each TextLayout creates a single
DrawText call:
class TextLayout:
def paint(self):
color = self.node.style["color"]
return [DrawText(self.x, self.y, self.word, self.font, color)]Now we don’t need a display_list field in
BlockLayout, and we can also remove the part of
BlockLayout’s paint that handles it. Instead,
paint_tree can just recurse into its children and paint
them. So by adding LineLayout and TextLayout
we made BlockLayout quite a bit simpler and shared more
code between block and inline layout modes.
So, oof, well, this was quite a bit of refactoring. Take a moment to test everything—it should look exactly identical to how it did before we started this refactor. But while you can’t see it, there’s a crucial difference: each blue link on the page now has an associated layout object and its own size and position.
Actually, text rendering is way more complex than this. Letters can transform and overlap, and the user might want to color certain letters—or parts of letters—a different color. All of this is possible in HTML, and real browsers do implement support for it.
Click Handling
Now that we know where the links are, we can work on clicking them.
In Tk, click handling works just like key press handling: you bind an
event handler to a certain event. For click handling that event is
<Button-1>, button number 1 being the left button on
the mouse.Button 2 is
the middle button; button 3 is the right-hand button.
class Browser:
def __init__(self):
# ...
self.window.bind("<Button-1>", self.click)Inside click, we want to figure out what link the user
has clicked on. Luckily, the event handler is passed an event object,
whose x and y fields refer to where the click
happened:
class Browser:
def click(self, e):
x, y = e.x, e.yNow, here, we have to be careful with coordinate systems. Those x and y coordinates are relative to the browser window. Since the canvas is in the top-left corner of the window, those are also the x and y coordinates relative to the canvas. We want the coordinates relative to the web page, so we need to account for scrolling:
class Browser:
def click(self, e):
# ...
y += self.scrollMore generally, handling events like clicks involves reversing the usual rendering pipeline. Normally, rendering goes from elements to layout objects to page coordinates to screen coordinates; click handling goes backward, starting with screen coordinates, then converting to page coordinates, and so on. The correspondence isn’t perfectly reversed in practiceThough see some exercises in this chapter and future ones on making it a closer match. but it’s a worthwhile analogy.
So the next step is to go from page coordinates to a layout object:You could try to first find the paint command clicked on, and go from that to layout object, but in real browsers there are all sorts of reasons this won’t work, starting with invisible objects that can nonetheless be clicked on. See Exercise 7-11.
# ...
objs = [obj for obj in tree_to_list(self.document, [])
if obj.x <= x < obj.x + obj.width
and obj.y <= y < obj.y + obj.height]In principle there might be more than one layout object in this
list.In real browsers
there are all sorts of ways this could happen, like negative
margins. But remember that click handling is the reverse
of painting. When we paint, we paint the tree from front to back, so
when hit testing we should start at the last element:Real browsers use the
z-index property to control which sibling is on top. So
real browsers have to compute stacking
contexts to resolve what you actually clicked on.
# ...
if not objs: return
elt = objs[-1].nodeThis elt node is the most specific node that was
clicked. With a link, that’s usually going to be a text node. But since
we want to know the actual URL the user clicked on, we need to climb
back up the HTML tree to find the link element:I wrote this in a kind of
curious way so it’s easy to add other types of clickable things—like
text boxes and buttons—in Chapter
8.
# ...
while elt:
if isinstance(elt, Text):
pass
elif elt.tag == "a" and "href" in elt.attributes:
# ...
elt = elt.parentOnce we find the link element itself, we need to extract the URL and load it:
# ...
elif elt.tag == "a" and "href" in elt.attributes:
url = self.url.resolve(elt.attributes["href"])
return self.load(url)Note that this resolve call requires storing the current
page’s URL:
class Browser:
def __init__(self):
# ...
self.url = None
def load(self, url):
self.url = url
# ...Try it out! You should now be able to click on links and navigate to new web pages.
On mobile devices, a “click” happens over an area, not just at a single point. This is because mobile “taps” are often pretty inaccurate, so clicks should use area, not point information for “hit testing”. This can happen even with a normal mouse click when the click is on a rotated or scaled element.
Multiple Pages
If you’re anything like me, the next thing you tried after clicking on links is middle-clicking them to open in a new tab. Every browser now has tabbed browsing, and honestly it’s a little embarrassing that our browser doesn’t.Back in the day, browser tabs were the feature that would convince friends and relatives to switch from IE 6 to Firefox.
Fundamentally, implementing tabbed browsing requires us to distinguish between the browser itself and the tabs that show individual web pages. The canvas the browser draws to, for example, is shared by all web pages, but the layout tree and display list are specific to one page. We need to tease tabs and browsers apart.
Here’s the plan: the Browser class will own the window
and canvas and all related methods, such as event handling. And it’ll
also contain a list of Tab objects and the browser chrome.
But the web page itself and its associated methods will live in a new
Tab class.
To start, rename your existing Browser class to be just
Tab, since until now we’ve only handled a single web
page:
class Tab:
# ...Then we’ll need a new Browser class. It has to store a
list of tabs and also which one is active:
class Browser:
def __init__(self):
self.tabs = []
self.active_tab = NoneIt also owns the window and handles all events:
class Browser:
def __init__(self):
self.window = tkinter.Tk()
self.canvas = tkinter.Canvas(
# ...
)
self.canvas.pack()
self.window.bind("<Down>", self.handle_down)
self.window.bind("<Button-1>", self.handle_click)Remove these lines from Tab’s constructor.
The handle_down and handle_click methods
need page-specific information, so these handler methods just forward
the event to the active tab:
class Browser:
def handle_down(self, e):
self.active_tab.scrolldown()
self.draw()
def handle_click(self, e):
self.active_tab.click(e.x, e.y)
self.draw()You’ll need to tweak the Tab’s scrolldown
and click methods:
scrolldownnow takes no arguments (instead of an event object)clicknow takes two coordinates (instead of an event object)
Finally, the Browser’s draw call also calls
into the active tab:
class Browser:
def draw(self):
self.canvas.delete("all")
self.active_tab.draw(self.canvas)Note that clearing the screen is the Browser’s job, not
the Tab’s. After that, we only draw the active tab, which
is how tabs are supposed to work. Tab’s draw
method needs to take the canvas in as an argument:
class Tab:
def draw(self, canvas):
# ...Since the Browser controls the canvas and handles
events, it decides when rendering happens and which tab does the
drawing. So let’s also remove the draw calls from the
load and scrolldown methods. More generally,
the Browser is “active” and the Tab is
“passive”: all user interactions start at the Browser,
which then calls into the tabs as appropriate.
We’re basically done splitting Tab from
Browser, and after a refactor like this we need to test
things. To do that, we’ll need to create at least one tab, like
this:
class Browser:
def new_tab(self, url):
new_tab = Tab()
new_tab.load(url)
self.active_tab = new_tab
self.tabs.append(new_tab)
self.draw()On startup, you should now create a Browser with one
tab:
if __name__ == "__main__":
import sys
Browser().new_tab(URL(sys.argv[1]))
tkinter.mainloop()Of course, we need a way for the user to switch tabs, create new ones, and so on. Let’s turn to that next.
Browser tabs first appeared in SimulBrowse, which was a kind of custom UI for the Internet Explorer engine.Some people instead attribute tabbed browsing to Booklink’s InternetWorks browser, a browser obscure enough that it doesn’t have a Wikipedia page, though you can see some screenshots on Twitter. However, its tabs were slightly different from the modern conception, more like bookmarks or history than tabs. SimulBrowse instead used the modern notion of tabs. SimulBrowse (later renamed to NetCaptor) also had ad blocking and a private browsing mode. The old advertisements are a great read!
Browser Chrome
Real web browsers don’t just show web page contents—they’ve got labels and icons and buttons.Oh my! This is called the browser “chrome”;Yep, that predates and inspired the name of Google’s Chrome browser. all of this stuff is drawn by the browser to the same window as the page contents, and it requires information about the browser as a whole (like the list of all tabs), so it has to happen at the browser level, not per tab.
However, a browser’s UI is quite complicated, so let’s put that code
in a new Chrome helper class:
class Chrome:
def __init__(self, browser):
self.browser = browser
class Browser:
def __init__(self):
# ...
self.chrome = Chrome(self)Let’s design the browser chrome. Ultimately, I think it should have two rows (see Figure 1):
At the top, a list of tab names, separated by vertical lines, and a “
+” button to add a new tab.Underneath, the URL of the current web page, and a “
<” button to represent the browser back button.

A lot of this design involves text, so let’s start by picking a font:
class Chrome:
def __init__(self, browser):
# ...
self.font = get_font(20, "normal", "roman")
self.font_height = self.font.metrics("linespace")Because different operating systems draw fonts differently, we’ll
need to adjust the exact design of the browser chrome based on font
metrics. So we’ll need the font_height later.I chose 20px as
the font size, but that might be too large on your device. Feel free to
adjust.
Using that font height, we can now determine where the tab bar starts and ends:
class Chrome:
def __init__(self, browser):
# ...
self.padding = 5
self.tabbar_top = 0
self.tabbar_bottom = self.font_height + 2*self.paddingNote that I’ve added some padding so that text doesn’t run into the edge of the window.
We will store rectangles representing the size of various elements in
the browser chrome. For that, a new Rect class will be
convenient:
class Rect:
def __init__(self, left, top, right, bottom):
self.left = left
self.top = top
self.right = right
self.bottom = bottomNow, this tab row needs to contain a new-tab button and the tab names themselves.
I’ll add padding around the new-tab button:
class Chrome:
def __init__(self, browser):
# ...
plus_width = self.font.measure("+") + 2*self.padding
self.newtab_rect = Rect(
self.padding, self.padding,
self.padding + plus_width,
self.padding + self.font_height)Then the tabs will start padding past the end of the
new-tab button. Because the number of tabs can change, I’m not going to
store the location of each tab. Instead I’ll just compute their bounds
on the fly:
class Chrome:
def tab_rect(self, i):
tabs_start = self.newtab_rect.right + self.padding
tab_width = self.font.measure("Tab X") + 2*self.padding
return Rect(
tabs_start + tab_width * i, self.tabbar_top,
tabs_start + tab_width * (i + 1), self.tabbar_bottom)Note that I measure the text “Tab X” and use that for all of the tab widths. This is not quite right—in many fonts, numbers like 8 are wider than numbers like 1—but it is close enough, and anyway, the letter X is typically as wide as the widest number.
To actually draw the UI, we’ll first have the browser chrome paint a
display list, which the Browser will then draw to the
screen:
class Chrome:
def paint(self):
cmds = []
# ...
return cmdsLet’s start by first painting the new-tab button:
class Chrome:
def paint(self):
# ...
cmds.append(DrawOutline(self.newtab_rect, "black", 1))
cmds.append(DrawText(
self.newtab_rect.left + self.padding,
self.newtab_rect.top,
"+", self.font, "black"))
# ...The DrawOutline command draws a rectangular border:
class DrawOutline:
def __init__(self, rect, color, thickness):
self.rect = rect
self.color = color
self.thickness = thickness
def execute(self, scroll, canvas):
canvas.create_rectangle(
self.rect.left, self.rect.top - scroll,
self.rect.right, self.rect.bottom - scroll,
width=self.thickness,
outline=self.color)Next up is drawing the tabs. Python’s enumerate function
lets you iterate over both the indices and the contents of an array at
the same time. For each tab, we need to create a border on the left and
right and then draw the tab name:
class Chrome:
def paint(self):
# ...
for i, tab in enumerate(self.browser.tabs):
bounds = self.tab_rect(i)
cmds.append(DrawLine(
bounds.left, 0, bounds.left, bounds.bottom,
"black", 1))
cmds.append(DrawLine(
bounds.right, 0, bounds.right, bounds.bottom,
"black", 1))
cmds.append(DrawText(
bounds.left + self.padding, bounds.top + self.padding,
"Tab {}".format(i), self.font, "black"))
# ...Finally, to identify which tab is the active tab, we’ve got to make that file folder shape with the current tab sticking up:
class Chrome:
def paint(self):
for i, tab in enumerate(self.browser.tabs):
# ...
if tab == self.browser.active_tab:
cmds.append(DrawLine(
0, bounds.bottom, bounds.left, bounds.bottom,
"black", 1))
cmds.append(DrawLine(
bounds.right, bounds.bottom, WIDTH, bounds.bottom,
"black", 1))The DrawLine command draws a line of a given color and
thickness. It’s defined like so:
class DrawLine:
def __init__(self, x1, y1, x2, y2, color, thickness):
self.rect = Rect(x1, y1, x2, y2)
self.color = color
self.thickness = thickness
def execute(self, scroll, canvas):
canvas.create_line(
self.rect.left, self.rect.top - scroll,
self.rect.right, self.rect.bottom - scroll,
fill=self.color, width=self.thickness)One final thing: we want to make sure that the browser chrome is always drawn on top of the page contents. To guarantee that, we can draw a white rectangle behind the chrome:
class Chrome:
def __init__(self, browser):
# ...
self.bottom = self.tabbar_bottom
def paint(self):
# ...
cmds.append(DrawRect(
Rect(0, 0, WIDTH, self.bottom),
"white"))
cmds.append(DrawLine(
0, self.bottom, WIDTH,
self.bottom, "black", 1))
# ...Make sure the background is drawn before any other part of the
chrome. I also added a line at the bottom of the chrome to separate it
from the page. Note how I also changed DrawRect to pass a
Rect instead of the four corners; this requires a change to
BlockLayout:
class BlockLayout:
def self_rect(self):
return Rect(self.x, self.y,
self.x + self.width, self.y + self.height)
def paint(self):
# ...
if bgcolor != "transparent":
rect = DrawRect(self.self_rect(), bgcolor)
cmds.append(rect)
return cmdsAdd a rect field to DrawText and
DrawLine too. (The width and height for
DrawText should be the width and height of the text.)
Drawing this chrome display list is now straightforward:
class Browser:
def draw(self):
# ...
for cmd in self.chrome.paint():
cmd.execute(0, self.canvas)Note that this display list is always drawn at the top of the window, unlike the tab contents (which scroll). Make sure to draw the chrome after the main tab contents, so that the chrome is drawn over it.
However, we also have to make some adjustments to tab drawing to
account for the fact that the browser chrome takes up some vertical
space. Let’s add a tab_height parameter to
Tabs:
class Tab:
def __init__(self, tab_height):
# ...
self.tab_height = tab_heightWe can pass it to new_tab:
class Browser:
def new_tab(self, url):
new_tab = Tab(HEIGHT - self.chrome.bottom)
# ...We can then adjust scrolldown to account for the height
of the page content now being tab_height:
class Tab:
def scrolldown(self):
max_y = max(
self.document.height + 2*VSTEP - self.tab_height, 0)
self.scroll = min(self.scroll + SCROLL_STEP, max_y)Finally, in Tab’s draw method we need to
shift the drawing commands down by the chrome height. I’ll pass the
chrome height in as an offset parameter:
class Tab:
def draw(self, canvas, offset):
for cmd in self.display_list:
if cmd.rect.top > self.scroll + self.tab_height:
continue
if cmd.rect.bottom < self.scroll: continue
cmd.execute(self.scroll - offset, canvas)The Browser’s final draw method now looks
like this:
class Browser:
def draw(self):
self.canvas.delete("all")
self.active_tab.draw(self.canvas, self.chrome.bottom)
for cmd in self.chrome.paint():
cmd.execute(0, self.canvas)One more thing: clicking on tabs to switch between them. The
Browser handles the click and now needs to delegate clicks
on the browser chrome to the Chrome object:
class Browser:
def handle_click(self, e):
if e.y < self.chrome.bottom:
self.chrome.click(e.x, e.y)
else:
tab_y = e.y - self.chrome.bottom
self.active_tab.click(e.x, tab_y)
self.draw()Note that we need to subtract out the chrome size when clicking on
tab contents. As for clicks on the browser chrome, inside
Chrome we need to figure out what the user clicked on. To
make that easier, let’s add a quick method to test whether a point is
contained in a Rect:
class Rect:
def contains_point(self, x, y):
return x >= self.left and x < self.right \
and y >= self.top and y < self.bottomWe use this method to handle clicks inside Chrome, and
then use it to choose between clicking to add a tab or select an open
tab.
class Chrome:
def click(self, x, y):
if self.newtab_rect.contains_point(x, y):
self.browser.new_tab(URL("https://browser.engineering/"))
else:
for i, tab in enumerate(self.browser.tabs):
if self.tab_rect(i).contains_point(x, y):
self.browser.active_tab = tab
breakThat’s an appropriate “new tab” page, don’t you think? Anyway, you should now be able to load multiple tabs, scroll and click around them independently, and switch tabs by clicking on them.
Google Chrome 1.0 was accompanied by a comic book to pitch its features. There’s a whole chapter about its design ideas and user interface features, many of which stuck around. Even this book’s browser has tabs on top, for example.
Navigation History
Now that we are navigating between pages all the time, it’s easy to get a little lost and forget what web page you’re looking at. An address bar that shows the current URL would help a lot. Let’s make room for it in the chrome:
class Chrome:
def __init__(self, browser):
# ...
self.urlbar_top = self.tabbar_bottom
self.urlbar_bottom = self.urlbar_top + \
self.font_height + 2*self.padding
self.bottom = self.urlbar_bottomThis “URL bar” will contain the back button and the address bar:
class Chrome:
def __init__(self, browser):
# ...
back_width = self.font.measure("<") + 2*self.padding
self.back_rect = Rect(
self.padding,
self.urlbar_top + self.padding,
self.padding + back_width,
self.urlbar_bottom - self.padding)
self.address_rect = Rect(
self.back_rect.top + self.padding,
self.urlbar_top + self.padding,
WIDTH - self.padding,
self.urlbar_bottom - self.padding)Painting the back button is straightforward:
class Chrome:
def paint(self):
# ...
cmds.append(DrawOutline(self.back_rect, "black", 1))
cmds.append(DrawText(
self.back_rect.left + self.padding,
self.back_rect.top,
"<", self.font, "black"))The address bar needs to get the current tab’s URL from the browser:
class Chrome:
def paint(self):
# ...
cmds.append(DrawOutline(self.address_rect, "black", 1))
url = str(self.browser.active_tab.url)
cmds.append(DrawText(
self.address_rect.left + self.padding,
self.address_rect.top,
url, self.font, "black"))Here, str is a built-in Python function that we can
override to correctly convert URL objects to strings:
class URL:
def __str__(self):
port_part = ":" + str(self.port)
if self.scheme == "https" and self.port == 443:
port_part = ""
if self.scheme == "http" and self.port == 80:
port_part = ""
return self.scheme + "://" + self.host + port_part + self.pathI think the extra logic to hide port numbers is worth it to make the URLs more tidy.
What should happen when the back button is clicked? Well, that
tab should go back. Other tabs are not affected. So the
Browser has to invoke some method on the current tab to go
back:
class Chrome:
def click(self, x, y):
# ...
elif self.back_rect.contains_point(x, y):
self.browser.active_tab.go_back()For the active tab to “go back”, it needs to store a “history” of which pages it’s visited before:
class Tab:
def __init__(self, tab_height):
# ...
self.history = []The history grows every time we go to a new page:
class Tab:
def load(self, url):
self.history.append(url)
# ...Going back uses that history. You might think to write this:
class Tab:
def go_back(self):
if len(self.history) > 1:
self.load(self.history[-2])That’s almost correct, but it doesn’t work if you click the back
button twice, because load adds to the history. Instead, we
need to do something more like this:
class Tab:
def go_back(self):
if len(self.history) > 1:
self.history.pop()
back = self.history.pop()
self.load(back)Now, going back shrinks the history and clicking on links grows it, as it should.
So we’ve now got a pretty good web browser for reading this very book: you can click links, browse around, and even have multiple chapters open simultaneously for cross-referencing things. But it’s a little hard to visit a website not linked to from the current one.
A browser’s navigation history can contain sensitive information
about which websites a user likes visiting, so keeping it secure is
important. Surprisingly, this is pretty hard, because CSS features like
the :visited
selector can be used to check
whether a URL has been visited before. For this reason, there are efforts
to restrict :visited.
Editing the URL
One way to go to another page is by clicking on a link. But most browsers also allow you to type into the address bar to visit a new URL, if you happen to know the URL.
Take a moment to notice the complex ritual of typing in an address (see Figure 2):
- First, you have to click on the address bar to “focus” on it.
- That also selects the full address, so that it’s all deleted when you start typing.
- Then, letters you type go into the address bar.
- The address bar updates as you type, but the browser doesn’t yet navigate to the new page.
- Finally, you type the “Enter” key which navigates to a new page.
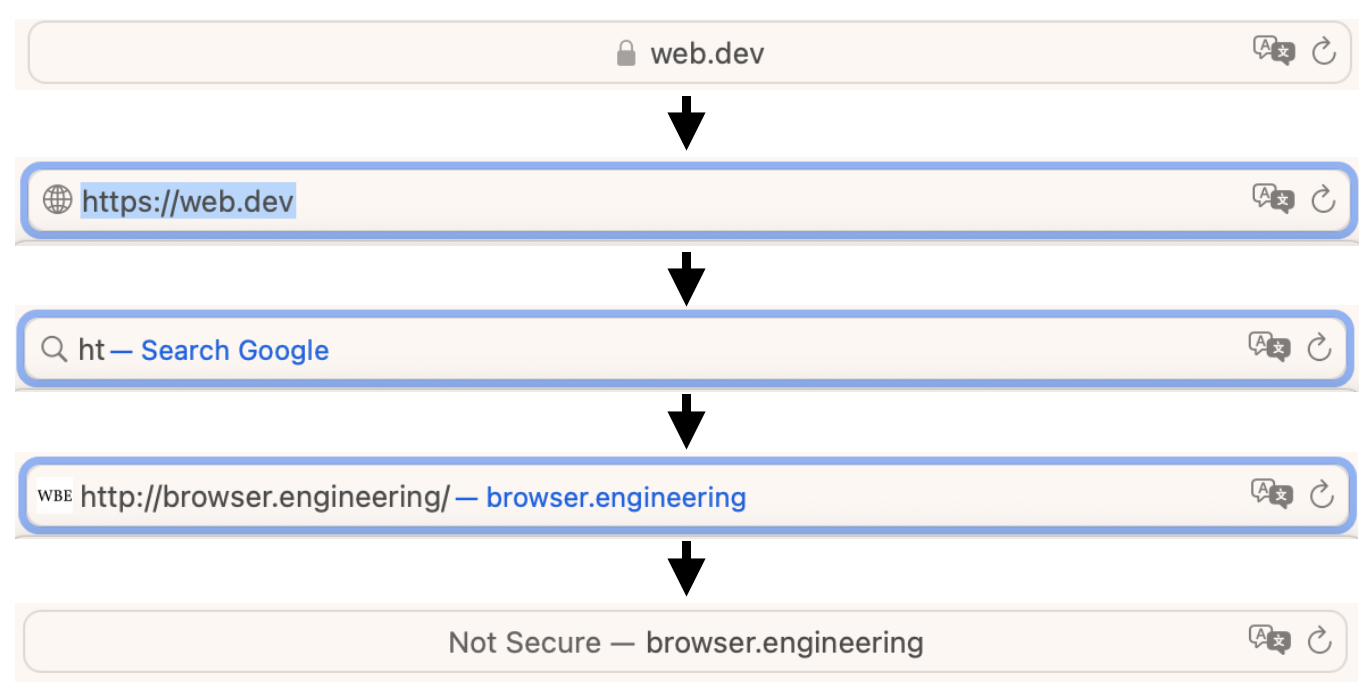
These steps suggest that the browser stores the contents of the
address bar separately from the url field, and also that
there’s some state to say whether you’re currently typing into the
address bar. Let’s call the contents address_bar and the
state focus:
class Chrome:
def __init__(self, browser):
# ...
self.focus = None
self.address_bar = ""Clicking on the address bar should set focus and
clicking outside it should clear focus:
class Chrome:
def click(self, x, y):
self.focus = None
# ...
elif self.address_rect.contains_point(x, y):
self.focus = "address bar"
self.address_bar = ""Note that clicking on the address bar also clears the address bar contents. That’s not quite what a real browser does, but it’s pretty close, and it lets us skip adding text selection.
Now, when we draw the address bar, we need to check whether to draw the current URL or the currently typed text:
class Chrome:
def paint(self):
# ...
if self.focus == "address bar":
cmds.append(DrawText(
self.address_rect.left + self.padding,
self.address_rect.top,
self.address_bar, self.font, "black"))
else:
url = str(self.browser.active_tab.url)
cmds.append(DrawText(
self.address_rect.left + self.padding,
self.address_rect.top,
url, self.font, "black"))When the user is typing in the address bar, let’s also draw a cursor. Making states (like focus) visible on the screen (like with the cursor) makes software easier to use:
class Chrome:
def paint(self):
# ...
if self.focus == "address bar":
# ...
w = self.font.measure(self.address_bar)
cmds.append(DrawLine(
self.address_rect.left + self.padding + w,
self.address_rect.top,
self.address_rect.left + self.padding + w,
self.address_rect.bottom,
"red", 1))Next, when the address bar is focused, we need to support typing in a
URL. In Tk, you can bind to <Key> to capture all key
presses. The event object’s char field contains the
character the user typed.
class Browser:
def __init__(self):
# ...
self.window.bind("<Key>", self.handle_key)
def handle_key(self, e):
if len(e.char) == 0: return
if not (0x20 <= ord(e.char) < 0x7f): return
self.chrome.keypress(e.char)
self.draw()This handle_key handler starts with some conditions:
<Key> fires for every key press, not just regular
letters, so we want to ignore cases where no character is typed (a
modifier key is pressed) or the character is outside the ASCII range
(which can represent the arrow keys or function keys). For now let’s
have the Browser send all key presses to
Chrome and then call draw() so that the new
letters actually show up.
Then Chrome can check focus and add on to
address_bar:
class Chrome:
def keypress(self, char):
if self.focus == "address bar":
self.address_bar += charFinally, once the new URL is entered, we need to handle the “Enter”
key, which Tk calls <Return>, and actually send the
browser to the new address:
class Chrome:
def enter(self):
if self.focus == "address bar":
self.browser.active_tab.load(URL(self.address_bar))
self.focus = None
class Browser:
def __init__(self):
# ...
self.window.bind("<Return>", self.handle_enter)
def handle_enter(self, e):
self.chrome.enter()
self.draw()So there—after a long chapter, you can now unwind a bit by surfing the web.
Text editing is surprisingly complex, and can be pretty tricky to implement well, especially for languages other than English. And nowadays URLs can be written in any language, though modern browsers restrict this somewhat for security reasons.
Summary
It’s been a lot of work just to handle links! We had to:
- give each word an explicit size and position;
- determine which piece of text a user clicked on;
- split per-page from browser-wide information;
- draw a tab bar, an address bar, and a back button;
- even implement text editing!
Now just imagine all the features you can add to your browser!
And here’s the lab 7 browser. Try using the browser chrome—it works! Our browser is starting to look like a real one:
Outline
The complete set of functions, classes, and methods in our browser should now look something like this:
class URL:
def __init__(url)
def request()
def resolve(url)
def __str__()
class Text:
def __init__(text, parent)
def __repr__()
class Element:
def __init__(tag, attributes, parent)
def __repr__()
def print_tree(node, indent)
def tree_to_list(tree, list)
class HTMLParser:
SELF_CLOSING_TAGS
HEAD_TAGS
def __init__(body)
def parse()
def get_attributes(text)
def add_text(text)
def add_tag(tag)
def implicit_tags(tag)
def finish()
class CSSParser:
def __init__(s)
def whitespace()
def literal(literal)
def word()
def ignore_until(chars)
def pair()
def selector()
def body()
def parse()
class TagSelector:
def __init__(tag)
def matches(node)
class DescendantSelector:
def __init__(ancestor, descendant)
def matches(node)
FONTS
def get_font(size, weight, style)
DEFAULT_STYLE_SHEET
INHERITED_PROPERTIES
def style(node, rules)
def cascade_priority(rule)
WIDTH, HEIGHT
HSTEP, VSTEP
class Rect:
def __init__(left, top, right, bottom)
def contains_point(x, y)
BLOCK_ELEMENTS
class DocumentLayout:
def __init__(node)
def layout()
def paint()
class BlockLayout:
def __init__(node, parent, previous)
def layout_mode()
def layout()
def recurse(node)
def new_line()
def word(node, word)
def self_rect()
def paint()
class LineLayout:
def __init__(node, parent, previous)
def layout()
def paint()
class TextLayout:
def __init__(node, word, parent, previous)
def layout()
def paint()
class DrawText:
def __init__(x1, y1, text, font, color)
def execute(scroll, canvas)
class DrawRect:
def __init__(rect, color)
def execute(scroll, canvas)
class DrawLine:
def __init__(x1, y1, x2, y2, color, thickness)
def execute(scroll, canvas)
class DrawOutline:
def __init__(rect, color, thickness)
def execute(scroll, canvas)
def paint_tree(layout_object, display_list)
SCROLL_STEP
class Tab:
def __init__(tab_height)
def load(url)
def draw(canvas, offset)
def scrolldown()
def click(x, y)
def go_back()
class Chrome:
def __init__(browser)
def tab_rect(i)
def paint()
def click(x, y)
def keypress(char)
def enter()
class Browser:
def __init__()
def draw()
def new_tab(url)
def handle_down(e)
def handle_click(e)
def handle_key(e)
def handle_enter(e)
Exercises
7-1 Backspace. Add support for the backspace key when typing in the address bar. Honestly, do this exercise just for your sanity.
7-2 Middle-click. Add support for middle-clicking on a link
(Button-2) to open it in a new tab. You might want to use a
mouse when testing.
7-3 Window title. Browsers set their window title to the
contents of the current tab’s <title> element. Make
your browser do the same. (You can call the title method of
Browser.window to change the window title.)
7-4 Forward. Add a forward button, which should undo the back button. If the most recent navigation action wasn’t a back button, the forward button shouldn’t do anything.To accomplish this, you’ll need to keep around history items when clicking the back button, and store an index into it for the current page, instead of removing them entirely from the array. Draw it in gray in that case, so the user isn’t stuck wondering why it doesn’t work. Also draw the back button in gray if there’s nowhere to go back to.
7-5 Fragments. URLs can contain a fragment, which
comes at the end of a URL and is separated from the path by a hash sign
#. When the browser navigates to a URL with a fragment, it
should scroll the page so that the element with that identifier is at
the top of the screen. Also, implement fragment links: relative URLs
that begin with a # don’t load a new page, but instead
scroll the element with that identifier to the top of the screen. The
table of contents on the web version of this
chapter uses fragment links.
7-6 Search. If the user types something that’s not
a URL into the address bar, make your browser automatically search for
it with a search engine. This usually means going to a special URL. For
example, you can search Google by going to
https://google.com/search?q=QUERY, where QUERY
is the search query with every space replaced by a +
sign.Actually, you need
to escape lots of
punctuation characters in these “query strings”, but that’s kind of
orthogonal to this address bar search feature.
7-7 Visited links. In real browsers, links you’ve visited before are usually purple. Implement that feature. You’ll need to store the set of visited URLs, annotate the corresponding HTML elements, and check those annotations when drawing the text.Real browsers support special pseudo-class selectors that select all visited links, which you could implement if you want.
7-8 Bookmarks. Implement basic bookmarks. Add a
button to the browser chrome; clicking it should bookmark the page. When
you’re looking at a bookmarked page, that bookmark button should look
different (maybe yellow?) to remind the user that the page is
bookmarked, and clicking it should un-bookmark it. Add a special web
page, about:bookmarks, for viewing the list of
bookmarks.
7-9 Cursor. Make the left and right arrow keys move the text cursor around the address bar when it is focused. Pressing the backspace key should delete the character before the cursor, and typing other keys should add characters at the cursor. (Remember that the cursor can be before the first character or after the last!)
7-10 Multiple windows. Add support for multiple browser
windows in addition to tabs. This will require keeping track of multiple
Tk windows and canvases and grouping tabs by their containing window.
You’ll also need some way to create a new window, perhaps with a
keypress such as Ctrl+N.
7-11 Clicks via the display list. At the moment, our browser converts a click location to page coordinates and then finds the layout object at those coordinates. But you could instead first look up the draw command at that location, and then go from the draw command to the layout object that generated it. Implement this. You’ll need draw commands to know which layout object generated them.Real browsers don’t currently do this, but it’s an attractive possibility: display lists are pure data structures so access to them is easier to optimize or parallelize than the more complicated layout tree.
Sending Information to Servers
So far, our browser has seen the web as read-only—but when you post on Facebook, fill out a survey, or search Google, you’re sending information to servers as well as receiving information from them. In this chapter, we’ll start to transform our browser into a platform for web applications by building out support for HTML forms, the simplest way for a browser to send information to a server.
How Forms Work
HTML forms have a couple of moving parts.
First, in HTML there is a form element, which contains
input elements,There are other elements similar to input,
such as select and textarea. They work
similarly enough; they just represent different kinds of user controls,
like dropdowns and multi-line inputs. which in turn can be
edited by the user. So a form might be written like this (see results in
Figure 1):
<form action="/submit" method="post">
<p>Name: <input name=name value=1></p>
<p>Comment: <input name=comment value=2></p>
<p><button>Submit!</button></p>
</form>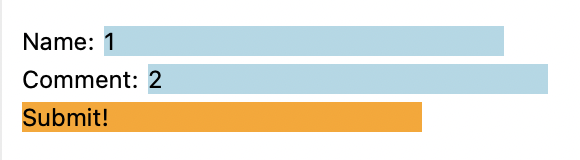
This form contains two text entry boxes called name and
comment. When the user goes to this page, they can click on
those boxes to edit their values. Then, when they click the button at
the end of the form, the browser collects all of the name–value pairs
and bundles them into an HTTP POST request (as indicated by
the method attribute), sent to the URL given by the
form element’s action attribute, with the
usual rules of relative URLs—so in this case, /submit. The
POST request looks like this:
POST /submit HTTP/1.0
Host: example.org
Content-Length: 16
name=1&comment=2In other words, it’s a lot like the regular GET requests
we’ve already seen, except that it has a body—you’ve already seen HTTP
responses with bodies, but requests can have them too. Note the
Content-Length header; it’s mandatory for POST
requests. The server responds to this request with a web page, just like
normal, and the browser then does everything it normally does.
Implementing forms requires extending many parts of the browser, from
implementing HTTP POST through new layout objects that draw
input elements to handling buttons clicks. That makes it a
great starting point for transforming our browser into an application
platform, our goal for the next few chapters. Let’s get started
implementing it all!
HTML forms were first standardized in HTML+, which also proposed tables, mathematical equations, and text that wraps around images. Amazingly, all three of these technologies survive, but in totally different standards: tables in RFC 1942, equations in MathML, and floating images in CSS 1.0.
Rendering Widgets
First, let’s draw the input areas that the user will type into.Most applications use OS
libraries to draw input areas, so that those input areas look like other
applications on that OS. But browsers need a lot of control over
application styling, so they often draw their own input
areas. Input areas are inline content, laid out in lines
next to text. So to support inputs we’ll need a new kind of layout
object, which I’ll call InputLayout. We can copy
TextLayout and use it as a template, though we’ll need to
make some quick edits.
First, there’s no word argument to
InputLayouts:
class InputLayout:
def __init__(self, node, parent, previous):
self.node = node
self.children = []
self.parent = parent
self.previous = previousSecond, input elements usually have a fixed width:
INPUT_WIDTH_PX = 200
class InputLayout:
def layout(self):
# ...
self.width = INPUT_WIDTH_PX
# ...The input and button elements need to be
visually distinct so the user can find them easily. Our browser’s
styling capabilities are limited, so let’s use background color to do
that:
input {
font-size: 16px; font-weight: normal; font-style: normal;
background-color: lightblue;
}
button {
font-size: 16px; font-weight: normal; font-style: normal;
background-color: orange;
}When the browser paints an InputLayout it needs to draw
the background:
class InputLayout:
def paint(self):
cmds = []
bgcolor = self.node.style.get("background-color",
"transparent")
if bgcolor != "transparent":
rect = DrawRect(self.self_rect(), bgcolor)
cmds.append(rect)
return cmdsIt then needs to get the input element’s text contents:
class InputLayout:
def paint(self):
# ...
if self.node.tag == "input":
text = self.node.attributes.get("value", "")
elif self.node.tag == "button":
if len(self.node.children) == 1 and \
isinstance(self.node.children[0], Text):
text = self.node.children[0].text
else:
print("Ignoring HTML contents inside button")
text = ""
# ...Note that <button> elements can in principle
contain complex HTML, not just a text node. That’s too complicated for
this chapter, so I’m having the browser print a warning and skip the
text in that case.See
Exercise 8-8. Finally, we draw that text:
class InputLayout:
def paint(self):
# ...
color = self.node.style["color"]
cmds.append(
DrawText(self.x, self.y, text, self.font, color))
return cmdsBy this point in the book, you’ve seen many layout objects, so I’m glossing over these changes. The point is that new layout objects are one common way to extend the browser.
We now need to create some InputLayouts, which we can do
in BlockLayout:
class BlockLayout:
def recurse(self, node):
if isinstance(node, Text):
# ...
else:
if node.tag == "br":
self.new_line()
elif node.tag == "input" or node.tag == "button":
self.input(node)
else:
for child in node.children:
self.recurse(child)Finally, this new input method is similar to the
text method, creating a new layout object and adding it to
the current line:It’s so
similar in fact that they only differ in how they compute
w. I’ll resist the temptation to refactor this code until
we get to Chapter 15.
class BlockLayout:
def input(self, node):
w = INPUT_WIDTH_PX
if self.cursor_x + w > self.width:
self.new_line()
line = self.children[-1]
previous_word = line.children[-1] if line.children else None
input = InputLayout(node, line, previous_word)
line.children.append(input)
weight = node.style["font-weight"]
style = node.style["font-style"]
if style == "normal": style = "roman"
size = int(float(node.style["font-size"][:-2]) * .75)
font = get_font(size, weight, style)
self.cursor_x += w + font.measure(" ")But actually, there are a couple more complications due to the way we
decided to resolve the block-mixed-with-inline-siblings problem (see Chapter 5). One is that if there are
no children for a node, we assume it’s a block element. But
<input> elements don’t have children, yet must have
inline layout or else they won’t draw correctly. Likewise, a
<button> does have children, but they are treated
specially.This situation
is specific to these elements in our browser, but only because they are
the only elements with special painting behavior within an inline
context. These are also two examples of atomic
inlines.
We can fix that with this change to layout_mode to add a
second condition for returning “inline”:
class BlockLayout:
def layout_mode(self):
# ...
elif self.node.children or self.node.tag == "input":
return "inline"
# ...The second problem is that, again due to having block siblings,
sometimes an <input> or <button>
element will create a BlockLayout (which will then create
an InputLayout inside). In this case we don’t want to paint
the background twice, so let’s add some simple logic to skip painting it
in BlockLayout in this case, via a new
should_paint method:Recall (see Chapter
5) that we only get into this situation due to the presence of
anonymous block boxes. Also, it’s worth noting that there are various
other ways that our browser does not fully implement all the
complexities of inline painting—one example is that it does not
correctly paint nested inlines with different background colors. Inline
layout and paint are very complicated in real
browsers.
class BlockLayout:
# ...
def should_paint(self):
return isinstance(self.node, Text) or \
(self.node.tag != "input" and self.node.tag != "button")Add a trivial should_paint method that just returns
True to all of the other layout object types. Now we can
skip painting objects based on should_paint:
def paint_tree(layout_object, display_list):
if layout_object.should_paint():
display_list.extend(layout_object.paint())
# ...With these changes the browser should now draw input and
button elements as blue and orange rectangles.
The reason buttons surround their contents but input areas don’t is
that a button can contain images, styled text, or other content. In a
real browser, that relies on the inline-block
display mode: a way of putting a block element into a line of text.
There’s also an older <input type=button> syntax more
similar to text inputs.
Interacting with Widgets
We’ve got input elements rendering, but you can’t edit
their contents yet. But of course that’s the whole point! So let’s make
input elements work like the address bar does—clicking on
one will clear it and let you type into it.
Clearing is easy, another case inside Tab’s
click method:
class Tab:
def click(self, x, y):
while elt:
# ...
elif elt.tag == "input":
elt.attributes["value"] = ""
# ...However, if you try this, you’ll notice that clicking does not
actually clear the input element. That’s because the code
above updates the HTML tree—but we need to update the layout tree and
then the display list for the change to appear on the screen.
Right now, the layout tree and display list are computed in
load, but we don’t want to reload the whole page; we just
want to redo the styling, layout, paint and draw phases. Together these
are called rendering. So let’s extract these phases into a new
Tab method, render:
class Tab:
def load(self, url, payload=None):
# ...
self.render()
def render(self):
style(self.nodes, sorted(self.rules, key=cascade_priority))
self.document = DocumentLayout(self.nodes)
self.document.layout()
self.display_list = []
paint_tree(self.document, self.display_list)For this code to work, you’ll also need to change nodes
and rules from local variables in the load
method to new fields on a Tab. Note that styling moved from
load to render, but downloading the style
sheets didn’t—we don’t re-download the style sheetsActually, some changes to the
web page could delete existing link nodes or create new
ones. Real browsers respond to this correctly, either removing the rules
corresponding to deleted link nodes or downloading new
style sheets when new link nodes are created. This is
tricky to get right, and typing into an input area definitely can’t make
such changes, so let’s skip this in our browser. every
time you type!
Now when we click an input element and clear its
contents, we can call render to redraw the page with the
input cleared:
class Tab:
def click(self, x, y):
while elt:
elif elt.tag == "input":
elt.attributes["value"] = ""
return self.render()So that’s clicking in an input area. But typing is
harder. Think back to how we implemented the
address bar in Chapter 7: we added a focus field that
remembered what we clicked on so we could later send it our key presses.
We need something like that focus field for input areas,
but it’s going to be more complex because the input areas live inside a
Tab, not inside the Browser.
Naturally, we will need a focus field on each
Tab, to remember which text entry (if any) we’ve recently
clicked on:
class Tab:
def __init__(self):
# ...
self.focus = NoneNow when we click on an input element, we need to set
focus (and clear focus if nothing was found to focus
on):
class Tab:
def click(self, x, y):
self.focus = None
# ...
while elt:
elif elt.tag == "input":
self.focus = elt
# ...But remember that keyboard input isn’t handled by the
Tab—it’s handled by the Browser. So how does
the Browser even know when keyboard events should be sent
to the Tab? The Browser has to remember that
in its own focus field!
In other words, when you click on the web page, the
Browser updates its focus field to remember
that the user is interacting with the page, not the browser chrome. And
if so, it should unfocus (“blur”) the browser chrome:
class Chrome:
def blur(self):
self.focus = Noneclass Browser:
def handle_click(self, e):
if e.y < self.chrome.bottom:
self.focus = None
# ...
else:
self.focus = "content"
self.chrome.blur()
# ...
self.draw()The if branch that corresponds to clicks in the browser
chrome unsets focus, meaning focus is no longer on the page
contents, and key presses will thus be sent to the
Chrome.
When a key press happens, the Browser either sends it to
the address bar or calls the active tab’s keypress method
(or neither, if nothing is focused):
class Browser:
def handle_key(self, e):
# ...
if self.chrome.keypress(e.char):
self.draw()
elif self.focus == "content":
self.active_tab.keypress(e.char)
self.draw()Here I’ve changed keypress to return true if the browser
chrome consumed the key:
class Chrome:
def keypress(self, char):
if self.focus == "address bar":
self.address_bar += char
return True
return FalseThat keypress method then uses the tab’s
focus field to put the character in the right text
entry:
class Tab:
def keypress(self, char):
if self.focus:
self.focus.attributes["value"] += char
self.render()Note that here we call render instead of
draw, because we’ve modified the web page and thus need to
regenerate the display list instead of just redrawing it to the
screen.
Hierarchical focus handling is an important pattern for combining
graphical widgets; in a real browser, where web pages can be embedded
into one another with iframes,The iframe
element allows you to embed one web page into another as a little
window. We’ll talk about this more in Chapter
15. the focus tree can be arbitrarily deep.
So now we have user input working with input elements.
Before we move on, there is one last tweak that we need to make: drawing
the text cursor in the Tab’s render method.
This turns out to be harder than expected: the cursor should be drawn by
the InputLayout of the focused node, and that means that
each node has to know whether or not it’s focused:
class Element:
def __init__(self, tag, attributes, parent):
# ...
self.is_focused = FalseAdd the same field to Text nodes; they’ll never be
focused and never draw cursors, but it’s more convenient if
Text and Element have the same fields. We’ll
set this when we move focus to an input element:
class Tab:
def click(self, x, y):
while elt:
elif elt.tag == "input":
elt.attributes["value"] = ""
if self.focus:
self.focus.is_focused = False
self.focus = elt
elt.is_focused = True
return self.render()Note that we have to un-focus the currently focused element, lest it
keep drawing its cursor. Anyway, now we can draw a cursor if an
input element is focused:
class InputLayout:
def paint(self):
# ...
if self.node.is_focused:
cx = self.x + self.font.measure(text)
cmds.append(DrawLine(
cx, self.y, cx, self.y + self.height, "black", 1))
# ...Now you can click on a text entry, type into it, and modify its value. The next step is submitting the now-filled-out form.
This approach to drawing the text cursor—having the
InputLayout draw it—allows visual effects to apply to the
cursor, as we’ll see in Chapter 11.
But not every browser does it this way. Chrome, for example, keeps track
of a global focused
element to make sure the cursor can be globally
styled.
Submitting Forms
You submit a form by clicking on a button. So let’s add
another condition to the big while loop in
click:
class Tab:
def click(self, x, y):
while elt:
# ...
elif elt.tag == "button":
# ...
# ...Once we’ve found the button, we need to find the form that it’s in by walking up the HTML tree:
elif elt.tag == "button":
while elt:
if elt.tag == "form" and "action" in elt.attributes:
return self.submit_form(elt)
elt = elt.parentThe submit_form method is then in charge of finding all
of the input elements, encoding them in the right way, and sending the
POST request. First, we look through all the descendents of
the form to find input elements:
class Tab:
def submit_form(self, elt):
inputs = [node for node in tree_to_list(elt, [])
if isinstance(node, Element)
and node.tag == "input"
and "name" in node.attributes]For each of those input elements, we need to extract the
name attribute and the value attribute, and
form encode both of them. Form encoding is how the name–value
pairs are formatted in the HTTP POST request. Basically, it
is: name, then equal sign, then value; and name–value pairs are
separated by ampersands:
class Tab:
def submit_form(self, elt):
# ...
body = ""
for input in inputs:
name = input.attributes["name"]
value = input.attributes.get("value", "")
body += "&" + name + "=" + value
body = body[1:]Here, body initially has an extra &
tacked on to the front, which is removed on the last line.
Now, any time you see special syntax like this, you’ve got to ask:
what if the name or the value has an equal sign or an ampersand in it?
So in fact, “percent encoding” replaces all special characters with a
percent sign followed by those characters’ hex codes. For example, a
space becomes %20 and a period becomes %2e.
Python provides a percent-encoding function as quote in the
urllib.parse module:You can write your own percent_encode function
using Python’s ord and hex functions if you
like. I’m using the standard function for expediency. In Chapter 1, using these library functions would
have obscured key concepts, but by this point percent encoding is
necessary but not conceptually interesting.
for input in inputs:
# ...
name = urllib.parse.quote(name)
value = urllib.parse.quote(value)
# ...Now that submit_form has built a request body, it needs
to make a POST request. I’m going to defer that
responsibility to the load function, which handles making
requests:
def submit_form(self, elt):
# ...
url = self.url.resolve(elt.attributes["action"])
self.load(url, body)The new payload argument to load is then
passed through to request:
def load(self, url, payload=None):
# ...
body = url.request(payload)
# ...In request, this new argument is used to decide between
a GET and a POST request:
class URL:
def request(self, payload=None):
# ...
method = "POST" if payload else "GET"
# ...
request = "{} {} HTTP/1.0\r\n".format(method, self.path)
# ...If it’s a POST request, the Content-Length
header is mandatory:
class URL:
def request(self, payload=None):
# ...
if payload:
length = len(payload.encode("utf8"))
request += "Content-Length: {}\r\n".format(length)
# ...Note that the Content-Length is the length of the
payload in bytes, which might not be equal to its length in
letters.Because
characters from many languages take up multiple bytes.
Finally, after the headers, we send the payload itself:
class URL:
def request(self, payload=None):
# ...
if payload: request += payload
s.send(request.encode("utf8"))
# ...So that’s how the POST request gets sent. Then the
server responds with an HTML page and the browser will render it in the
totally normal way.Actually, because browsers treat going “back” to a
POST-requested page specially (see Exercise 8-5), it’s
common to respond to a POST request with a
redirect. That’s basically it for forms!
While most form submissions use the form encoding described here,
forms with file uploads (using <input type=file>) use
a different
encoding that includes metadata for each key–value pair (like the
file name or file type). There’s also an obscure text/plain
encoding option, which uses no escaping and which even the standard
warns against using.
How web apps work
So … how do web applications (web apps) use forms? When you use an application from your browser—whether you are registering to vote, looking at pictures of your baby cousin, or checking your email—there are typicallyHere I’m talking in general terms. There are some browser applications without a server, and others where the client code is exceptionally simple and almost all the code is on the server. two programs involved: client code that runs in the browser, and server code that runs on the server. When you click on things or take actions in the application, that runs client code, which then sends data to the server via HTTP requests.
For example, imagine a simple message board application. The server stores the state of the message board—who has posted what—and has logic for updating that state. But all the actual interaction with the page—drawing the posts, letting the user enter new ones—happens in the browser. Both components are necessary.
The browser and the server interact over HTTP. The browser first
makes a GET request to the server to load the current
message board. The user interacts with the browser to type a new post,
and submits it to the server (say, via a form). That causes the browser
to make a POST request to the server, which instructs the
server to update the message board state. The server then needs the
browser to update what the user sees; with forms, the server sends a new
HTML page in its response to the POST request. This process
is shown in Figure 2.
Forms are a simple, minimal introduction to this cycle of request and
response and make a good introduction to how browser applications work.
They’re also implemented in every browser and have been around for
decades. These days many web applications use the form elements, but
replace synchronous POST requests with asynchronous ones
driven by Javascript,In
the early 2000s, the adoption of asynchronous HTTP requests sparked the
wave of innovative new web applications called Web 2.0.
which makes applications snappier by hiding the time to make the HTTP
request. In return for that snappiness, that JavaScript code must now
handle errors, validate inputs, and indicate loading time. In any case,
both synchronous and asynchronous uses of forms are based on the same
principles of client and server code.
There are request types besides GET and
POST, like PUT
(create if non-existent) and DELETE,
or the more obscure CONNECT and TRACE. In 2010
the PATCH
method was standardized in RFC 5789. New
methods were intended as a standard extension mechanism for HTTP, and
some protocols were built this way (like WebDav’s
PROPFIND, MOVE, and LOCK
methods), but this did not become an enduring way to extend the web
itself, and HTTP 2.0 and 3.0 did not add any new methods.
Receiving POST Requests
To better understand the request/response cycle, let’s write a simple web server. It’ll implement an online guest book,They were very hip in the 1990s—comment threads from before there was anything to comment on. kind of like an open, anonymous comment thread. Now, this is a book on web browser engineering, so I won’t discuss web server implementation that thoroughly. But I want you to see how the server side of an application works.
A web server is a separate program from the web browser, so let’s start a new file. The server will need to:
- open a socket and listen for connections;
- parse HTTP requests it receives;
- respond to those requests with an HTML web page.
Let’s start by opening a socket. Like for the browser, we need to create an internet streaming socket using TCP:
import socket
s = socket.socket(
family=socket.AF_INET,
type=socket.SOCK_STREAM,
proto=socket.IPPROTO_TCP)
s.setsockopt(socket.SOL_SOCKET, socket.SO_REUSEADDR, 1)The setsockopt call is optional. Normally, when a
program has a socket open and it crashes, your OS prevents that port
from being reusedWhen
your process crashes, the computer on the end of the connection won’t be
informed immediately; if some other process opens the same port, it
could receive data meant for the old, now-dead process.
for a short period. That’s annoying when developing a server; calling
setsockopt with the SO_REUSEADDR option allows
the OS to immediately reuse the port.
Now, with this socket, instead of calling connect (to
connect to some other server), we’ll call bind, which waits
for other computers to connect:
s.bind(('', 8000))
s.listen()Let’s look at the bind call first. Its first argument
says who should be allowed to make connections to the server;
the empty string means that anyone can connect. The second argument is
the port others must use to talk to our server; I’ve chosen
8000. I can’t use 80, because ports below 1024 require
administrator privileges, but you can pick something other than 8000 if,
for whatever reason, port 8000 is taken on your machine.
Finally, after the bind call, the listen
call tells the OS that we’re ready to accept connections.
To actually accept those connections, we enter a loop that runs once
per connection. At the top of the loop we call s.accept to
wait for a new connection:
while True:
conx, addr = s.accept()
handle_connection(conx)That connection object is, confusingly, also a socket: it is the socket corresponding to that one connection. We know what to do with those: we read the contents and parse the HTTP message. But it’s a little trickier in the server than in the browser, because the server can’t just read from the socket until the connection closes—the browser is waiting for the server and won’t close the connection.
So, we’ve got to read from the socket line by line. First, we read the request line:
def handle_connection(conx):
req = conx.makefile("b")
reqline = req.readline().decode('utf8')
method, url, version = reqline.split(" ", 2)
assert method in ["GET", "POST"]Then we read the headers until we get to a blank line, accumulating the headers in a dictionary:
def handle_connection(conx):
# ...
headers = {}
while True:
line = req.readline().decode('utf8')
if line == '\r\n': break
header, value = line.split(":", 1)
headers[header.casefold()] = value.strip()Finally we read the body, but only when the
Content-Length header tells us how much of it to read
(that’s why that header is mandatory on POST requests):
def handle_connection(conx):
# ...
if 'content-length' in headers:
length = int(headers['content-length'])
body = req.read(length).decode('utf8')
else:
body = NoneNow the server needs to generate a web page in response. We’ll get to
that later; for now, just abstract that away behind a
do_request call:
def handle_connection(conx):
# ...
status, body = do_request(method, url, headers, body)The server then sends this page back to the browser:
def handle_connection(conx):
# ...
response = "HTTP/1.0 {}\r\n".format(status)
response += "Content-Length: {}\r\n".format(
len(body.encode("utf8")))
response += "\r\n" + body
conx.send(response.encode('utf8'))
conx.close()The architecture is summarized in Figure 3. Our implementation is all
pretty bare-bones: our server doesn’t check that the browser is using
HTTP 1.0 to talk to it, it doesn’t send back any headers at all except
Content-Length, it doesn’t support TLS, and so on. Again:
this is a web browser book—it’ll do.
Ilya Grigorik’s High Performance Browser Networking is an excellent deep dive into networking and how to optimize for it in a web application. There are things the client can do (make fewer requests, avoid polling, reuse connections) and things the server can do (compression, protocol support, sharing domains).
Generating Web Pages
So far, all of this server code is “boilerplate”—any web application
will have similar code. What makes our server a guest book, on the other
hand, depends on what happens inside do_request. It needs
to store the guest book state, generate HTML pages, and respond to
POST requests.
Let’s store guest book entries in a Python list. Usually web applications use persistent state, like a database, so that the server can be restarted without losing state, but our guest book need not be that resilient.
ENTRIES = [ 'Pavel was here' ]Next, do_request has to output HTML that shows those
entries:
def do_request(method, url, headers, body):
out = "<!doctype html>"
for entry in ENTRIES:
out += "<p>" + entry + "</p>"
return "200 OK", outThis is definitely “minimal” HTML, so it’s a good thing our browser
will insert implicit tags and has some default styles! You can test it
out by running this minimal web server and, while it’s running, direct
your browser to http://localhost:8000/, where
localhost is what your computer calls itself and
8000 is the port we chose earlier. You should see one guest
book entry.
By the way, while you’re debugging this web server, it’s probably better to use a real web browser, instead of this book’s browser, to interact with it. That way you don’t have to worry about browser bugs while you work on server bugs. But this server does support both real and toy browsers.
We’ll use forms to let visitors write in the guest book:
def do_request(method, url, headers, body):
# ...
out += "<form action=add method=post>"
out += "<p><input name=guest></p>"
out += "<p><button>Sign the book!</button></p>"
out += "</form>"
# ...When this form is submitted, the browser will send a
POST request to http://localhost:8000/add. So
the server needs to react to these submissions. That means
do_request will field two kinds of requests: regular
browsing and form submissions. Let’s separate the two kinds of requests
into different functions.
First rename the current do_request to
show_comments:
def show_comments():
# ...
return outThis then frees up the do_request function to figure out
which function to call for which request:
def do_request(method, url, headers, body):
if method == "GET" and url == "/":
return "200 OK", show_comments()
elif method == "POST" and url == "/add":
params = form_decode(body)
return "200 OK", add_entry(params)
else:
return "404 Not Found", not_found(url, method)When a POST request to /add comes in, the
first step is to decode the request body:
def form_decode(body):
params = {}
for field in body.split("&"):
name, value = field.split("=", 1)
name = urllib.parse.unquote_plus(name)
value = urllib.parse.unquote_plus(value)
params[name] = value
return paramsNote that I use unquote_plus instead of
unquote, because browsers may also use a plus sign to
encode a space. The add_entry function then looks up the
guest parameter and adds its content as a new guest book
entry:
def add_entry(params):
if 'guest' in params:
ENTRIES.append(params['guest'])
return show_comments()I’ve also added a “404” response. Fitting the austere stylings of our guest book, here’s the 404 page:
def not_found(url, method):
out = "<!doctype html>"
out += "<h1>{} {} not found!</h1>".format(method, url)
return outTry it! You should be able to restart the server, open it in your browser, and update the guest book a few times. You should also be able to use the guest book from a real web browser.
Typically, connection handling and request routing is handled by a web framework; this book’s website, for example uses bottle.py. Frameworks parse requests into convenient data structures, route requests to the right handler, and can also provide tools like HTML templates, session handling, database access, input validation, and API generation.
Summary
With this chapter we’re starting to transform our browser into an application platform. We’ve added:
- layout objects for input areas and buttons;
- clicking on buttons and typing into input areas;
- hierarchical focus handling;
- form submission with HTTP
POST.
Plus, our browser now has a little web server friend. That’s going to be handy as we add more interactive features to the browser.
Since this chapter introduces a server, I’ve also added support for that in the browser widget below, by cross-compiling this chapter’s server code to JavaScript. Try submitting a comment through the form, it should work!
Outline
The complete set of functions, classes, and methods in our browser should now look something like this:
class URL:
def __init__(url)
def request(payload)
def resolve(url)
def __str__()
class Text:
def __init__(text, parent)
def __repr__()
class Element:
def __init__(tag, attributes, parent)
def __repr__()
def print_tree(node, indent)
def tree_to_list(tree, list)
class HTMLParser:
SELF_CLOSING_TAGS
HEAD_TAGS
def __init__(body)
def parse()
def get_attributes(text)
def add_text(text)
def add_tag(tag)
def implicit_tags(tag)
def finish()
class CSSParser:
def __init__(s)
def whitespace()
def literal(literal)
def word()
def ignore_until(chars)
def pair()
def selector()
def body()
def parse()
class TagSelector:
def __init__(tag)
def matches(node)
class DescendantSelector:
def __init__(ancestor, descendant)
def matches(node)
FONTS
def get_font(size, weight, style)
DEFAULT_STYLE_SHEET
INHERITED_PROPERTIES
def style(node, rules)
def cascade_priority(rule)
WIDTH, HEIGHT
HSTEP, VSTEP
class Rect:
def __init__(left, top, right, bottom)
def contains_point(x, y)
INPUT_WIDTH_PX
BLOCK_ELEMENTS
class DocumentLayout:
def __init__(node)
def layout()
def should_paint()
def paint()
class BlockLayout:
def __init__(node, parent, previous)
def layout_mode()
def layout()
def recurse(node)
def new_line()
def word(node, word)
def input(node)
def self_rect()
def should_paint()
def paint()
class LineLayout:
def __init__(node, parent, previous)
def layout()
def should_paint()
def paint()
class TextLayout:
def __init__(node, word, parent, previous)
def layout()
def should_paint()
def paint()
class InputLayout:
def __init__(node, parent, previous)
def layout()
def should_paint()
def paint()
def self_rect()
class DrawText:
def __init__(x1, y1, text, font, color)
def execute(scroll, canvas)
class DrawRect:
def __init__(rect, color)
def execute(scroll, canvas)
class DrawLine:
def __init__(x1, y1, x2, y2, color, thickness)
def execute(scroll, canvas)
class DrawOutline:
def __init__(rect, color, thickness)
def execute(scroll, canvas)
def paint_tree(layout_object, display_list)
SCROLL_STEP
class Tab:
def __init__(tab_height)
def load(url, payload)
def render()
def draw(canvas, offset)
def scrolldown()
def click(x, y)
def go_back()
def submit_form(elt)
def keypress(char)
class Chrome:
def __init__(browser)
def tab_rect(i)
def paint()
def click(x, y)
def keypress(char)
def enter()
def blur()
class Browser:
def __init__()
def draw()
def new_tab(url)
def handle_down(e)
def handle_click(e)
def handle_key(e)
def handle_enter(e)
There’s also a server now, but it’s much simpler:
def handle_connection(conx)
def do_request(method, url, headers, body)
def form_decode(body)
ENTRIES
def show_comments()
def not_found(url, method)
def add_entry(params)
If you run it, it should look something like this:
Exercises
8-1 Enter key. In most browsers, if you hit the “Enter” or “Return” key while inside a text entry, that submits the form that the text entry was in. Add this feature to your browser.
8-2 GET forms. Forms can be submitted via
GET requests as well as POST requests. In
GET requests, the form-encoded data is pasted onto the end
of the URL, separated from the path by a question mark, like
/search?q=hi; GET form submissions have no
body. Implement GET form submissions.
8-3 Blurring. Right now, if you click inside a text entry,
and then inside the address bar, two cursors will appear on the screen.
To fix this, add a blur method to each Tab
which unfocuses anything that is focused, and call it before changing
focus.
8-4 Check boxes. In HTML, input elements have a
type attribute. When set to checkbox, the
input element looks like a checkbox; it’s checked if the
checked attribute is set, and unchecked otherwise.Technically, the
checked attribute only
affects the state of the checkbox when the page loads; checking and
unchecking a checkbox does not affect this attribute but instead
manipulates internal state. When the form is submitted, a
checkbox’s name=value pair is included only if the checkbox
is checked. (If the checkbox has no value attribute, the
default is the string on.)
8-5 Resubmit requests. One reason to separate
GET and POST requests is that GET
requests are supposed to be idempotent (read-only, basically)
while POST requests are assumed to change the web server
state. That means that going “back” to a GET request
(making the request again) is safe, while going “back” to a
POST request is a bad idea. Change the browser history to
record what method was used to access each URL, and the
POST body if one was used. When you go back to a
POST-ed URL, ask the user if they want to resubmit the
form. Don’t go back if they say no; if they say yes, submit a
POST request with the same body as before.
8-6 Message board. Right now our web server is a simple
guest book. Extend it into a simple message board by adding support for
topics. Each topic should have its own URL and its own list of messages.
So, for example, /cooking should be a page of posts (about
cooking) and comments submitted through the form on that page should
only show up when you go to /cooking, not when you go to
/cars. Make the home page, at /, list the
available topics with a link to each topic’s page. Make it possible for
users to add new topics.
8-7 Persistence. Back the server’s list of guest book entries with a file, so that when the server is restarted it doesn’t lose data.
8-8 Rich buttons. Make it possible for a button to contain arbitrary elements as children, and render them correctly. The children should be contained inside the button instead of spilling out—this can make a button really tall. Think about edge cases, like a button that contains another button, an input area, or a link, and test real browsers to see what they do.
8-9 HTML chrome. Browser chrome is quite complicated in real
browsers, with tricky details such as font sizes, padding, outlines,
shadows, icons and so on. This makes it tempting to try to reuse our
layout engine for it. Implement this, using <button>
elements for the new tab and back buttons, an <input>
element for the address bar, and <a> elements for the
tab names. It won’t look exactly the same as the current chrome—outline
will have to wait for Chapter 14, for
example—but if you adjust the default CSS you should be able to make it
look passable.Real
browsers have in fact gone down this implementation path multiple times,
building layout engines for the browser chrome that are heavily inspired
by or reuse pieces of the main web layout engine. Firefox had one, and Chrome has one.
However, because it’s so important for the browser chrome to be very
fast and responsive to draw, such approaches have had mixed
success.
Running Interactive Scripts
The first web applications were like the previous chapter’s guest book, with the server generating new web pages for every user action. But in the early 2000s, JavaScript-enhanced web applications, which can update pages dynamically and respond immediately to user actions, took their place. Let’s add support for this key web technology to our browser.
Installing DukPy
Actually writing a JavaScript interpreter is beyond the scope of this
book,But check out a
book on programming language implementation if it sounds
interesting! so this chapter uses the dukpy
library for executing JavaScript.
DukPy wraps a JavaScript interpreter called Duktape. The most famous JavaScript interpreters are those used in browsers: TraceMonkey (Firefox), JavaScriptCore (Safari), and V8 (Chrome). Unlike those implementations, which are extremely fast but also extremely complex, Duktape aims to be simple and extensible, and is usually embedded inside a larger C or C++ project.For example, in a video game the high-speed graphics code is usually written in C or C++ , but the actual plot of the game is usually written in a higher-level language like JavaScript.
Like other JavaScript engines, DukPy not only executes JavaScript code, but also allows it to call exported Python functions. We’ll be using this feature to allow JavaScript code to modify the web page it’s running on.
The first step to using DukPy is installing it. On most machines, including on Windows, macOS, and Linux systems, you should be able to do this with:
python3 -m pip install dukpyIf you have a really old version of Python, you might need to install
the pip package first, possibly using a command line
easy_install. If you do your Python programming through an
integrated development environment (IDE), you may need to use your IDE’s
package installer. If nothing else works, you can build from source.
If you’re following along in something other than Python, you might
need to skip this chapter, though you could try binding directly to the
duktape library that dukpy uses.
To test whether you installed DukPy correctly, execute this:
import dukpy
dukpy.evaljs("2 + 2")If you get an error on the first line, you probably failed to install DukPy.Or, on my Linux machine, I sometimes get errors due to file ownership. You may have to do some sleuthing. If you get an error, or a segfault, on the second line, there’s a chance that Duktape failed to compile, or maybe doesn’t support your system, and you might need to debug further.
Note to JavaScript experts: DukPy does not implement newer syntax
like let and const or arrow functions. In
keeping with this book’s aesthetics, you’ll need to use old-school
JavaScript from the turn of the century.
Running JavaScript Code
The test above shows how you run JavaScript code in DukPy: you just
call evaljs! Let’s put this newfound knowledge to work in
our browser.
On the web, JavaScript is found in <script> tags.
Normally, a <script> tag has a src
attribute with a relative URL that points to a JavaScript file, much
like with CSS files. A <script> tag could also
contain JavaScript source code between the start and end tag, but we
won’t implement that.It’s a challenge for parsing, since it’s hard to avoid
less-than and greater-than signs in JavaScript code. See Exercise 4-3.
Finding and downloading those scripts is similar to what we did for CSS. First, we need to find all of the scripts:
class Tab:
def load(self, url, payload=None):
# ...
scripts = [node.attributes["src"] for node
in tree_to_list(self.nodes, [])
if isinstance(node, Element)
and node.tag == "script"
and "src" in node.attributes]
# ...Next, we run all of the scripts:
def load(self, url, payload=None):
# ...
for script in scripts:
script_url = url.resolve(script)
try:
body = script_url.request()
except:
continue
print("Script returned: ", dukpy.evaljs(body))
# ...This should run before styling and layout. To try it out, create a
simple web page with a script tag:
<script src=test.js></script>Then write a super simple script to test.js, maybe
this:
var x = 2
x + xPoint your browser at that page, and you should see:
Script returned: 4That’s your browser running its first bit of JavaScript!
Actually, real browsers run JavaScript code as soon as the browser
parses the <script> tag, not after the whole
page is parsed. Or, at least, that is the default; there are many
options. What our browser does is what a real browser does when the
defer
attribute is set. The default behavior is much
trickier to implement efficiently.
Exporting Functions
Right now, our browser just prints the last expression in a script;
but in a real browser scripts must call the console.log
function to print. To support that, we will need to export a
function from Python into JavaScript. We’ll be exporting a lot of
functions, so to avoid polluting the Tab object with many
new methods, let’s put this code in a new JSContext
class:
class JSContext:
def __init__(self):
self.interp = dukpy.JSInterpreter()
def run(self, code):
return self.interp.evaljs(code)DukPy’s JSInterpreter object stores the values of all
the JavaScript variables, and lets us run multiple JavaScript snippets
and share variable values and other state between them.
We create this new JSContext object while loading the
page:
class Tab:
def load(self, url, payload=None):
# ...
self.js = JSContext()
for script in scripts:
# ...
self.js.run(body)As a side benefit of using one JSContext for all
scripts, it is now possible to run two scripts and have one of them
define a variable that the other uses, say on a page like this:
<script src=a.js></script>
<script src=b.js></script>Suppose a.js is “var x = 2;” and
b.js is “console.log(x + x)”; the variable
x is set in a.js but used in
b.js. In real web browsers, that’s common, since one script
might define library functions that another script wants to call.
Now, to allow JavaScript to interact with the outside world, DukPy
allows us to “export” functions to it. For example, we can export
Python’s print function like so:
class JSContext:
def __init__(self):
# ...
self.interp.export_function("log", print)We can call an exported function from JavaScript using DukPy’s
call_python function. For example:
call_python("log", "Hi from JS")When this JavaScript code runs, DukPy converts the JavaScript string
"Hi from JS" into a Python string,This conversion works for
numbers, strings, and booleans, plus arrays and dictionaries thereof,
but not with fancy objects. and then passes that Python
string to the print function we exported. Then
print prints that string.
Since we ultimately want a console.log
function, not a call_python function, we need to define a
console object and then give it a log
property. We can do that in JavaScript:
console = { log: function(x) { call_python("log", x); } }In case you’re not too familiar with JavaScript,Now’s a good time to brush
up! this defines a variable called
console, whose value is an object literal with the property
log, whose value is a function that calls
call_python. The interaction between the browser and
JavaScript is shown in Figure 1.
We can call that JavaScript code our “JavaScript runtime”; we run it
before we run any user code, so let’s stick it in a
runtime.js file and execute it when the
JSContext is created, before we run any user code:
RUNTIME_JS = open("runtime.js").read()
class JSContext:
def __init__(self):
# ...
self.interp.evaljs(RUNTIME_JS)Now you should be able to put console.log("Hi from JS!")
into a JavaScript file, run it from your browser, and see output in your
terminal. You should also be able to call console.log
multiple times.
Taking a step back, when we run JavaScript in our browser, we’re mixing C code, which implements the JavaScript interpreter; Python code, which implements certain JavaScript functions; a JavaScript runtime, which wraps the Python API to look more like the JavaScript one; and of course some user code in JavaScript. There’s a lot of complexity here!
If a script runs for a long time, or has an infinite loop, our browser locks up and becomes completely unresponsive to the user. This is a consequence of JavaScript’s single-threaded semantics and its task-based, run-to-completion scheduling. Some APIs like Web Workers allow limited multithreading, but those threads don’t have access to the DOM.
Handling Crashes
Crashes in JavaScript code are frustrating to debug. You can cause a crash by writing bad code, or by explicitly raising an exception, like so:
throw Error("bad");When a web page runs some JavaScript that crashes, the browser should
ignore the crash. Web pages shouldn’t be able to crash our browser! You
can implement that like this (plus changing the call site of
run to pass the script):
class JSContext:
def run(self, script, code):
try:
return self.interp.evaljs(code)
except dukpy.JSRuntimeError as e:
print("Script", script, "crashed", e)But as you go through this chapter, you’ll also run into another type of crash: crashes in our own JavaScript runtime. We can’t ignore those, because that’s our code. Debugging these crashes is a bear: by default DukPy won’t show a backtrace, and if the runtime code calls into an exported function that crashes it gets even more confusing.
Here are a few tips to help with these crashes. First, if you get a crash inside some JavaScript function, wrap the body of the function like this:
function foo() {
try {
// ...
} catch(e) {
console.log("Crash in function foo()", e.stack);
throw e;
}
}This code catches all exceptions and prints a stack trace before re-raising them. If you instead are getting crashes inside an exported function you will need to wrap that function, on the Python side:
class JSContext:
def foo(self, arg):
try:
# ...
except:
import traceback
traceback.print_exc()
raiseDebugging these issues is not easy, because all these calls between Python and JavaScript get pretty complicated. Because these bugs are hard, it’s worth approaching debugging systematically and gathering a lot of information before attempting a fix.
Returning Handles
So far, JavaScript evaluation is fun but useless, because JavaScript can’t make any kinds of modifications to the page itself. (Why even run JavaScript if it can’t do anything besides print? Who looks at a browser’s console output?) We need to allow JavaScript to modify the page.
JavaScript manipulates a web page by calling any of a large set of methods collectively called the DOM API. The DOM API is big, and it keeps getting bigger, so we won’t be implementing all, or even most, of it. But a few core functions show key elements of the full API:
querySelectorAllreturns all the elements matching a selector;getAttributereturns an element’s value for some attribute; andinnerHTMLreplaces the content of an element with new HTML.
We’ll implement simplified versions of these APIs.The simplifications will be
minor. querySelectorAll will return an array, not this
thing called a NodeList; innerHTML will only
write the HTML contents of an element, and won’t allow reading those
contents. This suffices to demonstrate JavaScript–browser
interaction.
Let’s start with querySelectorAll. First, export a
function:
class JSContext:
def __init__(self):
# ...
self.interp.export_function("querySelectorAll",
self.querySelectorAll)
# ...In JavaScript, querySelectorAll is a method on the
document object, which we need to define in the JavaScript
runtime:
document = { querySelectorAll: function(s) {
return call_python("querySelectorAll", s);
}}On the Python side, querySelectorAll first has to parse
the selector and then find and return the matching elements. To parse
the selector, I’ll call into the CSSParser’s
selector method:If you pass querySelectorAll an invalid
selector, the selector call will throw an error, and DukPy
will convert that Python-side exception into a JavaScript-side exception
in the web script we are running, which can catch it.
class JSContext:
def querySelectorAll(self, selector_text):
selector = CSSParser(selector_text).selector()Next we need to find and return all matching elements. To do that, we
need the JSContext to have access to the Tab,
specifically to its nodes field. So let’s pass in the
Tab when creating a JSContext:
class JSContext:
def __init__(self, tab):
self.tab = tab
# ...
class Tab:
def load(self, url, payload=None):
# ...
self.js = JSContext(self)
# ...Now querySelectorAll will find all nodes matching the
selector:
def querySelectorAll(self, selector_text):
# ...
nodes = [node for node
in tree_to_list(self.tab.nodes, [])
if selector.matches(node)]Finally, we need to return those nodes back to JavaScript. You might try something like this:
def querySelectorAll(self, selector_text):
# ...
return nodesHowever, this throws an error:Yes, that’s a confusing error message. Is it a
JSRuntimeError, an EvalError, or a
TypeError? The confusion is a consequence of the complex
interaction of Python, JS, and C code. (JSON, or JavaScript Object
Notation, is a language-independent data format.)
_dukpy.JSRuntimeError: EvalError:
Error while calling Python Function:
TypeError('Object of type Element is not JSON serializable')What DukPy is trying to tell you is that it has no idea what to do
with the Element objects that querySelectorAll
returns. After all, the Element class only exists in
Python, not JavaScript!
Python objects need to stay on the Python side of the browser, so JavaScript code will need to refer to them via some kind of indirection. I’ll use a simple numeric identifier, which I’ll call a handle (see Figure 2).Note the similarity to file descriptors, which give user-level applications access to kernel data structures.
We’ll need to keep track of the handle to node mapping. Let’s create
a node_to_handle data structure to map nodes to handles,
and a handle_to_node map that goes the other way:
class JSContext:
def __init__(self, tab):
# ...
self.node_to_handle = {}
self.handle_to_node = {}
# ...Now the querySelectorAll handler can allocate handles
for each node and return those handles instead:
def querySelectorAll(self, selector_text):
# ...
return [self.get_handle(node) for node in nodes]The get_handle function should create a new handle if
one doesn’t exist yet:
class JSContext:
def get_handle(self, elt):
if elt not in self.node_to_handle:
handle = len(self.node_to_handle)
self.node_to_handle[elt] = handle
self.handle_to_node[handle] = elt
else:
handle = self.node_to_handle[elt]
return handleSo now the querySelectorAll handler returns something
like [1, 3, 4, 7], with each number being a handle for an
element, which DukPy can easily convert into JavaScript objects without
issue. Now of course, on the JavaScript side,
querySelectorAll shouldn’t return a bunch of numbers: it
should return a list of Node objects.In a real browser,
querySelectorAll actually returns a NodeList
object, for kind of abstruse reasons that aren’t relevant
here. So let’s define a Node object in our
runtime that wraps a handle:If your JavaScript is rusty, you might want to read up on
the crazy way you define classes in JavaScript. Modern JavaScript also
provides the class syntax, which is more sensible, but it’s
not supported in DukPy.
function Node(handle) { this.handle = handle; }We create these Node objects in
querySelectorAll’s wrapper:This code creates new
Node objects every time you call
querySelectorAll, even if there’s already a
Node for that handle. That means you can’t use equality to
compare Node objects. I’ll ignore that but a real browser
wouldn’t.
document = { querySelectorAll: function(s) {
var handles = call_python("querySelectorAll", s);
return handles.map(function(h) { return new Node(h) });
}}Wrapping Handles
Now that we’ve got some Nodes, what can we do with
them?
One simple DOM method is getAttribute, a method on
Node objects that lets you get the value of HTML
attributes. Implementing getAttribute means solving the
opposite problem to querySelectorAll: taking
Node objects on the JavaScript side, and shipping them over
to Python.
The solution is similar to querySelectorAll: instead of
shipping the Node object itself, we send over its
handle:
Node.prototype.getAttribute = function(attr) {
return call_python("getAttribute", this.handle, attr);
}On the Python side, the getAttribute function takes two
arguments, a handle and an attribute:
class JSContext:
def getAttribute(self, handle, attr):
elt = self.handle_to_node[handle]
attr = elt.attributes.get(attr, None)
return attr if attr else ""Note that if the attribute is not assigned, the get
method will return None, which DukPy will translate to
JavaScript’s null. Don’t forget to export this function as
getAttribute.
We finally have enough of the DOM API to implement a little character count function for text areas:
inputs = document.querySelectorAll('input')
for (var i = 0; i < inputs.length; i++) {
var name = inputs[i].getAttribute("name");
var value = inputs[i].getAttribute("value");
if (value.length > 100) {
console.log("Input " + name + " has too much text.")
}
}Ideally, though we’d update the character count every time the user types into an input box. That requires running JavaScript on every key press. Let’s implement that next.
Node objects in the DOM correspond to
Element nodes in the browser. They thus have JavaScript
object properties as well as HTML attributes. They’re
easy to confuse, and to make matters worse, many DOM object properties
reflect
attribute values automatically. For example, the id
property on Node objects gives read-write access to the id
attribute of the underlying Element. This is very
convenient, and avoids calling setAttribute and
getAttribute all over the place. But this reflection only
applies to certain fields; setting made-up JavaScript properties won’t
create corresponding HTML attributes, nor vice versa.
Event Handling
The browser executes JavaScript code as soon as it loads the web page, but that code often wants to change the page in response to user actions.
Here’s how that works. Any time the user interacts with the page, the
browser generates events. Each event has a type, like
change, click, or submit, and
happens at a target element. The addEventListener
method allows JavaScript to react to those events:
node.addEventListener('click', func) sets func
to run every time the element corresponding to node
generates a click event. It’s basically Tk’s
bind, but in the browser—see Figure 3. Let’s implement
it.
Let’s start with generating events. I’ll create a
dispatch_event method and call it whenever an event is
generated. That includes, first of all, any time we click in the
page:
class Tab:
def click(self, x, y):
# ...
elif elt.tag == "a" and "href" in elt.attributes:
self.js.dispatch_event("click", elt)
# ...
elif elt.tag == "input":
self.js.dispatch_event("click", elt)
# ...
elif elt.tag == "button":
self.js.dispatch_event("click", elt)
# ...
# ...Second, before updating input area values:
class Tab:
def keypress(self, char):
if self.focus:
self.js.dispatch_event("keydown", self.focus)
# ...And finally, when submitting forms but before actually sending the request to the server:
def submit_form(self, elt):
self.js.dispatch_event("submit", elt)
# ...So far so good—but what should the dispatch_event method
do? Well, it needs to run listeners passed to
addEventListener, so those need to be stored somewhere.
Since those listeners are JavaScript functions, we need to keep that
data on the JavaScript side, in a variable in the runtime. I’ll call
that variable LISTENERS; we’ll use it to look up handles
and event types, so let’s make it map handles to a dictionary that maps
event types to a list of listeners:
LISTENERS = {}
Node.prototype.addEventListener = function(type, listener) {
if (!LISTENERS[this.handle]) LISTENERS[this.handle] = {};
var dict = LISTENERS[this.handle];
if (!dict[type]) dict[type] = [];
var list = dict[type];
list.push(listener);
}To dispatch an event, we need to look up the type and handle in the
LISTENERS array, like this:
Node.prototype.dispatchEvent = function(type) {
var handle = this.handle;
var list = (LISTENERS[handle] && LISTENERS[handle][type]) || [];
for (var i = 0; i < list.length; i++) {
list[i].call(this);
}
}Note that dispatchEvent uses the call
method on functions, which sets the value of this inside
that function. As is standard in JavaScript, I’m setting it to the node
that the event was generated on.
When an event occurs, the browser calls dispatchEvent
from Python:
class JSContext:
def dispatch_event(self, type, elt):
handle = self.node_to_handle.get(elt, -1)
self.interp.evaljs(
EVENT_DISPATCH_JS, type=type, handle=handle)Here, the EVENT_DISPATCH_JS constant is a string of
JavaScript code that dispatches a new event:
EVENT_DISPATCH_JS = \
"new Node(dukpy.handle).dispatchEvent(dukpy.type)"So when dispatch_event is called on the Python side,
that runs dispatchEvent on the JavaScript side, and that in
turn runs all of the event listeners. The dukpy JavaScript
object in this code snippet stores the named type and
handle arguments to evaljs.
With all this event-handling machinery in place, we can update the character count every time an input area changes:
function lengthCheck() {
var name = this.getAttribute("name");
var value = this.getAttribute("value");
if (value.length > 100) {
console.log("Input " + name + " has too much text.")
}
}var inputs = document.querySelectorAll("input");
for (var i = 0; i < inputs.length; i++) {
inputs[i].addEventListener("keydown", lengthCheck);
}Note that lengthCheck uses this to
reference the input element that actually changed, as set up by
dispatchEvent.
So far so good—but ideally the length check wouldn’t print to the console; it would add a warning to the web page itself. To do that, we’ll need to not only read from the page but also modify it.
JavaScript first
appeared in 1995, as part of Netscape Navigator. Its name was chosen
to indicate a similarity to the Java
language, and the syntax is Java-esque for that reason. However, under
the surface JavaScript is a much more dynamic language than Java, as is
appropriate given its role as a progressive enhancement mechanism for
the web. For example, any method or property on any object (including
built-in ones like Element) can be dynamically overridden
at any time. This makes it possible to polyfill
differences between browsers, adding features that look built-in to
other JavaScript code.
Modifying the DOM
So far we’ve implemented read-only DOM methods; now we need methods
that change the page. The full DOM API provides a lot of such methods,
but for simplicity I’m going to implement only innerHTML,
which is used like this:
node.innerHTML = "This is my <b>new</b> bit of content!";In other words, innerHTML is a property of node
objects, with a setter that is run when the field is modified.
That setter takes the new value, which must be a string, parses it as
HTML, and makes the new, parsed HTML nodes children of the original
node.
Let’s implement this, starting on the JavaScript side. JavaScript has
the obscure Object.defineProperty function to define
setters, which DukPy supports:
Object.defineProperty(Node.prototype, 'innerHTML', {
set: function(s) {
call_python("innerHTML_set", this.handle, s.toString());
}
});In innerHTML_set, we’ll need to parse the HTML string.
That turns out to be trickier than you’d think, because our browser’s
HTML parser is intended to parse whole HTML documents, not these
document fragments. As an expedient, close-enough hack,Real browsers follow the standardized
parsing algorithm for HTML fragments. I’ll just wrap
the HTML in an html and body element:
def innerHTML_set(self, handle, s):
doc = HTMLParser("<html><body>" + s + "</body></html>").parse()
new_nodes = doc.children[0].childrenDon’t forget to export the innerHTML_set function. Note
that we extract all children of the body element, because
an innerHTML_set call can create multiple nodes at a time.
These new nodes must now be made children of the element
innerHTML_set was called on:
def innerHTML_set(self, handle, s):
# ...
elt = self.handle_to_node[handle]
elt.children = new_nodes
for child in elt.children:
child.parent = eltWe update the parent pointers of those parsed child nodes because
otherwise they would point to the dummy body element that
we added to aid parsing.
It might look like we’re done—but try this out and you’ll realize
that nothing happens when a script calls innerHTML_set.
That’s because, while we have changed the HTML tree, we haven’t
regenerated the layout tree or the display list, so the browser is still
showing the old page.
Whenever the page changes, we need to update its rendering by calling
render:Redoing layout for the whole page is often wasteful; Chapter 16 explores a more complicated
algorithm that speeds this up.
class JSContext:
def innerHTML_set(self, handle, s):
# ...
self.tab.render()JavaScript can now modify the web page!Note that while rendering will update to account for the new HTML, any added scripts or style sheets will not properly load, and removed style sheets will (incorrectly) still apply. I’ve left fixing that as Exercise 9-7.
Let’s try this out in our guest book. Say we want a 100-character limit on guest book entries to prevent long, incoherent rants from making it in.
First, switch to the server codebase and add a
<strong> after the guest book form. Initially this
element will be empty, but we’ll write an error message into it if the
paragraph gets too long.
def show_comments():
# ...
out += "<strong></strong>"
# ...Also add a script to the page.
def show_comments():
# ...
out += "<script src=/comment.js></script>"
# ...Now the browser will request comment.js, so our server
needs to serve that JavaScript file:
def do_request(method, url, headers, body):
# ...
elif method == "GET" and url == "/comment.js":
with open("comment.js") as f:
return "200 OK", f.read()
# ...We can then put our little input length checker into
comment.js, with the lengthCheck function
modified to use innerHTML:
var strong = document.querySelectorAll("strong")[0];
function lengthCheck() {
var value = this.getAttribute("value");
if (value.length > 100) {
strong.innerHTML = "Comment too long!";
}
}
var inputs = document.querySelectorAll("input");
for (var i = 0; i < inputs.length; i++) {
inputs[i].addEventListener("keydown", lengthCheck);
}Try it out: write a long comment and you should see the page warning
you when it grows too long. By the way, we might want to make it stand
out more, so let’s go ahead and add another URL to our web server,
/comment.css, with the contents:
strong { font-weight: bold; color: red; }Add a link to the guest book page so that this style
sheet is loaded.
But even though we tell the user that their comment is too long the user can submit the guest book entry anyway. Oops! Let’s fix that.
This code has a subtle memory leak: if you access an HTML element
from JavaScript (thereby creating a handle for it) and then remove the
element from the page (using innerHTML), Python won’t be
able to garbage-collect the Element object because it is
still stored in the node_to_handle map. And that’s good, if
JavaScript can still access that Element via its handle,
but bad otherwise. Solving this is quite tricky, because it requires the
Python and JavaScript garbage collectors to cooperate.
Event Defaults
So far, when an event is generated, the browser will run the listeners, and then also do whatever it normally does for that event—the default action. I’d now like JavaScript code to be able to cancel that default action.
There are a few steps involved. First of all, event listeners should
receive an event object as an argument. That object should have
a preventDefault method. When that method is called, the
default action shouldn’t occur.
First of all, we’ll need event objects. Back to our JavaScript runtime:
function Event(type) {
this.type = type
this.do_default = true;
}
Event.prototype.preventDefault = function() {
this.do_default = false;
}Note the do_default field, to record whether
preventDefault has been called. We’ll now be passing an
Event object to dispatchEvent, instead of just
the event type:
Node.prototype.dispatchEvent = function(evt) {
var type = evt.type;
// ...
for (var i = 0; i < list.length; i++) {
list[i].call(this, evt);
}
// ...
return evt.do_default;
}In Python, we now need to create an Event to pass to
dispatchEvent:
EVENT_DISPATCH_JS = \
"new Node(dukpy.handle).dispatchEvent(new Event(dukpy.type))"Also note that dispatchEvent returns
evt.do_default, which is not only standard in JavaScript
but also helpful when dispatching events from Python, because Python’s
dispatch_event can return that boolean to its handler:
class JSContext:
def dispatch_event(self, type, elt):
# ...
do_default = self.interp.evaljs(
EVENT_DISPATCH_JS, type=type, handle=handle)
return not do_defaultThis way, every time an event happens, the browser can check the
return value of dispatch_event and stop if it is
True. We have three such places in the click
method:
class Tab:
def click(self, x, y):
while elt:
# ...
elif elt.tag == "a" and "href" in elt.attributes:
if self.js.dispatch_event("click", elt): return
# ...
elif elt.tag == "input":
if self.js.dispatch_event("click", elt): return
# ...
elif elt.tag == "button":
if self.js.dispatch_event("click", elt): return
# ...
# ...
# ...And one in submit_form:
class Tab:
def submit_form(self, elt):
if self.js.dispatch_event("submit", elt): returnAnd one in keypress:
class Tab:
def keypress(self, char):
if self.focus:
if self.js.dispatch_event("keydown", self.focus): returnNow our character count code can prevent the user from submitting a form: it can use a global variable to track whether or not submission is allowed, and then when submission is attempted it can check that variable and cancel that submission if necessary:
var allow_submit = true;
function lengthCheck() {
// ...
allow_submit = value.length <= 100;
if (!allow_submit) {
// ...
}
}
var form = document.querySelectorAll("form")[0];
form.addEventListener("submit", function(e) {
if (!allow_submit) e.preventDefault();
});This way it’s impossible to submit the form when the comment is too long!
Well … impossible in this browser. But since there are browsers that don’t run JavaScript (like ours, one chapter back), we should check the length on the server side too:
def add_entry(params):
if 'guest' in params and len(params['guest']) <= 100:
ENTRIES.append(params['guest'])Note that we shouldn’t—can’t—rely on JavaScript being executed by the browser, because the browser is the user’s agent, not ours. Ideally, web pages should be written so that they work correctly without JavaScript, but work better with it. This is called progressive enhancement, and it means we’re not replicating in JavaScript what the browser can already do.
A closing thought: while our guest book now has a little bit of JavaScript code, it’s still mostly HTML, CSS, form elements, other standard web features. In this way JavaScript extends the web instead of replacing it. This is in contrast to the recently departed Adobe Flash, and before that Java Applets, which were self-contained plug-ins that handled input and rendering on their own.
Search engines are constantly crawling the web and indexing all of the web pages they can find. In the early days, indexing was just a matter of loading the HTML, parsing it and extracting the information. But these days, a lot of single-page app sites use JavaScript to “hydrate”This process is called “hydration” by analogy with how water is added to dehydrated food to make it edible again. their site into its full contents. On such sites, before hydration happens, the information in the site is hidden inside of JavaScript data structures. For this reason, search engines need to not just parse HTML, but also run JavaScript (and load style sheets) during indexing. In other words, the indexing systems use browsers (such as, for example, headless Chrome)—one more place browsers appear in the web ecosystem.
Summary
Our browser now runs JavaScript applications on behalf of websites. Granted, it supports just four methods from the vast DOM API, but even those demonstrate:
- generating handles to allow scripts to refer to page elements;
- reading attribute values from page elements;
- writing and modifying page elements;
- attaching event listeners so that scripts can respond to page events.
A web page can now add functionality via a clever script, instead of waiting for a browser developer to add it into the browser itself. And as a side benefit, a web page can now earn the lofty title of “web application”.
Starting with this chapter, I won’t be able to inline the chapter’s browser into an iframe, due to security restrictions related to the way I’m communicating with scripts within the web page. But you can still load it in a new browser tab by clicking here.
Outline
The complete set of functions, classes, and methods in our browser should now look something like this:
class URL:
def __init__(url)
def request(payload)
def resolve(url)
def __str__()
class Text:
def __init__(text, parent)
def __repr__()
class Element:
def __init__(tag, attributes, parent)
def __repr__()
def print_tree(node, indent)
def tree_to_list(tree, list)
class HTMLParser:
SELF_CLOSING_TAGS
HEAD_TAGS
def __init__(body)
def parse()
def get_attributes(text)
def add_text(text)
def add_tag(tag)
def implicit_tags(tag)
def finish()
class CSSParser:
def __init__(s)
def whitespace()
def literal(literal)
def word()
def ignore_until(chars)
def pair()
def selector()
def body()
def parse()
class TagSelector:
def __init__(tag)
def matches(node)
class DescendantSelector:
def __init__(ancestor, descendant)
def matches(node)
FONTS
def get_font(size, weight, style)
DEFAULT_STYLE_SHEET
INHERITED_PROPERTIES
def style(node, rules)
def cascade_priority(rule)
WIDTH, HEIGHT
HSTEP, VSTEP
class Rect:
def __init__(left, top, right, bottom)
def contains_point(x, y)
INPUT_WIDTH_PX
BLOCK_ELEMENTS
class DocumentLayout:
def __init__(node)
def layout()
def should_paint()
def paint()
class BlockLayout:
def __init__(node, parent, previous)
def layout_mode()
def layout()
def recurse(node)
def new_line()
def word(node, word)
def input(node)
def self_rect()
def should_paint()
def paint()
class LineLayout:
def __init__(node, parent, previous)
def layout()
def should_paint()
def paint()
class TextLayout:
def __init__(node, word, parent, previous)
def layout()
def should_paint()
def paint()
class InputLayout:
def __init__(node, parent, previous)
def layout()
def should_paint()
def paint()
def self_rect()
class DrawText:
def __init__(x1, y1, text, font, color)
def execute(scroll, canvas)
class DrawRect:
def __init__(rect, color)
def execute(scroll, canvas)
class DrawLine:
def __init__(x1, y1, x2, y2, color, thickness)
def execute(scroll, canvas)
class DrawOutline:
def __init__(rect, color, thickness)
def execute(scroll, canvas)
def paint_tree(layout_object, display_list)
EVENT_DISPATCH_JS
RUNTIME_JS
class JSContext:
def __init__(tab)
def run(script, code)
def dispatch_event(type, elt)
def get_handle(elt)
def querySelectorAll(selector_text)
def getAttribute(handle, attr)
def innerHTML_set(handle, s)
SCROLL_STEP
class Tab:
def __init__(tab_height)
def load(url, payload)
def render()
def draw(canvas, offset)
def scrolldown()
def click(x, y)
def go_back()
def submit_form(elt)
def keypress(char)
class Chrome:
def __init__(browser)
def tab_rect(i)
def paint()
def click(x, y)
def keypress(char)
def enter()
def blur()
class Browser:
def __init__()
def draw()
def new_tab(url)
def handle_down(e)
def handle_click(e)
def handle_key(e)
def handle_enter(e)
Exercises
9-1 Node.children. Add support for the children
property on JavaScript Nodes. Node.children
returns the immediate Element children of a node, as an
array. Text children are not included.The DOM method
childNodes gives access to both elements and text
nodes.
9-2 createElement. The document.createElement
method creates a new element, which can be attached to the
document with the appendChild
and insertBefore
methods on Nodes; unlike innerHTML, there’s no
parsing involved. Implement all three methods.
9-3 removeChild. The removeChild
method on Nodes detaches the provided child and returns it,
bringing that child—and its subtree—back into a detached state.
(It can then be re-attached elsewhere, with
appendChild and insertBefore, or deleted.)
Implement this method. It’s more challenging to implement this one,
because you’ll need to also remove the subtree from the Python side.
9-4 IDs. When an HTML element has an id
attribute, a JavaScript variable pointing to that element is predefined.
So, if a page has a <div id="foo"></div>, then
there’s a variable foo referring to that node.This is standard
behavior. Implement this in your browser. Make sure to
handle the case of nodes being added and removed (such as with
innerHTML).
9-5 Event bubbling. Right now, you can attach a
click handler to a (anchor) elements, but not
to anything else. Fix this. One challenge you’ll face is that when you
click on an element, you also click on all its ancestors. On the web,
this sort of quirk is handled by event
bubbling: when an event is generated on an element, listeners
are run not just on that element but also on its ancestors. Implement
event bubbling, and make sure listeners can call
stopPropagation on the event object to stop bubbling the
event up the tree. Double-check that clicking on links still works, and
make sure preventDefault still successfully prevents clicks
on a link from actually following the link.
9-6 Serializing HTML. Reading from innerHTML
should return a string containing HTML source code. That source code
should reflect the current attributes of the element; for
example:
element.innerHTML = '<span id=foo>Chris was here</span>';
element.id = 'bar';
console.log(element.innerHTML);
// Prints "<span id=bar>Chris was here</span>":Implement this behavior for innerHTML as a getter. Also
implement outerHTML, which differs from
innerHTML in that it contains the element itself, not just
its children.
9-7 Script-added scripts and style sheets. The
innerHTML API could cause <script> or
<link> elements to be added to the document, but
currently our browser does not load them when this happens. Fix this.
Likewise, when a <link> element is removed from the
document, its style sheet should be removed from the global list;
implement that as well.Note that, unlike a style sheet, a removed
<script>’s evaluated code still exists for the
lifetime of the web page. Can you see why it has to be that
way?
Keeping Data Private
Our browser has grown up and now runs (small) web applications. With one final step—user identity via cookies—it will be able to run all sorts of personalized online services. But capability demands responsibility: our browser must now secure cookies against adversaries interested in stealing them. Luckily, browsers have sophisticated systems for controlling access to cookies and preventing their misuse.
Web security is a vast topic, covering browser, network, and application security. It also involves educating the user, so that attackers can’t mislead them into revealing their own secure data. This chapter can’t cover all of that: if you’re writing web applications or other security-sensitive code, this book is not enough.
Cookies
With what we’ve implemented so far, there’s no way for a web server to tell whether two HTTP requests come from the same user or from two different ones; our browser is effectively anonymous.I don’t mean anonymous against malicious attackers, who might use browser fingerprinting or similar techniques to tell users apart. I mean anonymous in the good-faith sense. That means it can’t “log in” anywhere, since a logged-in user’s requests would be indistinguishable from those of not-logged-in users.
The web fixes this problem with cookies. A cookie—the name is meaningless, ignore it—is a little bit of information stored by your browser on behalf of a web server. The cookie distinguishes your browser from any other, and is sent with each web request so the server can distinguish which requests come from whom. In effect, a cookie is a decentralized, server-granted identity for your browser.
Here are the technical details. An HTTP response can contain a
Set-Cookie header. This header contains a key–value pair;
for example, the following header sets the value of the foo
cookie to bar:
Set-Cookie: foo=barThe browser remembers this key–value pair, and the next time it makes
a request to the same server (cookies are site-specific), the browser
echoes it back in the Cookie header:
Cookie: foo=barServers can set multiple cookies, and also set parameters like
expiration dates, but this Set-Cookie / Cookie
transaction as shown in Figure 1 is the core principle.
Let’s use cookies to write a login system for our guest book. Each
user will be identified by a long random number stored in the
token cookie.This random.random call returns a decimal
number with 53 bits of randomness. That’s not great; 256 bits is
typically the goal. And random.random is not a secure
random number generator: by observing enough tokens you can predict
future values and use those to hijack accounts. A real web application
must use a cryptographically secure random number generator for
tokens. The server will either extract a token from the
Cookie header, or generate a new one for new visitors:
import random
def handle_connection(conx):
# ...
if "cookie" in headers:
token = headers["cookie"][len("token="):]
else:
token = str(random.random())[2:]
# ...Of course, new visitors need to be told to remember their newly generated token:
def handle_connection(conx):
# ...
if 'cookie' not in headers:
template = "Set-Cookie: token={}\r\n"
response += template.format(token)
# ...The first code block runs after all the request headers are parsed,
before handling the request in do_request, while the second
code block runs after do_request returns, when the server
is assembling the HTTP response.
With these two code changes, each visitor to the guest book now has a
unique identity. We can now use that identity to store information about
each user. Let’s do that in a server side SESSIONS
variable:Browsers and
servers both limit header lengths, so it’s best to store minimal data in
cookies. Plus, cookies are sent back and forth on every request, so long
cookies mean a lot of useless traffic. It’s therefore wise to store user
data on the server, and only store a pointer to that data in the cookie.
And, since cookies are stored by the browser, they can be changed
arbitrarily by the user, so it would be insecure to trust the cookie
data.
SESSIONS = {}
def handle_connection(conx):
# ...
session = SESSIONS.setdefault(token, {})
status, body = do_request(session, method, url, headers, body)
# ...SESSIONS maps tokens to session data dictionaries. The
setdefault method both gets a key from a dictionary and
also sets a default value if the key isn’t present. I’m passing that
session data via do_request to individual pages like
show_comments and add_entry:
def do_request(session, method, url, headers, body):
if method == "GET" and url == "/":
return "200 OK", show_comments(session)
# ...
elif method == "POST" and url == "/add":
params = form_decode(body)
add_entry(session, params)
return "200 OK", show_comments(session)
# ...You’ll need to modify the argument lists for add_entry
and show_comments to accept this new argument. We now have
the foundation upon which to build a login system.
The original specification for cookies says there is “no compelling reason” for calling them “cookies”, but in fact using this term for opaque identifiers exchanged between programs seems to date way back; Wikipedia traces it back to at least 1979, and cookies were used in X11 for authentication before they were used on the web.
A Login System
I want users to log in before posting to the guest book. Minimally, that means:
- Users will log in with a username and password.
- The server will check if the login is valid.
- Users have to be logged in to add guest book entries.
- The server will display who added which guest book entry.
Let’s start coding. We’ll hard-code two user/password pairs:
LOGINS = {
"crashoverride": "0cool",
"cerealkiller": "emmanuel"
}Users will log in by going to /login:
def do_request(session, method, url, headers, body):
# ...
elif method == "GET" and url == "/login":
return "200 OK", login_form(session)
# ...This page shows a form with a username and a password field:I’ve given the
password input area the type password, which
in a real browser will draw stars or dots instead of showing what you’ve
entered, though our browser doesn’t do that; see Exercise 10-1. Also, do note that this is not
particularly accessible HTML, lacking for example
<label> elements around the form labels. Not that our
browser supports that!
def login_form(session):
body = "<!doctype html>"
body += "<form action=/ method=post>"
body += "<p>Username: <input name=username></p>"
body += "<p>Password: <input name=password type=password></p>"
body += "<p><button>Log in</button></p>"
body += "</form>"
return body Note that the form POSTs its data to the /
URL. We’ll want to handle these POST requests in a new
function that checks passwords and does logins:
def do_request(session, method, url, headers, body):
# ...
elif method == "POST" and url == "/":
params = form_decode(body)
return do_login(session, params)
# ...This do_login function checks passwords and logs people
in by storing their user name in the session data:Actually, using
== to compare passwords like this is a bad idea: Python’s
equality function for strings scans the string from left to right, and
exits as soon as it finds a difference. Therefore, you get a clue about
the password from how long it takes to check a password guess;
this is called a timing side
channel. This book is about the browser, not the server, but a real
web application has to do a constant-time
string comparison!
def do_login(session, params):
username = params.get("username")
password = params.get("password")
if username in LOGINS and LOGINS[username] == password:
session["user"] = username
return "200 OK", show_comments(session)
else:
out = "<!doctype html>"
out += "<h1>Invalid password for {}</h1>".format(username)
return "401 Unauthorized", outNote that the session data (including the user key) is
stored on the server, so users can’t modify it directly. That’s good,
because we only want to set the user key in the session
data if users supply the right password in the login form.
So now we can check if a user is logged in by checking the
session data. Let’s only show the comment form to logged in
users:
def show_comments(session):
# ...
if "user" in session:
out += "<h1>Hello, " + session["user"] + "</h1>"
out += "<form action=add method=post>"
out += "<p><input name=guest></p>"
out += "<p><button>Sign the book!</button></p>"
out += "</form>"
else:
out += "<a href=/login>Sign in to write in the guest book</a>"
# ...Likewise, add_entry must check that the user is logged
in before posting comments:
def add_entry(session, params):
if "user" not in session: return
if 'guest' in params and len(params['guest']) <= 100:
ENTRIES.append((params['guest'], session["user"]))Note that the username from the session is stored into
ENTRIES:The
pre-loaded comments reference 1995’s Hackers. Hack the Planet!
ENTRIES = [
("No names. We are nameless!", "cerealkiller"),
("HACK THE PLANET!!!", "crashoverride"),
]When we print the guest book entries, we’ll show who authored them:
def show_comments(session):
# ...
for entry, who in ENTRIES:
out += "<p>" + entry + "\n"
out += "<i>by " + who + "</i></p>"
# ...Try it out in a normal web browser. You should be able to go to the
main guest book page, click the link to log in, log in with one of the
username/password pairs above, and then be able to post entries.The login flow slows down
debugging. You might want to add the empty string as a username/password
pair. Of course, this login system has a whole slew of
insecurities.The
insecurities include not hashing passwords, not using bcrypt,
not allowing password changes, not having a “forget your password” flow,
not forcing TLS, not sandboxing the server, and many many
others. But the focus of this book is the browser, not the
server, so once you’re sure it’s all working, let’s switch back to our
web browser and implement cookies.
A more obscure browser authentication system is TLS
client certificates. The user downloads a public/private key pair
from the server, and the browser then uses them to prove who it is upon
later requests to that server. Also, if you’ve ever seen a URL with
username:password@ before the hostname, that’s HTTP
authentication. Please don’t use either method in new websites
(without a good reason).
Implementing Cookies
To start, we need a place in the browser that stores cookies; that data structure is traditionally called a cookie jar:Because once you have one silly name it’s important to stay on-brand.
COOKIE_JAR = {}Since cookies are site-specific, our cookie jar will map sites to
cookies. Note that the cookie jar is global, not limited to a particular
tab. That means that if you’re logged in to a website and you open a
second tab, you’re logged in on that tab as well.Moreover, since
request can be called multiple times on one page—to load
CSS and JavaScript—later requests transmit cookies set by previous
responses. For example our guest book sets a cookie when the browser
first requests the page and then receives that cookie when our browser
later requests the page’s CSS file.
When the browser visits a page, it needs to send the cookie for that site:
class URL:
def request(self, payload=None):
# ...
if self.host in COOKIE_JAR:
cookie = COOKIE_JAR[self.host]
request += "Cookie: {}\r\n".format(cookie)
# ...Symmetrically, the browser has to update the cookie jar when it sees
a Set-Cookie header:A server can actually send multiple Set-Cookie
headers to set multiple cookies in one request, though our browser won’t
handle that correctly.
class URL:
def request(self, payload=None):
# ...
if "set-cookie" in response_headers:
cookie = response_headers["set-cookie"]
COOKIE_JAR[self.host] = cookie
# ...You should now be able to use your browser to log in to the guest book and post to it. Moreover, you should be able to open the guest book in two browsers simultaneously—maybe your browser and a real browser as well—and log in and post as two different users.
Now that our browser supports cookies and uses them for logins, we need to make sure cookie data is safe from malicious actors. After all, the cookie is the browser’s identity, so if someone stole it, the server would think they are you. We need to prevent that.
At one point, an attempt was made to “clean up” the cookie
specification in RFC 2965,
including human-readable cookie descriptions and cookies restricted to
certain ports. This required introducing the Cookie2 and
Set-Cookie2 headers; the new headers were not popular. They
are now obsolete.
Cross-site Requests
Cookies are site-specific, so one server shouldn’t be sent another server’s cookies.Well… Our connection isn’t encrypted, so an attacker could read it from an open Wi-Fi connection. But another server couldn’t. Or how about this attack: another server could hijack our DNS and redirect our hostname to a different IP address, and then steal our cookies. Some internet service providers support DNSSEC, which prevents this, but not all. Or consider this attack: a state-level attacker could announce fradulent BGP (Border Gateway Protocol) routes, which would send even a correctly retrieved IP address to the wrong physical computer. (Security is very hard.) But if an attacker is clever, they might be able to get the server or the browser to help them steal cookie values.
The easiest way for an attacker to steal your private data is to ask
for it. Of course, there’s no API in the browser for a website to ask
for another website’s cookies. But there is an API to make
requests to another website. It’s called
XMLHttpRequest.It’s a weird name! Why is XML capitalized but
not Http? And it’s not restricted to XML! Ultimately, the
naming is historical,
dating back to Microsoft’s “Outlook Web Access” feature for Exchange
Server 2000.
XMLHttpRequest sends asynchronous HTTP requests from
JavaScript. Since I’m using XMLHttpRequest just to
illustrate security issues, I’ll implement a minimal version here.
Specifically, I’ll support only synchronous requests.Synchronous
XMLHttpRequests are slowly moving through deprecation and
obsolescence, but I’m using them here because they are easier to
implement. We’ll implement the asynchronous variant in Chapter
12. Using this minimal XMLHttpRequest looks
like this:
x = new XMLHttpRequest();
x.open("GET", url, false);
x.send();
// use x.responseTextWe’ll define the XMLHttpRequest objects and methods in
JavaScript. The open method will just save the method and
URL:XMLHttpRequest has more options not
implemented here, like support for usernames and passwords. This code is
also missing some error checking, like making sure the method is a valid
HTTP method supported by our browser.
function XMLHttpRequest() {}
XMLHttpRequest.prototype.open = function(method, url, is_async) {
if (is_async) throw Error("Asynchronous XHR is not supported");
this.method = method;
this.url = url;
}The send method calls an exported function:As above, this implementation
skips important XMLHttpRequest features, like setting
request headers (and reading response headers), changing the response
type, or triggering various events and callbacks during the
request.
XMLHttpRequest.prototype.send = function(body) {
this.responseText = call_python("XMLHttpRequest_send",
this.method, this.url, body);
}The XMLHttpRequest_send function just calls
request:Note that the method argument is ignored,
because our request function chooses the method on its own
based on whether a payload is passed. This doesn’t match the standard
(which allows POST requests with no payload), and I’m only
doing it here for convenience.
class JSContext:
def XMLHttpRequest_send(self, method, url, body):
full_url = self.tab.url.resolve(url)
headers, out = full_url.request(body)
return outWith XMLHttpRequest, a web page can make HTTP requests
in response to user actions, making websites more interactive (see
Figure 2). This API, and newer analogs like fetch,
are how websites allow you to like a post, see hover previews, or submit
a form without reloading.
XMLHttpRequest objects have setRequestHeader
and getResponseHeader
methods to control HTTP headers. However, this could allow a script to
interfere with the cookie mechanism or with other security measures, so
some request
and response
headers are not accessible from JavaScript.
Same-origin Policy
However, new capabilities lead to new responsibilities. HTTP requests
sent with XMLHttpRequest include cookies. This is by
design: when you “like” something, the server needs to associate the
“like” to your account. But it also means that
XMLHttpRequest can access private data, and thus there is a
need to protect it.
Let’s imagine an attacker wants to know your username on our guest book server. When you’re logged in, the guest book includes your username on the page (where it says “Hello, so and so”), so reading the guest book with your cookies is enough to determine your username.
With XMLHttpRequest, an attacker’s websiteWhy is the user on the
attacker’s site? Perhaps it has funny memes, or it’s been hacked and is
being used for the attack against its will, or perhaps the evildoer paid
for ads on sketchy websites where users have low standards for security
anyway. could request the guest book page:
x = new XMLHttpRequest();
x.open("GET", "http://localhost:8000/", false);
x.send();
user = x.responseText.split(" ")[2].split("<")[0];The issue here is that one server’s web page content is being sent to a script running on a website delivered by another server. Since the content is derived from cookies, this leaks private data.
To prevent issues like this, browsers have a same-origin
policy, which says that requests like
XMLHttpRequestSome kinds of request are not subject to the same-origin
policy (most prominently CSS and JavaScript files linked from a web
page); conversely, the same-origin policy also governs JavaScript
interactions with iframes, images,
localStorage and many other browser features.
can only go to web pages on the same “origin”—scheme, hostname, and
port.You may have
noticed that this is not the same definition of “website” as cookies
use: cookies don’t care about scheme or port! This seems to be an
oversight or incongruity left over from the messy early
web. This way, a website’s private data has to stay on
that website, and cannot be leaked to an attacker on another server.
Let’s implement the same-origin policy for our browser. We’ll need to compare the URL of the request to the URL of the page we are on:
class JSContext:
def XMLHttpRequest_send(self, method, url, body):
# ...
if full_url.origin() != self.tab.url.origin():
raise Exception("Cross-origin XHR request not allowed")
# ...The origin function can just strip off the path from a
URL:
class URL:
def origin(self):
return self.scheme + "://" + self.host + ":" + str(self.port)Now an attacker can’t read the guest book web page. But can they write to it? Actually…
One interesting form of the same-origin policy involves images and
the HTML <canvas> element. The drawImage
method allows drawing an image to a canvas, even if that image was
loaded from another origin. But to prevent that image from being read
back with getImageData
or related methods, writing cross-origin data to a canvas taints
it, blocking read methods.
Cross-site Request Forgery
The same-origin policy prevents cross-origin
XMLHttpRequest calls. But the same-origin policy doesn’t
apply to normal browser actions like clicking a link or filling out a
form. This enables an exploit called cross-site request
forgery, often shortened to CSRF.
In cross-site request forgery, instead of using
XMLHttpRequest, the attacker uses a form that submits to
the guest book:
<form action="http://localhost:8000/add" method=post>
<p><input name=guest></p>
<p><button>Sign the book!</button></p>
</form>Even though this form is on the evildoer’s website, when you submit the form, the browser will make an HTTP request to the guest book. And that means it will send its guest book cookies, so it will be logged in, so the guest book code will allow a post. But the user has no way of knowing which server a form submits to—the attacker’s web page could have misrepresented that—so they may have posted something they didn’t mean to.Even worse, the form submission could be triggered by JavaScript, with the user not involved at all. And this kind of attack can be further disguised by hiding the entry widget, pre-filling the post, and styling the button to look like a normal link.
Of course, the attacker can’t read the response, so this doesn’t leak private data to the attacker. But it can allow the attacker to act as the user! Posting a comment this way is not too scary (though shady advertisers will pay for it!) but posting a bank transaction is. And if the website has a change-of-password form, there could even be a way to take control of the account.
Unfortunately, we can’t just apply the same-origin policy to form submissions.For example, many search forms on websites submit to Google, because those websites don’t have their own search engines. So how do we defend against this attack?
To start with, there are things the server can do. The usual advice is to give a unique identity to every form the server serves, and make sure that every POST request comes from one of them. The way to do that is to embed a secret value, called a nonce, into the form, and to reject form submissions that don’t come with the right secret value.Note the similarity to cookies, except that instead of granting identity to browsers, we grant one to forms. Like a cookie, a nonce can be stolen with cross-site scripting. You can only get a nonce from the server, and the nonce is tied to the user session,It’s important that nonces are associated with the particular user. Otherwise, the attacker can generate a nonce for themselves and insert it into a form meant for the user. so the attacker could not embed it in their form.
To implement this fix, generate a nonce and save it in the user
session when a form is requested:Usually <input type=hidden> is
invisible, though our browser doesn’t support this.
def show_comments(session):
# ...
if "user" in session:
nonce = str(random.random())[2:]
session["nonce"] = nonce
# ...
out += "<input name=nonce type=hidden value=" + nonce + ">"When a form is submitted, the server checks that the right nonce is submitted with it:In real websites it’s usually best to allow one user to have multiple active nonces, so that a user can open two forms in two tabs without that overwriting the valid nonce. To prevent the nonce set from growing over time, you’d have nonces expire after a while. I’m skipping this here, because it’s not the focus of this chapter.
def add_entry(session, params):
if "nonce" not in session or "nonce" not in params: return
if session["nonce"] != params["nonce"]: return
# ...Now this form can’t be submitted except from our website. Repeat this nonce fix for each form in the application, and it’ll be secure from CSRF attacks. But server-side solutions are fragile (what if you forget a form?) and relying on every website out there to do it right is a pipe dream. It’d be better for the browser to provide a fail-safe backup.
One unusual attack, similar in spirit to cross-site request forgery,
is click-jacking.
In this attack, an external site in a transparent iframe is
positioned over the attacker’s site. The user thinks they are clicking
around one site, but they actually take actions on a different one.
Nowadays, sites can prevent this with the frame-ancestors
directive to Content-Security-Policy or the older X-Frame-Options
header.
SameSite Cookies
For form submissions, that fail-safe solution is
SameSite cookies. The idea is that if a server marks its
cookies SameSite, the browser will not send them in
cross-site form submissions.At the time of writing the SameSite cookie
standard is still in a draft stage, and not all browsers implement that
draft fully. So it’s possible that this section may become out of date,
though some kind of SameSite cookies will probably be
ratified. The MDN
page is helpful for checking the current status of
SameSite cookies.
A cookie is marked SameSite in the
Set-Cookie header like this:
Set-Cookie: foo=bar; SameSite=LaxThe SameSite attribute can take the value
Lax, Strict, or None, and as I
write, browsers have and plan different defaults. Our browser will
implement only Lax and None, and default to
None. When SameSite is set to
Lax, the cookie is not sent on cross-site POST
requests, but is sent on same-site POST or cross-site
GET requests.Cross-site GET requests are also known as
“clicking a link”, which is why those are allowed in Lax
mode. The Strict version of SameSite blocks
these too, but you need to design your web application carefully for
this to work.
First, let’s modify COOKIE_JAR to store cookie/parameter
pairs, and then parse those parameters out of Set-Cookie
headers:
def request(self, payload=None):
if "set-cookie" in response_headers:
cookie = response_headers["set-cookie"]
params = {}
if ";" in cookie:
cookie, rest = cookie.split(";", 1)
for param in rest.split(";"):
if '=' in param:
param, value = param.split("=", 1)
else:
value = "true"
params[param.strip().casefold()] = value.casefold()
COOKIE_JAR[self.host] = (cookie, params)When sending a cookie in an HTTP request, the browser only sends the cookie value, not the parameters:
def request(self, payload=None):
if self.host in COOKIE_JAR:
cookie, params = COOKIE_JAR[self.host]
request += "Cookie: {}\r\n".format(cookie)This stores the SameSite parameter of a cookie. But to
actually use it, we need to know which site an HTTP request is being
made from. Let’s add a new referrer parameter to
request to track that:The “referrer” is the web page that “referred” our browser
to make the current request. SameSite cookies are actually
supposed to use
the “top-level site”, not the referrer, to determine if the cookies
should be sent, but the differences are subtle and I’m skipping them for
simplicity.
class URL:
def request(self, referrer, payload=None):
# ...Our browser calls request in three places, and we need
to send the top-level URL in each case. At the top of load,
it makes the initial request to a page. Modify it like so:
class Tab:
def load(self, url, payload=None):
headers, body = url.request(self.url, payload)
# ...Here, url is the new URL to visit, but
self.url is the URL of the page the request comes from.
Make sure this line comes at the top of load, before
self.url is changed!
Later, the browser loads styles and scripts with more
request calls:
class Tab:
def load(self, url, payload=None):
# ...
for script in scripts:
# ...
try:
header, body = script_url.request(url)
except:
continue
# ...
# ...
for link in links:
# ...
try:
header, body = style_url.request(url)
except:
continue
# ...
# ...For these requests the top-level URL is the new URL being loaded. That’s because it is the new page that made us request these particular styles and scripts, so it defines which of those resources are on the same site.
Similarly, XMLHttpRequest-triggered requests use the tab
URL as their top-level URL:
class JSContext:
def XMLHttpRequest_send(self, method, url, body):
# ...
headers, out = full_url.request(self.tab.url, body)
# ...The request function can now check the
referrer argument before sending SameSite
cookies. Remember that SameSite cookies are only sent for
GET requests or if the new URL and the top-level URL have
the same host name:As I
write this, some browsers also check that the new URL and the top-level
URL have the same scheme and some browsers ignore subdomains, so that
www.foo.com and login.foo.com are considered
the “same site”. If cookies were invented today, they’d probably be
specific to URL origins (in fact, there is an effort to do
just that), much like content security policies, but alas historical
contingencies and backward compatibility force rules that are more
complex but easier to deploy.
def request(self, referrer, payload=None):
if self.host in COOKIE_JAR:
# ...
cookie, params = COOKIE_JAR[self.host]
allow_cookie = True
if referrer and params.get("samesite", "none") == "lax":
if method != "GET":
allow_cookie = self.host == referrer.host
if allow_cookie:
request += "Cookie: {}\r\n".format(cookie)
# ...Note that we check whether the referrer is set—it won’t
be when we’re loading the first web page in a new tab.
Our guest book can now mark its cookies SameSite:
def handle_connection(conx):
if 'cookie' not in headers:
template = "Set-Cookie: token={}; SameSite=Lax\r\n"
response += template.format(token)SameSite provides a kind of “defense in depth”, a
fail-safe that makes sure that even if we forgot a nonce somewhere,
we’re still secure against CSRF attacks. But don’t remove the nonces we
added earlier! They’re important for older browsers and are more
flexible in cases like multiple domains.
The web was not initially designed around security, which has led to some awkward patches after the fact. These patches may be ugly, but a dedication to backward compatibility is a strength of the web, and at least newer APIs can be designed around more consistent policies.
To this end, while there is a full specification for
SameSite, it is still the case that real browsers support
different subsets of the feature or different defaults. For example,
Chrome defaults to Lax, but Firefox and Safari do not.
Likewise, Chrome uses the scheme (https or
http) as part of the definition of a “site”,This is called “schemeful
same-site”. but other browsers may not. The main reason
for this situation is the need to maintain backward compatibility with
existing websites.
Cross-site Scripting
Now other websites can’t misuse our browser’s cookies to read or
write private data. This seems secure! But what about our own
website? With cookies accessible from JavaScript, any scripts run on our
browser could, in principle, read the cookie value. This might seem
benign—doesn’t our browser only run comment.js? But in
fact…
A web service needs to defend itself from being misused. Consider the code in our guest book that outputs guest book entries:
out += "<p>" + entry + "\n"
out += "<i>by " + who + "</i></p>"Note that entry can be anything, including anything the
user might stick into our comment form. That includes HTML tags, like a
custom <script> tag! So, a malicious user could post
this comment:
Hi! <script src="http://my-server/evil.js"></script>The server would then output this HTML:
<p>Hi! <script src="http://my-server/evil.js"></script>
<i>by crashoverride</i></p>Every user’s browser would then download and run the
evil.js script, which can sendA site’s cookies and cookie
parameters are available to scripts running on that site through the document.cookie
API. See Exercise 10-5 for more details on how web servers can opt
in to allowing cross-origin requests. To steal cookies, it’s the
attacker’s server that would to opt in to receiving stolen cookies. Or,
in a real browser, evil.js could add images or scripts to
the page to trigger additional requests. In our limited browser the
attack has to be a little clunkier, but the evil script can still, for
example, replace the whole page with a link that goes to their site and
includes the token value in the URL. You’ve seen “please click to
continue” screens and have clicked through unthinkingly; your users will
too. the cookies to the attacker. The attacker could then
impersonate other users, posting as them or misusing any other
capabilities those users had.
The core problem here is that user comments are supposed to be data, but the browser is interpreting them as code. In web applications, this kind of exploit is usually called cross-site scripting (often written “XSS”), though misinterpreting data as code is a common security issue in all kinds of programs.
The standard fix is to encode the data so that it can’t be
interpreted as code. For example, in HTML, you can write
< to display a less-than sign.You may have implemented this
in Exercise 1-4. Python has an html module
for this kind of encoding:
import html
def show_comments(session):
# ...
out += "<p>" + html.escape(entry) + "\n"
out += "<i>by " + html.escape(who) + "</i></p>"
# ...This is a good fix, and every application should be careful to do this escaping. But if you forget to encode any text anywhere—that’s a security bug. So browsers provide additional layers of defense.
Since the CSS parser we implemented in Chapter 6 is very permissive,
some HTML pages also parse as valid CSS. This leads to an attack:
include an external HTML page as a style sheet and observe the styling
it applies. A similar
attack involves including external JSON files as scripts. Setting a
Content-Type header can prevent this sort of attack thanks
to browsers’ Cross-Origin
Read Blocking policy.
Content Security Policy
One such layer is the Content-Security-Policy header.
The full specification for this header is quite complex, but in the
simplest case, the header is set to the keyword default-src
followed by a space-separated list of servers:
Content-Security-Policy: default-src http://example.orgThis header asks the browser not to load any resources (including
CSS, JavaScript, images, and so on) except from the listed origins. If
our guest book used Content-Security-Policy, even if an
attacker managed to get a <script> added to the page,
the browser would refuse to load and run that script.
Let’s implement support for this header. First, we’ll need
request to return the response headers:
class URL:
def request(self, referrer, payload=None):
# ...
return response_headers, contentMake sure to update all existing uses of request to
ignore the headers.
Next, we’ll need to extract and parse the
Content-Security-Policy header when loading a page:In real browsers
Content-Security-Policy can also list scheme-generic URLs
and other sources like self. And there are keywords other
than default-src, to restrict styles, scripts, and
XMLHttpRequests each to their own set of
URLs.
class Tab:
def load(self, url, payload=None):
# ...
self.allowed_origins = None
if "content-security-policy" in headers:
csp = headers["content-security-policy"].split()
if len(csp) > 0 and csp[0] == "default-src":
self.allowed_origins = []
for origin in csp[1:]:
self.allowed_origins.append(URL(origin).origin())
# ...This parsing needs to happen before we request any JavaScript or CSS, because we now need to check whether those requests are allowed:
class Tab:
def load(self, url, payload=None):
# ...
for script in scripts:
script_url = url.resolve(script)
if not self.allowed_request(script_url):
print("Blocked script", script, "due to CSP")
continue
# ...Note that we need to first resolve relative URLs to know if they’re allowed. Add a similar test to the CSS-loading code.
XMLHttpRequest URLs also need to be checked:Note that when loading styles
and scripts, our browser merely ignores blocked resources, while for
blocked XMLHttpRequests it throws an exception. That’s
because exceptions in XMLHttpRequest calls can be caught
and handled in JavaScript.
class JSContext:
def XMLHttpRequest_send(self, method, url, body):
full_url = self.tab.url.resolve(url)
if not self.tab.allowed_request(full_url):
raise Exception("Cross-origin XHR blocked by CSP")
# ...The allowed_request check needs to handle both the case
where there is no Content-Security-Policy and the case
where there is one:
class Tab:
def allowed_request(self, url):
return self.allowed_origins == None or \
url.origin() in self.allowed_originsThe guest book can now send a Content-Security-Policy
header:
def handle_connection(conx):
# ...
csp = "default-src http://localhost:8000"
response += "Content-Security-Policy: {}\r\n".format(csp)
# ...To check that our implementation works, let’s have the guest book request a script from outside the list of allowed servers:
def show_comments(session):
# ...
out += "<script src=https://example.com/evil.js></script>"
# ...If you’ve got everything implemented correctly, the browser should
block the evil scriptNeedless to say, example.com does not actually
host an evil.js file, and any request to it returns “404
Not Found”. and report so in the console.
So are we done? Is the guest book totally secure? Uh … no. There’s more—much, much more—to web application security than what’s in this book. And just like the rest of this book, there are many other browser mechanisms that touch on security and privacy. Let’s settle for this fact: the guest book is more secure than before.
On a complicated site, deploying Content-Security-Policy
can accidentally break something. For this reason, browsers can
automatically report Content-Security-Policy violations to
the server, using the report-to
directive. The Content-Security-Policy-Report-Only
header asks the browser to report violations of the content security
policy without actually blocking the requests.
Summary
We’ve added user data, in the form of cookies, to our browser, and immediately had to bear the heavy burden of securing that data and ensuring it was not misused. That involved:
- mitigating cross-site
XMLHttpRequests with the same-origin policy; - mitigating cross-site request forgery with nonces and with
SameSitecookies; - mitigating cross-site scripting with escaping and with
Content-Security-Policy.
We’ve also seen the more general lesson that every increase in the capabilities of a web browser also leads to an increase in its responsibility to safeguard user data. Security is an ever-present consideration throughout the design of a web browser.
The purpose of this book is to teach the internals of web browsers, not to teach web application security. There’s much more you’d want to do to make this guest book truly secure, let alone what we’d need to do to avoid denial of service attacks or to handle spam and malicious use. Please consult other sources before working on security-critical code.
Click here to try this chapter’s browser.
Outline
The complete set of functions, classes, and methods in our browser should now look something like this:
COOKIE_JAR
class URL:
def __init__(url)
def request(referrer, payload)
def resolve(url)
def origin()
def __str__()
class Text:
def __init__(text, parent)
def __repr__()
class Element:
def __init__(tag, attributes, parent)
def __repr__()
def print_tree(node, indent)
def tree_to_list(tree, list)
class HTMLParser:
SELF_CLOSING_TAGS
HEAD_TAGS
def __init__(body)
def parse()
def get_attributes(text)
def add_text(text)
def add_tag(tag)
def implicit_tags(tag)
def finish()
class CSSParser:
def __init__(s)
def whitespace()
def literal(literal)
def word()
def ignore_until(chars)
def pair()
def selector()
def body()
def parse()
class TagSelector:
def __init__(tag)
def matches(node)
class DescendantSelector:
def __init__(ancestor, descendant)
def matches(node)
FONTS
def get_font(size, weight, style)
DEFAULT_STYLE_SHEET
INHERITED_PROPERTIES
def style(node, rules)
def cascade_priority(rule)
WIDTH, HEIGHT
HSTEP, VSTEP
class Rect:
def __init__(left, top, right, bottom)
def contains_point(x, y)
INPUT_WIDTH_PX
BLOCK_ELEMENTS
class DocumentLayout:
def __init__(node)
def layout()
def should_paint()
def paint()
class BlockLayout:
def __init__(node, parent, previous)
def layout_mode()
def layout()
def recurse(node)
def new_line()
def word(node, word)
def input(node)
def self_rect()
def should_paint()
def paint()
class LineLayout:
def __init__(node, parent, previous)
def layout()
def should_paint()
def paint()
class TextLayout:
def __init__(node, word, parent, previous)
def layout()
def should_paint()
def paint()
class InputLayout:
def __init__(node, parent, previous)
def layout()
def should_paint()
def paint()
def self_rect()
class DrawText:
def __init__(x1, y1, text, font, color)
def execute(scroll, canvas)
class DrawRect:
def __init__(rect, color)
def execute(scroll, canvas)
class DrawLine:
def __init__(x1, y1, x2, y2, color, thickness)
def execute(scroll, canvas)
class DrawOutline:
def __init__(rect, color, thickness)
def execute(scroll, canvas)
def paint_tree(layout_object, display_list)
EVENT_DISPATCH_JS
RUNTIME_JS
class JSContext:
def __init__(tab)
def run(script, code)
def dispatch_event(type, elt)
def get_handle(elt)
def querySelectorAll(selector_text)
def getAttribute(handle, attr)
def innerHTML_set(handle, s)
def XMLHttpRequest_send(...)
SCROLL_STEP
class Tab:
def __init__(tab_height)
def load(url, payload)
def render()
def draw(canvas, offset)
def allowed_request(url)
def scrolldown()
def click(x, y)
def go_back()
def submit_form(elt)
def keypress(char)
class Chrome:
def __init__(browser)
def tab_rect(i)
def paint()
def click(x, y)
def keypress(char)
def enter()
def blur()
class Browser:
def __init__()
def draw()
def new_tab(url)
def handle_down(e)
def handle_click(e)
def handle_key(e)
def handle_enter(e)
The server has also grown since the previous chapter:
SESSIONS
def handle_connection(conx)
ENTRIES
LOGINS
def do_request(session, method, url, headers, body)
def form_decode(body)
def show_comments(session)
def login_form(session)
def do_login(session, params)
def not_found(url, method)
def add_entry(session, params)
Exercises
10-1 New inputs. Add support for hidden and password input elements. Hidden inputs shouldn’t show up or take up space, while password input elements should show their contents as stars instead of characters.
10-2 Certificate errors. When accessing an HTTPS page, the
web server can send an invalid certificate (badssl.com hosts various
invalid certificates you can use for testing). In this case, the
wrap_socket function will raise a certificate error; catch
these errors and show a warning message to the user. For all
other HTTPS pages draw a padlock (spelled
\N{lock}) in the address bar.
10-3 Script access. Implement the document.cookie
JavaScript API. Reading this field should return a string containing
the cookie value and parameters, formatted similarly to the
Cookie header. Writing to this field updates the cookie
value and parameters, just like receiving a Set-Cookie
header does. Also implement the HttpOnly cookie parameter;
cookies with this parameter cannot
be read or written from JavaScript.
10-4 Cookie expiration. Add support for cookie expiration.
Cookie expiration dates are set in the Set-Cookie header,
and can be overwritten if the same cookie is set again with a later
date. On the server side, save the expiration date in the
SESSIONS variable and use it to delete old sessions to save
memory.
10-5 Cross-origin resource sharing (CORS). Web servers can
opt
in to allowing cross-origin XMLHttpRequests. The
way it works is that on cross-origin HTTP requests, the browser makes
the request and includes an Origin header with the origin
of the requesting site; this request includes cookies for the target
origin. To satisfy the same-origin policy, the browser then throws away
the response. But the server can send the
Access-Control-Allow-Origin header, and if its value is
either the requesting origin or the special * value, the
browser returns the response to the script instead. All requests made by
your browser will be what the CORS standard calls “simple requests”.
10-6 Referer. When your browser visits a web
page, or when it loads a CSS or JavaScript file, it sends a
Referer headerYep, spelled that
way. containing the URL it is coming from. Sites often
use this for analytics. Implement this in your browser. However, some
URLs contain personal data that they don’t want revealed to other
websites, so browsers support a Referrer-Policy
header,Yep, spelled that
way. which can contain values like
no-referrerYep, spelled that
way. (never send the Referer header when
leaving this page) or same-origin (only do so if navigating
to another page on the same origin). Implement those two values for
Referrer-Policy.
Adding Visual Effects
Right now our browser can only draw colored rectangles and text—pretty boring! Real browsers support all kinds of visual effects that change how pixels and colors blend together. To implement those effects, and also make our browser faster, we’ll need control over surfaces, the key low-level feature behind fast scrolling, visual effects, animations, and many other browser capabilities. To get that control, we’ll also switch to using the Skia graphics library and even take a peek under its hood.
Installing Skia and SDL
While Tkinter is great for basic shapes and input handling, it doesn’t give us control over surfacesThat’s because Tk, the graphics library that Tkinter uses, dates from the early 1990s, before high-performance graphics cards and GPUs became widespread. and lacks implementations of most visual effects. Implementing them ourselves would be fun, but it’s outside the scope of this book, so we need a new graphics library. Let’s use Skia, the library that Chromium uses. Unlike Tkinter, Skia doesn’t handle inputs or create graphical windows, so we’ll pair it with the SDL GUI library. Beyond new capabilities, switching to Skia will allow us to control graphics and rasterization at a lower level.
Start by installing Skia and SDL:
python3 -m pip install 'skia-python==87.*' pysdl2 pysdl2-dllAs elsewhere in this book, you may need to install the
pip package first, or use your IDE’s package installer. If
you’re on Linux, you’ll need to install additional dependencies, like
OpenGL and fontconfig. Also, you may not be able to install
pysdl2-dll; if so, you’ll need to find SDL in your system
package manager instead. Consult the skia-python
and pysdl2
web pages for more details.
Note that I’m explicitly installing Skia version 87. Skia makes regular releases that change APIs or break compatibility; version 87 is fairly old and should work reliably on most systems. In your own projects, or before filing bug reports in Skia, please do use more recent Skia releases. It’s also possible that future Python version no longer support Skia 87; our porting notes explain how to use recent Skia releases for the code in this book.
Once installed, remove the tkinter imports from browser
and replace them with these:
import ctypes
import sdl2
import skiaThe ctypes module is a standard part of Python; we’ll
use it to convert between Python and C types. If any of these imports
fail, check that Skia and SDL were installed correctly.
The <canvas>
HTML element provides a JavaScript API that is similar to Skia and
Tkinter. Combined with WebGL,
it’s possible to implement basically all of SDL and Skia in JavaScript.
Alternatively, one can compile Skia to
WebAssembly
to do the same.
SDL Creates the Window
The first big task is to switch to using SDL to create the window and handle events. The main loop of the browser first needs some boilerplate to get SDL started:
if __name__ == "__main__":
sdl2.SDL_Init(sdl2.SDL_INIT_EVENTS)
browser = Browser()
browser.new_tab(URL(sys.argv[1]))
# ...Next, we need to create an SDL window, instead of a Tkinter window,
inside the Browser. Here’s the SDL incantation:
class Browser:
def __init__(self):
self.sdl_window = sdl2.SDL_CreateWindow(b"Browser",
sdl2.SDL_WINDOWPOS_CENTERED, sdl2.SDL_WINDOWPOS_CENTERED,
WIDTH, HEIGHT, sdl2.SDL_WINDOW_SHOWN)Now that we’ve created a window, we need to handle events sent to it.
SDL doesn’t have a mainloop or bind method; we
have to implement it ourselves:
def mainloop(browser):
event = sdl2.SDL_Event()
while True:
while sdl2.SDL_PollEvent(ctypes.byref(event)) != 0:
if event.type == sdl2.SDL_QUIT:
browser.handle_quit()
sdl2.SDL_Quit()
sys.exit()
# ...The details of ctypes and PollEvent aren’t
too important here, but note that SDL_QUIT is an event,
sent when the user closes the last open window. The
handle_quit method it calls just cleans up the window
object:
class Browser:
def handle_quit(self):
sdl2.SDL_DestroyWindow(self.sdl_window)Call mainloop in place of
tkinter.mainloop:
if __name__ == "__main__":
# ...
mainloop(browser)In place of all the bind calls in the
Browser constructor, we can just directly call methods for
various types of events, like clicks, typing, and so on. The SDL syntax
looks like this:
def mainloop(browser):
while True:
while sdl2.SDL_PollEvent(ctypes.byref(event)) != 0:
# ...
elif event.type == sdl2.SDL_MOUSEBUTTONUP:
browser.handle_click(event.button)
elif event.type == sdl2.SDL_KEYDOWN:
if event.key.keysym.sym == sdl2.SDLK_RETURN:
browser.handle_enter()
elif event.key.keysym.sym == sdl2.SDLK_DOWN:
browser.handle_down()
elif event.type == sdl2.SDL_TEXTINPUT:
browser.handle_key(event.text.text.decode('utf8'))I’ve changed the signatures of the various event handler methods. For
example, the handle_click method is now passed a
MouseButtonEvent object, which thankfully contains
x and y coordinates, while the
handle_enter and handle_down methods aren’t
passed any argument at all, because we don’t use that argument anyway.
You’ll need to change the Browser methods’ signatures to
match.
SDL is most popular for making games. Their site lists a selection of books about game programming in SDL.
Surfaces and Pixels
Let’s peek under the hood of these SDL calls. When we create an SDL window, we’re asking SDL to allocate a surface, a chunk of memory representing the pixels on the screen.A surface may or may not be bound to the physical pixels on the screen via a window, and there can be many surfaces. A canvas is an API interface that allows you to draw into a surface with higher-level commands such as for rectangles or text. Our browser uses separate Skia and SDL surfaces for simplicity, but in a highly optimized browser, minimizing the number of surfaces is important for good performance. Creating and managing surfaces is going to be the big focus of this chapter. On today’s large screens, surfaces take up a lot of memory, so handling surfaces well is essential to good browser performance.
A surface is a representation of a graphics buffer into which you can draw pixels (bits representing colors). We implicitly created an SDL surface when we created an SDL window; let’s also create a surface for Skia to draw to:
class Browser:
def __init__(self):
self.root_surface = skia.Surface.MakeRaster(
skia.ImageInfo.Make(
WIDTH, HEIGHT,
ct=skia.kRGBA_8888_ColorType,
at=skia.kUnpremul_AlphaType))Each pixel has a color. Note the ct argument, meaning
“color type”, which indicates that each pixel of this surface should be
represented as red, green, blue, and
alpha values, each of which should take up eight bits. In other
words, pixels are basically defined like so:
class Pixel:
def __init__(self, r, g, b, a):
self.r = r
self.g = g
self.b = b
self.a = aThis Pixel definition is an illustrative example, not
actual code in our browser. It’s standing in for somewhat more complex
code within SDL and Skia themselves.Skia actually represents colors as 32-bit integers, with
the most significant byte representing the alpha value (255 meaning
opaque and 0 meaning transparent) and the next three bytes representing
the red, green, and blue color channels.
Defining colors via red, green, and blue components is fairly
standardIt’s formally
known as the sRGB color
space, and it dates back to CRT (cathode-ray
tube) displays, which had a pretty limited gamut of
expressible colors. New technologies like LCD, LED, and OLED can display
more colors, so CSS now includes syntax for expressing
these new colors. Still, all color spaces have a limited gamut of
expressible colors. and corresponds to how computer
screens work.Actually,
some screens contain lights
besides red, green, and blue, including white, cyan, or yellow.
Moreover, different screens can use slightly different reds, greens, or
blues; professional color designers typically have to calibrate their
screen to display colors accurately. For the rest of us, the
software still communicates with the display in terms of standard red,
green, and blue colors, and the display hardware converts them to
whatever pixels it uses. For example, in CSS, we refer to
arbitrary colors with a hash character and six hex digits, like
#ffd700, with two digits each for red, green, and
blue:Alpha is implicitly
255, meaning opaque, in this case.
def parse_color(color):
if color.startswith("#") and len(color) == 7:
r = int(color[1:3], 16)
g = int(color[3:5], 16)
b = int(color[5:7], 16)
return skia.Color(r, g, b)The colors we’ve seen so far can just be specified in terms of this syntax:
NAMED_COLORS = {
"black": "#000000",
"white": "#ffffff",
"red": "#ff0000",
# ...
}
def parse_color(color):
# ...
elif color in NAMED_COLORS:
return parse_color(NAMED_COLORS[color])
else:
return skia.ColorBLACKYou can add more named colors from the
list as you come across them; the demos in this book use
blue, green, lightblue,
lightgreen, orange, orangered,
and gray. Note that unsupported colors are interpreted as
black, so that at least something is drawn to the screen.This is not the
standards-required behavior—the invalid value should just not
participate in styling, so an element styled with an unknown color might
inherit a color other than black—but I’m doing it as a
convenience.
Let’s now use our understanding of surfaces and colors to copy from the Skia surface, where we will draw the chrome and page content, to the SDL surface, which actually appears on the screen. This is a little hairy, because we are moving data between two low-level libraries, but really we’re just copying pixels from one place to another. First, get the sequence of bytes representing the Skia surface:
class Browser:
def draw(self):
# ...
skia_image = self.root_surface.makeImageSnapshot()
skia_bytes = skia_image.tobytes()Next, we need to copy the data to an SDL surface. This requires telling SDL what order the pixels are stored in and your computer’s endianness:
class Browser:
def __init__(self):
if sdl2.SDL_BYTEORDER == sdl2.SDL_BIG_ENDIAN:
self.RED_MASK = 0xff000000
self.GREEN_MASK = 0x00ff0000
self.BLUE_MASK = 0x0000ff00
self.ALPHA_MASK = 0x000000ff
else:
self.RED_MASK = 0x000000ff
self.GREEN_MASK = 0x0000ff00
self.BLUE_MASK = 0x00ff0000
self.ALPHA_MASK = 0xff000000The CreateRGBSurfaceFrom method then wraps the data in
an SDL surface (without copying the bytes):
class Browser:
def draw(self):
# ...
depth = 32 # Bits per pixel
pitch = 4 * WIDTH # Bytes per row
sdl_surface = sdl2.SDL_CreateRGBSurfaceFrom(
skia_bytes, WIDTH, HEIGHT, depth, pitch,
self.RED_MASK, self.GREEN_MASK,
self.BLUE_MASK, self.ALPHA_MASK)Finally, we draw all this pixel data on the window itself by blitting
(copying) it from sdl_surface to sdl_window’s
surface:Note that since
Skia and SDL are C++ libraries, they are not always consistent with
Python’s garbage collection system. So the link between the output of
tobytes and sdl_window is not guaranteed to be
kept consistent when skia_bytes is garbage-collected. The
SDL surface could be left pointing at a bogus piece of memory, leading
to memory corruption or a crash. The code here is correct because all of
these are local variables that are garbage-collected together, but if
not you need to be careful to keep all of them alive at the same
time.
class Browser:
def draw(self):
# ...
rect = sdl2.SDL_Rect(0, 0, WIDTH, HEIGHT)
window_surface = sdl2.SDL_GetWindowSurface(self.sdl_window)
# SDL_BlitSurface is what actually does the copy.
sdl2.SDL_BlitSurface(sdl_surface, rect, window_surface, rect)
sdl2.SDL_UpdateWindowSurface(self.sdl_window)So now we can copy from the Skia surface to the SDL window. One last step: we have to draw the browser to the Skia surface.
We take it for granted, but color standards like CIELAB derive from attempts to reverse-engineer human vision. Screens use red, green, and blue color channels to match the three types of cone cells in a human eye. These cone cells vary between people: some have more and some fewer (typically an inherited condition carried on the X chromosome). Moreover, different people have different ratios of cone types and those cone types use different protein structures that vary in the exact frequency of green, red, and blue that they respond to. The study of color thus combines software, hardware, chemistry, biology, and psychology.
Rasterizing with Skia
We want to draw text, rectangles, and so on to the Skia surface. This step—coloring in the pixels of a surface to draw shapes on it—is called “rasterization” and is one important task of a graphics library. In Skia, rasterization happens via a canvas API. A canvas is just an object that draws to a particular surface:
class Browser:
def draw(self, canvas, offset):
# ...
canvas = self.root_surface.getCanvas()
# ...Let’s change the various classes to use Skia’s raster APIs.
The first thing we need to do is change the rect field
into a Skia Rect object. Get rid of the old
Rect class that was introduced in Chapter 7 in favor of skia.Rect.
Everywhere that a Rect was constructed, instead put
skia.Rect.MakeLTRB (for “make left-top-right-bottom”) or
MakeXYWH (for “make x-y-width-height”).
Everywhere that the sides of the rectangle (e.g., left)
were checked, replace them with the corresponding function on a Skia
Rect (e.g., left()). Also replace calls to
containsPoint with Skia’s contains.
For DrawText and DrawLine in particular,
it’s:
class DrawText:
def __init__(self, x1, y1, text, font, color):
self.rect = skia.Rect.MakeLTRB(
x1, y1,
x1 + font.measureText(text),
y1 - font.getMetrics().fAscent \
+ font.getMetrics().fDescent)
# ...
class DrawLine:
def __init__(self, x1, y1, x2, y2, color, thickness):
self.rect = skia.Rect.MakeLTRB(x1, y1, x2, y2)
# ...Our browser’s drawing commands will need to invoke Skia methods on
this canvas. To draw a line, you use Skia’s Path
object:Consult the Skia and skia-python
documentation for more on the Skia API.
class DrawLine:
def execute(self, canvas, scroll):
path = skia.Path().moveTo(
self.rect.left(), self.rect.top() - scroll) \
.lineTo(self.rect.right(),
self.rect.bottom() - scroll)
paint = skia.Paint(
Color=parse_color(self.color),
StrokeWidth=self.thickness,
Style=skia.Paint.kStroke_Style,
)
canvas.drawPath(path, paint)Note the steps involved here. We first create a Path
object, and then call drawPath to actually draw this path
to the canvas. This drawPath call takes a second argument,
paint, which defines how to actually perform this drawing.
We specify the color, but we also need to specify that we want to draw a
line along the path, instead of filling in the interior of the
path, which is the default. To do that we set the style to “stroke”, a
standard term referring to drawing along the border of some shape.The opposite is “fill”,
meaning filling in the interior of the shape.
We do something similar to draw text using
drawString:
class DrawText:
def execute(self, canvas, scroll):
paint = skia.Paint(
AntiAlias=True,
Color=parse_color(self.color),
)
baseline = self.rect.top() - scroll \
- self.font.getMetrics().fAscent
canvas.drawString(self.text, float(self.rect.left()),
baseline, self.font, paint)Note again that we create a Paint object identifying the
color and asking for anti-aliased text.“Anti-alias”ing just means
drawing some semi-transparent pixels to better approximate the shape of
the text. This is important when drawing shapes with fine details, like
text, but is less important when drawing large shapes like rectangles
and lines. We don’t specify the “style” because we want to
fill the interior of the text, the default.
Finally, for drawing rectangles you use drawRect:
class DrawRect:
def execute(self, canvas, scroll):
paint = skia.Paint(
Color=parse_color(self.color),
)
canvas.drawRect(self.rect.makeOffset(0, -scroll), paint)To create an outline, draw a rectangle but set the Style
parameter of the Paint to Stroke_Style:
class DrawOutline:
def execute(self, scroll, canvas):
paint = skia.Paint(
Color=parse_color(self.color),
StrokeWidth=self.thickness,
Style=skia.Paint.kStroke_Style,
)
canvas.drawRect(self.rect.makeOffset(0, -scroll), paint)Since we’re replacing Tkinter with Skia, we are also replacing
tkinter.font. In Skia, a font object has two pieces: a
Typeface, which is a type family with a certain weight,
style, and width; and a Font, which is a
Typeface at a particular size. It’s the
Typeface that contains data and caches, so that’s what we
need to cache:
def get_font(size, weight, style):
key = (weight, style)
if key not in FONTS:
if weight == "bold":
skia_weight = skia.FontStyle.kBold_Weight
else:
skia_weight = skia.FontStyle.kNormal_Weight
if style == "italic":
skia_style = skia.FontStyle.kItalic_Slant
else:
skia_style = skia.FontStyle.kUpright_Slant
skia_width = skia.FontStyle.kNormal_Width
style_info = \
skia.FontStyle(skia_weight, skia_width, skia_style)
font = skia.Typeface('Arial', style_info)
FONTS[key] = font
return skia.Font(FONTS[key], size)Our browser also needs font metrics and measurements. In Skia, these
are provided by the measureText and getMetrics
methods. Let’s start with measureText replacing all calls
to measure. For example, in the paint method
in InputLayout, we must do:
class InputLayout:
def paint(self):
if self.node.is_focused:
cx = self.x + self.font.measureText(text)
# ...There are measure calls in several other layout objects
(both in paint and layout), in
DrawText, in the draw method on
Chrome, in the text method in
BlockLayout, and in the layout method in
TextLayout. Update all of them to use
measureText.
Also, in the layout method of LineLayout
and in DrawText we make calls to the metrics
method on fonts. In Skia, this method is called getMetrics,
and to get the ascent and descent we need the fAscent and
fDescent fields on its result.
Importantly, in Skia the ascent needs to be negated. In Skia, ascent
and descent are positive if they go downward and negative if they go
upward, so ascents will normally be negative, the opposite of Tkinter.
There’s no analog for the linespace field that Tkinter
provides, but you can use descent minus ascent instead:
def linespace(font):
metrics = font.getMetrics()
return metrics.fDescent - metrics.fAscentYou should now be able to run the browser again. It should look and behave just as it did in previous chapters, and it might feel faster on complex pages, because Skia and SDL are in general faster than Tkinter. If the transition felt easy—well, that’s one of the benefits to abstracting over the drawing backend using a display list!
Finally, Skia also provides some new features. For example, Skia has
native support for rounded rectangles via RRect objects. We
can implement that by converting DrawRect to
DrawRRect:
class DrawRRect:
def __init__(self, rect, radius, color):
self.rect = rect
self.rrect = skia.RRect.MakeRectXY(rect, radius, radius)
self.color = color
def execute(self, scroll, canvas):
paint = skia.Paint(
Color=parse_color(self.color),
)
canvas.drawRRect(self.rrect, paint)Then we can draw these rounded rectangles for backgrounds:
class BlockLayout:
def paint(self):
if bgcolor != "transparent":
radius = float(
self.node.style.get(
"border-radius", "0px")[:-2])
cmds.append(DrawRRect(
self.self_rect(), radius, bgcolor))With that, this example:Note that the example listed here, in common with other examples present in the book, accesses a local resource (a CSS file in this case) that is also present on browser.engineering.
<link rel=stylesheet href="example11-longword.css">
<div>
Background is rounded
</div>will round the corners of its background (see Figure 1).

Similar changes should be made to InputLayout. New
shapes, like rounded rectangles, is one way that Skia is a more advanced
rasterization library than Tk. More broadly, since Skia is also used by
Chromium, we know it has fast, built-in support for all of the shapes we
might need in a browser.
Font rasterization is surprisingly deep, with techniques such as subpixel rendering and hinting used to make fonts look better on lower-resolution screens. These techniques are much less necessary on high-pixel-density screens, though. It’s likely that all screens will eventually be high-density enough to retire these techniques.
Browser Compositing
Skia and SDL have just made our browser more complex, but the low-level control offered by these libraries is important because it allows us to optimize common interactions like scrolling.
So far, any time the user scrolled a web page, we had to clear the canvas and re-raster everything on it from scratch. This is inefficient—we’re drawing the same pixels, just in a different place. When the context is complex or the screen is large, rastering too often produces a visible slowdown and drains laptop and mobile batteries. Real browsers optimize scrolling using a technique I’ll call browser compositing: drawing the whole web page to a hidden surface, and only copying the relevant pixels to the window itself.
To implement this, we’ll need two new Skia surfaces: a surface for
browser chrome and a surface for the current Tab’s
contents. We’ll only need to re-raster the Tab surface if
page contents change, but not when (say) the user types into the address
bar. And we can scroll the Tab without any raster at all—we
just copy a different part of the current Tab surface to
the screen. Let’s call those surfaces chrome_surface and
tab_surface:We could even use a different surface for each
Tab, but real browsers don’t do this, since each surface
uses up a lot of memory, and typically users don’t notice the small
raster delay when switching tabs.
class Browser:
def __init__(self):
# ...
self.chrome_surface = skia.Surface(
WIDTH, math.ceil(self.chrome.bottom))
self.tab_surface = NoneI’m not explicitly creating tab_surface right away,
because we need to lay out the page contents to know how tall the
surface needs to be.
We’ll also need to split the browser’s draw method into
three parts:
raster_tabwill raster the page to thetab_surface;raster_chromewill raster the browser chrome to thechrome_surface;drawwill composite the chrome and tab surfaces and copy the result from Skia to SDL.It might seem wasteful to copy from the chrome and tab surfaces to an intermediate Skia surface, instead of directly to the SDL surface. It is, but skipping that copy requires a lot of tricky low-level code. In Chapter 13 we’ll avoid this copy in a different, better way.
Let’s start by doing the split:
class Browser:
def raster_tab(self):
canvas = self.tab_surface.getCanvas()
canvas.clear(skia.ColorWHITE)
# ...
def raster_chrome(self):
canvas = self.chrome_surface.getCanvas()
canvas.clear(skia.ColorWHITE)
# ...
def draw(self):
canvas = self.root_surface.getCanvas()
canvas.clear(skia.ColorWHITE)
# ...Since we didn’t create the tab_surface on startup, we
need to create it at the top of raster_tab:For a very big web page,
tab_surface can be much larger than the size of the SDL
window, and therefore take up a very large amount of memory. We’ll
ignore that, but a real browser would only paint and raster surface
content up to a certain distance from the visible region, and
re-paint/raster as the user scrolls.
import math
class Browser:
def raster_tab(self):
tab_height = math.ceil(
self.active_tab.document.height + 2*VSTEP)
if not self.tab_surface or \
tab_height != self.tab_surface.height():
self.tab_surface = skia.Surface(WIDTH, tab_height)
# ...Note that we need to recreate the tab surface if the page’s height changes. The way we compute the page bounds here, based on the layout tree’s height, would be incorrect if page elements could stick out below (or to the right) of their parents—but our browser doesn’t support any features like that.
Next, draw should copy from the chrome and tab surfaces
to the root surface. Moreover, we need to translate the
tab_surface down by chrome_bottom and up by
scroll, and clip it to just the area of the window that
doesn’t overlap the browser chrome:
class Browser:
def draw(self):
# ...
tab_rect = skia.Rect.MakeLTRB(
0, self.chrome.bottom, WIDTH, HEIGHT)
tab_offset = self.chrome.bottom - self.active_tab.scroll
canvas.save()
canvas.clipRect(tab_rect)
canvas.translate(0, tab_offset)
self.tab_surface.draw(canvas, 0, 0)
canvas.restore()
chrome_rect = skia.Rect.MakeLTRB(
0, 0, WIDTH, self.chrome.bottom)
canvas.save()
canvas.clipRect(chrome_rect)
self.chrome_surface.draw(canvas, 0, 0)
canvas.restore()
# ...Note the draw calls: these copy the
tab_surface and chrome_surface to the
canvas, which is bound to root_surface. The
clipRect and translate calls make sure we copy
the right parts.
Finally, everywhere in Browser that we call
draw, we now need to call either raster_tab or
raster_chrome first. For example, in
handle_click, we do this:
class Browser:
def handle_click(self, e):
if e.y < self.chrome.bottom:
# ...
self.raster_chrome()
else:
# ...
self.raster_tab()
self.draw()Notice how we don’t redraw the chrome when only the tab changes, and
vice versa. Likewise, in handle_down, we don’t need to call
raster_tab at all, since scrolling doesn’t change the
page.
However, clicking on a web page can cause it to navigate to a new one, so we do need to detect that and raster the browser chrome if the URL changed:
class Browser:
def handle_click(self, e):
if e.y < self.chrome.bottom:
# ...
else:
# ...
url = self.active_tab.url
tab_y = e.y - self.chrome.bottom
self.active_tab.click(e.x, tab_y)
if self.active_tab.url != url:
self.raster_chrome()
self.raster_tab()We also have some related changes in Tab. Let’s rename
Tab’s draw method to raster. In
it, we no longer need to pass around the scroll offset to the
execute methods, or account for chrome_bottom,
because we always draw the whole tab to the tab surface:
class Tab:
def raster(self, canvas):
for cmd in self.display_list:
cmd.execute(canvas)Likewise, we can remove the scroll parameter from each
drawing command’s execute method:
class DrawRect:
def execute(self, canvas):
paint = skia.Paint(
Color=parse_color(self.color),
)
canvas.drawRect(self.rect, paint)Our browser now uses composited scrolling, making scrolling faster and smoother, all because we are now using a mix of intermediate surfaces to store already-rastered content and avoid re-rastering unless the content has actually changed.
Real browsers allocate new surfaces for various different situations,
such as implementing accelerated overflow scrolling and animations of
certain CSS properties such as transform
and opacity that can be done without raster. They also allow scrolling
arbitrary HTML elements via overflow: scroll
in CSS. Basic scrolling for DOM elements is very similar to what we’ve
just implemented. But implementing it in its full generality, and with
excellent performance, is extremely challenging. Scrolling may
well be the single most complicated feature in a browser rendering
engine. The corner cases and subtleties involved are almost endless.
Transparency
Drawing shapes quickly is already a challenge, but with multiple shapes there’s an additional question: what color should the pixel be when two shapes overlap? So far, our browser has only handled opaque shapes,It also hasn’t considered subpixel geometry or anti-aliasing, which also rely on color mixing. and the answer has been simple: take the color of the top shape. But now we need more nuance.
Consider partially transparent colors in CSS. These use a hex color
with eight hex digits, with the last two indicating the level of
transparency. For example, the color #00000080 is 50%
transparent black. Over a white background, that looks gray, but over an
orange background it looks like Figure 2.
Figure 2: Example of black semi-transparent text blending into an orange background.
Note that the text is a kind of dark orange, because its color is a mix of 50% black and 50% orange. Many objects in the real world are partially transparent: frosted glass, clouds, or colored paper, for example. Looking through one, you see multiple colors blended together. That’s also why computer screens work: the red, green, and blue lights blend together and appear to our eyes as another color. Designers use this effectMostly. Some more advanced blending modes on the web are difficult, or perhaps impossible, in real-world physics. in overlays, shadows, and tooltips, so our browser needs to support color mixing.
Skia supports this kind of transparency by setting the “alpha” field on the parsed color:
def parse_color(color):
# ...
elif color.startswith("#") and len(color) == 9:
r = int(color[1:3], 16)
g = int(color[3:5], 16)
b = int(color[5:7], 16)
a = int(color[7:9], 16)
return skia.Color(r, g, b, a)
# ...Check that your browser renders dark-orange text for the example above. That shows that it’s actually mixing the black color with the existing orange color from the background.
However, there’s another, subtly different way to create transparency
with CSS. Here, 50% transparency is applied to the whole element using
the opacity property, as in Figure 3.
Figure 3: Example of black text on an orange background, then blended semi-transparently into its ancestor.
Now the opacity applies to both the background and the text, so the background is now a little lighter. But note that the text is now gray, not dark orange. The black and orange pixels are no longer blended together!
That’s because opacity introduces what CSS calls a stacking context. Most of the details aren’t important right now, but the order of operations is. In the first example, the black pixels were first made transparent, then blended with the background. Thus, 50% transparent black pixels were blending with orange pixels, resulting in a dark-orange color. In the second example, the black pixels were first blended with the background, then the result was made transparent. Thus, fully black pixels replaced fully orange ones, resulting in just black pixels, which were later made 50% transparent.
Applying blending in the proper order, as is necessary to implement
effects like opacity, requires more careful handling of
surfaces.
Mostly, elements form
a stacking context because of CSS properties that have something to
do with layering (like z-index) or visual effects (like
mix-blend-mode). On the other hand, the
overflow property, which can make an element scrollable,
does not induce a stacking context, which I think was a mistake.While we’re at it, perhaps
scrollable elements should also be a containing
block for descendants. Otherwise, a scrollable element can have
non-scrolling children via properties like position. This
situation is very complicated to handle in real browsers.
The reason is that inside a modern browser, scrolling is done on the GPU
by offsetting two surfaces. Without a stacking context the browser might
(depending on the web page structure) have to move around multiple
independent surfaces with complex paint orders, in lockstep, to achieve
scrolling. Fixed- and sticky-positioned elements also form stacking
contexts because of their interaction with scrolling.
Blending and Stacking
To handle the order of operations properly, browsers apply blending
not to individual shapes but to a tree of surfaces (see Figure 4).
Conceptually, each shape is drawn to its own surface, and then blended
into its parent surface. Different structures of intermediate surfaces
create different visual effects.You can see a more detailed discussion of how the tree
structure affects the final image, and how that impacted the CSS
specifications, on David
Baron’s blog. Rastering a web page requires a
bottom-up traversal of this conceptual tree: to raster a surface you
first need to raster its contents, including its child surfaces, and
then the contents need to be blended together into the parent.This tree of surfaces is an
implementation strategy and not something required by any specific web
API. However, the concept of a stacking
context is related. A stacking context is technically a
mechanism to define groups and ordering during paint, and stacking
contexts need not correspond to a surface (e.g. ones created via z-index
do not). However, for ease of implementation, all visual effects in CSS
that generally require surfaces to implement are specified to go
hand-in-hand with a stacking context, so the tree of stacking contexts
is very related to the tree of surfaces.
To match this use pattern, in Skia, surfaces form a stack. You can push a new surface on the stack, raster things to it, and then pop it off, which blends it with the surface below. When rastering, you push a new surface onto the stack every time you need to apply some visual effect, and pop-and-blend once you’re done rastering all the elements that that effect will be applied to, like this:
# draw parent
canvas.saveLayer(None, skia.Paint(Alphaf=0.5))
# draw children
canvas.restore()Here, the saveLayer call asks SkiaIt’s called
saveLayer instead of createSurface because
Skia doesn’t actually promise to create a new surface, if it can
optimize that away. So what you’re really doing with
saveLayer is telling Skia that there is a new conceptual
layer (“piece of paper”) on the stack. Skia’s terminology distinguishes
between a layer and a surface for this reason as well, but for our
purposes it makes sense to assume that each new layer comes with a
surface. to draw all the children to a separate surface
before blending them into the parent once restore is
called. The second parameter to saveLayer specifies the
specific type of blending, here with the Alphaf parameter
requesting 50% opacity.
saveLayer and restore are like a pair of
parentheses enclosing child drawing operations. This means our display
list is no longer just a linear sequence of drawing operations, but a
tree. So in our display list, let’s handle opacity with an
Opacity command that takes a sequence of other drawing
commands as an argument:
class Opacity:
def __init__(self, opacity, children):
self.opacity = opacity
self.children = children
self.rect = skia.Rect.MakeEmpty()
for cmd in self.children:
self.rect.join(cmd.rect)
def execute(self, canvas):
paint = skia.Paint(
Alphaf=self.opacity
)
canvas.saveLayer(None, paint)
for cmd in self.children:
cmd.execute(canvas)
canvas.restore()We can now wrap the drawing commands painted by an element with
Opacity to add transparency to the whole element. I’m going
to do this by adding a new paint_effects method to layout
objects, which should be passed a list of drawing commands to wrap:
class BlockLayout:
def paint_effects(self, cmds):
cmds = paint_visual_effects(
self.node, cmds, self.self_rect())
return cmdsI put the actual construction of the Opacity command in
a new global paint_visual_effects method (because other
object types will also need it):
def paint_visual_effects(node, cmds, rect):
opacity = float(node.style.get("opacity", "1.0"))
return [
Opacity(opacity, cmds)
]A change is now needed in paint_tree to call
paint_effects, but only after recursing into
children, and only if should_paint is true. That’s because
these visual effects apply to the entire subtree’s display list, not
just the current object, and don’t apply to “anonymous” objects (see
Chapter 8).
def paint_tree(layout_object, display_list):
if layout_object.should_paint():
cmds = layout_object.paint()
for child in layout_object.children:
paint_tree(child, cmds)
if layout_object.should_paint():
cmds = layout_object.paint_effects(cmds)
display_list.extend(cmds)Note that paint_visual_effects receives a list of
commands and returns another list of commands. It’s just that the output
list is always a single Opacity command that wraps the
original content—which makes sense, because first we need to draw the
commands to a surface, and then apply transparency to it when
blending into the parent.
I highly recommend a blog post by Bartosz Ciechanowski, that gives a really nice visual overview of many of the concepts explored in this chapter, plus way more content about how a library such as Skia might implement features like raster sampling of vector graphics for lines and text and interpolation of surfaces when their pixel arrays don’t match in resolution or orientation.
Compositing Pixels
Now let’s pause and explore how opacity actually works under the hood. Skia, SDL, and many other color libraries account for opacity with a fourth alpha value for each pixel.The difference between opacity and alpha can be confusing. Think of opacity as a visual effect applied to content, but alpha as a part of content. Think of alpha as implementation technique for representing opacity. An alpha of 0 means the pixel is fully transparent (meaning, no matter what the colors are, you can’t see them anyway), and an alpha of 1 means fully opaque.
When a pixel with alpha overlaps another pixel, the final color is a
mix of their two colors. How exactly the colors are mixed is defined by
Skia’s Paint objects. Of course, Skia is pretty complex,
but we can sketch these paint operations in Python as methods on the
conceptual Pixel class I introduced earlier.
When we apply a Paint with an Alphaf
parameter, the first thing Skia does is add the requested opacity to
each pixel:
class Pixel:
def alphaf(self, opacity):
self.a = self.a * opacityI want to emphasize that this code is not a part of our browser—I’m simply using Python code to illustrate what Skia is doing internally.
That Alphaf parameter applies to pixels in one surface.
But with saveLayer we will end up with two surfaces, with
all of their pixels aligned, and therefore we will need to combine, or
blend, corresponding pairs of pixels.
Here, the terminology can get confusing: we imagine that the pixels “on top” are blending into the pixels “below”, so we call the top surface the source surface, with source pixels, and the bottom surface the destination surface, with destination pixels. When we combine them, there are lots of ways we could do it, but the default on the web is called “simple alpha compositing” or source-over compositing. In Python, the code to implement it looks like this:The formula for this code can be found here. Note that that page refers to premultiplied alpha colors, but Skia’s API generally does not use premultiplied representations, and this code doesn’t either. (Skia does represent colors internally in a premultiplied form, however.)
class Pixel:
def source_over(self, source):
new_a = source.a + self.a * (1 - source.a)
if new_a == 0: return self
self.r = \
(self.r * (1 - source.a) * self.a + \
source.r * source.a) / new_a
self.g = \
(self.g * (1 - source.a) * self.a + \
source.g * source.a) / new_a
self.b = \
(self.b * (1 - source.a) * self.a + \
source.b * source.a) / new_a
self.a = new_aHere, the destination pixel self is modified to blend in
the source pixel source. The mathematical expressions for
the red, green, and blue color channels are identical, and basically
average the source and destination colors, weighted by alpha.For example, if the alpha of
the source pixel is 1, the result is just the source pixel color, and if
it is 0 the result is the backdrop pixel color. You might
imagine the overall operation of saveLayer with an
Alphaf parameter as something like this:In reality, reading individual
pixels into memory to manipulate them like this is slow, so libraries
such as Skia don’t make it convenient to do so. (Skia canvases do have
peekPixels and readPixels methods that are
sometimes used, but not for this.)
for (x, y) in destination.coordinates():
source[x, y].alphaf(opacity)
destination[x, y].source_over(source[x, y])Source-over compositing is one way to combine two pixel values. But it’s not the only method—you could write literally any computation that combines two pixel values if you wanted. Two computations that produce interesting effects are traditionally called “multiply” and “difference” and use simple mathematical operations.
“Multiply” multiplies the color values:
class Pixel:
def multiply(self, source):
self.r = self.r * source.r
self.g = self.g * source.g
self.b = self.b * source.bAnd “difference” computes their absolute differences:
class Pixel:
def difference(self, source):
self.r = abs(self.r - source.r)
self.g = abs(self.g - source.g)
self.b = abs(self.b - source.b)CSS supports these and many other blending modesMany of these blending modes
are common to
other graphics editing programs like Photoshop and GIMP. Some, like “dodge” and
“burn”, go back to analog photography, where photographers would
expose some parts of the image more than others to manipulate their
brightness. via the mix-blend-mode
property, like this:
<div style="background-color:orange">
Parent
<div style="background-color:blue;mix-blend-mode:difference">
Child
</div>
Parent
</div>This HTML will look like Figure 5.
Parent
Figure 5: Example of the difference value for
mix-blend-mode with a blue child and orange parent,
resulting in pink.
Here, when blue overlaps with orange, we see pink: blue has (red,
green, blue) color channels of (0, 0, 1), and orange has
(1, 0.65, 0), so with “difference” blending the resulting
pixel will be (1, 0.65, 1), which is pink. On a pixel
level, what’s happening is something like this:
for (x, y) in destination.coordinates():
source[x, y].alphaf(opacity)
source[x, y].difference(destination[x, y])
destination[x, y].source_over(source[x, y])This looks weird, but conceptually it blends the destination into the source (which ignores alpha) and then draws the source over the destination (with alpha considered). In some sense, blending thus happens twice.
Skia supports the multiply and difference blend modes natively:
def parse_blend_mode(blend_mode_str):
if blend_mode_str == "multiply":
return skia.BlendMode.kMultiply
elif blend_mode_str == "difference":
return skia.BlendMode.kDifference
else:
return skia.BlendMode.kSrcOverWe can then support blending in our browser by defining a new
Blend operation:
class Blend:
def __init__(self, blend_mode, children):
self.blend_mode = blend_mode
self.children = children
self.rect = skia.Rect.MakeEmpty()
for cmd in self.children:
self.rect.join(cmd.rect)
def execute(self, canvas):
paint = skia.Paint(
BlendMode=parse_blend_mode(self.blend_mode),
)
canvas.saveLayer(None, paint)
for cmd in self.children:
cmd.execute(canvas)
canvas.restore()Applying it when mix-blend-mode is set just requires a
simple change to paint_visual_effects:
def paint_visual_effects(node, cmds, rect):
# ...
blend_mode = node.style.get("mix-blend-mode")
return [
Blend(blend_mode, [
Opacity(opacity, cmds),
]),
]Note the order of operations here: we first apply
transparency, and then blend the result into the rest of the
page. If we switched the Opacity and Blend
calls there wouldn’t be anything to blend it into!
Alpha might seem intuitive, but it’s less obvious than you think:
see, for example, this history of
alpha written by its co-inventor (and co-founder of Pixar). And
there are several different implementation options. For example, many
graphics libraries, Skia included, multiply the color channels by the
opacity instead of allocating a whole color channel. This premultiplied
representation is generally more efficient; for example,
source_over above had to divide by self.a at
the end, because otherwise the result would be premultiplied. Using a
premultiplied representation throughout would save a division. Nor is it
obvious how alpha behaves when
resized.
Clipping and Masking
The “multiply” and “difference” blend modes can seem kind of obscure, but blend modes are a flexible way to implement per-pixel operations. One common use case is clipping—intersecting a surface with a given shape. It’s called clipping because it’s like putting a second piece of paper (called a mask) over the first one, and then using scissors to cut along the mask’s edge.
There are all sorts of powerful methodsThe CSS clip-path
property lets you specify a mask shape using a curve, while the mask
property lets you instead specify a image URL for the
mask. for clipping content on the web, but the most common
form involves the overflow property. This property has lots
of possible values,For
example, overflow: scroll adds scroll bars and makes an
element scrollable, while overflow: hidden is similar to
but subtly different from overflow: clip. but
let’s focus here on overflow: clip, which cuts off contents
of an element that are outside the element’s bounds.
Usually, overflow: clip is used with properties like
height or rotate which can make an element’s
children poke outside their parent. Our browser doesn’t support these,
but there is one edge case where overflow: clip is
relevant: rounded corners.Technically, clipping is also relevant for our browser with
single words that are longer than the browser window’s width. Here is an example; visually
it looks like Figure 6. Consider this example:

<div
style="border-radius:30px;background-color:lightblue;overflow:clip">
This test text exists here to ensure that the "div" element is
large enough that the border radius is obvious.
</div>That HTML looks like Figure 7.
This test text exists here to ensure that the “div” element is large enough that the border radius is obvious.
Figure 7: An example of overflow from text children of a div with
overflow:clip and border-radius being clipped
out.
Observe that the letters near the corner are cut off to maintain a
sharp rounded edge. That’s clipping; without the
overflow: clip property these letters would instead be
fully drawn.
Counterintuitively, we’ll implement clipping using blending modes. We’ll make a new surface (the mask), draw a rounded rectangle into it, and then blend it with the element contents. But we want to see the element contents, not the mask, so when we do this blending we will use destination-in compositing.
Destination-in compositing basically means keeping the pixels of the destination surface that intersect with the source surface. The source surface’s color is not used—just its alpha. In our case, the source surface is the rounded rectangle mask and the destination surface is the content we want to clip, so destination-in fits perfectly. In code, destination-in looks like this:
class Pixel:
def destination_in(self, source):
self.a = self.a * source.aNow, in paint_visual_effects, we need to create a new
layer, draw the mask image into it, and then blend it with the element
contents with destination-in blending:
def paint_visual_effects(node, cmds, rect):
# ...
if node.style.get("overflow", "visible") == "clip":
border_radius = float(node.style.get(
"border-radius", "0px")[:-2])
cmds.append(Blend("destination-in", [
DrawRRect(rect, border_radius, "white")
]))
return [
Blend(blend_mode, [
Opacity(opacity, cmds),
]),
]Here I pass destination-in as the blend mode, though
note that this is a bit of a hack and that isn’t actually a valid value
of mix-blend-mode:
def parse_blend_mode(blend_mode_str):
# ...
elif blend_mode_str == "destination-in":
return skia.BlendMode.kDstIn
# ...After drawing all of the element contents with cmds (and
applying opacity), this code draws a rounded rectangle on another layer
to serve as the mask, and uses destination-in blending to clip the
element contents. Here I chose to draw the rounded rectangle in white,
but the color doesn’t matter as long as it’s opaque.
Notice how similar this masking technique is to the physical analogy
with scissors described earlier, with the two layers playing the role of
two sheets of paper and destination-in compositing playing the role of
the scissors.If all our
browser wanted to clip were rounded rectangles, Skia actually provides a
specialized clipRRect operation. It’s more efficient than
destination-in blending because it applies as other commands are being
drawn, and so can skip drawing anything outside the clipped region. This
requires specialized code in each of Skia’s shaders, or GPU
programs, so can only be done for a couple of common shapes.
Destination-in blending is more general.
Rounded corners have an interesting
history in computing. Features that are simple today were very
complex to implement on early personal computers with limited memory
and no hardware floating-point arithmetic. Even when floating-point
hardware and eventually GPUs became standard, the
border-radius CSS property didn’t appear in browsers until
around 2010.The lack of
support didn’t stop web developers from putting rounded corners on their
sites before border-radius was supported. There are a
number of clever ways to do it; a
video from 2008 walks through several. More recently,
the introduction of animations, visual effects, multi-process
compositing, and hardware
overlays have made rounded corners pretty complex to implement. The
clipRRect fast path, for example, can fail to apply for
cases such as hardware video overlays and nested rounded corner
clips.
Optimizing Surface Use
Our browser now works correctly, but uses way too many surfaces. For
example, for a single, no-effects-needed div with some text
content, there are currently 18 surfaces allocated in the display list.
If there’s no blending going on, we should only need one!
Let’s review all the surfaces that our code can create for an element:
- The top-level surface is used to apply blend modes. Since it’s the top-level surface, it also isolates the element from other parts of the page, so that clipping only applies to that element.
- The first nested surface is used for applying opacity.
- The second nested surface is used to implement clipping.
But not every element has opacity, blend modes, or clipping applied,
and we could skip creating those surfaces most of the time. For example,
there’s no reason to create a surface in Opacity if no
opacity is actually applied:
class Opacity:
def execute(self, canvas):
paint = skia.Paint(
Alphaf=self.opacity,
)
if self.opacity < 1:
canvas.saveLayer(None, paint)
for cmd in self.children:
cmd.execute(canvas)
if self.opacity < 1:
canvas.restore()Similarly, Blend doesn’t necessarily need to create a
layer if there’s no blending going on. But the logic here is a little
trickier: the Blend operation not only applies blending but
also isolates the element contents, which matters if they are being
clipped by overflow. So let’s skip creating a layer in
Blend when there’s no blending mode, but let’s set the
blend mode to a special, non-standard source-over value
when we need clipping:
def paint_visual_effects(node, cmds, rect):
if node.style.get("overflow", "visible") == "clip":
if not blend_mode:
blend_mode = "source-over"
# ...We’ll parse that as the default source-over blend mode:
def parse_blend_mode(blend_mode_str):
# ...
elif blend_mode_str == "source-over":
return skia.BlendMode.kSrcOver
# ...This is actually unnecessary, since parse_blend_mode
already parses unknown strings as source-over blending, but it’s good to
be explicit. Anyway, now Blend can skip
saveLayer if no blend mode is passed:
class Blend:
def execute(self, canvas):
paint = skia.Paint(
BlendMode=parse_blend_mode(self.blend_mode),
)
if self.blend_mode:
canvas.saveLayer(None, paint)
for cmd in self.children:
cmd.execute(canvas)
if self.blend_mode:
canvas.restore()So now we skip creating extra surfaces when Opacity and
Blend aren’t really necessary. But there’s still one case
where we use too many: both Opacity and Blend
can create a surface instead of sharing one. Let’s fix that by just
merging opacity into Blend:This works for opacity, but
not for filters that “move pixels” such as blur.
Such a filter needs to be applied before clipping, not when blending
into the parent surface. Otherwise, the edge of the blur will not be
sharp.
class Blend:
def __init__(self, opacity, blend_mode, children):
self.opacity = opacity
self.blend_mode = blend_mode
self.should_save = self.blend_mode or self.opacity < 1
self.children = children
self.rect = skia.Rect.MakeEmpty()
for cmd in self.children:
self.rect.join(cmd.rect)
def execute(self, canvas):
paint = skia.Paint(
Alphaf=self.opacity,
BlendMode=parse_blend_mode(self.blend_mode),
)
if self.should_save:
canvas.saveLayer(None, paint)
for cmd in self.children:
cmd.execute(canvas)
if self.should_save:
canvas.restore()Now paint_visual_effects looks like this:
def paint_visual_effects(node, cmds, rect):
# ...
if node.style.get("overflow", "visible") == "clip":
# ...
cmds.append(Blend(1.0, "destination-in", [
DrawRRect(rect, border_radius, "white")
]))
return [Blend(opacity, blend_mode, cmds)]Note that I’ve specified an opacity of 1.0 for the clip
Blend.
Implementing high-quality raster libraries is very interesting in its own right—check out Real-Time Rendering for more.There is also Computer Graphics: Principles and Practice, which incidentally I remember buying—this is Chris speaking—back in the days of my youth (1992 or so). At the time I didn’t get much further than rastering lines and polygons (in assembly language!). These days you can do the same and more with Skia and a few lines of Python. These days, it’s especially important to leverage GPUs when they’re available, and browsers often push the envelope. Browser teams typically include or work closely with raster library experts: Skia for Chromium and Core Graphics for WebKit, for example. Both of these libraries are used outside of the browser, too: Core Graphics in iOS and macOS, and Skia in Android.
Summary
So there you have it: our browser can draw not only boring text and boxes but also:
- browser compositing with extra surfaces for faster scrolling.
- partial transparency via an alpha channel;
- user-configurable blending modes via
mix-blend-mode; - rounded rectangle clipping via destination-in blending or direct clipping;
- optimizations to avoid surfaces when possible;
Besides the new features, we’ve upgraded from Tkinter to SDL and Skia, which makes our browser faster and more responsive, and also sets a foundation for more work on browser performance to come.
Click here to try this chapter’s browser.
Outline
The complete set of functions, classes, and methods in our browser should now look something like this:
COOKIE_JAR
class URL:
def __init__(url)
def request(referrer, payload)
def resolve(url)
def origin()
def __str__()
class Text:
def __init__(text, parent)
def __repr__()
class Element:
def __init__(tag, attributes, parent)
def __repr__()
def print_tree(node, indent)
def tree_to_list(tree, list)
class HTMLParser:
SELF_CLOSING_TAGS
HEAD_TAGS
def __init__(body)
def parse()
def get_attributes(text)
def add_text(text)
def add_tag(tag)
def implicit_tags(tag)
def finish()
class CSSParser:
def __init__(s)
def whitespace()
def literal(literal)
def word()
def ignore_until(chars)
def pair()
def selector()
def body()
def parse()
class TagSelector:
def __init__(tag)
def matches(node)
class DescendantSelector:
def __init__(ancestor, descendant)
def matches(node)
FONTS
def get_font(size, weight, style)
def linespace(font)
NAMED_COLORS
def parse_color(color)
def parse_blend_mode(blend_mode_str)
DEFAULT_STYLE_SHEET
INHERITED_PROPERTIES
def style(node, rules)
def cascade_priority(rule)
WIDTH, HEIGHT
HSTEP, VSTEP
INPUT_WIDTH_PX
BLOCK_ELEMENTS
class DocumentLayout:
def __init__(node)
def layout()
def should_paint()
def paint()
def paint_effects(cmds)
class BlockLayout:
def __init__(node, parent, previous)
def layout_mode()
def layout()
def recurse(node)
def new_line()
def word(node, word)
def input(node)
def self_rect()
def should_paint()
def paint()
def paint_effects(cmds)
class LineLayout:
def __init__(node, parent, previous)
def layout()
def should_paint()
def paint()
def paint_effects(cmds)
class TextLayout:
def __init__(node, word, parent, previous)
def layout()
def should_paint()
def paint()
def paint_effects(cmds)
class InputLayout:
def __init__(node, parent, previous)
def layout()
def should_paint()
def paint()
def paint_effects(cmds)
def self_rect()
class DrawText:
def __init__(x1, y1, text, font, color)
def execute(canvas)
class DrawRect:
def __init__(rect, color)
def execute(canvas)
class DrawRRect:
def __init__(rect, radius, color)
def execute(canvas)
class DrawLine:
def __init__(x1, y1, x2, y2, color, thickness)
def execute(canvas)
class DrawOutline:
def __init__(rect, color, thickness)
def execute(canvas)
class Blend:
def __init__(opacity, blend_mode, children)
def execute(canvas)
def paint_tree(layout_object, display_list)
def paint_visual_effects(node, cmds, rect)
EVENT_DISPATCH_JS
RUNTIME_JS
class JSContext:
def __init__(tab)
def run(script, code)
def dispatch_event(type, elt)
def get_handle(elt)
def querySelectorAll(selector_text)
def getAttribute(handle, attr)
def innerHTML_set(handle, s)
def XMLHttpRequest_send(...)
SCROLL_STEP
class Tab:
def __init__(tab_height)
def load(url, payload)
def render()
def allowed_request(url)
def raster(canvas)
def scrolldown()
def click(x, y)
def go_back()
def submit_form(elt)
def keypress(char)
class Chrome:
def __init__(browser)
def tab_rect(i)
def paint()
def click(x, y)
def keypress(char)
def enter()
def blur()
class Browser:
def __init__()
def raster_tab()
def raster_chrome()
def draw()
def new_tab(url)
def handle_down()
def handle_click(e)
def handle_key(char)
def handle_enter()
def handle_quit()
def mainloop(browser)
Exercises
11-1 Filters. The filter CSS property allows
specifying various kinds of more complex
effects, such as grayscale or blur. These are fun to implement, and
some, like blur, have built-in support in Skia. Implement
blur. Think carefully about when blurring occurs, relative
to other effects like transparency, clipping, and blending.
11-2 Hit testing. If you have an element with a
border-radius, it’s possible to click outside the element
but inside its containing rectangle, by clicking in the part of the
corner that is “rounded off”. This shouldn’t result in clicking on the
element, but in our browser it currently does. Modify the
click method to take border radii into account.
11-3 Interest region. Our browser now draws the whole web
page to a single surface, which means a very long web page (like this
chapter’s!) creates a large surface, thereby using a lot of memory.
Instead, only draw an “interest region” of limited height, say
4 * HEIGHT pixels. You’ll need to keep track of where the
interest region is on the page, draw the correct part of it to the
screen, and re-raster the interest region when the user attempts to
scroll outside of it. Use Skia’s clipRect operation to
avoid drawing outside the interest region.
11-4 Overflow scrolling. An element with the
overflow property set to scroll and a fixed
pixel height is scrollable. (You’ll want to implement
Exercise 6-2) so that height is supported.) Implement some
version of overflow: scroll. I recommend the following user
interaction: the user clicks within a scrollable element to focus it,
and then can press the arrow keys to scroll up and down. You’ll need to
keep track of the layout
overflow. For an extra challenge, make sure you support
scrollable elements nested within other scrollable elements.
11-5 Touch input. Many desktop (and all mobile, of course)
screens these days support touch and multitouch input. And SDL has APIs to
support it. Implement a touch-input variant of click.You might want to go back and
look at the “Go Further” block in Chapter 7
for some hints about good ways to implement touch
input.
Scheduling Tasks and Threads
Modern browsers must handle user input, request remote files, run various callbacks, and ultimately render to the screen, all while staying fast and responsive. That requires a unified task abstraction to keep track of the browser’s pending work. Moreover, browser work must be split across multiple CPU threads, with different threads running tasks in parallel to maximize responsiveness.
Tasks and Task Queues
So far, most of the work our browser’s been doing has come from user actions like scrolling, pressing buttons, and clicking on links. But as the web applications our browser runs get more and more sophisticated, they begin querying remote servers, showing animations, and prefetching information for later. And while users are slow and deliberative, leaving long gaps between actions for the browser to catch up, applications can be very demanding. This requires a change in perspective: the browser now has a never-ending queue of tasks to do.
Modern browsers adapt to this reality by multitasking, prioritizing, and deduplicating work. Every bit of work the browser might do—loading pages, running scripts, and responding to user actions—is turned into a task, which can be executed later, where a task is just a function (plus its arguments) that can be executed:
class Task:
def __init__(self, task_code, *args):
self.task_code = task_code
self.args = args
def run(self):
self.task_code(*self.args)
self.task_code = None
self.args = NoneNote the special *args syntax in the constructor
arguments and in the call to task_code. This syntax
indicates that a Task can be constructed with any number of
arguments, which are then available as the list args. Then,
calling a function with *args unpacks the list back into
multiple arguments.
The point of a task is that it can be created at one point in time, and then run at some later time by a task runner of some kind, according to a scheduling algorithm.The event loops we discussed in Chapter 2 and Chapter 11 are task runners, where the tasks to run are provided by the operating system. In our browser, the task runner will store tasks in a first-in, first-out queue:
class TaskRunner:
def __init__(self):
self.tab = tab
self.tasks = []
def schedule_task(self, task):
self.tasks.append(task)When the time comes to run a task, our task runner can just remove the first task from the queue and run it:First-in, first-out is a simplistic way to choose which task to run next, and real browsers have sophisticated schedulers which consider many different factors.
class TaskRunner:
def run(self):
if len(self.tasks) > 0:
task = self.tasks.pop(0)
task.run()To run those tasks, we need to call the run method on
our TaskRunner, which we can do in the main event loop:
class Tab:
def __init__(self):
self.task_runner = TaskRunner(self)def mainloop(browser):
while True:
# ...
browser.active_tab.task_runner.run()The TaskRunner allows us to choose when exactly
different tasks are handled. Here, I’ve chosen to check for user events
between every Task the browser runs, which makes our
browser more responsive when there are lots of tasks. I’ve also chosen
to only run tasks on the active tab, which means background tabs can’t
slow our browser down.
With this simple task runner, we can now queue up tasks and execute them later. For example, right now, when loading a web page, our browser will download and run all scripts before doing its rendering steps. That makes pages slower to load. We can fix this by creating tasks for running scripts:
class Tab:
def load(self, url, payload=None):
# ...
for script in scripts:
# ...
try:
header, body = script_url.request(url)
except:
continue
task = Task(self.js.run, script_url, body)
self.task_runner.schedule_task(task)Now our browser will not run scripts until after load
has completed and the event loop comes around again. And if there are
lots of scripts to run, we’ll also be able to process user events while
the page loads.
JavaScript uses a task-based event loop even outside of the browser. For example, JavaScript uses message passing, handles input and output via asynchronous APIs, and has run-to-completion semantics. Of course, this programming model grew out of early browser implementations, and is now another important reason to architect a browser using tasks.
Timers and setTimeout
Tasks are also a natural way to support several JavaScript
APIs that ask for a function to be run at some point in the future. For
example, setTimeout
lets you run a JavaScript function some number of milliseconds from now.
This code prints “Callback” to the console one second from now:
function callback() { console.log('Callback'); }
setTimeout(callback, 1000);As with addEventListener in Chapter 9, we’ll implement
setTimeout by saving the callback in a JavaScript variable
and creating a handle by which the Python-side code can call it:
SET_TIMEOUT_REQUESTS = {}
function setTimeout(callback, time_delta) {
var handle = Object.keys(SET_TIMEOUT_REQUESTS).length;
SET_TIMEOUT_REQUESTS[handle] = callback;
call_python("setTimeout", handle, time_delta)
}The exported setTimeout function will create a timer,
wait for the requested time period, and then ask the JavaScript runtime
to run the callback. That last part will happen via
__runSetTimeout:Note that we never remove callback from the
SET_TIMEOUT_REQUESTS dictionary. This could lead to a
memory leak, if the callback is holding on to the last reference to some
large data structure. Chapter 9 had a similar
issue with handles. Avoiding memory leaks in data structures shared
between the browser and the browser application takes a lot of care and
this book doesn’t attempt to do it right.
function __runSetTimeout(handle) {
var callback = SET_TIMEOUT_REQUESTS[handle]
callback();
}Now let’s implement the Python side of this API. We can use the Timer
class in Python’s threading
module. You use the class like this:An alternative approach would be to record when each
Task is supposed to occur, and compare against the current
time in the event loop. This is called polling, and is what,
for example, the SDL event loop does to look for events and tasks.
However, that can mean wasting CPU cycles in a loop until the task is
ready, so I expect the Timer to be more
efficient.
import threading
def callback():
# ...
threading.Timer(1.0, callback).start()This runs callback one second from now. Simple! But
threading.Timer executes its callback on a new Python
thread, and that introduces a lot of challenges. The callback can’t
just call evaljs directly: we’d end up with JavaScript
running on two Python threads at the same time, which is not good.JavaScript is not a
multithreaded programming language. It’s possible on the web to create
workers
of various kinds, but they all run independently and communicate only
via special message-passing APIs. So as a workaround, the
callback will add a new Task to the task queue to call
__runSetTimeout. That has the downside of potentially
delaying the callback, but it means that JavaScript will only ever
execute on the main thread.
Let’s implement that:
SETTIMEOUT_JS = "__runSetTimeout(dukpy.handle)"
class JSContext:
def __init__(self, tab):
# ...
self.interp.export_function("setTimeout",
self.setTimeout)
def dispatch_settimeout(self, handle):
self.interp.evaljs(SETTIMEOUT_JS, handle=handle)
def setTimeout(self, handle, time):
def run_callback():
task = Task(self.dispatch_settimeout, handle)
self.tab.task_runner.schedule_task(task)
threading.Timer(time / 1000.0, run_callback).start()But this still isn’t quite right. We now have two threads accessing
the task_runner: the primary thread, to run tasks, and the
timer thread, to add them. This is a race condition
that can cause all sorts of bad things to happen, so we need to make
sure only one thread accesses the task_runner at a
time.
To do so we use a Condition
object, which can only be held by one thread at a time. Each thread will
try to acquire condition before reading or writing to the
task_runner, avoiding simultaneous access.The blocking
parameter to acquire indicates whether the thread should
wait for the condition to be available before continuing; in this
chapter you’ll always set it to True. (When the thread is
waiting, it’s said to be blocked.)
The Condition class is actually a Lock,
plus functionality to be able to wait until a state condition
occurs. If you have no more work to do right now, acquire
condition and then call wait. This will cause
the thread to stop at that line of code. When more work comes in to do,
such as in schedule_task, a call to notify_all
will wake up the thread that called wait.
class TaskRunner:
def __init__(self, tab):
# ...
self.condition = threading.Condition()
def schedule_task(self, task):
self.condition.acquire(blocking=True)
self.tasks.append(task)
self.condition.notify_all()
self.condition.release()
def run(self):
task = None
self.condition.acquire(blocking=True)
if len(self.tasks) > 0:
task = self.tasks.pop(0)
self.condition.release()
if task:
task.run()
self.condition.acquire(blocking=True)
if len(self.tasks) == 0:
self.condition.wait()
self.condition.release()It’s important to call wait at the end of the
run loop if there is nothing left to do. Otherwise that
thread will tend to use up a lot of the CPU, plus constantly be
acquiring and releasing condition. This busywork not only
slows down the computer, but also causes the callbacks from the
Timer to happen at erratic times, because the two threads
are competing for the lock.Try removing this code and observe. The timers will become
quite erratic.
When using locks, it’s super important to remember to release the
lock eventually and to hold it for the shortest time possible. The code
above, for example, releases the lock before running the
task. That’s because after the task has been removed from
the queue, it can’t be accessed by another thread, so the lock does not
need to be held while the task is running.
The setTimeout code is now thread-safe, but still has
yet another bug: if we navigate from one page to another,
setTimeout callbacks still pending on the previous page
might still try to execute. That is easily prevented by adding a
discarded field on JSContext and setting it
when loading a new page:
class JSContext:
def __init__(self, tab):
# ...
self.discarded = False
def dispatch_settimeout(self, handle):
if self.discarded: return
self.interp.evaljs(SETTIMEOUT_JS, handle=handle)class Tab:
def load(self, url, payload=None):
# ...
if self.js: self.js.discarded = True
self.js = JSContext(self)
# ...Unfortunately, Python currently has a global interpreter lock (GIL), so Python threads don’t truly run in parallel. This unfortunate limitation of Python has some effect on our browser, but not on real browsers, so in this chapter I mostly pretend the GIL isn’t there. And perhaps a future version of Python will get rid of it. We still need locks despite the global interpreter lock, because Python threads can yield between bytecode operations or during calls into C libraries. That means concurrent accesses and race conditions are still possible.In fact, while debugging the code for this chapter, I often encountered this kind of race condition when I forgot to add a lock. Remove some of the locks from your browser and you can see for yourself!
Long-lived threads
Threads can also be used to add browser multitasking. For example, in
Chapter 10 we
implemented the XMLHttpRequest class, which lets scripts
make requests to the server. But in our implementation, the whole
browser would seize up while waiting for the request to finish. That’s
obviously bad.For this
reason, the synchronous version of the API that we implemented in
Chapter 10 is not very useful and a huge performance footgun. Some
browsers are now moving to deprecate synchronous
XMLHttpRequest. Python’s Thread
class lets us do better:
threading.Thread(target=callback).start()This code creates a new thread and then immediately returns. The
callback then runs in parallel, on the new thread, while
the initial thread continues to execute later code.
We’ll implement asynchronous XMLHttpRequest calls using
threads. Specifically, we’ll have the browser start a thread, do the
request and parse the response on that thread, and then schedule a
Task to send the response back to the script.
Like with setTimeout, we’ll store the callback on the
JavaScript side and refer to it with a handle:
XHR_REQUESTS = {}
function XMLHttpRequest() {
this.handle = Object.keys(XHR_REQUESTS).length;
XHR_REQUESTS[this.handle] = this;
}When a script calls the open method on an
XMLHttpRequest object, we’ll now allow the
is_async flag to be true:In browsers, the is_async parameter is
optional and defaults to true, but our browser doesn’t
implement that.
XMLHttpRequest.prototype.open = function(method, url, is_async) {
this.is_async = is_async;
this.method = method;
this.url = url;
}The send method will need to send over the
is_async flag and the handle:
XMLHttpRequest.prototype.send = function(body) {
this.responseText = call_python("XMLHttpRequest_send",
this.method, this.url, body, this.is_async, this.handle);
}On the browser side, the XMLHttpRequest_send handler
will have three parts. The first part will resolve the URL and do
security checks:
class JSContext:
def XMLHttpRequest_send(
self, method, url, body, isasync, handle):
full_url = self.tab.url.resolve(url)
if not self.tab.allowed_request(full_url):
raise Exception("Cross-origin XHR blocked by CSP")
if full_url.origin() != self.tab.url.origin():
raise Exception(
"Cross-origin XHR request not allowed")Then, we’ll define a function that makes the request and enqueues a task for running callbacks:
class JSContext:
def XMLHttpRequest_send(
self, method, url, body, isasync, handle):
# ...
def run_load():
headers, response = full_url.request(self.tab.url, body)
task = Task(self.dispatch_xhr_onload, response, handle)
self.tab.task_runner.schedule_task(task)
return responseNote that the task runs dispatch_xhr_onload, which we’ll
define in just a moment.
Finally, depending on the is_async flag the browser will
either call this function right away, or in a new thread:
class JSContext:
def XMLHttpRequest_send(
self, method, url, body, isasync, handle):
# ...
if not isasync:
return run_load()
else:
threading.Thread(target=run_load).start()Note that in the asynchronous case, the
XMLHttpRequest_send method starts a thread and then
immediately returns. That thread will run in parallel with the browser’s
main work until the request is done.In theory two parallel requests could race while accessing
the cookie jar; I’m not fixing this out of expediency but a proper
implementation would have locks for the cookie jar.
To communicate the result back to JavaScript, we’ll call a
__runXHROnload function from
dispatch_xhr_onload:
XHR_ONLOAD_JS = "__runXHROnload(dukpy.out, dukpy.handle)"
class JSContext:
def dispatch_xhr_onload(self, out, handle):
if self.discarded: return
do_default = self.interp.evaljs(
XHR_ONLOAD_JS, out=out, handle=handle)The __runXHROnload method just pulls the relevant object
from XHR_REQUESTS and calls its onload
function, which is the standard callback for asynchronous
XMLHttpRequests:
function __runXHROnload(body, handle) {
var obj = XHR_REQUESTS[handle];
var evt = new Event('load');
obj.responseText = body;
if (obj.onload)
obj.onload(evt);
}As you can see, tasks allow not only the browser but also applications running in the browser to delay tasks until later.
XMLHttpRequest played a key role in helping the web
evolve. In the 1990s, clicking on a link or submitting a form required
loading a new pages. With XMLHttpRequest web pages were
able to act a whole lot more like a dynamic application; GMail was one
famous early example.GMail dates from April 2004, soon
after enough browsers finished adding support for the API. The first
application to use XMLHttpRequest was Outlook Web
Access, in 1999, but it took a while for the API to make it into
other browsers. Nowadays, a web application that uses DOM
mutations instead of page loads to update its state is called a single-page
app. Single-page apps enabled more interactive and complex web apps,
which in turn made browser speed and responsiveness more important.
The Cadence of Rendering
There’s more to tasks than just implementing some JavaScript APIs.
Once something is a Task, the task runner controls when it
runs: perhaps now, perhaps later, or maybe at most once a second, or
even at different rates for active and inactive pages, or according to
its priority. A browser could even have multiple task runners, optimized
for different use cases.
Now, it might be hard to see how the browser can prioritize which JavaScript callback to run, or why it might want to execute JavaScript tasks at a fixed cadence. But besides JavaScript the browser also has to render the page, and as you may recall from Chapter 2, we’d like the browser to render the page exactly as fast as the display hardware can refresh. On most computers, this is 60 times per second, or 16 ms per frame. However, even with today’s computers, it’s quite difficult to maintain such a high frame rate, and certainly too high a bar for our toy browser.
So let’s establish 30 frames per second—33 ms for each frame—as our refresh rate target:Of course, 30 times per second is actually 33.33333… ms. But it’s a toy browser, and having a more exact value also makes tests easier to write.
REFRESH_RATE_SEC = .033Now, drawing a frame is split between the Tab and
Browser. The Tab needs to call
render to compute a display list. Then the
Browser needs to raster and draw that display list (and
also the chrome display list). Let’s put those Browser
tasks in their own method:
class Browser:
def raster_and_draw(self):
self.raster_chrome()
self.raster_tab()
self.draw()Now, we don’t need each tab redrawing itself every frame,
because the user only sees one tab at a time. We just need the
active tab redrawing itself. Therefore, it’s the
Browser that should control when we update the display, not
individual Tabs. So let’s write a
schedule_animation_frame methodIt’s called an “animation
frame” because sequential rendering of different pixels is an animation,
and each time you render it’s one “frame”—like a drawing in a picture
frame. that schedules a task to render the
active tab:
class Browser:
def __init__(self):
self.animation_timer = None
def schedule_animation_frame(self):
def callback():
active_tab = self.active_tab
task = Task(active_tab.render)
active_tab.task_runner.schedule_task(task)
self.animation_timer = None
if not self.animation_timer:
self.animation_timer = \
threading.Timer(REFRESH_RATE_SEC, callback)
self.animation_timer.start()We can kick off the process when we start the browser. In the top-level loop, after running a task on the active tab the browser will need to raster and draw, in case that task was a rendering task:
def mainloop(browser):
while True:
# ...
browser.active_tab.task_runner.run()
browser.raster_and_draw()
browser.schedule_animation_frame()The additional call to schedule_animation_frame will
happen every time through the loop. However, because of the check for
self.animation_timer being None, it will only
have an effect once callback was called, which only happens
after 33 ms. Thus we’re scheduling a new rendering task every 33 ms,
just as we wanted to.
There’s nothing special about any particular refresh rate. Some displays refresh 72 times per second, and displays that refresh even more often are becoming more common. Movies are often shot at 24 frames per second (though some directors advocate 48) while television shows traditionally use 30 frames per second. Consistency is often more important than the actual frame rate: a consistant 24 frames per second can look a lot smoother than a varying rate between 60 and 24.
Optimizing with Dirty Bits
If you run this on your computer, there’s a good chance your CPU
usage will spike and your batteries will start draining. That’s because
we’re calling render every frame, which means our browser
is now constantly styling elements, building layout trees, and painting
display lists. Most of that work is wasted, because on most frames, the
web page will not have changed at all, so the old styles, layout trees,
and display lists would have worked just as well as the new ones.
Let’s fix this using a dirty bit, a piece of state that
tells us if some complex data structure is up to date. Since we want to
know if we need to run render, let’s call our dirty bit
needs_render:
class Tab:
def __init__(self, browser, tab_height):
# ...
self.needs_render = False
def set_needs_render(self):
self.needs_render = True
def render(self):
if not self.needs_render: return
# ...
self.needs_render = FalseOne advantage of this flag is that we can now set
needs_render when the HTML has changed instead of calling
render directly. The render will still happen,
but later. This makes scripts faster, especially if they modify the page
multiple times. Make this change in innerHTML_set,
load, click, and keypress when
changing the DOM. For example, in load, do this:
class Tab:
def load(self, url, payload=None):
# ...
self.set_needs_render()And in innerHTML_set, do this:
class JSContext:
def innerHTML_set(self, handle, s):
# ...
self.tab.set_needs_render()There are more calls to render; you should find and fix
all of them … except, let’s take a closer look at
click.
We now don’t immediately render when something changes. That means
that the layout tree (and style) could be out of date when a method is
called. Normally, this isn’t a problem, but in one important case it is:
click handling. That’s because we need to read the layout tree to figure
out what object was clicked on, which means the layout tree needs to be
up to date. To fix this, add a call to render at the top of
click:
class Tab:
def click(self, x, y):
self.render()
# ...Another problem with our implementation is that the browser is now
doing raster_and_draw every time the active tab runs a
task. But sometimes that task is just running JavaScript that doesn’t
touch the web page, and the raster_and_draw call is a
waste.
We can avoid this using another dirty bit, which I’ll call
needs_raster_and_draw:The needs_raster_and_draw dirty bit doesn’t
just make the browser a bit more efficient. Later in this chapter, we’ll
add multiple browser threads, and at that point this dirty bit is
necessary to avoid erratic behavior when animating. Try removing it
later and see for yourself!
class Browser:
def __init__(self):
self.needs_raster_and_draw = False
def set_needs_raster_and_draw(self):
self.needs_raster_and_draw = True
def raster_and_draw(self):
if not self.needs_raster_and_draw:
return
# ...
self.needs_raster_and_draw = FalseWe will need to call set_needs_raster_and_draw every
time either the Browser changes something about the browser
chrome, or any time the Tab changes its rendering. The
browser chrome is changed by event handlers:
class Browser:
def handle_click(self, e):
if e.y < self.chrome.bottom:
# ...
self.set_needs_raster_and_draw()
def handle_key(self, char):
if self.chrome.keypress(char):
# ...
self.set_needs_raster_and_draw()
def handle_enter(self):
if self.chrome.enter():
# ...
self.set_needs_raster_and_draw()Here I need a small change to make enter return whether
something was done:
class Chrome:
def enter(self):
if self.focus == "address bar":
self.browser.active_tab.load(URL(self.address_bar))
self.focus = None
return True
return FalseAnd the Tab should also set this bit after running
render:
class Tab:
def __init__(self, browser, tab_height):
# ...
self.browser = browser
def render(self):
# ...
self.browser.set_needs_raster_and_draw()You’ll need to pass in the browser parameter when a
Tab is constructed:
class Browser:
def new_tab(self, url):
new_tab = Tab(self, HEIGHT - self.chrome.bottom)
# ...Now the rendering pipeline is only run if necessary, and the browser should have acceptable performance again.
This scheduled, task-based approach to rendering is necessary for running complex interactive applications, but it still took until the 2010s for all modern browsers to adopt it, well after such web applications became widespread. That’s because it typically required extensive refactors of vast browser codebases. Chromium, for example, only recently finished 100% of the work to leverage this model, though of course work (always) remains to be done.
Animating Frames
One big reason for a steady rendering cadence is so that animations
run smoothly. Web pages can set up such animations using the requestAnimationFrame
API. This API allows scripts to run code right before the browser runs
its rendering pipeline, making the animation maximally smooth. It works
like this:
function callback() { /* Modify DOM */ }
requestAnimationFrame(callback);By calling requestAnimationFrame, this code is doing two
things: scheduling a rendering task, and asking that the browser call
callback at the beginning of that rendering task,
before any browser rendering code. This lets web page authors change the
page and be confident that it will be rendered right away.
The implementation of this JavaScript API is straightforward. Like before, we store the callbacks on the JavaScript side:
RAF_LISTENERS = [];
function requestAnimationFrame(fn) {
RAF_LISTENERS.push(fn);
call_python("requestAnimationFrame");
}In JSContext, when that method is called, we need to
schedule a new rendering task:
class JSContext:
def __init__(self, tab):
# ...
self.interp.export_function("requestAnimationFrame",
self.requestAnimationFrame) def requestAnimationFrame(self):
task = Task(self.tab.render)
self.tab.task_runner.schedule_task(task)Then, when render is actually called, we need to call
back into JavaScript, like this:
class Tab:
def render(self):
if not self.needs_render: return
self.js.interp.evaljs("__runRAFHandlers()")
# ...This __runRAFHandlers function is a little tricky:
function __runRAFHandlers() {
var handlers_copy = RAF_LISTENERS;
RAF_LISTENERS = [];
for (var i = 0; i < handlers_copy.length; i++) {
handlers_copy[i]();
}
}Note that __runRAFHandlers needs to reset
RAF_LISTENERS to the empty array before it runs any of the
callbacks. That’s because one of the callbacks could itself call
requestAnimationFrame. If this happens during such a
callback, the specification says that a second animation frame
should be scheduled. That means we need to make sure to store the
callbacks for the current frame separately from the callbacks
for the next frame.
This situation may seem like a corner case, but it’s actually very important, as this is how pages can run an animation: by iteratively scheduling one frame after another. For example, here’s a simple counter “animation”:
var count = 0;
function callback() {
var output = document.querySelectorAll("div")[1];
output.innerHTML = "count: " + (count++);
if (count < 100)
requestAnimationFrame(callback);
}
requestAnimationFrame(callback);This script will cause 100 animation frame tasks to run on the rendering event loop. During that time, our browser will display an animated count from 0 to 99. Serve this example web page from our HTTP server:
def do_request(session, method, url, headers, body):
elif method == "GET" and url == "/count":
return "200 OK", show_count()
# ...
def show_count():
out = "<!doctype html>"
out += "<div>";
out += " Let's count up to 99!"
out += "</div>";
out += "<div>Output</div>"
out += "<script src=/eventloop.js></script>"
return outLoad this up and observe an animation from 0 to 99.
One flaw with our implementation so far is that an inattentive coder
might call requestAnimationFrame multiple times and thereby
schedule more animation frames than expected. If other JavaScript tasks
appear later, they might end up delayed by many, many frames.
Luckily, rendering is special in that it never makes sense to have
two rendering tasks in a row, since the page wouldn’t have changed in
between. To avoid having two rendering tasks we’ll add a dirty bit
called needs_animation_frame to the Browser
that indicates whether a rendering task actually needs to be
scheduled:
class Browser:
def __init__(self):
self.needs_animation_frame = True def schedule_animation_frame(self):
# ...
if self.needs_animation_frame and not self.animation_timer:
# ...A tab will set the needs_animation_frame flag when an
animation frame is requested:
class JSContext:
def requestAnimationFrame(self):
self.tab.browser.set_needs_animation_frame(self.tab)
class Tab:
def set_needs_render(self):
# ...
self.browser.set_needs_animation_frame(self)
class Browser:
def set_needs_animation_frame(self, tab):
if tab == self.active_tab:
self.needs_animation_frame = TrueNote that set_needs_animation_frame will only actually
set the dirty bit if called from the active tab. This guarantees that
inactive tabs can’t interfere with active tabs. Besides preventing
scripts from scheduling too many animation frames, this system also
makes sure that if our browser consistently runs slower than 30 frames
per second, we won’t end up with an ever-growing queue of rendering
tasks.
Before the requestAnimationFrame API, developers
approximated it with setTimeout. This did run animations at
a (roughly) fixed cadence, but because it didn’t line up with the
browser’s rendering loop, events would sometimes be handled between the
callback and rendering, which might force an extra, unnecessary
rendering step. Not only does requestAnimationFrame avoid
this, but it also lets the browser turn off rendering work when a web
page tab or window is backgrounded, minimized or otherwise throttled,
while still allowing other background tasks like saving your work to the
cloud.
Profiling Rendering
We now have a system for scheduling a rendering task every 33 ms. But what if rendering takes longer than 33 ms to finish? Before we answer this question, let’s instrument the browser and measure how much time is really being spent rendering. It’s important to always measure before optimizing, because the result is often surprising.
To instrument our browser, let’s have it output the JSON tracing format used by chrome://tracing
in Chrome, Firefox
Profiler or Perfetto UI.Though note that these three
tools seem to have somewhat different interpretations of the JSON format
and display the same trace in slightly different ways.
To start, let’s wrap the actual file and format in a class:
class MeasureTime:
def __init__(self):
self.file = open("browser.trace", "w")A trace file is just a JSON object with a traceEvents
fieldThere are other
optional fields too, which provide various kinds of metadata. We won’t
need them here. which contains a list of trace events:
class MeasureTime:
def __init__(self):
# ...
self.file.write('{"traceEvents": [')Each trace event has a number of fields. The ph and
name fields define the event type. For example, setting
ph to M and name to
process_name allows us to change the displayed process
name:
class MeasureTime:
def __init__(self):
# ...
ts = time.time() * 1000000
self.file.write(
'{ "name": "process_name",' +
'"ph": "M",' +
'"ts": ' + str(ts) + ',' +
'"pid": 1, "cat": "__metadata",' +
'"args": {"name": "Browser"}}')
self.file.flush()The new name (“Browser”) is passed in args, and the
other fields are required. Since our browser only has one process, I
just pass 1 for the process ID, and the
category has to be __metadata for metadata
trace events. The ts field stores a timestamp; since this
is the first event, it’ll set the start time for the whole trace, so
it’s important to put in the actual current time.
We’ll create this MeasureTime object when we start the
browser, so we can use it to measure how long various browser components
take:
class Browser:
def __init__(self):
self.measure = MeasureTime()Now let’s add trace events when our browser does something
interesting. We specifically want B and E
events, which mark the beginning and end of some interesting
computation. Because we have that initial trace event, every later trace
event needs to be preceded by a comma:
class MeasureTime:
def time(self, name):
ts = time.time() * 1000000
self.file.write(
', { "ph": "B", "cat": "_",' +
'"name": "' + name + '",' +
'"ts": ' + str(ts) + ',' +
'"pid": 1, "tid": 1}')
self.file.flush()Here, the name argument to time should
describe what kind of computation is starting, and it needs to match the
name passed to the corresponding stop event:
class MeasureTime:
def stop(self, name):
ts = time.time() * 1000000
self.file.write(
', { "ph": "E", "cat": "_",' +
'"name": "' + name + '",' +
'"ts": ' + str(ts) + ',' +
'"pid": 1, "tid": 1}')
self.file.flush()We can measure tab rendering by just calling time and
stop:
class Tab:
def render(self):
if not self.needs_render: return
self.browser.measure.time('render')
# ...
self.browser.measure.stop('render')Do the same for raster_and_draw, and for all of the code
that calls evaljs to run JavaScript.
Finally, when we finish tracing (that is, when we close the browser window), we want to leave the file a valid JSON file:
class MeasureTime:
def finish(self):
self.file.write(']}')
self.file.close()
class Browser:
def handle_quit(self):
# ...
self.measure.finish()By the way, note that I’m careful to flush after every
write. This makes sure that if the browser crashes, all of the log
events—which might help me debug—are already safely on disk.Some of the tracing tools
listed above actually accept invalid JSON files, in case the trace comes
from a browser crash.
Fire up the server, open our timer script, wait for it to finish counting, and then exit the browser. Then open up Chrome tracing or one of the other tracing tools named above and load the trace. If you don’t want to do it yourself, here is a sample trace file from my computer. You should see something like Figure 1.

In Chrome tracing, you can choose the cursor icon from the toolbar
and drag a selection around a set of trace events. That will show counts
and average times for those events in the details window at the bottom
of the screen. On my computer, my browser spent about 23 ms in
render and about 62 ms in raster_and_draw on
average, as you can see in the zoomed-in view in Figure 2. That clearly
blows through our 33 ms budget. So, what can we do?

Our browser spends a lot of time copying pixels. That’s why optimizing
surfaces is important! It’ll be faster if you’ve completed Exercise
11-3, because making tab_surface smaller also helps a lot.
Modern browsers go a step further and perform raster-and-draw on the
GPU, where a lot more parallelism is available. Even so, on complex
pages raster and draw really do sometimes take a lot of time. I’ll dig
into this more in Chapter 13.
Two Threads
Well, one option, of course, is optimizing raster-and-draw, or even
render, and we’ll do that in Chapter 13
But another option—complex, but worthwhile and done by every major
browser—is to do the render step in parallel with the raster-and-draw
step by adopting a multithreaded architecture. Not only would this speed
up the rendering pipeline (dropping from 85 ms to 62 ms) but we could
also execute JavaScript on one thread while the expensive
raster_and_draw task runs on the other.
Let’s call our two threads the browser threadIn modern browsers the
analogous thread is often called the compositor
thread, though modern browsers have lots of threads and the
correspondence isn’t exact. and the main
thread.Here I’m
going with the name real browsers often use. A better name might be the
“DOM” thread (since JavaScript can sometimes run on other
threads). The browser thread corresponds to the
Browser class and will handle raster-and-draw. It’ll also
handle interactions with the browser chrome. The main thread, on the
other hand, corresponds to a Tab and will handle running
scripts, loading resources, and rendering, along with associated tasks
like running event handlers and callbacks. If you’ve got more than one
tab open, you’ll have multiple main threads (one per tab) but only one
browser thread.
Now, multithreaded architectures are tricky, so let’s do a little planning.
To start, the one thread that exists already—the one that runs when you start the browser—will be the browser thread. We’ll make a main thread every time we create a tab. These two threads will need to communicate to handle events and draw to the screen.
When the browser thread needs to communicate with the main thread, to
inform it of events, it’ll place tasks on the main thread’s
TaskRunner.You might be wondering why the main thread doesn’t also
communicate back to the browser thread with a TaskRunner.
That could certainly be done. Here I chose to only do it in one
direction, because the main thread is generally the “slowest” thread in
browsers, due to the unpredictable nature of JavaScript and the unknown
size of the DOM. The main thread will need to communicate
with the browser thread to request animation frames and to send it a
display list to raster-and-draw, and the main thread will do that via
two methods on browser:
set_needs_animation_frame to request an animation frame and
commit to send it a display list.
The overall control flow for rendering a frame will therefore be:
- The code running in the main thread requests an animation frame with
set_needs_animation_frame, perhaps in response to an event handler or due torequestAnimationFrame. - The browser thread event loop schedules an animation frame on the
main thread
TaskRunner. - The main thread executes its part of rendering, then calls
browser.commit. - The browser thread rasters the display list and draws to the screen.
Let’s implement this design. To start, we’ll add a
Thread to each TaskRunner, which will be the
tab’s main thread. This thread will need to run in a loop, pulling tasks
from the task queue and running them. We’ll put that loop inside the
TaskRunner’s run method.
class TaskRunner:
def __init__(self, tab):
# ...
self.main_thread = threading.Thread(
target=self.run,
name="Main thread",
)
def start_thread(self):
self.main_thread.start()Note that I name the thread; this is a good habit that helps with debugging. Let’s also name the browser thread:
class Browser:
def __init__(self):
# ...
threading.current_thread().name = "Browser thread"Remove the call to run from the top-level
while True loop, since that loop is now going to be running
in the browser thread. And run will have its own loop:
class TaskRunner:
def run(self):
while True:
# ...Because this loop runs forever, the main thread will live on indefinitely. So if the browser quits, we’ll want it to ask the main thread to quit as well:
class Browser:
def handle_quit(self):
for tab in self.tabs:
tab.task_runner.set_needs_quit()The set_needs_quit method sets a flag on
TaskRunner that’s checked every time it loops:
class TaskRunner:
def set_needs_quit(self):
self.condition.acquire(blocking=True)
self.needs_quit = True
self.condition.notify_all()
self.condition.release()
def run(self):
while True:
self.condition.acquire(blocking=True)
needs_quit = self.needs_quit
self.condition.release()
if needs_quit:
return
# ...
self.condition.acquire(blocking=True)
if len(self.tasks) == 0 and not self.needs_quit:
self.condition.wait()
self.condition.release()The Browser should no longer call any methods on the
Tab. Instead, to handle events, it should schedule tasks on
the main thread. For example, here is loading:
class Browser:
def schedule_load(self, url, body=None):
self.active_tab.task_runner.clear_pending_tasks()
task = Task(self.active_tab.load, url, body)
self.active_tab.task_runner.schedule_task(task)We need to clear any pending tasks before loading a new page, because those previous tasks are now invalid:
class TaskRunner:
def clear_pending_tasks(self):
self.condition.acquire(blocking=True)
self.tasks.clear()
self.condition.release()We also need to split new_tab into a version that
acquires a lock and one that doesn’t
(new_tab_internal):
class Browser:
def new_tab(self, url):
self.lock.acquire(blocking=True)
self.new_tab_internal(url)
self.lock.release()
def new_tab_internal(self, url):
new_tab = Tab(self, HEIGHT - self.chrome.bottom)
self.tabs.append(new_tab)
self.set_active_tab(new_tab)
self.schedule_load(url)This way new_tab_internal can be called directly by
methods, like Chrome’s click method, that
already hold the lock.Using locks while avoiding race conditions and deadlocks
can be quite difficult!
class Chrome:
def click(self, x, y):
if self.newtab_rect.contains(x, y):
self.browser.new_tab_internal(
URL("https://browser.engineering/"))
def enter(self):
if self.focus == "address bar":
self.browser.schedule_load(URL(self.address_bar))Event handlers are mostly similar, except that we need to be careful
to distinguish events that affect the browser chrome from those that
affect the tab. For example, consider handle_click. If the
user clicked on the browser chrome, we can handle it right there in the
browser thread. But if the user clicked on the web page, we must
schedule a task on the main thread:
class Browser:
def handle_click(self, e):
self.lock.acquire(blocking=True)
if e.y < self.chrome.bottom:
# ...
else:
# ...
tab_y = e.y - self.chrome.bottom
task = Task(self.active_tab.click, e.x, tab_y)
self.active_tab.task_runner.schedule_task(task)
self.lock.release()The same logic holds for keypress:
class Browser:
def handle_key(self, char):
if not (0x20 <= ord(char) < 0x7f): return
if self.chrome.keypress(char):
# ...
elif self.focus == "content":
task = Task(self.active_tab.keypress, char)
self.active_tab.task_runner.schedule_task(task)Do the same with any other calls from the Browser to the
Tab.
So now we have the browser thread telling the main thread what to do. Communication in the other direction is a little subtler.
Originally, threads were a mechanism for improving responsiveness via pre-emptive multitasking, but these days they also allow browsers to increase throughput because even phones have several cores. But different CPU architectures differ, and browser engineers (like you!) have to use more or less hardware parallelism as appropriate to the situation. For example, some devices have more CPU cores than others, or are more sensitive to battery power usage, or their system processes such as listening to the wireless radio may limit the actual parallelism available to the browser.
Committing a Display List
We already have a set_needs_animation_frame method, but
we also need a commit method that a Tab can
call when it’s finished creating a display list. And if you look
carefully at our raster-and-draw code, you’ll see that to draw a display
list we also need to know the URL (to update the browser chrome), the
document height (to allocate a surface of the right size), and the
scroll position (to draw the right part of the surface).
Let’s make a simple class for storing this data:
class CommitData:
def __init__(self, url, scroll, height, display_list):
self.url = url
self.scroll = scroll
self.height = height
self.display_list = display_listWhen running an animation frame, the Tab should
construct one of these objects and pass it to commit. To
keep render from getting too confusing, let’s put this in a
new run_animation_frame method, and move
__runRAFHandlers there too.Why not reuse
render instead of a new method? Because the
render method is just about updating style, layout and
paint when needed; it’s called for every frame, but it’s also called
from click, and in real browsers from many other places
too. Meanwhile, run_animation_frame is only called for
frames, and therefore it, not render, runs RAF handlers and
calls commit.
class Tab:
def __init__(self, browser, tab_height):
# ...
self.browser = browser
def run_animation_frame(self):
self.js.interp.evaljs("__runRAFHandlers()")
self.render()
commit_data = CommitData(
self.url, self.scroll, document_height, \
self.display_list)
self.display_list = None
self.browser.commit(self, commit_data)Think of the CommitData object as being sent from the
main thread to the browser thread. That means the main thread shouldn’t
access it any more, and for this reason I’m resetting the
display_list field. The Browser should now
schedule run_animation_frame:
class Browser:
def schedule_animation_frame(self):
def callback():
# ...
task = Task(self.active_tab.run_animation_frame)
# ...On the Browser side, the new commit method
needs to read out all of the data it was sent and call
set_needs_raster_and_draw as needed. Because this call will
come from another thread, we’ll need to acquire a lock. Another
important step is to not clear the animation_timer object
until after the next commit occurs. Otherwise multiple
rendering tasks could be queued at the same time. Finally, store all the
CommitData: save the scroll in
active_tab_scroll, the url in
active_tab_url, and additionally store the
height and, if available, the
display_list:
class Browser:
def __init__(self):
self.lock = threading.Lock()
self.active_tab_url = None
self.active_tab_scroll = 0
self.active_tab_height = 0
self.active_tab_display_list = None
def commit(self, tab, data):
self.lock.acquire(blocking=True)
if tab == self.active_tab:
self.active_tab_url = data.url
self.active_tab_scroll = data.scroll
self.active_tab_height = data.height
if data.display_list:
self.active_tab_display_list = data.display_list
self.animation_timer = None
self.set_needs_raster_and_draw()
self.lock.release()Make sure to update the Chrome class to use this new
url field, since we don’t want the chrome, running on the
browser thread, to read from the tab, running on the main thread.
Note that commit is called on the main thread, but
acquires the browser thread lock. As a result, commit is a
critical time when both threads are “stopped” simultaneously.For this reason commit needs
to be as fast as possible, to maximize parallelism and responsiveness.
In modern browsers, optimizing commit is quite challenging, because
their method of caching and sending data between threads is much more
sophisticated. Also note that it’s possible for the
browser thread to get a commit from an inactive tab,That’s because even inactive
tabs might be processing one last animation frame. so the
tab parameter is compared with the active tab before
copying over any committed data.
Now that we have a browser lock, we also need to acquire the lock any
time the browser thread accesses any of its variables. For example, in
set_needs_animation_frame, do this:
class Browser:
def set_needs_animation_frame(self, tab):
self.lock.acquire(blocking=True)
# ...
self.lock.release()In schedule_animation_frame you’ll need to do it both
inside and outside the callback:
class Browser:
def schedule_animation_frame(self):
def callback():
self.lock.acquire(blocking=True)
# ...
self.lock.release()
# ...
self.lock.acquire(blocking=True)
# ...
self.lock.release()Add locks to raster_and_draw, handle_down,
handle_click, handle_key, and
handle_enter as well.
We also don’t want the main thread doing rendering faster than the browser thread can raster and draw. So we should only schedule animation frames once raster and draw are done.The technique of controlling the speed of the front of a pipeline by means of the speed of its end is called back pressure. Luckily, that’s exactly what we’re doing:
def mainloop(browser):
while True:
# ...
browser.raster_and_draw()
browser.schedule_animation_frame()And that’s it: we should now be doing render on one thread and raster and draw on another!
Due to the Python GIL, threading in Python doesn’t increase throughput, but it can increase responsiveness by, say, running JavaScript tasks on the main thread while the browser does raster and draw. It’s also possible to turn off the global interpreter lock while running foreign C/C++ code linked into a Python library; Skia is thread-safe, but DukPy and SDL may not be, and don’t seem to release the GIL. If they did, then JavaScript or raster-and-draw truly could run in parallel with the rest of the browser, and performance would improve as well.
Threaded Profiling
Now that we have two threads, we’ll want to be able to visualize this
in the traces we produce. Luckily, the Chrome tracing format supports
that. First of all, we’ll want to make the MeasureTime
methods thread-safe, so they can be called from either thread:
class MeasureTime:
def __init__(self):
self.lock = threading.Lock()
# ...
def time(self, name):
self.lock.acquire(blocking=True)
# ...
self.lock.release()
def stop(self, name):
self.lock.acquire(blocking=True)
# ...
self.lock.release()
def finish(self):
self.lock.acquire(blocking=True)
# ...
self.lock.release()Next, in every trace event, we’ll want to provide a real thread ID in
the tid field, which we can get by calling
get_ident from the threading library:
class MeasureTime:
def time(self, name):
# ...
tid = threading.get_ident()
self.file.write(
', { "ph": "B", "cat": "_",' +
'"name": "' + name + '",' +
'"ts": ' + str(ts) + ',' +
'"pid": 1, "tid": ' + str(tid) + '}')
# ...Do the same thing in stop. We can also show
human-readable thread names by adding metadata events when finishing the
trace:Note that our
browser doesn’t let you close tabs, so any thread stays around until the
trace is finished. If closing tabs were possible, we’d need
to do thread names somewhat differently.
class MeasureTime:
def finish(self):
self.lock.acquire(blocking=True)
for thread in threading.enumerate():
self.file.write(
', { "ph": "M", "name": "thread_name",' +
'"pid": 1, "tid": ' + str(thread.ident) + ',' +
'"args": { "name": "' + thread.name + '"}}')
# ...Now, if you make a new trace from the counting animation and load it into one of the tracing tools, you should see something like Figure 3 ( click here to download an example trace):

You can see how the render and raster tasks now happen on different
threads, and how our multithreaded architecture allows them to happen
concurrently.However, in
this case the two threads are not running tasks concurrently.
That’s because all of the JavaScript tasks are
requestAnimationFrame callbacks, which are scheduled by the
browser thread, and those are only kicked off once the browser thread
finishes its raster and draw work. Execise 12-8 addresses that problem.
The tracing system we introduced in this chapter comes directly from real browsers. And it’s used every day by browser engineers to understand the performance characteristics of the browser in different situations, find bottlenecks, and fix them. Without these tools, browsers would not have been able to make many of the performance leaps they did in recent years. Good debugging tools are essential to software engineering!
Threaded Scrolling
Splitting the main thread from the browser thread means that the main thread can run a lot of JavaScript without slowing down the browser much. But it’s still possible for really slow JavaScript to slow the browser down. For example, imagine our counter adds the following artificial slowdown:
function callback() {
for (var i = 0; i < 5e6; i++);
// ...
}Now, every tick of the counter has an artificial pause during which the main thread is stuck running JavaScript. This means it can’t respond to any events; for example, if you hold down the down key, the scrolling will be janky and annoying. I encourage you to try this and witness how annoying it is, because modern browsers usually don’t have this kind of jank.Adjust the loop bound to make it pause for about a second or so on your computer.
To fix this, we need the browser thread to handle scrolling, not the main thread. This is harder than it might seem, because the scroll offset can be affected by both the browser (when the user scrolls) and the main thread (when loading a new page or changing the height of the document via JavaScript). Now that the browser thread and the main thread run in parallel, they can disagree about the scroll offset.
The best we can do is to keep two scroll offsets, one on the browser thread and one on the main thread. Importantly, the browser thread’s scroll offset refers to the browser’s copy of the display list, while the main thread’s scroll offset refers to the main thread’s display list, which can be slightly different. We’ll have the browser thread send scroll offsets to the main thread when it renders, but then the main thread will have to be able to override that scroll offset if the new frame requires it.
Let’s implement that. To start, we’ll need to store an
active_tab_scroll variable on the Browser, and
update it when the user scrolls:
class Browser:
def __init__(self):
# ...
self.active_tab_scroll = 0
def clamp_scroll(self, scroll):
height = self.active_tab_height
maxscroll = height - (HEIGHT - self.chrome.bottom)
return max(0, min(scroll, maxscroll))
def handle_down(self):
self.lock.acquire(blocking=True)
if not self.active_tab_height:
self.lock.release()
return
self.active_tab_scroll = self.clamp_scroll(
self.active_tab_scroll + SCROLL_STEP)
self.set_needs_raster_and_draw()
self.needs_animation_frame = True
self.lock.release()This code calls set_needs_raster_and_draw to redraw the
screen with a new scroll offset, and also sets
needs_animation_frame to cause the main thread to receive
the scroll offset asynchronously in the future. Even though the browser
thread has already handled scrolling, it’s still important to
synchronize the new value back to the main thread soon because APIs like
click handling depend on it.
The scroll offset also needs to change when the user switches tabs,
but in this case we don’t know the right scroll offset yet. We need the
main thread to run in order to commit a new display list for the other
tab, and at that point we will have a new scroll offset as well. Move
tab switching (in load and handle_click) to a
new method set_active_tab that simply schedules a new
animation frame:Note
that both callers already hold the lock, so this method doesn’t need to
acquire it.
class Browser:
def set_active_tab(self, tab):
self.active_tab = tab
self.active_tab_scroll = 0
self.active_tab_url = None
self.needs_animation_frame = True
self.animation_timer = NoneSo far, this is only updating the scroll offset on the browser
thread. But the main thread eventually needs to know about the scroll
offset, so it can pass it back to commit. So, when the
Browser creates a rendering task for
run_animation_frame, it should pass in the scroll offset.
The run_animation_frame function can then store the scroll
offset before doing anything else. Add a scroll parameter
to run_animation_frame:
class Browser:
def schedule_animation_frame(self):
# ...
def callback():
self.lock.acquire(blocking=True)
scroll = self.active_tab_scroll
self.needs_animation_frame = False
task = Task(self.active_tab.run_animation_frame, scroll)
self.active_tab.task_runner.schedule_task(task)
self.lock.release()
# ...But the main thread also needs to be able to modify the scroll
offset. We’ll add a scroll_changed_in_tab flag that tracks
whether it’s done so, and only store the browser thread’s scroll offset
if scroll_changed_in_tab is not already true.Two-threaded scroll has a lot
of edge cases, including some I didn’t anticipate when writing this
chapter. For example, it’s pretty clear that a load should force scroll
to 0 (unless the browser implements scroll
restoration for back-navigations!), but what about a scroll clamp
followed by a browser scroll that brings it back to within the clamped
region? By splitting the browser into two threads, we’ve brought in all
of the challenges of concurrency and distributed
state.
class Tab:
def __init__(self, browser, tab_height):
# ...
self.scroll_changed_in_tab = False
def run_animation_frame(self, scroll):
if not self.scroll_changed_in_tab:
self.scroll = scroll
# ...We’ll set scroll_changed_in_tab when loading a new page
or when the browser thread’s scroll offset is past the bottom of the
page:
class Tab:
def load(self, url, payload=None):
# ...
self.scroll = 0
self.scroll_changed_in_tab = True
def clamp_scroll(self, scroll):
height = math.ceil(self.document.height + 2*VSTEP)
maxscroll = height - self.tab_height
return max(0, min(scroll, maxscroll))
def run_animation_frame(self, scroll):
# ...
self.browser.commit(self, commit_data)
self.scroll_changed_in_tab = False
def render(self):
# ...
clamped_scroll = self.clamp_scroll(self.scroll)
if clamped_scroll != self.scroll:
self.scroll_changed_in_tab = True
self.scroll = clamped_scroll
# ...If the main thread hasn’t overridden the browser’s scroll
offset, we’ll set the scroll offset to None in the commit
data:
class Tab:
def run_animation_frame(self, scroll):
# ...
scroll = None
if self.scroll_changed_in_tab:
scroll = self.scroll
commit_data = CommitData(
self.url, scroll, document_height, \
self.display_list)
# ...The browser thread can ignore the scroll offset in this case:
class Browser:
def commit(self, tab, data):
if tab == self.active_tab:
# ...
if data.scroll != None:
self.active_tab_scroll = data.scrollThat’s it! If you try the counting demo now, you’ll be able to scroll even during the artificial pauses. Here is a trace that shows threaded scrolling at work (notice how raster and draw now sometimes happen at the same time as main-thread work), and it’s visualized in Figure 4.

As you’ve seen, moving tasks to the browser thread can be challenging, but can also lead to a much more responsive browser. These same trade-offs are present in real browsers, at a much greater level of complexity.
Scrolling in real browsers goes way beyond what we’ve
implemented here. For example, in a real browser JavaScript can listen
to a scroll
event and call preventDefault to cancel scrolling. And some
rendering features like background-attachment: fixed
are hard to implement on the browser thread.Our browser doesn’t support
any of these features, so it doesn’t run into these difficulties. That’s
also a strategy. For example, until 2020, Chromium-based browsers on
Android did not support
background-attachment: fixed. For this
reason, most real browsers implement both threaded and non-threaded
scrolling, and fall back to non-threaded scrolling when these advanced
features are used.Actually, a real browser only falls back to non-threaded
scrolling when necessary. For example, it might disable threaded
scrolling only if a scroll event listener calls
preventDefault. Concerns like this also drive
new
JavaScript APIs.
Threaded Style and Layout
Now that we have separate browser and main threads, and now that some operations are performed on the browser thread, our browser’s thread architecture has started to resemble that of a real browser.Note that many browsers now run some parts of the browser thread and main thread in different processes, which has advantages for security and error handling. But why not move even more browser components into even more threads? Wouldn’t that make the browser even faster?
In a word, yes. Modern browsers have dozens of threads, which together serve to make the browser even faster and more responsive. For example, raster-and-draw often runs on its own thread so that the browser thread can handle events even while a new frame is being prepared. Likewise, modern browsers typically have a collection of network or input/output (I/O) threads, which move all interaction with the network or the file system off the main thread.
On the other hand, some parts of the browser can’t be easily threaded. For example, consider the earlier part of the rendering pipeline: style, layout and paint. In our browser, these run on the main thread. But could they move to their own thread?
In principle, yes. The only thing browsers have to do is
implement all the web API specifications correctly, and draw to the
screen after scripts and requestAnimationFrame callbacks
have completed. The specification spells this out in detail in what it
calls the “update-the-rendering”
steps. These steps don’t mention style or layout at all—because style
and layout, just like paint and draw, are implementation details of a
browser. The specification’s update-the-rendering steps are the
JavaScript-observable things that have to happen before drawing
to the screen.
Nevertheless, in practice, no current modern browser runs style or
layout on any thread but the main one.Some browsers do use multiple threads within style
and layout; the Servo research
browser was the pioneer here, attempting a fully parallel style, layout,
and paint phase. Some of Servo’s code is now part of Firefox. Still,
even if style or another phase uses threads internally, those steps
still don’t happen concurrently with, say, JavaScript
execution. The reason is simple: there are many JavaScript
APIs that can query style or layout state. For example, getComputedStyle
requires first computing style, and getBoundingClientRect
requires first doing layout.There is no JavaScript API that allows reading back state
from anything later in the rendering pipeline than layout, which is what
made it possible to move the back half of the pipeline to another
thread. If a web page calls one of these APIs, and style
or layout is not up to date, then it has to be computed then and there.
These computations are called forced style or forced
layout: style or layout are “forced” to happen right away, as
opposed to possibly 33 ms in the future, if they’re not already
computed. Because of these forced style and layout situations, browsers
have to be able to compute style and layout on the main thread.Or the main thread could force
the browser thread to do that work, but that’s even worse, because
forcing work on the compositor thread will make scrolling janky unless
you do even more work to avoid that somehow.
One possible way to resolve these tensions is to optimistically move
style and layout off the main thread, similar to optimistically doing
threaded scrolling if a web page doesn’t preventDefault a
scroll. Is that a good idea? Maybe, but forced style and layout aren’t
just caused by JavaScript execution. One example is our implementation
of click, which causes a forced render before hit
testing:
class Tab:
def click(self, x, y):
self.render()
# ...It’s possible (but very hard) to move hit testing off the main thread or to do hit testing against an older version of the layout tree, or to come up with some other technological fix. Thus it’s not impossible to move style and layout off the main thread “optimistically”, but it is challenging. That said, browser developers are always looking for ways to make things faster, and I expect that at some point in the future style and layout will be moved to their own thread. Maybe you’ll be the one to do it?
Browser rendering pipelines are strongly influenced by graphics and games. Many high-performance games are driven by event loops, update a scene graph on each event, convert the scene graph into a display list, and then convert the display list into pixels. But in a game, the programmer knows in advance what scene graphs will be provided, and can tune the graphics pipeline for those graphs. Games can upload hyper-optimized code and pre-rendered data to the CPU and GPU memory when they start. Browsers, on the other hand, need to handle arbitrary web pages, and can’t spend much time optimizing anything. This makes for a very different set of trade-offs, and is why browsers often feel less fancy and smooth than games.
Summary
This chapter demonstrated the two-thread rendering system at the core of modern browsers. The main points to remember are:
- The browser organizes work into task queues, with tasks for things like running JavaScript, handling user input, and rendering the page.
- The goal is to consistently generate frames to the screen at a 30 Hz cadence, which means a 33 ms budget to draw each animation frame.
- The browser has two key threads involved in rendering.
- The main thread runs JavaScript and the special rendering task.
- The browser thread draws the display list to the screen, handles/dispatches input events, and performs scrolling.
- The main thread communicates with the browser thread via
commit, which synchronizes the two threads.
Additionally, you’ve seen how hard it is to move tasks between the two threads, such as the challenges involved in scrolling on the browser thread, or how forced style and layout makes it hard to fully isolate the rendering pipeline from JavaScript.
Click here to try this chapter’s browser.
Outline
The complete set of functions, classes, and methods in our browser should now look something like this:
COOKIE_JAR
class URL:
def __init__(url)
def request(referrer, payload)
def resolve(url)
def origin()
def __str__()
class Text:
def __init__(text, parent)
def __repr__()
class Element:
def __init__(tag, attributes, parent)
def __repr__()
def print_tree(node, indent)
def tree_to_list(tree, list)
class HTMLParser:
SELF_CLOSING_TAGS
HEAD_TAGS
def __init__(body)
def parse()
def get_attributes(text)
def add_text(text)
def add_tag(tag)
def implicit_tags(tag)
def finish()
class CSSParser:
def __init__(s)
def whitespace()
def literal(literal)
def word()
def ignore_until(chars)
def pair()
def selector()
def body()
def parse()
class TagSelector:
def __init__(tag)
def matches(node)
class DescendantSelector:
def __init__(ancestor, descendant)
def matches(node)
FONTS
def get_font(size, weight, style)
def linespace(font)
NAMED_COLORS
def parse_color(color)
def parse_blend_mode(blend_mode_str)
REFRESH_RATE_SEC
class MeasureTime:
def __init__()
def time(name)
def stop(name)
def finish()
class Task:
def __init__(task_code)
def run()
class TaskRunner:
def __init__(tab)
def schedule_task(task)
def set_needs_quit()
def clear_pending_tasks()
def start_thread()
def run()
def handle_quit()
DEFAULT_STYLE_SHEET
INHERITED_PROPERTIES
def style(node, rules)
def cascade_priority(rule)
WIDTH, HEIGHT
HSTEP, VSTEP
INPUT_WIDTH_PX
BLOCK_ELEMENTS
class DocumentLayout:
def __init__(node)
def layout()
def should_paint()
def paint()
def paint_effects(cmds)
class BlockLayout:
def __init__(node, parent, previous)
def layout_mode()
def layout()
def recurse(node)
def new_line()
def word(node, word)
def input(node)
def self_rect()
def should_paint()
def paint()
def paint_effects(cmds)
class LineLayout:
def __init__(node, parent, previous)
def layout()
def should_paint()
def paint()
def paint_effects(cmds)
class TextLayout:
def __init__(node, word, parent, previous)
def layout()
def should_paint()
def paint()
def paint_effects(cmds)
class InputLayout:
def __init__(node, parent, previous)
def layout()
def should_paint()
def paint()
def paint_effects(cmds)
def self_rect()
class DrawText:
def __init__(x1, y1, text, font, color)
def execute(canvas)
class DrawRect:
def __init__(rect, color)
def execute(canvas)
class DrawRRect:
def __init__(rect, radius, color)
def execute(canvas)
class DrawLine:
def __init__(x1, y1, x2, y2, color, thickness)
def execute(canvas)
class DrawOutline:
def __init__(rect, color, thickness)
def execute(canvas)
class Blend:
def __init__(opacity, blend_mode, children)
def execute(canvas)
def paint_tree(layout_object, display_list)
def paint_visual_effects(node, cmds, rect)
EVENT_DISPATCH_JS
SETTIMEOUT_JS
XHR_ONLOAD_JS
RUNTIME_JS
class JSContext:
def __init__(tab)
def run(script, code)
def dispatch_event(type, elt)
def dispatch_settimeout(handle)
def dispatch_xhr_onload(out, handle)
def get_handle(elt)
def querySelectorAll(selector_text)
def getAttribute(handle, attr)
def innerHTML_set(handle, s)
def XMLHttpRequest_send(...)
def setTimeout(handle, time)
def requestAnimationFrame()
SCROLL_STEP
class Tab:
def __init__(browser, tab_height)
def load(url, payload)
def run_animation_frame(scroll)
def render()
def allowed_request(url)
def raster(canvas)
def clamp_scroll(scroll)
def set_needs_render()
def scrolldown()
def click(x, y)
def go_back()
def submit_form(elt)
def keypress(char)
class Chrome:
def __init__(browser)
def tab_rect(i)
def paint()
def click(x, y)
def keypress(char)
def enter()
def blur()
class CommitData:
def __init__(...)
class Browser:
def __init__()
def schedule_animation_frame()
def commit(tab, data)
def render()
def raster_and_draw()
def raster_tab()
def raster_chrome()
def draw()
def set_needs_animation_frame(tab)
def set_needs_raster_and_draw()
def new_tab(url)
def new_tab_internal(url)
def set_active_tab(tab)
def schedule_load(url, body)
def clamp_scroll(scroll)
def handle_down()
def handle_click(e)
def handle_key(char)
def handle_enter()
def handle_quit()
def mainloop(browser)
If you run it, it should look something like this page; due to the browser sandbox, you will need to open that page in a new tab.
Exercises
12-1 setInterval. setInterval
is similar to setTimeout but runs repeatedly at a given
cadence until clearInterval
is called. Implement these APIs. Make sure to test
setInterval with various cadences in a page that also uses
requestAnimationFrame with some expensive rendering
pipeline work to do. Record the actual timing of
setInterval tasks; how consistent is the cadence?
12-2 Task timing. Modify Task to add trace
events every time a task executes. You’ll want to provide a good name
for these trace events. One option is to use the __name__
field of task_code, which will get the name of the Python
function run by the task.
12-3 Clock-based frame timing. Right now our browser schedules each animation frame exactly 33 ms after the previous one completes. This actually leads to a slower animation frame rate cadence than 33 ms. Fix this in our browser by using the absolute time to schedule animation frames, instead of a fixed delay between frames. Also implement main-thread animation frame scheduling that happens before raster and draw, not after, allowing both threads to do animation work simultaneously.
12-4 Scheduling. As more types of complex tasks end up on
the event queue, there comes a greater need to carefully schedule them
to ensure the rendering cadence is as close to 33 ms as possible, and
also to avoid task starvation. Implement a task scheduler with a
priority system that balances these two needs: prioritize rendering
tasks and input handling, and deprioritize (but don’t completely starve)
tasks that ultimately come from JavaScript APIs like
setTimeout. Test it out on a web page that taxes the system
with a lot of setTimeout-based tasks.
12-5 Threaded loading. When loading a page, our browser
currently waits for each style sheet or script resource to load in turn.
This is unnecessarily slow, especially on a bad network. Instead, make
your browser send off all the network requests in parallel. You must
still process resources like styles in source order, however. It may be
convenient to use the join method on a Thread,
which will block the thread calling join until the thread
being joined completes.
12-6 Networking thread. Real browsers usually have a separate thread for networking (and other I/O). Tasks are added to this thread in a similar fashion to the main thread. Implement a third networking thread and put all networking tasks on it.
12-7 Optimized scheduling. On a complicated web page, the
browser may not be able to keep up with the desired cadence. Instead of
constantly pegging the CPU in a futile attempt to keep up, implement a
frame time estimator that estimates the true cadence of the
browser based on previous frames, and adjust
schedule_animation_frame to match. This way complicated
pages get consistently slower, instead of having random slowdowns.
12-8 Raster-and-draw thread. Right now, if an input event arrives while the browser thread is rastering or drawing, that input event won’t be handled immediately. This is especially a problem because raster and draw are slow. Fix this by adding a separate raster-and-draw thread controlled by the browser thread. While the raster-and-draw thread is doing its work, the browser thread should be available to handle input events. Be careful: SDL is not thread-safe, so all of the steps that directly use SDL still need to happen on the browser thread.
Animating and Compositing
Complex web applications use animations when transitioning between states. These animations help users understand the state change and they improve visual polish by replacing sudden jumps with gradual changes. But to execute these animations smoothly, the browser must minimize time in each animation frame, using GPU acceleration to speed up visual effects and compositing to minimize rendering work.
JavaScript Animations
An animation is a sequence of still pictures shown in quick succession that create an illusion of movement to the human eye.Here movement should be construed broadly to encompass all of the kinds of visual changes humans are used to seeing and good at recognizing—not just movement from side to side, but growing, shrinking, rotating, fading, blurring, and sharpening. The rule is that an animation is not an arbitrary sequence of pictures; the sequence must feel continuous to a human mind trained by experience in the real world. Typical web page animations include changing an element’s color, fading it in or out, or resizing it. Browsers also use animations in response to user actions like scrolling, resizing, and pinch-zooming. Plus, some types of animated media (like videos) can be included in web pages.Video-like animations also include animated images and animated canvases. Since our browser doesn’t support images yet, this topic is beyond the scope of this chapter; video alone has its own fascinating complexities.
In this chapter we’ll focus on animations of web page elements. Let’s
start by writing a simple animation using the
requestAnimationFrame API implemented in Chapter 12.
This method requests that some JavaScript code run on the next frame; to
run repeatedly over many frames, we can just have that JavaScript code
call requestAnimationFrame itself:
function run_animation_frame() {
if (animate())
requestAnimationFrame(run_animation_frame);
}
requestAnimationFrame(run_animation_frame);The animate function then makes some small change to the
page to give the impression of continuous change.It returns true
while it’s animating, and then stops. By changing what
animate does we can change what animation occurs.
For example, we can fade an element in by smoothly transitioning its
opacity value from 0.1 to 0.999.Real browsers apply certain
optimizations when opacity is exactly 1, so real-world websites often
start and end animations at 0.999 so that each frame is drawn the same
way and the animation is smooth. It also avoids visual popping of the
content as it goes in and out of GPU-accelerated mode. I chose 0.999
because the visual difference from 1.0 is imperceptible.
Doing this over 120 frames (about four seconds) means increasing the
opacity by about 0.008 each frame.
So let’s take this div containing some text:
<div>This text fades</div>and write an animate function to incrementally change
its opacity:
var div = document.querySelectorAll("div")[0];
var total_frames = 120;
var current_frame = 0;
var change_per_frame = (0.999 - 0.1) / total_frames;
function animate() {
current_frame++;
var new_opacity = current_frame * change_per_frame + 0.1;
div.style = "opacity:" + new_opacity;
return current_frame < total_frames;
}Here’s how it looks; click the buttons to start a fade:
This animation almost runs in our browser, except that we
need to add support for changing an element’s style
attribute from JavaScript. To do that, register a setter on the
style attribute of Node in the JavaScript
runtime:
Object.defineProperty(Node.prototype, 'style', {
set: function(s) {
call_python("style_set", this.handle, s.toString());
}
});Then, inside the browser, define a handler for
style_set:
class JSContext:
def __init__(self, tab):
# ...
self.interp.export_function("style_set", self.style_set)
def style_set(self, handle, s):
elt = self.handle_to_node[handle]
elt.attributes["style"] = s;
self.tab.set_needs_render()Importantly, the style_set function sets the
needs_render flag to make sure that the browser re-renders
the web page with the new style parameter. With these
changes, you should now be able to open and run this animation in your
browser.
The animation pattern presented in this section is yet another
example of the event loop first introduced in Chapter 2 and evolved
further in Chapter 12.
What’s new in this chapter is that we finally have enough tech built up
to actually create meaningful, practical animations. And the same
happened with the web. A whole lot of the APIs for proper animations,
from the requestAnimationFrame API to CSS-native
animations, came onto the scene only in the 2010s.
GPU Acceleration
Try the fade animation in your browser, and you’ll probably notice that it’s not particularly smooth. And that shouldn’t be surprising; after all, Chapter 12 showed that raster and draw was about 62ms for simple pages, and render was 23ms.
Even with just 62ms per frame, our browser is barely doing 15 frames per second; for smooth animations we want 30! So we need to speed up raster and draw.
The best way to do that is to move raster and draw to the GPU. A GPU is essentially a chip in your computer that runs programs much like your CPU, but specialized toward running very simple programs with massive parallelism—it was developed to apply simple operations, in parallel, for every pixel on the screen. This makes GPUs faster for drawing simple shapes and much faster for applying visual effects.
At a high level, to raster and draw on the GPU our browser must:These steps vary a bit in their details by GPU architecture.
Upload the display list to specialized GPU memory.
Compile GPU programs that raster and draw the display list.That’s right, GPU programs are dynamically compiled! This allows them to be portable across a wide variety of implementations that may have very different instruction sets or acceleration tactics. These compiled programs will typically be cached, so this step won’t occur on every animation frame.
- Raster every drawing command into GPU textures.A surface represented on the GPU is called a texture. There can be more than one texture, and practically speaking they often can’t be rastered in parallel with each other.
- Draw the textures onto the screen.
Luckily, SDL and Skia support GPUs and all of these steps; it’s mostly a matter of passing them the right parameters to cause them to happen on the GPU. So let’s do that. Note that a real browser typically implements both CPU and GPU raster and draw, because in some cases CPU raster and draw can be faster than using the GPU, or it may be necessary to work around bugs.Any of the four steps can make GPU raster and draw slow. Large display lists take a while to upload. Complex display list commands take longer to compile. Raster can be slow if there are many surfaces, and draw can be slow if surfaces are deeply nested. On a CPU, the upload step and compile steps aren’t necessary, and more memory is available for raster and draw. Of course, many optimizations are available for both GPUs and CPUs, so choosing the best way to raster and draw a given page can be quite complex. In our browser, for simplicity, we’ll always use the GPU.
First, we’ll need to install the OpenGL library:
pip3 install PyOpenGLand import it:
import OpenGL.GLNow we’ll need to configure SDL to use OpenGL and start/stop a GL context at the beginning/end of the program. For our purposes, just consider this API boilerplate:Starting a GL context is just OpenGL’s way of saying “set up the surface into which subsequent OpenGL commands will draw”. After creating one you can even execute OpenGL commands manually, without using Skia at all, to draw polygons or other objects on the screen.
class Browser:
def __init__(self):
# ...
self.sdl_window = sdl2.SDL_CreateWindow(b"Browser",
sdl2.SDL_WINDOWPOS_CENTERED,
sdl2.SDL_WINDOWPOS_CENTERED,
WIDTH, HEIGHT,
sdl2.SDL_WINDOW_SHOWN | sdl2.SDL_WINDOW_OPENGL)
self.gl_context = sdl2.SDL_GL_CreateContext(
self.sdl_window)
print(("OpenGL initialized: vendor={}," + \
"renderer={}").format(
OpenGL.GL.glGetString(OpenGL.GL.GL_VENDOR),
OpenGL.GL.glGetString(OpenGL.GL.GL_RENDERER)))
def handle_quit(self):
# ...
sdl2.SDL_GL_DeleteContext(self.gl_context)
sdl2.SDL_DestroyWindow(self.sdl_window)That print statement shows the GPU vendor and renderer
that the browser is using; this will help you verify that it’s actually
using your GPU. I’m using a Chromebook to write this chapter, so for me
it says:The
virgl renderer stands for “virtual GL”, a way of
hardware-accelerating the Linux subsystem of ChromeOS that works with
the ChromeOS Linux sandbox. This is a bit slower than using the GPU
directly, so you’ll probably see even faster raster and draw than I
do.
OpenGL initialized: vendor=b'Red Hat', renderer=b'virgl'Now we can configure Skia to draw directly to the screen. The
incantation is:Weirdly,
this code draws to the window without referencing
gl_context or sdl_window directly. That’s
because OpenGL is a strange API with a lot of hidden global state; the
MakeGL Skia method implicitly binds to the existing GL
context.
class Browser:
def __init__(self):
# ...
self.skia_context = skia.GrDirectContext.MakeGL()
self.root_surface = \
skia.Surface.MakeFromBackendRenderTarget(
self.skia_context,
skia.GrBackendRenderTarget(
WIDTH, HEIGHT, 0, 0,
skia.GrGLFramebufferInfo(
0, OpenGL.GL.GL_RGBA8)),
skia.kBottomLeft_GrSurfaceOrigin,
skia.kRGBA_8888_ColorType,
skia.ColorSpace.MakeSRGB())
assert self.root_surface is not NoneAn extra advantage of using OpenGL is that we won’t need to copy data
between Skia and SDL anymore. Instead we just flush the Skia
surface (Skia surfaces draw lazily) and call
SDL_GL_SwapWindow to activate the new framebuffer (because
of OpenGL double-buffering):
class Browser:
def draw(self):
# ...
self.root_surface.flushAndSubmit()
sdl2.SDL_GL_SwapWindow(self.sdl_window)Finally, our browser also creates Skia surfaces for the
chrome_surface and tab_surface. We don’t want
to draw these straight to the screen, so the incantation is a bit
different:
class Browser:
def __init__(self):
# ...
self.chrome_surface = skia.Surface.MakeRenderTarget(
self.skia_context, skia.Budgeted.kNo,
skia.ImageInfo.MakeN32Premul(
WIDTH, math.ceil(self.chrome.bottom)))
assert self.chrome_surface is not NoneAgain, you should think of these changes mostly as boilerplate, since
the details of GPU operation aren’t our focus here.Example detail: a different
color space is required for GPU mode. Make sure to apply
the same treatment to tab_surface (with different width and
height arguments).
Thanks to the thorough support for GPU rendering in SDL and Skia, that should be all that’s necessary for our browser to raster and draw on the GPU. And as expected, speed is much improved. I found that raster and draw improved to 7 ms on average (see Figure 1).

That’s about 10 times faster, and enough to hit 30 frames per second. (And on your computer, you’ll likely see even more speedup than I did, so for you it might already be fast enough in this example.) But if we want to go faster yet, we’ll need to find ways to reduce the total amount of work in rendering, raster and draw.
A high-speed, reliable and cross-platform GPU raster path in Skia has only existed for a few years.You can see a timeline on the Chrome developer blog. In the very early days of Chromium, there was only CPU raster. Scrolling was implemented much like in the early chapters of this book, by re-rastering content. This was deemed acceptable at the time because computers were much slower than today in general, GPUs much less reliable, animations less frequent, and mobile platforms such as Android and iOS still emerging. (In fact, the first versions of Android also didn’t have GPU acceleration.) The same is generally true of Firefox and Safari, though Safari was able to accelerate content more easily because it only targeted the limited number of GPUs supported by macOS and iOS.
There are many challenges to implementing GPU-accelerated raster, among them working correctly across many GPU architectures, gracefully falling back to CPU raster in complex or error scenarios, and finding ways to efficiently GPU-raster content in difficult situations like anti-aliased and complex shapes. So while you might think it’s odd to wait until now to turn on GPU acceleration in our browser, this also mirrors the evolution timeline of browsers.
Compositing
So, how do we do less work in the raster-and-draw phase? The answer is a technique called compositing, which just means caching some rastered images on the GPU and reusing them during later frames.The term compositing means combining multiple images together into a final output. In the context of browsers, it typically means combining rastered images into the final on-screen image, but a similar technique is used in many operating systems to combine the contents of multiple windows. “Compositing” can also refer to multithreaded rendering. I first discussed compositing in Chapter 11; the algorithms described here generalize that beyond scrolling.
To explain compositing, we’ll need to think about our browser’s
display list, and to do that it’s useful to print it out. For example,
for DrawRect you might print:
class DrawRect:
def __repr__(self):
return ("DrawRect(top={} left={} " +
"bottom={} right={} color={})").format(
self.top, self.left, self.bottom,
self.right, self.color)The Blend command sometimes does nothing if no opacity
or blend mode is passed; it’s helpful to indicate that when
printing:
class Blend:
def __repr__(self):
args = ""
if self.opacity < 1:
args += ", opacity={}".format(self.opacity)
if self.blend_mode:
args += ", blend_mode={}".format(self.blend_mode)
if not args:
args = ", <no-op>"
return "Blend({})".format(args[2:])You’ll also need to add children fields to all of the
paint commands, since print_tree relies on those. Now we
can print out our browser’s display list:
class Tab:
def render(self):
# ...
for item in self.display_list:
print_tree(item)For our opacity example, the (key part of) the display list for one frame might look like this:
Blend(alpha=0.119866666667)
DrawText(text=This)
DrawText(text=text)
DrawText(text=fades)On the next frame, it instead might like this:
Blend(alpha=0.112375)
DrawText(text=This)
DrawText(text=text)
DrawText(text=fades)In each case, rastering this display list means first rastering the
three words to a Skia surface created by Blend, and then
copying that to the root surface while applying transparency. Crucially,
the raster is identical in both frames; only the copy differs. This
means we can speed it up with caching.
The idea is to first raster the three words to a separate surface (but this time owned by us, not Skia), which we’ll call a composited layer, that is saved for future use:
Composited Layer:
DrawText(text=This)
DrawText(text=text)
DrawText(text=fades)Now instead of rastering those three words, we can just copy over the
composited layer with a DrawCompositedLayer command:
Blend(alpha=0.112375)
DrawCompositedLayer()Importantly, on the next frame, the Blend changes but
the DrawTexts don’t, so on that frame all we need to do is
re-run the Blend:
Blend(alpha=0.119866666667)
DrawCompositedLayer()In other words, the idea behind compositing is to split the display list into two pieces: a set of composited layers, which are rastered during the browser’s raster phase and then cached, and a draw display list, which is drawn during the browser’s draw phase and which uses the composited layers.
Compositing improves performance when subsequent frames of an
animation reuse composited layers. That’s the case here, because the
only difference between frames is the Blend, which is in
the draw display list.
How exactly to split up the display list is up to the browser.
Typically, visual effects like opacity are very fast to execute on a
GPU, but paint commands that draw shapes—in our browser,
DrawText, DrawRect, DrawRRect,
and DrawLine—can be slower.And there are usually a lot
more of them to execute. Since it’s the visual effects
that are typically animated, this means browsers usually leave animated
visual effects in the draw display list and move everything else into
composited layers. Of course, in a real browser, hardware capabilities,
GPU memory, and application data all play into these decisions, but the
basic idea of compositing is the same no matter what goes where.
If you look closely at the opacity example in this section, you’ll
see that the DrawText command’s rect is only
as wide as the text. On the other hand, the Blend
rect is almost as wide as the viewport. The reason they
differ is that the text is only about as wide as it needs to be, but the
block element that contains it is as wide as the available width.
So if we put it in a composited layer, does it need to be as wide as the text or the whole viewport? In practice you could implement either. The algorithm presented in this chapter ends up with the smaller one but real browsers sometimes choose the larger, depending on their algorithm. Also note that if there was any kind of paint command associated with the block element containing the text, such as a background color, then the surface would definitely have to be as wide as the viewport. Likewise, if there were multiple inline children, the union of their bounds would contribute to the surface size.
Compositing Leaves
Let’s implementing compositing. We’ll need to identify paint commands and move them to composited layers. Then we’ll need to create the draw display list that combines these composited layers with visual effects. To keep things simple, we’ll start by creating a composited layer for every paint command.
To identify paint commands, it’ll be helpful to give them all a
PaintCommand superclass:
class PaintCommand:
def __init__(self, rect):
self.rect = rect
self.children = []Now each paint command needs to be a subclass of
PaintCommand; to do that, you need to name the superclass
when the class is declared and also use some special syntax in the
constructor:
class DrawLine(PaintCommand):
def __init__(self, x1, y1, x2, y2, color, thickness):
super().__init__(skia.Rect.MakeLTRB(x1, y1, x2, y2))
# ...MakeLTRB creates the rect for the
PaintCommand constructor. We can also give a superclass to
visual effects:
class VisualEffect:
def __init__(self, rect, children):
self.rect = rect.makeOffset(0.0, 0.0)
self.children = children
for child in self.children:
self.rect.join(child.rect)Note that since visual effects have children, we need to not only
pass those to the constructor, but also add their rect
fields to our own. I use the makeOffset function to make a
copy of the original rect, which is then grown by later
join methods to include all of the children as well.
Go ahead and modify each paint command and visual effect class to be
a subclass of one of these two new classes. Make sure you declare the
superclass on the class line and also call the superclass
constructor in the __init__ method using the
super() syntax.
We can now list all of the paint commands using
tree_to_list:
class Browser:
def composite(self):
all_commands = []
for cmd in self.active_tab_display_list:
all_commands = tree_to_list(cmd, all_commands)
paint_commands = [cmd for cmd in all_commands
if isinstance(cmd, PaintCommand)]Next we need to group paint commands into layers. For now, let’s do
the simplest possible thing and put each paint command into its own
CompositedLayer:
class Browser:
def __init__(self):
# ...
self.composited_layers = []
def composite(self):
self.composited_layers = []
# ...
for cmd in paint_commands:
layer = CompositedLayer(self.skia_context, cmd)
self.composited_layers.append(layer)Here, a CompositedLayer just stores a list of
display items (and a surface that they’ll be drawn to).For now, it’s just one display
item, but that will change pretty soon.
class CompositedLayer:
def __init__(self, skia_context, display_item):
self.skia_context = skia_context
self.surface = None
self.display_items = [display_item]Now we need a draw display list that combines the composited layers.
To build this we’ll walk up from each composited layer and build a chain
of all of the visual effects applied to it, with a
DrawCompositedLayer at the bottom of the chain.
First, to make it easy to access those ancestor visual effects and compare them, let’s add parent pointers to our display list tree:
def add_parent_pointers(nodes, parent=None):
for node in nodes:
node.parent = parent
add_parent_pointers(node.children, node)
class Browser:
def composite(self):
add_parent_pointers(self.active_tab_display_list)
# ...Next, we’ll need to clone each of the ancestors of the
layer’s paint commands and inject new children, so let’s add a new
clone method to the visual effects classes. For
Blend, it’ll create a new Blend with the same
parameters but new children:
class Blend(VisualEffect):
# ...
def clone(self, child):
return Blend(self.opacity, self.blend_mode,
self.node, [child])Our browser won’t be cloning paint commands, since they’re all going
to be inside a composited layer, so we don’t need to implement
clone for them.
We can now build the draw display list. For each composited layer,
create a DrawCompositedLayer command (which we’ll define in
just a moment). Then, walk up the display list, wrapping that
DrawCompositedLayer in each visual effect that applies to
that composited layer:
class Browser:
def __init__(self):
# ...
self.draw_list = []
def paint_draw_list(self):
self.draw_list = []
for composited_layer in self.composited_layers:
current_effect = \
DrawCompositedLayer(composited_layer)
if not composited_layer.display_items: continue
parent = composited_layer.display_items[0].parent
while parent:
current_effect = \
parent.clone(current_effect)
parent = parent.parent
self.draw_list.append(current_effect)The code in paint_draw_list just walks up from each
composited layer, recreating all of the effects applied to it. This will
work—mostly—but if one effect applies to more than one composited layer,
it’ll turn into multiple identical effects, applied separately to each
composited layer. That’s not right, because as we discussed in Chapter 11, the order of operations
matters.
Let’s fix that by reusing cloned effects:
class Browser:
def paint_draw_list(self):
new_effects = {}
self.draw_list = []
for composited_layer in self.composited_layers:
# ...
while parent:
if parent in new_effects:
new_parent = new_effects[parent]
new_parent.children.append(current_effect)
break
else:
current_effect = \
parent.clone(current_effect)
new_effects[parent] = current_effect
parent = parent.parent
if not parent:
self.draw_list.append(current_effect)That’s it! Now that we’ve split the display list into composited layers and a draw display list, we need to update the rest of the browser to use them for raster and draw.
Let’s start with raster. In the raster step, the browser needs to walk the list of composited layers and raster each:
class Browser:
def raster_tab(self):
for composited_layer in self.composited_layers:
composited_layer.raster()Inside raster, the composited layer needs to allocate a
surface to raster itself into; this requires knowing how big it is.
That’s just the union of the bounding boxes of all of its paint
commands—the rect field:
class CompositedLayer:
# ...
def composited_bounds(self):
rect = skia.Rect.MakeEmpty()
for item in self.display_items:
rect.join(item.rect)
# ...We’ll create a surface just big enough to store the items in this composited layer; this reduces how much GPU memory we need. That being said, there are some tricky corner cases to consider, such as how Skia rasters lines or anti-aliased text across multiple pixels in order to look nice or align with the pixel grid.One pixel of “slop” around the edges is not good enough for a real browser, which has to deal with lots of really subtle issues like nicely blending pixels between adjacent composited layers, subpixel positioning, and effects like blur filters with infinite theoretical extent. So let’s add in one extra pixel on each side to account for that:
def composited_bounds(self):
# ...
rect.outset(1, 1)
return rectAnd now we can make the surface with those bounds:
class CompositedLayer:
def raster(self):
bounds = self.composited_bounds()
if bounds.isEmpty(): return
irect = bounds.roundOut()
if not self.surface:
self.surface = skia.Surface.MakeRenderTarget(
self.skia_context, skia.Budgeted.kNo,
skia.ImageInfo.MakeN32Premul(
irect.width(), irect.height()))
assert self.surface
canvas = self.surface.getCanvas()To raster the composited layer, draw all of its display items to this
surface. The only tricky part is the need to offset by the
top and left of the composited bounds, since
the surface bounds don’t include that offset:
class CompositedLayer:
def raster(self):
# ...
canvas.clear(skia.ColorTRANSPARENT)
canvas.save()
canvas.translate(-bounds.left(), -bounds.top())
for item in self.display_items:
item.execute(canvas)
canvas.restore()That’s all for the raster phase. For the draw phase, we’ll first need
to implement the DrawCompositedLayer command. It takes a
composited layer to draw:
class DrawCompositedLayer(PaintCommand):
def __init__(self, composited_layer):
self.composited_layer = composited_layer
super().__init__(
self.composited_layer.composited_bounds())
def __repr__(self):
return "DrawCompositedLayer()"Executing a DrawCompositedLayer is straightforward—just
draw its surface into the parent surface, adjusting for the correct
offset:
class DrawCompositedLayer(PaintCommand):
def execute(self, canvas):
layer = self.composited_layer
bounds = layer.composited_bounds()
layer.surface.draw(canvas, bounds.left(), bounds.top())Compared with raster, the browser’s draw phase is
satisfyingly simple: simply execute the draw display list.
class Browser:
def draw(self):
# ...
canvas.save()
canvas.translate(0,
self.chrome.bottom - self.active_tab_scroll)
for item in self.draw_list:
item.execute(canvas)
canvas.restore()
# ...All that’s left is wiring these methods up; let’s rename
raster_and_draw to composite_raster_and_draw
(to remind us that there’s now an additional composite step) and add our
two new methods. (And don’t forget to rename the corresponding dirty bit
and call sites.)
class Browser:
def composite_raster_and_draw(self):
# ...
self.composite()
self.raster_chrome()
self.raster_tab()
self.paint_draw_list()
self.draw()
# ...So simple and elegant! Now, on every frame, we are simply splitting the display list into composited layers and the draw display list, and then running each of those in their own phase. We’re now half way toward getting super-smooth animations. What remains is skipping the layout and raster steps if the display list didn’t change much between frames.
The algorithm presented here is a simplified version of what Chromium actually implements. For more details and information on how Chromium implements these concepts see blog posts on the Chrome developer blog; other browsers do something broadly similar. Chromium’s implementation of the “visual effect nesting” data structure is called property trees. The name is plural because there is more than one tree, due to the complex containing block structure of scrolling and clipping.
CSS Transitions
The key to not re-rastering layers is to know which layers have changed, and which haven’t. Right now, we’re basically always assuming all layers have changed, but ideally we’d know exactly what’s changed between frames. Browsers have all sorts of complex methods to achieve this,Chromium, for example, tries to diff the old and new styles any time a style changes on the page. But this is tricky, because a change in style on one element could be inherited by a different element, so diffing will always be somewhat brittle and incomplete. but to keep things simple, let’s implement a CSS feature that’s perfect for compositing: CSS transitions.
CSS transitions take the requestAnimationFrame loop we
used to implement animations and move it “into the browser”. The web
page just needs to add a CSS transition
property, which defines properties to animate and how long to animate
them for. Here’s how to say opacity changes to a div should
animate for two seconds:
div { transition: opacity 2s; }Now, whenever the opacity property of a div
changes for any reason—like from changing its style attribute—the
browser smoothly interpolates between the old and new values for two
seconds. Here is an
example.
(click here to load the example in your browser)
Visually, it looks more or less identicalIt’s not exactly the same,
because our JavaScript code uses a linear interpolation (or easing
function) between the old and new values. Real browsers use a
non-linear default easing function for CSS transitions because it looks
better. We’ll implement a linear easing function for our browser, so it
will look identical to the JavaScript and subtly different from real
browsers, but you can try adding it via Exercise 13-2. to
the JavaScript animation. But since the browser understands the
animation, it can optimize how the animation is run. For example, since
opacity only affects Blend commands that end
up in the draw display list, the browser knows that this animation does
not require layout or raster, just paint and draw.
To implement CSS transitions, we’ll need to represent animation
state—like the JavaScript variables current_frame and
change_per_frame from the earlier example—in the browser.
Since multiple elements can animate at a time, let’s store an
animations dictionary on each node, keyed by the property
being animated:For
simplicity, this code leaves animations in the animations
dictionary even when they’re done animating. Removing them would be
necessary, however, for really long-running tabs where just looping over
all the already-completed animations can take a while.
class Text:
def __init__(self, text, parent):
# ...
self.style = {}
self.animations = {}
class Element:
def __init__(self, tag, attributes, parent):
# ...
self.style = {}
self.animations = {}The simplest type of thing to animate is numeric properties like
opacity:
class NumericAnimation:
def __init__(self, old_value, new_value, num_frames):
self.old_value = float(old_value)
self.new_value = float(new_value)
self.num_frames = num_frames
self.frame_count = 1
total_change = self.new_value - self.old_value
self.change_per_frame = total_change / num_framesMuch like in JavaScript, we’ll need an animate method
that increments the frame count, computes the new value and returns
it:
class NumericAnimation:
def animate(self):
self.frame_count += 1
if self.frame_count >= self.num_frames: return
current_value = self.old_value + \
self.change_per_frame * self.frame_count
return str(current_value)We’ll create these animation objects every time a style value
changes, which we can detect in style by diffing the old
and new styles of each node:
def style(node, rules):
old_style = node.style
# ...
if old_style:
transitions = diff_styles(old_style, node.style)This diff_styles function is going to look for all
properties that are mentioned in the transition property
and are different between the old and the new style. So first, we’re
going to have to parse the transition value.
The first challenge is, annoyingly, that at the moment our CSS parser
doesn’t recognize opacity 2s as a valid CSS value, since it
parses values as a single word. Let’s upgrade the parser to recognize
any string of characters except one of a specified set of
chars:
class CSSParser:
def until_chars(self, chars):
start = self.i
while self.i < len(self.s) and self.s[self.i] not in chars:
self.i += 1
return self.s[start:self.i]
def pair(self, until):
# ...
val = self.until_chars(until)
# ...
return prop.casefold(), val.strip()Inside a CSS rule body, a property value continues until a semicolon or a close curly brace:
class CSSParser:
def body(self):
while self.i < len(self.s) and self.s[self.i] != "}":
try:
prop, val = self.pair([";", "}"])
# ...Now that we parse the CSS property, we can parse out the properties with transitions:Note that this returns a dictionary mapping property names to transition durations, measured in frames.
def parse_transition(value):
properties = {}
if not value: return properties
for item in value.split(","):
property, duration = item.split(" ", 1)
frames = int(float(duration[:-1]) / REFRESH_RATE_SEC)
properties[property] = frames
return propertiesNow diff_style can loop through all of the properties
mentioned in transition and see which ones changed. It
returns a dictionary containing only the transitioning properties, and
mapping each such property to its old value, new value, and duration
(again in frames).Note
also that this code has to deal with subtleties like the
transition property being added or removed, or properties
being removed instead of changing values.
def diff_styles(old_style, new_style):
transitions = {}
for property, num_frames in \
parse_transition(new_style.get("transition")).items():
if property not in old_style: continue
if property not in new_style: continue
old_value = old_style[property]
new_value = new_style[property]
if old_value == new_value: continue
transitions[property] = \
(old_value, new_value, num_frames)
return transitionsBack inside style, we’re going to want to create a new
animation object for each transitioning property—we’ll support only
opacity.
def style(node, rules, tab):
if old_style:
transitions = diff_styles(old_style, node.style)
for property, (old_value, new_value, num_frames) \
in transitions.items():
if property == "opacity":
tab.set_needs_render()
animation = NumericAnimation(
old_value, new_value, num_frames)
node.animations[property] = animation
node.style[property] = animation.animate()Any time a property listed in a transition changes its
value, we create an animation and get ready to run it.Note that we need to call
set_needs_render here to make sure that the animation will
run on the next frame.
Running the animation entails iterating through all the active
animations on the page and calling animate on them. Since
CSS transitions are similar to requestAnimationFrame
animations, let’s run animations right after handling
requestAnimationFrame callbacks:
class Tab:
def run_animation_frame(self, scroll):
# ...
self.js.interp.evaljs("__runRAFHandlers()")
for node in tree_to_list(self.nodes, []):
for (property_name, animation) in \
node.animations.items():
# ...Inside this loop we need to do two things. First, call the
animation’s animate method and save the new value to the
node’s style. Second, since that changes rendering inputs,
set a dirty bit requiring rendering later.We also need to schedule an
animation frame for the next frame of the animation, but
set_needs_render already does that for us.
The whole rendering cycle between the browser and main threads is
summarized in Figure 2.
However, it’s not as simple as just setting needs_render
any time an animation is active. Setting needs_render means
re-running style, which would notice that the animation
changed a property value and start a new animation! During an
animation, we want to run layout and paint,
but we don’t want to run style:While a real browser
definitely has an analog of the needs_layout and
needs_paint flags, our fix for restarting animations
doesn’t handle a bunch of edge cases. For example, if a different style
property than the one being animated changes, the browser shouldn’t
restart the animation. Real browsers do things like storing multiple
copies of the style—the computed style and the animated style—to solve
issues like this.
class Tab:
def run_animation_frame(self, scroll):
for node in tree_to_list(self.nodes, []):
for (property_name, animation) in \
node.animations.items():
value = animation.animate()
if value:
node.style[property_name] = value
self.set_needs_layout()To implement set_needs_layout, we’ve got to replace the
single needs_render flag with three flags:
needs_style, needs_layout, and
needs_paint. In our implementation, setting a dirty bit
earlier in the pipeline will end up causing everything after it to also
run,This is yet another
difference from real browsers, which optimize some cases that just
require style and paint, or other combinations. so
set_needs_render still just sets the
needs_style flag:
class Tab:
def __init__(self, browser, tab_height):
# ...
self.needs_style = False
self.needs_layout = False
self.needs_paint = False
# ...
def set_needs_render(self):
self.needs_style = True
self.browser.set_needs_animation_frame(self)Now we can write a set_needs_layout method that sets
flags for the layout and paint phases, but not
the style phase:
class Tab:
def set_needs_layout(self):
self.needs_layout = True
self.browser.set_needs_animation_frame(self)To support these new dirty bits, render must check each
phase’s bit instead of checking needs_render at the
start:By the way, this
does obsolete our tracing code for how long rendering takes.
Rendering now does different work on different frames, so measuring
rendering overall doesn’t really make sense! I’m going to leave this be
and just not look at the rendering measures anymore, but the best fix
would be to have three trace events for the three phases of
render.
class Tab:
def render(self):
self.browser.measure.time('render')
if self.needs_style:
# ...
self.needs_layout = True
self.needs_style = False
if self.needs_layout:
# ...
self.needs_paint = True
self.needs_layout = False
if self.needs_paint:
# ...
self.needs_paint = False
self.browser.measure.stop('render')Well—with all that done, our browser now supports animations with just CSS. And importantly, we can have the browser optimize opacity animations to avoid layout.
CSS transitions are great for adding animations triggered by DOM updates from JavaScript. But what about animations that are just part of a page’s UI, and not connected to a visual transition? (For example, a pulse opacity animation on a button or cursor.) This can be expressed directly in CSS without any JavaScript with a CSS animation.
You can see the CSS animation variant of the opacity demo here.
Implementing this feature requires parsing a new
@keyframes syntax and the animation CSS
property. Notice how @keyframes defines the start and end
point declaratively, which allows us to make the animation alternate
infinitely because a reverse is just going backward among the keyframes.
There is also the Web
Animations API, which allows creation and management of animations
via JavaScript.
Composited Animations
We’re finally ready to teach the browser how to avoid raster (and
layout) when running certain animations. These are called composited
animations, since they are compatible with the compositing
optimization to avoid raster on every frame. Avoiding
raster and composite for opacity animations is
simple in concept: keep track of what is animating, and re-run only
paint, paint_draw_list and draw
on each frame.
Implementing this is harder than it sounds. We’ll need to split the
new display list into the old composited layers and a
new draw display list. To do this we’ll need to know how the
new and old display lists are related, and what parts of the display
list changed. For this purpose we’ll add a node field to
each display item, storing the node that painted it, as a sort of
identifier:Note that the
browser thread can never access that node, since it is owned by
another thread. But it can use the node as an
identifier.
class VisualEffect:
def __init__(self, rect, children, node=None):
# ...
self.node = nodeNow, when an animation runs—but nothing else changes—we’ll use these nodes to determine which display items in the draw display list we need to update.
First, when a composited animation runs, save the
Element whose style was changed in a new array called
composited_updates. We’ll also only set the
needs_paint flag, not needs_layout, in this
case:
class Tab:
def __init__(self, browser):
# ...
self.composited_updates = []
def run_animation_frame(self, scroll):
for node in tree_to_list(self.nodes, []):
for (property_name, animation) in \
node.animations.items():
value = animation.animate()
if value:
node.style[property_name] = value
self.composited_updates.append(node)
self.set_needs_paint()Now, when we commit a frame which only needs the paint
phase, send the composited_updates over to the browser,
which will use that to skip composite and raster. The data to be sent
across for each animation update will be an Element and a
Blend.
To accomplish this we’ll need several steps. First, when painting a
Blend, record it on the Element:
def paint_visual_effects(node, cmds, rect):
# ...
blend_op = Blend(opacity, blend_mode, cmds)
node.blend_op = blend_op
return [blend_op]Next, add a list of composited updates to CommitData
(each of which will contain the Element and
Blend pointers).
class CommitData:
def __init__(self, url, scroll, height,
display_list, composited_updates):
# ...
self.composited_updates = composited_updatesAnd finally, commit the new information.Note the distinction between
None and {} for
composited_updates. None means that the
compositing step is needed, whereas {} means that it is
not—the dictionary just happens to be empty, because there aren’t any
composited animations running. A good example of the latter is changes
to scroll, which don’t affect compositing, yet are not
animated.
class Tab:
def run_animation_frame(self, scroll):
# ...
needs_composite = self.needs_style or self.needs_layout
self.render()
composited_updates = None
if not needs_composite:
composited_updates = {}
for node in self.composited_updates:
composited_updates[node] = node.blend_op
self.composited_updates = []
commit_data = CommitData(
# ...
composited_updates,
)Now for the browser thread. First, add needs_composite,
needs_raster and needs_draw dirty bits and
corresponding set_needs_composite,
set_needs_raster, and set_needs_draw methods
(and remove the old dirty bit):
class Browser:
def __init__(self):
# ...
self.needs_composite = False
self.needs_raster = False
self.needs_draw = False
def set_needs_raster(self):
self.needs_raster = True
self.needs_draw = True
def set_needs_composite(self):
self.needs_composite = True
self.needs_raster = True
self.needs_draw = True
def composite_raster_and_draw(self):
if not self.needs_composite and \
not self.needs_raster and \
not self.needs_draw:
self.lock.release()
return
if self.needs_composite:
self.composite()
if self.needs_raster:
self.raster_chrome()
self.raster_tab()
if self.needs_draw:
self.draw()Then, where we currently call set_needs_raster_and_draw,
such as handle_down, we need to call
set_needs_raster:
class Browser:
def handle_down(self):
# ...
self.set_needs_raster()Use the data passed in commit to decide whether to call
set_needs_composite or set_needs_draw, and
store off the updates in composited_updates:
class Browser:
def __init__(self):
# ...
self.composited_updates = {}
def commit(self, tab, data):
# ...
if tab == self.active_tab:
# ...
self.composited_updates = data.composited_updates
if self.composited_updates == None:
self.composited_updates = {}
self.set_needs_composite()
else:
self.set_needs_draw()Now let’s think about the draw step. Normally, we create the draw
display list from the composited layers. But that won’t quite work now,
because the composited layers come from the old display list.
If we just try re-running paint_draw_list, we’ll get the
old draw display list! We need to update draw_list to take
into account the new display list based on the
composited_updates.
To do so, define a method get_latest that gets an
updated visual effect from composited_updates if there is
one:
class Browser:
def get_latest(self, effect):
node = effect.node
if node not in self.composited_updates:
return effect
if not isinstance(effect, Blend):
return effect
return self.composited_updates[node]Using get_latest in paint_draw_list is a
one-liner:
class Browser:
def paint_draw_list(self):
for composited_layer in self.composited_layers:
while parent:
new_parent = self.get_latest(parent)
# ...Update the rest of the while loop in
paint_draw_list to refer to new_parent instead
of parent when creating new effects (but not when walking
up from the composited layer).
Now the draw display list will be based on the new display list, and animations that only require the draw step, like our example opacity animation, will now run super smoothly.
One final note: the compositing data structures need to be cleared
when changing tabs. Let’s do that by factoring out a
clear_data method that clears everything in one go.
class Browser:
def clear_data(self):
self.active_tab_scroll = 0
self.active_tab_url = None
self.display_list = []
self.composited_layers = []
self.composited_updates = {}
def set_active_tab(self, tab):
# ...
self.clear_data()Figure 3 shows a screenshot of a rendered frame of an opacity
transition that only spends a bit more than a millisecond in each
composite_raster_and_draw call (source trace here):

This can be compared to the same with compositing disabled, shown in Figure 4, which spends about double that time (source here):And it would be much slower for a more complex example.

While visual effect animations in our browser are now efficient and composited, they are not threaded in the sense of Chapter 12: the animation still ticks on the main thread, and if there is some slow JavaScript or other task clogging the task queue, animations will stutter. This is a significant problem for real browsers, so almost all of them support threaded opacity, transform, and filter animations; some support certain kinds of clip animations as well. Adding threaded animations to our browser is left as Execise 13-3.
Nevertheless, it’s common to hear people use “composited” and “threaded” as synonyms. That’s because in most browsers, compositing is a prerequisite for threading. The reason is that if you’re going to animate efficiently, you usually need to composite a texture anyway, and plumbing animations on GPU textures is much easier to express in a browser than an animation on “part of a display list”.
That being said, it’s not impossible to animate display lists, and some browsers have attempted it. For example, one aim of the WebRender project at Mozilla is to get rid of cached composited layers entirely, and perform all animations by rastering and drawing at 60 Hz on the GPU directly from the display list. This is called a direct render approach. In practice this goal is hard to achieve with current GPU technology, because some GPUs are faster than others. So browsers are slowly evolving to a hybrid of direct rendering and compositing instead.
While all modern browsers have threaded animations, it’s interesting
to note that, as of the time of writing, Chromium and WebKit both
perform the compositing step on the main thread, whereas
our browser does it on the browser thread. In this area, our browser is
actually ahead of real browsers! The reason compositing doesn’t (yet)
happen on another thread in Chromium is that to get there took
re-architecting the entire algorithm for compositing. This turned out to
be extremely difficult, because the old architecture was deeply
intertwined with nearly every aspect of the rendering engine. It was
only completed
in 2021, so perhaps sometime soon this work will be threaded in
Chromium.
Optimizing Compositing
At this point, our browser successfully runs composited animations while avoiding needless layout and raster. But compared to a real browser, there are way too many composited layers—one per paint command! That is a big waste of GPU memory and time: each composited layer allocates a surface, and each of those allocates and holds on to GPU memory. GPU memory is limited, and we want to use less of it when possible.
To that end, we’d like to use fewer composited layers. The simplest thing we can do is put paint commands into the same composited layer if they have the exact same set of ancestor visual effects in the display list.
Let’s implement that. We’ll need two new methods on composited
layers: add and can_merge. The
add method just adds a new display item to a composited
layer:
class CompositedLayer:
def add(self, display_item):
self.display_items.append(display_item)But we should only add compatible display items to the same
composited layer, determined by the can_merge method. A
display item can be merged if it has the same parents as existing ones
in the composited layer:
class CompositedLayer:
def can_merge(self, display_item):
return display_item.parent == \
self.display_items[0].parentNow we want to use these methods in composite.
Basically, instead of making a new composited layer for every single
paint command, walk backwardBackward, because we can’t draw things in the wrong order.
Later items in the display list have to draw later.
through the composited_layers trying to find a composited
layer to merge the command into:If you’re not familiar with Python’s
for ... else syntax, the else block executes
only if the loop never executed break.
class Browser:
def composite(self):
for cmd in paint_commands:
for layer in reversed(self.composited_layers):
if layer.can_merge(cmd):
layer.add(cmd)
break
else:
# ...With this implementation, multiple paint commands will sometimes end up in the same composited layer, but if the ancestor effects don’t exactly match, they won’t.
We can do even better by placing entire display list subtrees that aren’t animating into the same composited layer. This will let us put non-animating visual effects in the raster phase, reducing the number of composited layers even more.
To implement this, add a new needs_compositing field,
which is True when a visual effect should go in the draw
display list and False when it should go into a composited
layer. We’ll set it to False for most visual effects:
class VisualEffect:
def __init__(self, rect, children):
self.needs_compositing = FalseWe should set it to True when compositing would help us
animate something. There are all sorts of complex heuristics real
browsers use, but to keep things simple let’s just set it to
True for Blends (when they actually do
something, not for no-ops), regardless of whether they are
animating:
class Blend(VisualEffect):
def __init__(self, opacity, blend_mode, node, children):
# ...
if self.should_save:
self.needs_compositing = TrueWe’ll also need to mark a visual effect as needing compositing if any of its descendants do. That’s because if one effect is in the draw phase, then the ones above it will have to be as well:
class VisualEffect:
def __init__(self, rect, children, node=None):
# ...
self.needs_compositing = any([
child.needs_compositing for child in self.children
])Now, instead of layers containing bare paint commands, they can contain subtrees of non-composited commands:
class Browser:
def composite(self):
# ...
non_composited_commands = [cmd
for cmd in all_commands
if isinstance(cmd, PaintCommand) or \
not cmd.needs_compositing
if not cmd.parent or cmd.parent.needs_compositing
]
# ...
for cmd in non_composited_commands:
# ...The multiple if statements inside the list comprehension
are and-ed together.
Our compositing algorithm now creates way fewer layers! It does a good job of grouping together non-animating content to reduce the number of composited layers (which saves GPU memory), and doing as much non-animation work as possible in raster rather than draw (which makes composited animations faster).
At this point, the compositing algorithm and its effect on content is
getting pretty complicated. It will be very useful to you to add in more
visual debugging to help understand what is going on. One good way to do
this is to add a flagI also recommend you add a
mode to your browser that disables compositing (that is, setting
needs_compositing to False for every
VisualEffect), and disables use of the GPU (that is, going
back to the old way of making Skia surfaces). Everything should still
work (albeit more slowly) in all of the modes, and you can use these
additional modes to debug your browser more fully and benchmark its
performance. to our browser that draws a red border around
CompositedLayer content. This is a very simple addition to
CompositedLayer.raster:
class CompositedLayer:
def raster(self):
# ...
if SHOW_COMPOSITED_LAYER_BORDERS:
border_rect = skia.Rect.MakeXYWH(
1, 1, irect.width() - 2, irect.height() - 2)
DrawOutline(border_rect, "red", 1).execute(canvas)The opacity transition example’s composited layers should look like Figure 5 (notice how there are two layers).

Mostly for simplicity, our browser composites Blend
visual effects regardless of whether they are animating. But in fact,
there are some good reasons to always composite certain visual
effects.
First, we’ll be able to start the animation quicker, since raster won’t have to happen first. That’s because whenever compositing reasons change, the browser has to redo compositing and re-raster the new surfaces.
Second, compositing sometimes has visual side-effects. Ideally, composited textures would look exactly the same on the screen as non-composited ones. But due to the details of pixel-sensitive raster technologies like sub-pixel rendering, image resize filter algorithms, blending and anti-aliasing, this isn’t always possible. For example, it’s common to observe subtle color differences in some pixels due to floating-point precision differences. “Pre-compositing” the content avoids visual jumps on the page when compositing starts.
Real browsers support the will-change
CSS property for the purpose of signaling pre-compositing.
Overlap and Transforms
The compositing algorithm we implemented works great in many cases. Unfortunately, it doesn’t work correctly for display list commands that overlap each other. Let me explain why with an example.
Consider a light blue square overlapped by a light green one, with a white background behind them, as in Figure 6.
Figure 6: Example of overlap that can lead to compositing draw errors.
Now suppose we want to animate opacity on the blue square, but not the green square. So the blue square goes in its own composited layer—but what about the green square? It has the same ancestor visual effects as the background. But we don’t want to put the green square in the same composited layer as the background, because the blue square has to be drawn in between the background and the green square.
Therefore, the green square has to go in its own composited layer. This is called an overlap reason for compositing, and is a major complication—and potential source of extra memory use and slowdown—faced by all real browsers.
Let’s modify our compositing algorithm to take overlap into account.
Basically, when considering which composited layer a display item goes
in, also check if it overlaps with an existing composited layer. If so,
start a new CompositedLayer for this display item:
class Browser:
def composite(self):
# ...
for cmd in non_composited_commands:
for layer in reversed(self.composited_layers):
if layer.can_merge(cmd):
# ...
elif skia.Rect.Intersects(
layer.composited_bounds(),
cmd.rect):
layer = CompositedLayer(self.skia_context, cmd)
self.composited_layers.append(layer)
breakIt’s a bit hard to test this code, however, because our
browser doesn’t yet support any ways to move or growBy grow, I mean that the pixel
bounding rect of the visual effect when drawn to the screen is
larger than the pixel bounding rect of a paint command like
DrawText within it. After all, blending, compositing, and
opacity all change the colors of pixels, but don’t expand the set of
affected ones. And clips and masking decrease rather than increase the
set of pixels, so they can’t cause additional overlap either (though
they might cause less overlap). Certain CSS
filters, such as blurs, can also expand pixel rects.
an element as part of a visual effect, so nothing ever overlaps. Oops!
In real browsers there are lots of visual effects that cause overlap,
the most important (for animations) being transforms, which let
you move the painted output of a DOM subtree around the screen.Technically,
transform is not always just a visual effect. In real
browsers, transformed element positions contribute to scrolling
overflow. Real browsers mostly do this correctly, but sometimes cut
corners to avoid slowing down transform animations. Plus,
transforms can be executed efficiently on the GPU.
The transform CSS property is quite powerful, and lets
you apply any
linear transform in 3D space, but let’s stick to basic 2D
translations. That’s enough to implement something similar to the
example with the blue and green square:The green square has a
transform property also so that paint order doesn’t change
when you try the demo in a real browser. That’s because there are
various rules for painting, and “positioned” elements (such as elements
with a transform) are supposed to paint after regular
(non-positioned) elements. (This particular rule is mostly a historical
artifact.)
<div style="background-color:lightblue;
transform:translate(50px, 50px)">Underneath</div>
<div style="background-color:lightgreen;
transform:translate(0px, 0px)">On top</div>Supporting these transforms is simple. First let’s parse the property values:The CSS transform syntax allows multiple transforms in a space-separated sequence; the end result involves applying each in sequence. I won’t implement that, just like I won’t implement many other parts of the standardized transform syntax.
def parse_transform(transform_str):
if transform_str.find('translate(') < 0:
return None
left_paren = transform_str.find('(')
right_paren = transform_str.find(')')
(x_px, y_px) = \
transform_str[left_paren + 1:right_paren].split(",")
return (float(x_px[:-2]), float(y_px[:-2]))Then, add some code to paint_visual_effects to add new
Transform visual effects:
def paint_visual_effects(node, cmds, rect):
translation = parse_transform(
node.style.get("transform", ""))
# ...
return [Transform(translation, rect, node, [blend_op])]These Transform display items just call the conveniently
built-in Skia canvas translate method:
class Transform(VisualEffect):
def __init__(self, translation, rect, node, children):
super().__init__(rect, children, node)
self.self_rect = rect
self.translation = translation
def execute(self, canvas):
if self.translation:
(x, y) = self.translation
canvas.save()
canvas.translate(x, y)
for cmd in self.children:
cmd.execute(canvas)
if self.translation:
canvas.restore()
def clone(self, child):
return Transform(self.translation, self.self_rect,
self.node, [child])
def __repr__(self):
if self.translation:
(x, y) = self.translation
return "Transform(translate({}, {}))".format(x, y)
else:
return "Transform(<no-op>)"We also need to fix the hit testing algorithm to take into account
translations in click. Instead of just comparing the
locations of layout objects with the click point, compute an
absolute bound—in coordinates of what the user sees, including
the translation offset—and compare against that. Let’s use two helper
methods that compute such bounds. The first maps a rect through a
translation, and the second walks up the node tree, mapping through each
translation found.
def map_translation(rect, translation):
if not translation:
return rect
else:
(x, y) = translation
matrix = skia.Matrix()
matrix.setTranslate(x, y)
return matrix.mapRect(rect)
def absolute_bounds_for_obj(obj):
rect = skia.Rect.MakeXYWH(
obj.x, obj.y, obj.width, obj.height)
cur = obj.node
while cur:
rect = map_translation(rect,
parse_transform(
cur.style.get("transform", "")))
cur = cur.parent
return rectAnd then use it in click:
class Tab:
# ...
def click(self, x, y):
# ...
loc_rect = skia.Rect.MakeXYWH(x, y, 1, 1)
objs = [obj for obj in tree_to_list(self.document, [])
if absolute_bounds_for_obj(obj).intersects(
loc_rect)] However, if you try to load the example above, you’ll find that it still looks wrong—the blue square is supposed to be under the green one, but it’s on top.Hit testing is correct, though, because the rendering problem is in compositing, not geometry of layout objects.
That’s because when we test for overlap, we’re comparing the
composited_bounds of the display item to the
composited_bounds of the composited layer. That means we’re
comparing the original location of the display item, not its shifted
version. We need to compute the absolute bounds instead:
class Browser:
def composite(self):
for cmd in non_composited_commands:
for layer in reversed(self.composited_layers):
if layer.can_merge(cmd):
# ...
elif skia.Rect.Intersects(
layer.absolute_bounds(),
local_to_absolute(cmd, cmd.rect)):
# ...The absolute_bounds method looks like this:
class CompositedLayer:
def absolute_bounds(self):
rect = skia.Rect.MakeEmpty()
for item in self.display_items:
rect.join(local_to_absolute(item, item.rect))
return rectTo implement local_to_absolute, we first need a new
map method on Transform that takes a rect in
the coordinate space of the “contents” of the transform and outputs a
rect in post-transform space. For example, if the transform was
translate(20px, 0px) then the output of calling
map on a rect would translate it by 20 pixels in the
x direction.
class Transform(VisualEffect):
def map(self, rect):
return map_translation(rect, self.translation)For Blend, it’s worth adding a special case for
clipping:
class Blend(VisualEffect):
def map(self, rect):
if self.children and \
isinstance(self.children[-1], Blend) and \
self.children[-1].blend_mode == "destination-in":
bounds = rect.makeOffset(0.0, 0.0)
bounds.intersect(self.children[-1].rect)
return bounds
else:
return rectNow we can compute the absolute bounds of a display item, mapping its
composited bounds through all of the visual effects applied to it. This
looks a lot like absolute_bounds_for_obj, except that it
works on the display list and not the layout object tree:
def local_to_absolute(display_item, rect):
while display_item.parent:
rect = display_item.parent.map(rect)
display_item = display_item.parent
return rectThe blue square should now be underneath the green square, so overlap testing is now complete. You should now be able to render this example correctly.
It should look like Figure 7.

Notice how this example exhibits two interesting features we had to get right when implementing compositing:
- Overlap testing (without it, the elements would paint in the wrong order); if this code were missing it would incorrectly render like Figure 8.

- Reusing cloned effects (without it, blending and clipping would be wrong); if this code were missing it would incorrectly render like Figure 9.

There’s one more situation worth thinking about, though. Suppose we
have a huge composited layer, containing a lot of text, except that only
a small part of that layer is shown on the screen, the rest being
clipped out. Then the absolute_bounds consider the clip
operations but the composited_bounds don’t, meaning that
we’ll make a much larger composited layer than necessary and waste a lot
of time rastering pixels that the user will never see.
Let’s fix that by also applying those clips to
composited_bounds.This is very important, because otherwise some composited
layers can end up huge despite not drawing much to the screen. A good
example of this optimization making a big difference is loading the
browser from Chapter
15 for the browser.engineering homepage,
where otherwise we would end up with an enormous composited layer for an
iframe. We’ll do it by first computing the absolute bounds
for each item, then mapping them back to local space, which will have
the effect of computing the “clipped local rect” for each display
item:
class CompositedLayer:
def composited_bounds(self):
rect = skia.Rect.MakeEmpty()
for item in self.display_items:
rect.join(absolute_to_local(
item, local_to_absolute(item, item.rect)))
rect.outset(1, 1)
return rectThis requires implementing absolute_to_local:
def absolute_to_local(display_item, rect):
parent_chain = []
while display_item.parent:
parent_chain.append(display_item.parent)
display_item = display_item.parent
for parent in reversed(parent_chain):
rect = parent.unmap(rect)
return rectWhich in turn relies on unmap. For Blend
these should be no-ops, but for Transform it’s just the
inverse translation:
def map_translation(rect, translation, reversed=False):
# ...
else:
# ...
if reversed:
matrix.setTranslate(-x, -y)
else:
matrix.setTranslate(x, y)
class Transform(VisualEffect):
def unmap(self, rect):
return map_translation(rect, self.translation, True)And with that, we now have completed the story of a pretty high-performance implementation of composited animations.
Overlap reasons for compositing not only create complications in the code, but without care from the browser and web developer can lead to a huge amount of GPU memory usage, as well as page slowdown to manage all of the additional composited layers. One way this could happen is that an additional composited layer results from one element overlapping another, and then a third because it overlaps the second, and so on. This phenomenon is called layer explosion. Our browser’s algorithm avoids this problem most of the time because it is able to merge multiple display items together as long as they have compatible ancestor effects, but in practice there are complicated situations where it’s hard to make content merge efficiently.
In addition to overlap, there are other situations where compositing has undesired side-effects leading to performance problems. For example, suppose we wanted to turn off composited scrolling in certain situations, such as on a machine without a lot of memory, but still use compositing for visual effect animations. But what if the animation is on content underneath a scroller? In practice, it can be very difficulty to implement this situation correctly without just giving up and compositing the scroller.
Summary
This chapter introduces animations. The key takeaways you should remember are:
- Animations come in DOM-based, input-driven and video-like varieties;
- GPU acceleration is necessary for smooth animations.
- Compositing is usually necessary for smooth and threaded visual effect animations.
- It’s important to optimize the number of composited layers.
- Overlap testing can cause additional GPU memory use and needs to be implemented with care.
Click here to try this chapter’s browser.
Outline
The complete set of functions, classes, and methods in our browser should now look something like this:
COOKIE_JAR
class URL:
def __init__(url)
def request(referrer, payload)
def resolve(url)
def origin()
def __str__()
class Text:
def __init__(text, parent)
def __repr__()
class Element:
def __init__(tag, attributes, parent)
def __repr__()
def print_tree(node, indent)
def tree_to_list(tree, list)
class HTMLParser:
SELF_CLOSING_TAGS
HEAD_TAGS
def __init__(body)
def parse()
def get_attributes(text)
def add_text(text)
def add_tag(tag)
def implicit_tags(tag)
def finish()
class CSSParser:
def __init__(s)
def whitespace()
def literal(literal)
def word()
def ignore_until(chars)
def pair(until)
def selector()
def body()
def parse()
def until_chars(chars)
class TagSelector:
def __init__(tag)
def matches(node)
class DescendantSelector:
def __init__(ancestor, descendant)
def matches(node)
FONTS
def get_font(size, weight, style)
def linespace(font)
NAMED_COLORS
def parse_color(color)
def parse_blend_mode(blend_mode_str)
def parse_transition(value)
def parse_transform(transform_str)
REFRESH_RATE_SEC
class MeasureTime:
def __init__()
def time(name)
def stop(name)
def finish()
class Task:
def __init__(task_code)
def run()
class TaskRunner:
def __init__(tab)
def schedule_task(task)
def set_needs_quit()
def clear_pending_tasks()
def start_thread()
def run()
def handle_quit()
DEFAULT_STYLE_SHEET
INHERITED_PROPERTIES
def style(node, rules, tab)
def cascade_priority(rule)
def diff_styles(old_style, new_style)
class NumericAnimation:
def __init__(old_value, new_value, num_frames)
def animate()
WIDTH, HEIGHT
HSTEP, VSTEP
INPUT_WIDTH_PX
BLOCK_ELEMENTS
class DocumentLayout:
def __init__(node)
def layout()
def should_paint()
def paint()
def paint_effects(cmds)
class BlockLayout:
def __init__(node, parent, previous)
def layout_mode()
def layout()
def recurse(node)
def new_line()
def word(node, word)
def input(node)
def self_rect()
def should_paint()
def paint()
def paint_effects(cmds)
class LineLayout:
def __init__(node, parent, previous)
def layout()
def should_paint()
def paint()
def paint_effects(cmds)
class TextLayout:
def __init__(node, word, parent, previous)
def layout()
def should_paint()
def paint()
def paint_effects(cmds)
class InputLayout:
def __init__(node, parent, previous)
def layout()
def should_paint()
def paint()
def paint_effects(cmds)
def self_rect()
class PaintCommand:
def __init__(rect)
class DrawText:
def __init__(x1, y1, text, font, color)
def execute(canvas)
class DrawRect:
def __init__(rect, color)
def execute(canvas)
class DrawRRect:
def __init__(rect, radius, color)
def execute(canvas)
class DrawLine:
def __init__(x1, y1, x2, y2, color, thickness)
def execute(canvas)
class DrawOutline:
def __init__(rect, color, thickness)
def execute(canvas)
class DrawCompositedLayer:
def __init__(composited_layer)
def execute(canvas)
class VisualEffect:
def __init__(rect, children, node)
class Blend:
def __init__(opacity, blend_mode, node, children)
def execute(canvas)
def map(rect)
def unmap(rect)
def clone(child)
class Transform:
def __init__(translation, rect, node, children)
def execute(canvas)
def map(rect)
def unmap(rect)
def clone(child)
def local_to_absolute(display_item, rect)
def absolute_bounds_for_obj(obj)
def absolute_to_local(display_item, rect)
def map_translation(rect, translation, reversed)
def paint_tree(layout_object, display_list)
def paint_visual_effects(node, cmds, rect)
def add_parent_pointers(nodes, parent)
class CompositedLayer:
def __init__(skia_context, display_item)
def can_merge(display_item)
def add(display_item)
def composited_bounds()
def absolute_bounds()
def raster()
EVENT_DISPATCH_JS
SETTIMEOUT_JS
XHR_ONLOAD_JS
RUNTIME_JS
class JSContext:
def __init__(tab)
def run(script, code)
def dispatch_event(type, elt)
def dispatch_settimeout(handle)
def dispatch_xhr_onload(out, handle)
def get_handle(elt)
def querySelectorAll(selector_text)
def getAttribute(handle, attr)
def innerHTML_set(handle, s)
def style_set(handle, s)
def XMLHttpRequest_send(...)
def setTimeout(handle, time)
def requestAnimationFrame()
SCROLL_STEP
class Tab:
def __init__(browser, tab_height)
def load(url, payload)
def run_animation_frame(scroll)
def render()
def allowed_request(url)
def raster(canvas)
def clamp_scroll(scroll)
def set_needs_render()
def set_needs_layout()
def set_needs_paint()
def scrolldown()
def click(x, y)
def go_back()
def submit_form(elt)
def keypress(char)
class Chrome:
def __init__(browser)
def tab_rect(i)
def paint()
def click(x, y)
def keypress(char)
def enter()
def blur()
class CommitData:
def __init__(...)
class Browser:
def __init__()
def schedule_animation_frame()
def commit(tab, data)
def render()
def composite_raster_and_draw()
def composite()
def get_latest(effect)
def paint_draw_list()
def raster_tab()
def raster_chrome()
def draw()
def set_needs_animation_frame(tab)
def set_needs_raster_and_draw()
def set_needs_raster()
def set_needs_composite()
def set_needs_draw()
def clear_data()
def new_tab(url)
def new_tab_internal(url)
def set_active_tab(tab)
def schedule_load(url, body)
def clamp_scroll(scroll)
def handle_down()
def handle_click(e)
def handle_key(char)
def handle_enter()
def handle_quit()
def mainloop(browser)
Exercises
13-1 background-color. Implement animations of
the background-color CSS property. You’ll have to define a
new kind of interpolation that applies to all the color channels.
13-2 Easing functions. Our browser only implements a linear
interpolation between start and end values, but there are many other easing
functions (in fact, the default one in real browsers is
cubic-bezier(0.25, 0.1, 0.25, 1.0), not linear). Implement
this easing function, and one or two others.
13-3 Composited and threaded animations. Our browser
supports transfoms and scrolling, but they are not fully composited and
threaded, and transform transition animations are not supported.
Implement these. (Hint: for transforms, it just requires following the
same pattern as for opacity; for scrolling, it requires
setting fewer dirty bits in handle_down.) A simultaneous
transform and opacity animation should now work, without any raster,
and scrolling on that page should not raster either.
13-4 Width/height animations. (You’ll need to have done
Exercise 6-2 first.) Make width and height
animatable; you’ll need a variant of NumericAnimation that
parses and produces pixel values (the “px” suffix in the string). Since
width and height are layout-inducing, make
sure that animating them sets needs_layout. Check that
animating width in your browser changes line breaks. A width transition
example should work once you’ve implemented width animations.Width animations can’t be
composited because width affects the layout tree, not just different
display lists, which in turn means that draw commands, not just visual
effects, change. Such animations are called layout-inducing,
and they are therefore slower and typically not a good idea. Chapter 16 will look at one way to speed
them up somewhat.
One exception is resizing the browser window
with your mouse. That’s layout-inducing, but it’s very useful for the
user to see the new layout as the window size changes. Modern browsers
are fast enough to do this, but it used to be that they’d only redraw
the screen every couple of frames, leaving a visual gutter
between content and the edge of the window.
13-5 CSS animations. Implement the basics of the CSS
animations API, in particular enough of the animation
CSS property and parsing of @keyframe to implement two demos on the
browser.engineering website.
13-6 Overlap testing with transform animations. (You’ll need
to have already done Exercise 13-3.) Our browser currently does not
overlap test correctly in the presence of transform animations that
cause overlap to come and go. First create a demo that exhibits the bug,
and then fix it. One way to fix it is to enter “assume overlap mode”
whenever an animated transform display item is encountered. This means
that every subsequent display item is assumed to overlap the animating
one (even if it doesn’t at the moment), and therefore can’t merge into
any CompositedLayer earlier in the list than the animating
one. Another way is to run overlap testing on every animation frame in
the browser thread, and if the results differ from the prior frame, redo
compositing and raster. And if you’ve done Exercise 13-5, and a transform animation
is defined in terms of a CSS animation, you can analytically determine
the bounding box of the animation, and use that for overlap
instead.
13-7 Avoiding sparse composited layers. Our browser’s
algorithm currently always merges paint chunks that have compatible
ancestor effects. But this can lead to inefficient situations, such as
where two paint chunks that are visually very far away on the web page
(e.g. one at the very top and one thousands of pixels lower down) end up
in the same CompositedLayer. That can be very bad, because
it results in a huge skia.Surface that is mostly wasted GPU
memory. One way to reduce that problem is to stop merging paint chunks
that would make the total area of the skia.Surface larger
than some fixed value. Implement that.Another way is via surface tiling.
13-8 Short display lists. it’s relatively common in real
browsers to encounter CompositedLayers that are only a
single solid color, or only a few simple paint commands.A real browser would use among
its criteria whether the time to raster the provided display items is
low enough to not justify a GPU texture. This will be true for solid
colors, but probably not for complex shapes or text.
Implement an optimization that skips storing a skia.Surface
on a CompositedLayer with less than a fixed number (three,
say) of paint commands, and instead execute them directly. In other
words, raster on these CompositedLayers will
be a no-op and draw will execute the paint commands
instead.
13-9 Hit testing. Right now, when handling clicks, we
convert each layout object’s bounds to absolute coordinates (via
absolute_bounds_for_obj) to compare to the click location.
But we could instead convert the click location to local coordinates as
we traverse the layout tree. Implement that instead. It’ll probably be
convenient to define a hit_test method on each layout
object which takes in a click location, adjusts it for transforms, and
recursively calls child hit_test methods.In real browsers hit testing
is used for more than just clicking. The name comes from thinking
whether an arrow shot at that location would “hit” the
object.
13-10 z-index. Right now, elements later in the
HTML document are drawn “on top” of earlier ones. The
z-index CSS property changes that order: an element with a
larger z-index draws on top (with ties broken by the
current order, and with the default z-index being 0). For
z-index to have any effect, the element’s
position property must be set to something other than
static (the default). Add support for z-index.
For an extra challenge, add support for nested
elements with z-index properties.
13-11 Animated scrolling. Real browsers have many kinds of
animations during scroll. For example, pressing the down key or the
down-arrow in a scrollbar causes a pleasant animated scroll, rather than
the immediate scroll our browser current implements. Or on mobile, a
touch interaction often causes a “fling” scroll according to a
physics-based model of scroll momentum with friction. Implement the scroll-behavior
CSS property on the <body> element, and use it to
trigger animated scroll in handle_down, by delegating
scroll to a main thread animation.This will result in your browser losing threaded scrolling.
If you’ve implemented Exercise 13-3, you could build on that code to
animate scroll on the browser thread. You’ll need to
implement a new ScrollAnimation class and some logic in
run_animation_frame. Scrolling in the transform
transition example should now be smooth, as that example uses
scroll-behavior.These days, many websites implement a number of
scroll-linked animation effects, such as parallax. In
real life, parallax is the phenomenon that objects further away appear
to move slower than closer-in objects (due to the angle of light
changing less quickly). This can be achieved with the perspective
CSS property. This
article explains how, and this one
gives a much deeper dive into perspective in CSS generally.
There are also animations that are tied to scroll
offset but are not, strictly speaking, part of the scroll. An
example is a rotation or opacity fade on an element that advances as the
user scrolls down the page (and reverses as they scroll back up). Or
there are scroll-triggered animations that start once an
element has scrolled to a certain point on the screen, or when scroll
changes direction.
13-12 Opacity plus draw. If a
DrawCompositedLayer command occurs inside a
Blend(alpha=0.5) then right now there might be two surface
copies: first copying the composited layer’s raster buffer into a
temporary buffer, then applying opacity to it and copying it into the
root surface. This is not necessary, and in fact Skia’s draw
API on a Surface allows opacity to be applied. Optimize the
browser to combine these into one draw command when this
situation happens. (This is an important optimization in real
browsers.)
Making Content Accessible
So far, we’ve focused on making the browser an effective platform for developing web applications. But ultimately, the browser is a user agent. That means it should assist the user in whatever way it can to access and use web applications. Browsers therefore offer a range of accessibility features that take advantage of declarative UI and the flexibility of HTML and CSS to make it possible to interact with web pages by touch, keyboard, or voice.
What is Accessibility?
Accessibility means that the user can change or customize how they interact with a web page in order to make it easier to use.This definition takes the browser’s point of view. Accessibility can also be defined from the developer’s point of view, in which case it’s about ways to make your web pages easy to use for as many people as possible. The web’s uniquely flexible core technologies mean that browsers offer a lot of accessibility featuresToo often, people take “accessibility” to mean “screen reader support”, but this is just one way a user may want to interact with a web page. that allow a user to customize the rendering of a web page, as well as interact with a web page with their keyboard, by voice, or using some kind of helper software.
The reasons for customizing, of course, are as diverse as the customizations themselves. The World Health Organization found that as much as 15% of the world population have some form of disability, and many of them are severe or permanent. Nearly all of them can benefit greatly from the accessibility features described in this chapter. The more severe the disability for a particular person, the more critically important these features become for them.
Some needs for accessibility come and go over time. For example, when my son was born,This is Pavel speaking. my wife and I alternated time taking care of the baby and I ended up spending a lot of time working at night. To maximize precious sleep, I wanted the screen to be less bright, and was thankful that many websites offer a dark mode. Later, I found that taking notes by voice was convenient when my hands were busy holding the baby. And when I was trying to put the baby to sleep, muting the TV and reading the closed captions turned out to be the best way of watching movies.
The underlying reasons for using these accessibility tools were temporary; but other uses may last longer, or be permanent. I’m ever-grateful, for example, for curb cuts, which make it much more convenient to go on walks with a stroller.And even though my son has now started walking on his own, he’s still small enough that walking up a curb without a curb cut is difficult for him. And there’s a good chance that, like many of my relatives, my eyesight will worsen as I age and I’ll need to set my computer to a permanently larger text size. For more severe and permanent disabilities, there are advanced tools like screen readers.Perhaps software assistants will become more widespread as technology improves, mediating between the user and web pages, and will one day no longer primarily be a screen reader accessibility technology. Password managers and form autofill agents are already somewhat like this, and in many cases use the same browser APIs as screen readers. These take time to learn and use effectively, but are transformative for those who need them.
Accessibility covers the whole spectrum, from minor accommodations to advanced accessibility tools.We have an ethical responsibility to help all users. Plus, there is the practical matter that if you’re making a web page, you want as many people as possible to benefit from it. But a key lesson of all kinds of accessibility work, physical and digital, is that once an accessibility tool is built, creative people find that it helps in all kinds of situations unforeseen by the tool’s designers. Dark mode helps you tell your work and personal email apart; web page zoom helps you print the whole web page on a single sheet of paper; and keyboard shortcuts let you leverage muscle memory to submit many similar orders to a web application that doesn’t have a batch mode.
Moreover, accessibility derives from the same principles that birthed the web: user control, multimodal content, and interoperability. These principles allowed the web to be accessible to all types of browsers and operating systems, and these same principles likewise make the web accessible to people of all types and abilities.
In the United States, the United Kingdom, the European Union, and many other countries, website accessibility is in many cases legally required. For example, United States Government websites are required to be accessible under Section 508 of the Rehabilitation Act Amendments of 1973 (with amendments added later), and associated regulations. Non-government websites are also required to be accessible under the Americans with Disabilities Act, though it’s not yet clear exactly what that legal requirement means in practice, since it’s mostly being decided through the courts. In the UK, the Equality Act 2010 established similar rules for websites, with stricter rules for government websites added in 2018. A similar law in the European Union is the European Accessibility Act.
Zoom
Let’s start with the simplest accessibility problem: text on the screen that is too small to read. It’s a problem many of us will face sooner or later, and is possibly the most common user disability issue. The simplest and most effective way to address this is by increasing font and element sizes. This approach is called zoom,The word zoom evokes an analogy to a camera zooming in, but it is not the same, because zoom causes layout. Pinch zoom, on the other hand, is just like a camera and does not cause layout. which means to lay out the page as if all of the CSS sizes were increased or decreased by a specified factor.
To implement it, we first need a way to trigger zooming. On most
browsers, that’s done with the Ctrl-+, Ctrl--,
and Ctrl-0 keys; using the Ctrl modifier key
means you can type a +, -, or 0
into a text entry without triggering the zoom function.
To handle modifier keys, we’ll need to listen to both “key down” and
“key up” events in the event loop, and store whether the
Ctrl key is pressed:
def mainloop(browser):
# ...
ctrl_down = False
while True:
if sdl2.SDL_PollEvent(ctypes.byref(event)) != 0:
elif event.type == sdl2.SDL_KEYDOWN:
# ...
elif event.key.keysym.sym == sdl2.SDLK_RCTRL or \
event.key.keysym.sym == sdl2.SDLK_LCTRL:
ctrl_down = True
elif event.type == sdl2.SDL_KEYUP:
if event.key.keysym.sym == sdl2.SDLK_RCTRL or \
event.key.keysym.sym == sdl2.SDLK_LCTRL:
ctrl_down = False
# ...Now we can have a case in the key handling code for “key down” events
while the Ctrl key is held:
def mainloop(browser):
while True:
if sdl2.SDL_PollEvent(ctypes.byref(event)) != 0:
elif event.type == sdl2.SDL_KEYDOWN:
if ctrl_down:
if event.key.keysym.sym == sdl2.SDLK_EQUALS:
browser.increment_zoom(True)
elif event.key.keysym.sym == sdl2.SDLK_MINUS:
browser.increment_zoom(False)
elif event.key.keysym.sym == sdl2.SDLK_0:
browser.reset_zoom()
# ...Here, the argument to increment_zoom is whether we
should increment (True) or decrement
(False).
The Browser code just delegates to the Tab,
via a main thread task:
class Browser:
# ...
def increment_zoom(self, increment):
task = Task(self.active_tab.zoom_by, increment)
self.active_tab.task_runner.schedule_task(task)
def reset_zoom(self):
task = Task(self.active_tab.reset_zoom)
self.active_tab.task_runner.schedule_task(task)Finally, the Tab responds to these commands by adjusting
a new zoom property, which starts at 1 and
acts as a multiplier for all “CSS sizes” on the web page:Zoom typically does not change
the size of elements of the browser chrome. Browsers can do
that too, but it’s usually triggered by a global OS
setting.
class Tab:
def __init__(self, browser, tab_height):
# ...
self.zoom = 1
def zoom_by(self, increment):
if increment:
self.zoom *= 1.1
self.scroll *= 1.1
else:
self.zoom *= 1/1.1
self.scroll *= 1/1.1
self.scroll_changed_in_tab = True
self.set_needs_render()
def reset_zoom(self):
self.scroll /= self.zoom
self.zoom = 1
self.scroll_changed_in_tab = True
self.set_needs_render()Note that we need to set the needs_render flag when we
zoom to redraw the screen after zooming is complete. Also note that when
we zoom the page we also need to adjust the scroll position,In a real browser, adjusting
the scroll position when zooming is more complex than just multiplying.
That’s because zoom not only changes the heights of individual lines of
text, but also changes line breaking, meaning more or fewer lines of
text. This means there’s no easy correspondence between old and new
scroll positions. Most real browsers implement a much more general
algorithm called scroll
anchoring that handles all kinds of changes beyond just
zoom. and reset the zoom level when we navigate to a new
page:
class Tab:
def load(self, url, payload=None):
self.zoom = 1
# ...The zoom factor is supposed to multiply all CSS sizes,
so we’ll need access to it during layout. There are a few ways to do
this, but one easy way is just to pass it as a parameter to
layout for DocumentLayout:
class DocumentLayout:
def layout(self, zoom):
self.zoom = zoom
child = BlockLayout(self.node, self, None)
# ...class Tab:
def render(self):
if self.needs_layout:
# ...
self.document.layout(self.zoom)
# ...Every other layout object can also have a zoom field,
copied from its parent in layout. Here’s
BlockLayout; the other layout classes should do the
same:
class BlockLayout:
def layout(self):
self.zoom = self.parent.zoom
# ...Various methods now need to scale their font sizes to account for
zoom. Since scaling by zoom is a common
operation, let’s wrap it in a helper method, dpx:Normally, dpx
would be a terrible function name, being short and cryptic. But we’ll be
calling this function a lot, mixed in with mathematical operations, and
it’ll be convenient for it not to take up too much
space.
def dpx(css_px, zoom):
return css_px * zoom Think of dpx not as a simple helper method, but as a
unit conversion from a CSS pixel (the units specified in a CSS
declaration) to a device pixel (what’s actually drawn on the
screen). In a real browser, this method could also account for
differences like high-DPI displays.
We’ll do this conversion to adjust the font sizes in the
text and input methods for
BlockLayout, and in InputLayout:
class BlockLayout:
def word(self, node, word):
# ...
px_size = float(node.style["font-size"][:-2])
size = dpx(px_size * 0.75, self.zoom)
# ...
def input(self, node):
# ...
px_size = float(node.style["font-size"][:-2])
size = dpx(px_size * 0.75, self.zoom)
# ...class InputLayout:
def layout(self):
# ...
px_size = float(self.node.style["font-size"][:-2])
size = dpx(px_size * 0.75, self.zoom)
# ...As well as the font size in TextLayout:Browsers also usually have a
minimum font size feature, but it’s a lot trickier to use
correctly. Since a minimum font size only affects some of the
text on the page, and doesn’t affect other CSS lengths, it can cause
overflowing fonts and broken layouts. Because of these problems,
browsers often restrict the feature to situations where the site seems
to be using relative
font sizes.
class TextLayout:
# ...
def layout(self):
# ...
px_size = float(self.node.style["font-size"][:-2])
size = dpx(px_size * 0.75, self.zoom)And the fixed INPUT_WIDTH_PX for text boxes:
class BlockLayout:
# ...
def input(self, node):
w = dpx(INPUT_WIDTH_PX, self.zoom) Finally, one tricky place we need to adjust for zoom is inside
DocumentLayout. Here there are two sets of lengths: the
overall WIDTH, and the
HSTEP/VSTEP padding around the edges of the
page. The WIDTH comes from the size of the application
window itself, so that’s measured in device pixels and doesn’t need to
be converted. But the HSTEP/VSTEP is part of
the page’s layout, so it’s in CSS pixels and does need to be
converted:
class DocumentLayout:
def layout(self, zoom):
# ...
self.width = WIDTH - 2 * dpx(HSTEP, self.zoom)
self.x = dpx(HSTEP, self.zoom)
self.y = dpx(VSTEP, self.zoom)
child.layout()
self.height = child.heightNow try it out. All of the fonts should get about 10% bigger each
time you press Ctrl-+, and shrink by 10% when you press
Ctrl--. The bigger text should still wrap appropriately at
the edge of the screen, and CSS lengths should be scaled just like the
text is. This is great for reading text more easily.
Here is an example of some text before zoom.No book on the web would be complete without some good old Lorem ipsum!
This should render as shown in Figure 1, while Figure 2 shows how it should look after a 2× zoom. Note how not only are the words twice as big, but the lines wrap at different words, just as desired.


On high-resolution screens, CSS pixels are scaled by both zoom and a
devicePixelRatio
factor.Strictly
speaking, the JavaScript variable called devicePixelRatio
is the product of the device-specific and zoom-based scaling
factors. This factor scales device pixels so that there
are approximately 96 CSS pixels per inch
(which a lot of old-school desktop displays had). For example, the
original iPhone had 163 pixels per inch; the browser on that device used
a devicePixelRatio of 2, so that 96 CSS pixels corresponds
to 192 device pixels or about 1.17 inches.Typically the
devicePixelRatio is rounded to an integer because that
tends to make text and layout look crisper, but this isn’t required, and
as pixel densities increase it becomes less and less important. For
example, the Pixelbook Go I’m using to write this book, with a
resolution of 166 pixels per inch, has a ratio of 1.25. The choice of
ratio for a given screen is somewhat arbitrary. This
scaling is especially tricky when a device is connected to multiple
displays: a window may switch from a low-resolution to a high-resolution
display (thus changing devicePixelRatio) or even be split
across two displays with different resolutions.
Dark Mode
Another useful visual change is using darker colors to help users who are extra sensitive to light, use their device at night, or who just prefer a darker color scheme. This browser dark mode feature should switch both the browser chrome and the web page itself to use white text on a black background, and otherwise adjust background colors to be darker.These days, dark mode has hit the mainstream. It’s supported by pretty much all operating systems, browsers, and popular apps, and many people enable it as a personal preference. But it was an accessibility feature, often called high contrast or color filtering mode, long before then. Many other technologies, including text-to-speech, optical character recognition, on-screen keyboards, and voice control were also pioneered by accessibility engineers before becoming widely used.
We’ll trigger dark mode in the event loop with
Ctrl-d:
def mainloop(browser):
while True:
if sdl2.SDL_PollEvent(ctypes.byref(event)) != 0:
elif event.type == sdl2.SDL_KEYDOWN:
if ctrl_down:
# ...
elif event.key.keysym.sym == sdl2.SDLK_d:
browser.toggle_dark_mode()When dark mode is active, we need to draw both the browser chrome and
the web page contents differently. The browser chrome is a bit easier,
so let’s start with that. We’ll start with a dark_mode
field indicating whether dark mode is active:
class Browser:
def __init__(self):
# ...
self.dark_mode = False
def toggle_dark_mode(self):
self.dark_mode = not self.dark_modeNow we just need to flip all the colors in raster_chrome
when dark_mode is set. Let’s store the foreground and
background colors in variables we can reuse:
class Browser:
def raster_chrome(self):
if self.dark_mode:
background_color = skia.ColorBLACK
else:
background_color = skia.ColorWHITE
canvas.clear(background_color)
# ...Similarly, in paint on Chrome, we need to
use the right foreground color:
class Chrome:
def paint(self):
if self.browser.dark_mode:
color = "white"
else:
color = "black"Then we just need to use color instead of
black everywhere. Make that change in
paint.Of
course, a full-featured browser’s chrome has many more buttons and
colors to adjust than our browser’s. Most browsers support a theming
system that stores all the relevant colors and images, and dark mode
switches the browser from one theme to another.
Now, we want the web page content to change from light mode to dark
mode as well. To start, let’s inform the Tab when the user
requests dark mode:
class Browser:
# ...
def toggle_dark_mode(self):
# ...
self.dark_mode = not self.dark_mode
task = Task(self.active_tab.set_dark_mode, self.dark_mode)
self.active_tab.task_runner.schedule_task(task)And in Tab:
class Tab:
def __init__(self, browser, tab_height):
# ...
self.dark_mode = browser.dark_mode
def set_dark_mode(self, val):
self.dark_mode = val
self.set_needs_render()Note that we need to re-render the page when the dark mode setting is flipped, so that the user actually sees the new colors. On that note, we also need to set dark mode when changing tabs, since all tabs should be either dark or light:
class Browser:
def set_active_tab(self, tab):
# ...
task = Task(self.active_tab.set_dark_mode, self.dark_mode)
self.active_tab.task_runner.schedule_task(task)Now we need the page’s colors to somehow depend on dark mode. The
easiest to change are the default text color and the background color of
the document, which are set by the browser. The default text color, for
example, comes from the INHERITED_PROPERTIES dictionary,
which we can just modify based on the dark mode:
class Tab:
# ...
def render(self):
if self.needs_style:
if self.dark_mode:
INHERITED_PROPERTIES["color"] = "white"
else:
INHERITED_PROPERTIES["color"] = "black"
style(self.nodes,
sorted(self.rules, key=cascade_priority))And the background for the page is drawn by the Browser
in the draw method, which we can make depend on dark
mode:
class Browser:
# ...
def draw(self):
# ...
if self.dark_mode:
canvas.clear(skia.ColorBLACK)
else:
canvas.clear(skia.ColorWHITE)Now if you open the browser and switch to dark mode, you should see white text on a black background, as in Figure 3.

The browser really should not be changing colors on unsuspecting
pages; that could have terrible readability outcomes if the page’s theme
conflicted! Instead web pages indicate
support for dark mode using the color-scheme meta
tag or CSS
property. Browsers use the presence of the meta tag to determine
whether it’s safe to apply dark mode. Before color-scheme
was standardized, web pages could in principle offer alternative color
schemes using alternative
style sheets, but few browsers supported it (of the major ones, only
Firefox) and it wasn’t commonly used.
Customizing Dark Mode
Our simple dark mode implementation works well for pages with just text on a background. But for a good-looking dark mode, we also need to adjust all the other colors on the page. For example, buttons and input elements probably need a darker background color, as do any colors that the web developer used on the page.
To support this, CSS uses media
queries. This is a special syntax that basically wraps some CSS
rules in an if statement with some kind of condition; if
the condition is true, those CSS rules are used, but if the condition is
false, they are ignored. The prefers-color-scheme condition
checks for dark mode. For example, this CSS will make
<div>s have a white text on a black background only
in dark mode:
@media (prefers-color-scheme: dark) {
div { background-color: black; color: white; }
}Web developers can use prefers-color-scheme queries in
their own style sheets, adjusting their own choice of colors to fit user
requests, but we can also use a prefers-color-scheme media
query in the browser default style sheet to adjust the default colors
for links, buttons, and text entries:
@media (prefers-color-scheme: dark) {
a { color: lightblue; }
input { background-color: #2222FF; }
button { background-color: #992500; }
}Here I chose very specific hexadecimal colors that preserve the general color scheme of blue and orange, but ensure maximum contrast with white foreground text so they are easy to read. It’s important to choose colors that ensure maximum contrast (an “AAA” rating). This tool is handy for checking the contrast of foreground and background colors.
To implement media queries, we’ll have to start with parsing this syntax:
class CSSParser:
def media_query(self):
self.literal("@")
assert self.word() == "media"
self.whitespace()
self.literal("(")
self.whitespace()
prop, val = self.pair([")"])
self.whitespace()
self.literal(")")
return prop, valThen, in parse, we keep track of the current color
scheme and adjust it every time we enter or exit an @media
rule:For simplicity,
this code doesn’t handle nested @media rules, because with
just one type of media query there’s no point in nesting them. To handle
nested @media queries the media variable would
have to store a stack of conditions.
class CSSParser:
def parse(self):
# ...
media = None
self.whitespace()
while self.i < len(self.s):
try:
if self.s[self.i] == "@" and not media:
prop, val = self.media_query()
if prop == "prefers-color-scheme" and \
val in ["dark", "light"]:
media = val
self.whitespace()
self.literal("{")
self.whitespace()
elif self.s[self.i] == "}" and media:
self.literal("}")
media = None
self.whitespace()
else:
# ...
rules.append((media, selector, body))Note that I’ve modified the list of rules to store not just the
selector and the body, but also the color scheme for those
rules—None if it applies regardless of color scheme,
dark for dark mode only, and light for light
mode only. This way, the style function can ignore rules
that don’t apply:
def style(node, rules, tab):
# ...
for media, selector, body in rules:
if media:
if (media == "dark") != tab.dark_mode: continue
# ...Try your browser on this web pageI’ll use it throughout the chapter as the “focus example”. with lots of links, text entries, and buttons, and you should now see that in dark mode they also change color to have a darker background and lighter foreground. It should look like Figure 4 in dark mode.

Besides prefers-color-scheme, web pages can use media
queries to increase or decrease contrast when a user prefers-contrast
or disable unnecessary animations when a user prefers-reduced-motion,
both of which can help users with certain disabilities. Users can also
force the use of a specific, limited palette of colors through their
operating system; web pages can detect this with the forced-colors
media query or disable it for certain elements (use with care!) with forced-color-adjust.
Keyboard Navigation
Right now, most of our browser’s features are triggered using the mouse,Except for scrolling, which is keyboard only. which is a problem for users with injuries or disabilities in their hand—and also a problem for power users that prefer their keyboards. So ideally every browser feature should be accessible via the keyboard as well as the mouse. That includes browser chrome interactions like back navigation, typing a URL, or quitting the browser, and also web page interactions such as submitting forms, typing in text areas, navigating links, and selecting items on the page.
Let’s start with the browser chrome, since it’s the easiest. Here, we
need to allow the user to back-navigate, to type in the address bar, and
to create and cycle through tabs, all with the keyboard. We’ll also add
a keyboard shortcut for quitting the browser.Depending on the OS you might
also need shortcuts for minimizing or maximizing the browser window.
Those require calling specialized OS APIs, so I won’t implement
them. Let’s make all these shortcuts in the event loop use
the Ctrl modifier key so they don’t interfere with normal
typing: Ctrl-Left to go back, Ctrl-l to type
in the address bar, Ctrl-t to create a new tab,
Ctrl-Tab to switch to the next tab, and Ctrl-q
to exit the browser:
def mainloop(browser):
while True:
if sdl2.SDL_PollEvent(ctypes.byref(event)) != 0:
elif event.type == sdl2.SDL_KEYDOWN:
if ctrl_down:
# ...
elif event.key.keysym.sym == sdl2.SDLK_LEFT:
browser.go_back()
elif event.key.keysym.sym == sdl2.SDLK_l:
browser.focus_addressbar()
elif event.key.keysym.sym == sdl2.SDLK_t:
browser.new_tab(
"https://browser.engineering/")
elif event.key.keysym.sym == sdl2.SDLK_TAB:
browser.cycle_tabs()
elif event.key.keysym.sym == sdl2.SDLK_q:
browser.handle_quit()
sdl2.SDL_Quit()
sys.exit()
breakHere, the focus_addressbar and cycle_tabs
methods are new, but their contents are just copied from
handle_click:
class Chrome:
def focus_addressbar(self):
self.focus = "address bar"
self.address_bar = ""
class Browser:
def focus_addressbar(self):
self.lock.acquire(blocking=True)
self.chrome.focus_addressbar()
self.set_needs_raster()
self.lock.release()
def cycle_tabs(self):
self.lock.acquire(blocking=True)
active_idx = self.tabs.index(self.active_tab)
new_active_idx = (active_idx + 1) % len(self.tabs)
self.set_active_tab(self.tabs[new_active_idx])
self.lock.release()Now any clicks in the browser chrome can be replaced with keyboard
actions. But what about clicks in the web page itself? This is trickier,
because web pages can have any number of links. So the standard solution
is letting the user Tab through all the clickable things on
the page, and press Enter to actually click on them.Though it’s not the only
solution. The old Vimperator
browser extension for Firefox and its successors instead shows one- or
two-letter codes next to each clickable element, and lets the user type
those codes to activate that element.
We’ll implement this by expanding our implementation of
focus. We already have a focus property on each
Tab indicating which input element is
capturing keyboard input. Let’s allow buttons and links to be focused as
well. Of course, they don’t capture keyboard input, but when the user
presses Enter we’ll press the button or navigate to the
link.
We’ll start by binding those keys in the event loop:
def mainloop(browser):
while True:
if sdl2.SDL_PollEvent(ctypes.byref(event)) != 0:
elif event.type == sdl2.SDL_KEYDOWN:
# ...
elif event.key.keysym.sym == sdl2.SDLK_RETURN:
browser.handle_enter()
elif event.key.keysym.sym == sdl2.SDLK_TAB:
browser.handle_tab()Note that these lines don’t go inside the if ctrl_down
block, since we’re binding Tab and Enter, not
Ctrl-Tab and Ctrl-Enter. In
Browser, we just forward these keys to the active tab’s
enter and advance_tab methods:Real browsers also support
Shift-Tab to go backwards in focus order.
class Browser:
def handle_tab(self):
self.focus = "content"
task = Task(self.active_tab.advance_tab)
self.active_tab.task_runner.schedule_task(task)
def handle_enter(self):
# ...
elif self.focus == "content":
task = Task(self.active_tab.enter)
self.active_tab.task_runner.schedule_task(task)
# ...Let’s start with the advance_tab method. Each time it’s
called, the browser should advance focus to the next focusable thing.
This will first require a definition of which elements are
focusable:
def is_focusable(node):
return node.tag in ["input", "button", "a"]
class Tab:
def advance_tab(self):
focusable_nodes = [node
for node in tree_to_list(self.nodes, [])
if isinstance(node, Element) and is_focusable(node)]Next, in advance_tab, we need to find out where the
currently focused element is in this list so we can move focus to the
next one.
class Tab:
def advance_tab(self):
# ...
if self.focus in focusable_nodes:
idx = focusable_nodes.index(self.focus) + 1
else:
idx = 0Finally, we just need to focus on the chosen element. If we’ve reached the last focusable node (or if there weren’t any focusable nodes to begin with), we’ll unfocus the page and move focus to the address bar:
class Tab:
def advance_tab(self):
if idx < len(focusable_nodes):
self.focus = focusable_nodes[idx]
else:
self.focus = None
self.browser.focus_addressbar()
self.set_needs_render()Now that an element is focused, the user should be able to interact
with it by pressing Enter. Since the exact action they’re
performing varies (navigating a link, pressing a button, clearing a text
entry), we’ll call this “activating” the element:
class Tab:
def enter(self):
if not self.focus: return
self.activate_element(self.focus)The activate_element method does different things for
different kinds of elements:
class Tab:
def activate_element(self, elt):
if elt.tag == "input":
elt.attributes["value"] = ""
self.set_needs_render()
elif elt.tag == "a" and "href" in elt.attributes:
url = self.url.resolve(elt.attributes["href"])
self.load(url)
elif elt.tag == "button":
while elt:
if elt.tag == "form" and "action" in elt.attributes:
self.submit_form(elt)
elt = elt.parentAll of this activation code is copied from the click
method on Tabs. Note that hitting Enter when
focused on a text entry clears the text entry; in most browsers, it
submits the containing form instead. That quirk is a workaround for our
browser not
implementing the Backspace key (Section 8.3).
The click method can now be rewritten to call
activate_element directly:
class Tab:
def click(self, x, y):
while elt:
if isinstance(elt, Text):
pass
elif is_focusable(elt):
self.focus_element(elt)
self.activate_element(elt)
return
elt = elt.parentAlso, since now any element can be focused, we need
keypress to check that an input element is
focused before typing into it:
class Tab:
def keypress(self, char):
if self.focus and self.focus.tag == "input":
if not "value" in self.focus.attributes:
self.activate_element(self.focus)
# ...I’ve called activate_element to create an empty
value attribute.
Similarly, InputLayout used to draw a cursor for any
focused element. Now that button elements can be focused,
it needs to be more careful:
class InputLayout:
def paint(self):
# ...
if self.node.is_focused and self.node.tag == "input":
# ...
# ...Finally, note that sometimes activating an element submits a form or navigates to a new page, which means the element we were focused on no longer exists. We need to make sure to clear focus in this case:
class Tab:
def load(self, url, payload=None):
self.focus = None
# ...We now have the ability to focus on links, buttons, and text entries. But as with any browser feature, it’s worth asking whether web page authors should be able to customize it. With keyboard navigation, the author might want certain links not to be focusable (like “permalinks” to a section heading, which would just be noise to most users), or might want to change the order in which the user tabs through focusable items.
Browsers support the tabindex HTML attribute to make
this possible. The tabindex attribute is a number. An
element isn’t focusable if its tabindex is negative, and
elements with smaller tabindex values come before those
with larger values and those without a tabindex at all. To
implement that, we need to sort the focusable elements by tab index, so
we need a function that returns the tab index:
def get_tabindex(node):
tabindex = int(node.attributes.get("tabindex", "9999999"))
return 9999999 if tabindex == 0 else tabindexThe default value, “9999999”, is a hack to make sure that elements
without a tabindex attribute sort after ones with the
attribute. Now we can sort by get_tabindex in
advance_tab:
class Tab:
def advance_tab(self):
focusable_nodes = [node
for node in tree_to_list(self.nodes, [])
if isinstance(node, Element) and is_focusable(node)]
focusable_nodes.sort(key=get_tabindex)
# ...Since Python’s sort is “stable”, two elements with the same
tabindex won’t change their relative position in
focusable_nodes.
Additionally, elements with non-negative tabindex are
automatically focusable, even if they aren’t a link or a button or a
text entry. That’s useful, because that element might listen to the
click event. To support this let’s first extend
is_focusable to consider tabindex:
def is_focusable(node):
if get_tabindex(node) < 0:
return False
elif "tabindex" in node.attributes:
return True
else:
return node.tag in ["input", "button", "a"]If you print out focusable_nodes for the focus example, you should get
this:
[<a tabindex="1" href="/">,
<button tabindex="2">,
<div tabindex="3">,
<div tabindex="12">,
<input>,
<a href="http://browser.engineering">]We also need to make sure to send a click event when an
element is activated. Note that just like clicking on an element,
activating an element can be canceled from JavaScript using
preventDefault.
class Tab:
def enter(self):
if not self.focus: return
if self.js.dispatch_event("click", self.focus): return
self.activate_element(self.focus)We now have configurable keyboard navigation for both the browser and the web page content. And it involved writing barely any new code, instead mostly moving code from existing methods into new standalone ones. The fact that keyboard navigation simplified, not complicated, our browser implementation is a common outcome: improving accessibility often involves generalizing and refining existing concepts, leading to more maintainable code overall.
Why send the click event when an element is activated,
instead of a special activate event? Internet Explorer did
use a special activate event, and other browsers used
to send a DOMActivate
event, but modern standards require sending the click event
even if the element was activated via keyboard, not via a click. This
works better when the developers aren’t thinking much about
accessibility and only register the click event
listener.
Indicating Focus
Thanks to our keyboard shortcuts, users can now reach any link,
button, or text entry from the keyboard. But if you try to use this to
navigate a website, it’s a little hard to know which element is focused
when. A visual indication—similar to the cursor we use on text
inputs—would help sighted users know if they’ve reached the element they
want or if they need to keep hitting Tab. In most browsers,
this visual indication is a focus ring that outlines the
focused element.
To implement focus rings, we’ll use the same mechanism we use to draw
text cursors. Recall that, right now, text cursors are added by drawing
a vertical line in InputLayout’s paint method.
We’ll add a call to paint_outline in that method, to draw a
rectangle around the focused element:
def paint_outline(node, cmds, rect, zoom):
if not node.is_focused: return
cmds.append(DrawOutline(rect, "black", 1))Set this is_focused flag in a new
focus_element method that we’ll now use to change the
focus field in a Tab:
class Tab:
def focus_element(self, node):
if self.focus:
self.focus.is_focused = False
self.focus = node
if node:
node.is_focused = TrueOutline painting should happen in paint_effects, because
it paints on top of the subtree.
class InputLayout:
def paint_effects(self, cmds):
cmds = paint_visual_effects(self.node, cmds, self.self_rect())
paint_outline(self.node, cmds, self.self_rect(), self.zoom)
return cmdsI also changed the cursor drawing to only happen if the node is
focused and it’s an input element. Tabbing over to
a button element should not draw a cursor!
Unfortunately, handling links is a little more complicated. That’s
because one <a> element corresponds to multiple
TextLayout objects, so there’s not just one layout object
where we can stick the code. Moreover, those TextLayouts
could be split across several lines, so we might want to draw more than
one focus ring. To work around this, let’s draw the focus ring in
LineLayout. Each LineLayout finds all of its
child TextLayouts that are focused, and draws a rectangle
around them all.
class LineLayout:
def paint_effects(self, cmds):
outline_rect = skia.Rect.MakeEmpty()
outline_node = None
for child in self.children:
if child.node.parent.is_focused:
outline_rect.join(child.self_rect())
outline_node = child.node.parent
if outline_node:
paint_outline(
outline_node, cmds, outline_rect, self.zoom)
return cmdsYou should also add a paint_outline call to
BlockLayout, since users can make any element focusable
with tabindex.This code does not correctly handle the case of text inside
an inline element inside another inline element, with the outside one
focused. You could fix this by walking from the child to
the LineLayout’s node, checking the
is_focused field along the way. I’m skipping that in the
interest of expediency.
Now when you Tab through a page, you should see the
focused element highlighted with a black outline. And if a link happens
to cross multiple lines, you will see our browser use multiple focus
rectangles to make crystal clear what is being focused on.
Except for one problem: if the focused element is scrolled offscreen, there is still no way to tell what’s focused. To fix this we’ll need to automatically scroll it onto the screen when the user tabs to it.
Doing this is a bit tricky, because determining if the element is
offscreen requires layout. So, instead of scrolling to it immediately,
we’ll set a new needs_focus_scroll bit on
Tab:
class Tab:
def __init__(self, browser, tab_height):
# ...
self.needs_focus_scroll = False
def focus_element(self, node):
if node and node != self.focus:
self.needs_focus_scroll = TrueThen, run_animation_frame can scroll appropriately
before resetting the flag:
class Tab:
def run_animation_frame(self, scroll):
# ...
if self.needs_focus_scroll and self.focus:
self.scroll_to(self.focus)
self.needs_focus_scroll = False
# ...To actually do the scrolling, we need to find the layout object corresponding to the focused node:
class Tab:
def scroll_to(self, elt):
objs = [
obj for obj in tree_to_list(self.document, [])
if obj.node == self.focus
]
if not objs: return
obj = objs[0]Then, we scroll to it:
class Tab:
def scroll_to(self, elt):
# ...
if self.scroll < obj.y < self.scroll + self.tab_height:
return
document_height = math.ceil(self.document.height + 2*VSTEP)
new_scroll = obj.y - SCROLL_STEP
self.scroll = self.clamp_scroll(new_scroll)
self.scroll_changed_in_tab = TrueHere, I’m shifting the scroll position to ensure that the object is
SCROLL_STEP pixels from the top of the screen, though a
real browser will likely use different logic for scrolling up versus
down.
Focus outlines now basically work, and will even scroll on-screen if you try it on the focus example. Figure 5 shows what it looks like after I pressed tab to focus the “this is a link” element.

But ideally, the focus indicator should be customizable, so that the
web page author can make sure the focused element stands out. In CSS,
that’s done with the :focus pseudo-class.
Basically, this means you can write a selector like this:
div:focus { ... }And then that selector applies only to <div>
elements that are currently focused.It’s called a pseudo-class because the syntax is similar to
class
selectors, except there’s no actual class attribute on the
matched elements.
To implement this, we need to parse this new kind of selector. Let’s
change selector to call a new simple_selector
subroutine to parse a tag name and a possible pseudo-class:
class CSSParser:
def selector(self):
out = self.simple_selector()
# ...
while self.i < len(self.s) and self.s[self.i] != "{":
descendant = self.simple_selector()
# ...In simple_selector, the parser first parses a tag name
and then checks if that’s followed by a colon and a pseudo-class
name:
class CSSParser:
def simple_selector(self):
out = TagSelector(self.word().casefold())
if self.i < len(self.s) and self.s[self.i] == ":":
self.literal(":")
pseudoclass = self.word().casefold()
out = PseudoclassSelector(pseudoclass, out)
return outA PseudoclassSelector wraps another selector:
class PseudoclassSelector:
def __init__(self, pseudoclass, base):
self.pseudoclass = pseudoclass
self.base = base
self.priority = self.base.priorityMatching is straightforward:
class PseudoclassSelector:
def matches(self, node):
if not self.base.matches(node):
return False
if self.pseudoclass == "focus":
return node.is_focused
else:
return FalseUnknown pseudoclasses simply never match anything.
The focused element can now be styled. But ideally we’d also be able
to customize the focus outline itself and not just the element. That can
be done by adding support for the CSS outline
property, which looks like this (for a 3-pixel-thick red
outline):We’ll only
implement this syntax, but outline can also take a few
other forms.
outline: 3px solid red;We can parse that into a thickness and a color:
def parse_outline(outline_str):
if not outline_str: return None
values = outline_str.split(" ")
if len(values) != 3: return None
if values[1] != "solid": return None
return int(values[0][:-2]), values[2]And then paint a parsed outline:
def paint_outline(node, cmds, rect, zoom):
outline = parse_outline(node.style.get("outline"))
if not outline: return
thickness, color = outline
cmds.append(DrawOutline(rect, color, dpx(thickness, zoom)))Even better, we can move the default two-pixel black outline into the browser default style sheet, like this:
input:focus { outline: 2px solid black; }
button:focus { outline: 2px solid black; }
div:focus { outline: 2px solid black; }Moreover, we can now make the outline white when dark mode is triggered, which is important for it to stand out against the black background:
@media (prefers-color-scheme: dark) {
input:focus { outline: 2px solid white; }
button:focus { outline: 2px solid white; }
div:focus { outline: 2px solid white; }
a:focus { outline: 2px solid white; }
}Finally, change all of our paint methods to use
parse_outline instead of is_focused to draw
the outline. Here is LineLayout:
class LineLayout:
def paint_effects(self, cmds):
# ...
for child in self.children:
outline_str = child.node.parent.style.get("outline")
if parse_outline(outline_str):
outline_rect.join(child.self_rect())
outline_node = child.node.parentFor the focus example,
the focus outline of an <a> element becomes thicker
and red, as in Figure 6.

As with dark mode, focus outlines are a case where adding an accessibility feature meant generalizing existing browser features to make them more powerful. And once they were generalized, this generalized form can be made accessible to web page authors, who can use it for anything they like.
It’s essential that the focus indicator have good contrast against the underlying web page, so the user can clearly see what they’ve tabbed over to. This might require some care if the default focus indicator looks like the page or element background. For example, it might be best to draw two outlines, white and black, to guarantee a visible focus indicator on both dark and light backgrounds. If you’re designing your own, the Web Content Accessibility Guidelines provides contrast guidance.
The Accessibility Tree
Zoom, dark mode, and focus indicators help users with difficulty seeing fine details, but if the user can’t see the screen at all,The original motivation for screen readers was for blind users, but it’s also sometimes useful for situations where the user shouldn’t be looking at the screen (such as driving), or for devices with no screen. they typically use a screen reader instead. The name kind of explains it all: the screen reader reads the text on the screen out loud, so that users know what it says without having to see it.
So: what should a screen reader say? There are basically two big challenges we must overcome.
First, web pages contain visual hints besides text that we need to
reproduce for screen reader users. For example, when focus is on an
<input> or <button> element, the
screen reader needs to say so, since these users won’t see the light
blue or orange background.
And second, when listening to a screen reader, the user must be able to direct the browser to the part of the page that interests them.Though many people who rely on screen readers learn to listen to much faster speech, it’s still a less informationally dense medium than vision. For example, the user might want to skip headers and navigation menus, or even skip most of the page until they get to a paragraph of interest. But once they’ve reached the part of the page of interest to them, they may want it read to them, and if some sentence or phrase is particularly complex, they may want the screen reader to re-read it.
You can see an exampleI encourage you to test out your operating system’s built-in screen reader to get a feel for what screen reader navigation is like. On macOS, type Cmd-Fn-F5 to turn on Voice Over; on Windows, type Win-Ctrl-Enter or Win-Enter to start Narrator; on ChromeOS type Ctrl-Alt-z to start ChromeVox. All are largely used via keyboard shortcuts that you can look up. of screen reader navigation in the talk presented in the video shown in Figure 7, specifically the segment from 2:36–3:54.The whole talk is recommended; it has great examples of using accessibility technology.
Figure 7: Accessibility talk available [here].
To support all this, browsers structure the page as a tree and use that tree to interact with the screen reader. The higher levels of the tree represent items like paragraphs, headings, or navigation menus, while lower levels represent text, links, or buttons.Generally speaking, the OS APIs consume this tree like a data model, and the actual tree and data model exposed to the OS APIs is platform-specific.
This probably sounds a lot like HTML—and it is quite similar! But,
just as the HTML tree does not exactly match the layout tree, there’s
not an exact match with this tree either. For example, some HTML
elements (like <div>) group content for styling that
is meaningless to screen reader users. Alternatively, some HTML elements
may be invisible on the screen,For example, using opacity:0. There are
several other ways in real browsers that elements can be made invisible,
such as with the visibility or display CSS
properties. but relevant to screen reader users. The
browser therefore builds a separate accessibility
tree to support screen reader navigation.
Let’s implement an accessibility tree in our browser. It’s built in a rendering phase just after layout:
class Tab:
def __init__(self, browser, tab_height):
# ...
self.needs_accessibility = False
self.accessibility_tree = None
def render(self):
# ...
if self.needs_layout:
# ...
self.needs_accessibility = True
self.needs_paint = True
self.needs_layout = False
if self.needs_accessibility:
self.accessibility_tree = AccessibilityNode(self.nodes)
self.accessibility_tree.build()
self.needs_accessibility = FalseThe accessibility tree is built out of
AccessibilityNodes:
class AccessibilityNode:
def __init__(self, node):
self.node = node
self.children = []The build method on AccessibilityNode
recursively creates the accessibility tree. To do so, we traverse the
HTML tree and, for each node, determine what “role” it plays in the
accessibility tree. Some elements, like <div>, have
no role, so don’t appear in the accessibility tree, while elements like
<input>, <a> and
<button> have default roles.Roles and default roles are
specified in the WAI-ARIA
standard. We can compute the role of a node based on
its tag name, or from the special role attribute if that
exists:
class AccessibilityNode:
def __init__(self, node):
# ...
if isinstance(node, Text):
if is_focusable(node.parent):
self.role = "focusable text"
else:
self.role = "StaticText"
else:
if "role" in node.attributes:
self.role = node.attributes["role"]
elif node.tag == "a":
self.role = "link"
elif node.tag == "input":
self.role = "textbox"
elif node.tag == "button":
self.role = "button"
elif node.tag == "html":
self.role = "document"
elif is_focusable(node):
self.role = "focusable"
else:
self.role = "none"To build the accessibility tree, just recursively walk the HTML tree.
Along the way, skip nodes with a none role, but still
recurse into their children:
class AccessibilityNode:
def build(self):
for child_node in self.node.children:
self.build_internal(child_node)
def build_internal(self, child_node):
child = AccessibilityNode(child_node)
if child.role != "none":
self.children.append(child)
child.build()
else:
for grandchild_node in child_node.children:
self.build_internal(grandchild_node)Here is the accessibility tree for the focus example:
role=document
role=button
role=focusable text
role=StaticText
role=textbox
role=StaticText
role=link
role=focusable text
role=StaticText
role=textbox
role=StaticText
role=focusable
role=focusable text
role=StaticText
role=StaticText
role=StaticText
role=StaticText
role=StaticText
role=StaticText
role=StaticText
role=StaticText
role=StaticText
role=StaticText
role=StaticText
role=StaticText
role=StaticText
role=StaticText
role=StaticText
role=StaticText
role=StaticText
role=StaticText
role=focusable
role=focusable text
role=link
role=focusable textThe user can now direct the screen reader to walk up or down this accessibility tree and describe each node or trigger actions on it. Let’s implement that.
In a multi-process browser (like Chromium), there is a browser process that interfaces with the OS, and render processes for loading web pages. Since screen reader APIs are synchronous, Chromium stores two copies of the accessibility tree, one in the browser and one in each renderer, and only sends changes between the two. An alternative design, used by pre-Chromium Microsoft Edge and some other browsers, connects each render process to accessibility API requests from the operating system. This removes the need to duplicate the accessibility tree, but exposing the operating system to individual tabs can lead to security issues.
Screen Readers
Typically, the screen reader is a separate application from the browser;Screen readers need to help the user with operating system actions such as logging in, starting applications, and switching between them, so it makes sense for the screen reader to be outside any application and to integrate with them through the operating system. the browser communicates with it through OS-specific APIs. To keep this book platform-independent and demonstrate more clearly how screen readers interact with the accessibility tree, our discussion of screen reader support will instead include a minimal screen reader integrated directly into the browser.
But should our built-in screen reader live in the
Browser or each Tab? Modern browsers generally
talk to screen readers from something like the Browser, so
we’ll do that too.And
therefore the browser thread in our multithreaded browser.
So the very first thing we need to do is send the tab’s accessibility
tree over to the browser thread. That’ll be a straightforward extension
of the commit concept introduced in Chapter 12. First,
we’ll add the tree to CommitData:
class CommitData:
def __init__(self, url, scroll, height, display_list,
composited_updates, accessibility_tree):
# ...
self.accessibility_tree = accessibility_treeThen we send it across in run_animation_frame:
class Tab:
def run_animation_frame(self, scroll):
# ...
commit_data = CommitData(
self.accessibility_tree,
# ...
# ...
self.accessibility_tree = None
class Browser:
def commit(self, tab, data):
# ...
self.accessibility_tree = data.accessibility_tree
def clear_data(self):
# ...
self.accessibility_tree = NoneNote that I clear the accessibility_tree field once it’s
sent to the browser thread, much like with the display list, to avoid a
data race.
Now that the tree is in the browser thread, let’s implement the
screen reader. We’ll use two Python libraries to actually read text out
loud: gtts
(which wraps the Google text-to-speech
service) and playsound.
You can install them using pip:
python3 -m pip install gtts
python3 -m pip install playsoundYou can use these libraries to convert text to an audio file, and then play it:
import os
import gtts
import playsound
SPEECH_FILE = "/tmp/speech-fragment.mp3"
def speak_text(text):
print("SPEAK:", text)
tts = gtts.gTTS(text)
tts.save(SPEECH_FILE)
playsound.playsound(SPEECH_FILE)
os.remove(SPEECH_FILE)You may need to adjust the SPEECH_FILE path to fit your
system better. If you have trouble importing any of the libraries, you
may need to consult the gtts or playsound
documentation. If you can’t get these libraries working, just delete
everything in speak_text except the print
statement. You won’t hear things being spoken, but you can at least
debug by watching the console output.
To start with, we’ll want a key binding that turns the screen reader
on and off. While real operating systems typically use more obscure
shortcuts, I’ll use Ctrl-a to turn on the screen reader in
the event loop:
def mainloop(browser):
while True:
if sdl2.SDL_PollEvent(ctypes.byref(event)) != 0:
elif event.type == sdl2.SDL_KEYDOWN:
if ctrl_down:
# ...
elif event.key.keysym.sym == sdl2.SDLK_a:
browser.toggle_accessibility()The toggle_accessibility method tells the
Tab that accessibility is on:
class Browser:
def __init__(self):
# ...
self.needs_accessibility = False
self.accessibility_is_on = False
def set_needs_accessibility(self):
if not self.accessibility_is_on:
return
self.needs_accessibility = True
self.needs_draw = True
def toggle_accessibility(self):
self.lock.acquire(blocking=True)
self.accessibility_is_on = not self.accessibility_is_on
self.set_needs_accessibility()
self.lock.release()When accessibility is on, the Browser should call a new
update_accessibility method, which we’ll implement in a
moment to actually produce sound:
class Browser:
def composite_raster_and_draw(self):
# ...
if self.needs_accessibility:
self.update_accessibility()Now, what should the screen reader say? That’s not really up to the browser—the screen reader is a standalone application, often heavily configured by its user, and can decide on its own. But as a simple debugging aid, let’s write a screen reader that speaks the whole web page once it’s loaded; of course, a real screen reader is much more flexible than that.
To speak the whole document, we need to know how to speak each
AccessibilityNode. This has to be decided back in the
Tab, since the text will include DOM content that is not
accessible to the browser thread. So let’s add a text field
to AccessibilityNode and set it in build
according to the node’s role and surrounding DOM context. For text nodes
it’s just the text, and otherwise it describes the element tag, plus
whether it’s focused.
class AccessibilityNode:
def __init__(self, node):
# ...
self.text = ""
def build(self):
for child_node in self.node.children:
self.build_internal(child_node)
if self.role == "StaticText":
self.text = repr(self.node.text)
elif self.role == "focusable text":
self.text = "Focusable text: " + self.node.text
elif self.role == "focusable":
self.text = "Focusable element"
elif self.role == "textbox":
if "value" in self.node.attributes:
value = self.node.attributes["value"]
elif self.node.tag != "input" and self.node.children and \
isinstance(self.node.children[0], Text):
value = self.node.children[0].text
else:
value = ""
self.text = "Input box: " + value
elif self.role == "button":
self.text = "Button"
elif self.role == "link":
self.text = "Link"
elif self.role == "alert":
self.text = "Alert"
elif self.role == "document":
self.text = "Document"
if self.node.is_focused:
self.text += " is focused"This text construction logic is, of course, pretty naive, but it’s enough to demonstrate the idea. Here is how it works out for the focus example:
role=document text=Document
role=button text=Button
role=focusable text text=Focusable text: This is a button
role=StaticText text='\nThis is an input element: '
role=textbox text=Input box:
role=StaticText text=' and\n'
role=link text=Link
role=focusable text text=Focusable text: this is a link.
role=StaticText text='Not focusable'
role=textbox text=Input box: custom contents
role=StaticText text='custom contents'
role=focusable text=Focusable element
role=focusable text text=Focusable text: Tabbable element
role=StaticText text='\n.\n'
role=StaticText text='\n.\n'
role=StaticText text='\n.\n'
role=StaticText text='\n.\n'
role=StaticText text='\n.\n'
role=StaticText text='\n.\n'
role=StaticText text='\n.\n'
role=StaticText text='\n.\n'
role=StaticText text='\n.\n'
role=StaticText text='\n.\n'
role=StaticText text='\n.\n'
role=StaticText text='\n.\n'
role=StaticText text='\n.\n'
role=StaticText text='\n.\n'
role=StaticText text='\n.\n'
role=StaticText text='\n.\n'
role=StaticText text='\n.\n'
role=StaticText text='\n.\n'
role=focusable text=Focusable element
role=focusable text text=Focusable text: Offscreen
role=link text=Link
role=focusable text text=Focusable text: browser.engineeringThe screen reader can then read the whole document by speaking the
text field on each AccessibilityNode.
class Browser:
def __init__(self):
# ...
self.has_spoken_document = False
def update_accessibility(self):
if not self.accessibility_tree: return
if not self.has_spoken_document:
self.speak_document()
self.has_spoken_document = True
def speak_document(self):
text = "Here are the document contents: "
tree_list = tree_to_list(self.accessibility_tree, [])
for accessibility_node in tree_list:
new_text = accessibility_node.text
if new_text:
text += "\n" + new_text
speak_text(text)Speaking the whole document happens only once. But the user might need feedback as they browse the page. For example, when the user tabs from one element to another, they may want the new element spoken to them so they know what they’re interacting with.
To do that, the browser thread is going to need to know which element
is focused. Let’s add that to the CommitData:
class CommitData:
def __init__(self, url, scroll, height, display_list,
composited_updates, accessibility_tree, focus):
# ...
self.focus = focusMake sure to pass this new argument in
run_animation_frame. Then, in Browser, we’ll
need to extract this field and save it to tab_focus:
class Browser:
def __init__(self):
# ...
self.tab_focus = None
def commit(self, tab, data):
self.lock.acquire(blocking=True)
if tab == self.active_tab:
# ...
self.tab_focus = data.focus
self.lock.release()Now we need to know when focus changes. The simplest way is to store
a last_tab_focus field on Browser with the
last focused element we actually spoke out loud:
class Browser:
def __init__(self):
# ...
self.last_tab_focus = NoneThen, if tab_focus isn’t equal to
last_tab_focus, we know focus has moved and it’s time to
speak the focused node. The change looks like this:
class Browser:
def update_accessibility(self):
# ...
if self.tab_focus and \
self.tab_focus != self.last_tab_focus:
nodes = [node for node in tree_to_list(
self.accessibility_tree, [])
if node.node == self.tab_focus]
if nodes:
self.focus_a11y_node = nodes[0]
self.speak_node(
self.focus_a11y_node, "element focused ")
self.last_tab_focus = self.tab_focusThe speak_node method is similar to
speak_document but it only speaks a single node:
class Browser:
def speak_node(self, node, text):
text += node.text
if text and node.children and \
node.children[0].role == "StaticText":
text += " " + \
node.children[0].text
if text:
speak_text(text)There’s a lot more in a real screen reader: landmarks, navigating text at different granularities, repeating text when requested, and so on. Those features make various uses of the accessibility tree and the roles of the various nodes. But since the focus of this book is on the browser, not the screen reader itself, let’s focus for the rest of this chapter on additional browser features that support accessibility.
The accessibility tree isn’t just for screen readers. For example, some users prefer touch output such as a braille display instead of or in addition to speech output. While the output device is quite different, the accessibility tree would still contain all the information about what content is on the page, whether it can be interacted with, its state, and so on. Moreover, by using the same accessibility tree for all output devices, users who use more than one assistive technology (like a braille display and a screen reader) are sure to receive consistent information.
Accessible Alerts
Scripts do not interact directly with the accessibility tree, much like they do not interact directly with the display list. However, sometimes scripts need to inform the screen reader about why they’re making certain changes to the page to give screen reader users a better experience. The most common example is an alertAlso called a “toast”, because it pops up. telling you that some action you just did failed. A screen reader user needs the alert read to them immediately, no matter where in the document it’s inserted.
The alert role addresses this need. A screen reader will
immediatelyThe alert is
only triggered if the element is added to the document, has the
alert role (or the equivalent aria-live value,
assertive), and is visible in the layout tree (meaning it
doesn’t have display: none), or if its contents change. In
this chapter, I won’t handle all of these cases—I’ll just focus on new
elements with an alert role, not changes to contents or
CSS. read an element with that role, no matter where in
the document the user currently is. Note that there aren’t any HTML
elements whose default role is alert, so this requires the
page author to explicitly set the role attribute.
On to implementation. We first need to make it possible for scripts
to change the role attribute, by adding support for the
setAttribute method. On the JavaScript side, this just
calls a browser API:
Node.prototype.setAttribute = function(attr, value) {
return call_python("setAttribute", this.handle, attr, value);
}The Python side is also quite simple:
class JSContext:
def __init__(self, tab):
# ...
self.interp.export_function("setAttribute",
self.setAttribute)
# ...
def setAttribute(self, handle, attr, value):
elt = self.handle_to_node[handle]
elt.attributes[attr] = value
self.tab.set_needs_render()Now we can implement the alert role. Search the
accessibility tree for elements with that role:
class Browser:
def __init__(self):
# ...
self.active_alerts = []
def update_accessibility(self):
self.active_alerts = [
node for node in tree_to_list(
self.accessibility_tree, [])
if node.role == "alert"
]
# ...Now, we can’t just read out every alert at every frame;
we need to keep track of what elements have already been read, so we
don’t read them twice:
class Browser:
def __init__(self):
# ...
self.spoken_alerts = []
def update_accessibility(self):
# ...
for alert in self.active_alerts:
if alert not in self.spoken_alerts:
self.speak_node(alert, "New alert")
self.spoken_alerts.append(alert)Since spoken_alerts points into the accessibility tree,
we need to update it any time the accessibility tree is rebuilt, to
point into the new tree. Just like with compositing, use the
node pointers in the accessibility tree to match
accessibility nodes between the old and new accessibility tree. Note
that, while this matching could be done inside
commit, we want that method to be as fast as possible since
that method blocks both the browser and main threads. So it’s best to do
it in update_accessibility:
class Browser:
def update_accessibility(self):
# ...
new_spoken_alerts = []
for old_node in self.spoken_alerts:
new_nodes = [
node for node in tree_to_list(
self.accessibility_tree, [])
if node.node == old_node.node
and node.role == "alert"
]
if new_nodes:
new_spoken_alerts.append(new_nodes[0])
self.spoken_alerts = new_spoken_alerts
# ...Note that if a node loses the alert role, we
remove it from spoken_alerts, so that if it later gains the
alert role back, it will be spoken again. This sounds like
an edge case, but having a single element for all of your alerts (and
just changing its class, say, from hidden to visible) is a common
pattern.
You should now be able to load up this example and hear alert text once the button is clicked.
The alert role is an example of what ARIA calls a “live
region”, a region of the page which can change as a result of user
actions. There are other roles (like status or
alertdialog), or live regions can be configured on a more
granular level by setting their “politeness” via the
aria-live attribute (assertive notifications interrupt the
user, but polite ones don’t); what kinds of changes to announce, via
aria-atomic and aria-relevant; and whether the
live region is in a finished or intermediate state, via
aria-busy. In addition, aria-live is all
that’s necessary to create a live region; no role is necessary.
Voice and Visual Interaction
Thanks to our work in this chapter, our rendering pipeline now basically has two different outputs: a display list for visual interaction, and an accessibility tree for screen reader interaction. Many users will use just one or the other. However, it can also be valuable to use both together. For example, a user might have limited vision—able to make out the general items on a web page but unable to read the text. Such a user might use their mouse to navigate the page, but need the items under the mouse to be read to them by a screen reader.
Let’s try that. Implementing this particular feature requires each accessibility node to know about its geometry on the page. The user could then instruct the screen reader to determine which object is under the mouse (via hit testing) and read it aloud.
Getting access to the geometry is tricky, because the accessibility
tree is generated from the HTML tree, while the geometry is accessible
in the layout tree. Let’s add a layout_object pointer to
each Element object to help with that:If it has a layout object,
that is. Some Elements might not, and their
layout_object pointers will stay
None.
class Element:
def __init__(self, tag, attributes, parent):
# ...
self.layout_object = None
class Text:
def __init__(self, text, parent):
# ...
self.layout_object = NoneNow, when we construct a layout object, we can fill in the
layout_object field of its Element. In
BlockLayout, it looks like this:
class BlockLayout:
def __init__(self, node, parent, previous):
# ...
node.layout_object = selfMake sure to add a similar line of code to the constructors for every
other type of layout object. Each AccessibilityNode can
then store the layout object’s bounds:
class AccessibilityNode:
def __init__(self, node):
# ...
self.bounds = self.compute_bounds()
def compute_bounds(self):
if self.node.layout_object:
return [absolute_bounds_for_obj(self.node.layout_object)]
# ...Note that I’m using absolute_bounds_for_obj here,
because the bounds we’re interested in are the absolute coordinates on
the screen, after any transformations like translate.
However, there is another complication: it may be that
node.layout_object is not set; for example, text nodes do
not have one.And that’s
OK, because I chose not to set bounds at all for these nodes, as they
are not focusable. Likewise, nodes with inline layout
generally do not. So we need to walk up the tree to find the parent with
a BlockLayout and union all text nodes in all
LineLayouts that are children of the current
node. And because there can be multiple
LineLayouts and text nodes, the bounds need to be in an
array of skia.Rect objects:
class AccessibilityNode:
def compute_bounds(self):
# ...
if isinstance(self.node, Text):
return []
inline = self.node.parent
bounds = []
while not inline.layout_object: inline = inline.parent
for line in inline.layout_object.children:
line_bounds = skia.Rect.MakeEmpty()
for child in line.children:
if child.node.parent == self.node:
line_bounds.join(skia.Rect.MakeXYWH(
child.x, child.y, child.width, child.height))
bounds.append(line_bounds)
return boundsSo let’s implement the read-on-hover feature. First we need to listen
for mouse move events in the event loop, which in SDL are called
MOUSEMOTION:
def mainloop(browser):
while True:
if sdl2.SDL_PollEvent(ctypes.byref(event)) != 0:
# ...
elif event.type == sdl2.SDL_MOUSEMOTION:
browser.handle_hover(event.motion)The browser should listen to the hovered position, determine if it’s
over an accessibility node, and highlight that node. We don’t want to
disturb the normal rendering cadence, so in handle_hover
save the hover event and then in composite_raster_and_draw
react to the hover:
class Browser:
def __init__(self):
# ...
self.pending_hover = None
def handle_hover(self, event):
if not self.accessibility_is_on or \
not self.accessibility_tree:
return
self.pending_hover = (event.x, event.y - self.chrome.bottom)
self.set_needs_accessibility()When the user hovers over a node, we’ll do two things. First, draw
its bounds on the screen; this helps users see what they’re hovering
over, plus it’s also helpful for debugging. Do that in
paint_draw_list; start by finding the accessibility node
the user is hovering over (note the need to take scroll into
account):
class Browser:
def __init__(self):
# ...
self.hovered_a11y_node = None
def paint_draw_list(self):
# ...
if self.pending_hover:
(x, y) = self.pending_hover
y += self.active_tab_scroll
a11y_node = self.accessibility_tree.hit_test(x, y)By the way, the acronym a11y in a11y_node,
with an “a”, the number 11, and a “y”, is a common shorthand for the
word “accessibility”.The
number “11” refers to the number of letters we’re eliding from
“accessibility”. The hit_test function
recurses over the accessibility tree:
class AccessibilityNode:
def contains_point(self, x, y):
for bound in self.bounds:
if bound.contains(x, y):
return True
return False
def hit_test(self, x, y):
node = None
if self.contains_point(x, y):
node = self
for child in self.children:
res = child.hit_test(x, y)
if res: node = res
return nodeOnce the hit test is done and the browser knows what node the user is
hovering over, save this information on the Browser—so that
the outline persists between frames—and draw an outline:
class Browser:
def paint_draw_list(self):
if self.pending_hover:
# ...
if a11y_node:
self.hovered_a11y_node = a11y_node
self.pending_hover = NoneFinally, we can draw the outline at the end of
paint_draw_list:
class Browser:
def paint_draw_list(self):
# ...
if self.hovered_a11y_node:
for bound in self.hovered_a11y_node.bounds:
self.draw_list.append(DrawOutline(
bound,
"white" if self.dark_mode else "black", 2))Note that the color of the outline depends on whether or not dark mode is on, to ensure high contrast.
So now we have an outline drawn. But we additionally want to speak
what the user is hovering over. To do that we’ll need another flag,
needs_speak_hovered_node, which we’ll set whenever hover
moves from one element to another:
class Browser:
def __init__(self):
# ...
self.needs_speak_hovered_node = False
def paint_draw_list(self):
if self.pending_hover:
if a11y_node:
if not self.hovered_a11y_node or \
a11y_node.node != self.hovered_a11y_node.node:
self.needs_speak_hovered_node = True
# ...The ugly conditional is necessary to handle two cases: either
hovering over an object when nothing was previously hovered, or moving
the mouse from one object onto another. We set the flag in either case,
and then use that flag in update_accessibility:
class Browser:
def update_accessibility(self):
# ...
if self.needs_speak_hovered_node:
self.speak_node(self.hovered_a11y_node, "Hit test ")
self.needs_speak_hovered_node = FalseYou should now be able to turn on accessibility mode and move your mouse over the page to get both visual and auditory feedback about what you’re hovering on!
A common issue is web page authors making custom input elements and not thinking much about their accessibility. The reason for this is that built-in input elements are hard to style, so authors roll their own better-looking ones.
Built-in input elements often involve several separate pieces, like
the path and button in a file input, the check box in a
checkbox element, or the pop-up menu in a
select dropdown, and CSS isn’t (yet) good at styling such
“compound” elements, though pseudo-elements
such as ::backdrop or ::file-selector-button
help. Perhaps the best solution is standards for new fully
styleable input elements.
Summary
This chapter introduces accessibility—features to ensure all users can access and interact with websites—and shows how to solve several of the most common accessibility problems in browsers. The key takeaways are:
- The semantic and declarative nature of HTML makes accessibility features natural extensions.
- Accessibility features often serve multiple needs, and almost everyone benefits from these features in one way or another.
- The accessibility tree is similar to the display list and drives the browser’s interaction with screen readers and other assistive technologies.
- New features like dark mode, keyboard navigation, and outlines need to be customizable by web page authors to be maximally usable.
Click here to try this chapter’s browser.
Outline
The complete set of functions, classes, and methods in our browser should now look something like this:
COOKIE_JAR
class URL:
def __init__(url)
def request(referrer, payload)
def resolve(url)
def origin()
def __str__()
class Text:
def __init__(text, parent)
def __repr__()
class Element:
def __init__(tag, attributes, parent)
def __repr__()
def print_tree(node, indent)
def tree_to_list(tree, list)
def is_focusable(node)
def get_tabindex(node)
class HTMLParser:
SELF_CLOSING_TAGS
HEAD_TAGS
def __init__(body)
def parse()
def get_attributes(text)
def add_text(text)
def add_tag(tag)
def implicit_tags(tag)
def finish()
class CSSParser:
def __init__(s)
def whitespace()
def literal(literal)
def word()
def ignore_until(chars)
def pair(until)
def selector()
def body()
def parse()
def until_chars(chars)
def simple_selector()
def media_query()
class TagSelector:
def __init__(tag)
def matches(node)
class DescendantSelector:
def __init__(ancestor, descendant)
def matches(node)
class PseudoclassSelector:
def __init__(pseudoclass, base)
def matches(node)
FONTS
def get_font(size, weight, style)
def linespace(font)
NAMED_COLORS
def parse_color(color)
def parse_blend_mode(blend_mode_str)
def parse_transition(value)
def parse_transform(transform_str)
def parse_outline(outline_str)
REFRESH_RATE_SEC
class MeasureTime:
def __init__()
def time(name)
def stop(name)
def finish()
class Task:
def __init__(task_code)
def run()
class TaskRunner:
def __init__(tab)
def schedule_task(task)
def set_needs_quit()
def clear_pending_tasks()
def start_thread()
def run()
def handle_quit()
DEFAULT_STYLE_SHEET
INHERITED_PROPERTIES
def style(node, rules, tab)
def cascade_priority(rule)
def diff_styles(old_style, new_style)
class NumericAnimation:
def __init__(old_value, new_value, num_frames)
def animate()
def dpx(css_px, zoom)
WIDTH, HEIGHT
HSTEP, VSTEP
INPUT_WIDTH_PX
BLOCK_ELEMENTS
class DocumentLayout:
def __init__(node)
def layout(zoom)
def should_paint()
def paint()
def paint_effects(cmds)
class BlockLayout:
def __init__(node, parent, previous)
def layout_mode()
def layout()
def recurse(node)
def new_line()
def word(node, word)
def input(node)
def self_rect()
def should_paint()
def paint()
def paint_effects(cmds)
class LineLayout:
def __init__(node, parent, previous)
def layout()
def should_paint()
def paint()
def paint_effects(cmds)
class TextLayout:
def __init__(node, word, parent, previous)
def layout()
def should_paint()
def paint()
def paint_effects(cmds)
def self_rect()
class InputLayout:
def __init__(node, parent, previous)
def layout()
def should_paint()
def paint()
def paint_effects(cmds)
def self_rect()
class PaintCommand:
def __init__(rect)
class DrawText:
def __init__(x1, y1, text, font, color)
def execute(canvas)
class DrawRect:
def __init__(rect, color)
def execute(canvas)
class DrawRRect:
def __init__(rect, radius, color)
def execute(canvas)
class DrawLine:
def __init__(x1, y1, x2, y2, color, thickness)
def execute(canvas)
class DrawOutline:
def __init__(rect, color, thickness)
def execute(canvas)
class DrawCompositedLayer:
def __init__(composited_layer)
def execute(canvas)
class VisualEffect:
def __init__(rect, children, node)
class Blend:
def __init__(opacity, blend_mode, node, children)
def execute(canvas)
def map(rect)
def unmap(rect)
def clone(child)
class Transform:
def __init__(translation, rect, node, children)
def execute(canvas)
def map(rect)
def unmap(rect)
def clone(child)
def local_to_absolute(display_item, rect)
def absolute_bounds_for_obj(obj)
def absolute_to_local(display_item, rect)
def map_translation(rect, translation, reversed)
def paint_tree(layout_object, display_list)
def paint_visual_effects(node, cmds, rect)
def paint_outline(node, cmds, rect, zoom)
def add_parent_pointers(nodes, parent)
class CompositedLayer:
def __init__(skia_context, display_item)
def can_merge(display_item)
def add(display_item)
def composited_bounds()
def absolute_bounds()
def raster()
SPEECH_FILE
class AccessibilityNode:
def __init__(node)
def compute_bounds()
def build()
def build_internal(child_node)
def contains_point(x, y)
def hit_test(x, y)
def speak_text(text)
EVENT_DISPATCH_JS
SETTIMEOUT_JS
XHR_ONLOAD_JS
RUNTIME_JS
class JSContext:
def __init__(tab)
def run(script, code)
def dispatch_event(type, elt)
def dispatch_settimeout(handle)
def dispatch_xhr_onload(out, handle)
def get_handle(elt)
def querySelectorAll(selector_text)
def getAttribute(handle, attr)
def setAttribute(handle, attr, value)
def innerHTML_set(handle, s)
def style_set(handle, s)
def XMLHttpRequest_send(...)
def setTimeout(handle, time)
def requestAnimationFrame()
SCROLL_STEP
class Tab:
def __init__(browser, tab_height)
def load(url, payload)
def run_animation_frame(scroll)
def render()
def allowed_request(url)
def raster(canvas)
def clamp_scroll(scroll)
def set_needs_render()
def set_needs_layout()
def set_needs_paint()
def scrolldown()
def click(x, y)
def go_back()
def submit_form(elt)
def keypress(char)
def focus_element(node)
def activate_element(elt)
def scroll_to(elt)
def enter()
def advance_tab()
def zoom_by(increment)
def reset_zoom()
def set_dark_mode(val)
class Chrome:
def __init__(browser)
def tab_rect(i)
def paint()
def click(x, y)
def keypress(char)
def enter()
def blur()
def focus_addressbar()
class CommitData:
def __init__(...)
class Browser:
def __init__()
def schedule_animation_frame()
def commit(tab, data)
def render()
def composite_raster_and_draw()
def composite()
def get_latest(effect)
def paint_draw_list()
def raster_tab()
def raster_chrome()
def update_accessibility()
def draw()
def speak_node(node, text)
def speak_document()
def set_needs_accessibility()
def set_needs_animation_frame(tab)
def set_needs_raster_and_draw()
def set_needs_raster()
def set_needs_composite()
def set_needs_draw()
def clear_data()
def new_tab(url)
def new_tab_internal(url)
def set_active_tab(tab)
def schedule_load(url, body)
def clamp_scroll(scroll)
def handle_down()
def handle_click(e)
def handle_key(char)
def handle_enter()
def handle_tab()
def handle_hover(event)
def handle_quit()
def toggle_dark_mode()
def increment_zoom(increment)
def reset_zoom()
def focus_content()
def focus_addressbar()
def go_back()
def cycle_tabs()
def toggle_accessibility()
def mainloop(browser)
Exercises
14-1 Focus ring with good contrast. Improve the contrast of the focus indicator by using two outlines, a thicker white one and a thinner black one, to ensure that there is contrast between the focus ring and surrounding content.
14-2 Focus method and events. Add support for the JavaScript
focus()
method and the corresponding focus
and blur
events on DOM elements. Make sure that focus() only has an
effect on focusable elements. Be careful: before reading an element’s
position, make sure that layout is up to date.
14-3 Highlighting elements during read. The method to read
the document works, but it would be nice to also highlight the element
being read as it happens, in a similar way to how we did it for mouse
hover. Implement that. You may want to replace the
speak_document method with an
advance_accessibility method that moves the accessibility
focus by one node and speaks it.
14-4 Width media queries. Zooming in or out causes the width
of the page in CSS pixels to change. That means that sometimes elements
that used to fit comfortably on the page no longer do, and if the page
becomes narrow enough, a different layout may be more appropriate. The
max-width
media query allows the developer to style pages differently based on
available width; it is active only if the width of the page, in CSS
pixels, is less than or equal to a given length.As you’ve seen, many
accessibility features also have non-accessibility uses. For example,
the max-width media query is indeed a way to customize
behavior on zoom, but most developers think of it instead as a way to
customize their website for different devices, like desktops, tablets,
and mobile devices. This is called responsive
design, and can be viewed as a kind of accessibility.
Implement this media query. Test that zooming in or out can trigger this
media query.
After completing the exercise, this example should have green text on narrow screens.
14-5 Mixed inlines. Make the focus ring work correctly on
nested inline elements. For example, in
<a>a <b>bold</b> link</a>, the
focus ring should cover all three words together when the user is
focused on the link, and with multiple rectangles if the inline crosses
lines. However, if the user focuses on a block-level element, such as in
<div tabindex=2>many<br>lines</div>,
there shouldn’t be a focus ring around each line, but instead the block
as a whole.
14-6 Threaded accessibility. The accessibility code currently speaks text on the browser thread, and blocks the browser thread while it speaks. That’s frustrating to use. Solve this by moving the speaking to a new accessibility thread.
14-7 High-contrast mode. Implement high-contrast forced-colors mode. This should replace all colors with one of a small set of high-contrast colors.
14-8 focus-visible. When the user tabs to a
link, we probably want to show a focus indicator, but if the user
clicked on it, most browsers don’t—the user knows where the focused
element is! And a redundant focus indicator could be ugly, or
distracting. Implement a similar heuristic. Clicking on a button should
focus it, but not show a focus indicator. (Test this on the focus example with a button
placed outside a form, so clicking the button doesn’t navigate to a new
page.) But both clicking on and tabbing to an input element should show
a focus ring. Also add support for the :focus-visible
pseudo-class. This applies only if the element is focused
and the browser would have drawn a focus ring (the focus ring
would have been visible, hence the name). This lets custom
widgets change focus ring styling without losing the useful browser
heuristics I mentioned above.
14-9 OS integration. Add the accessible_output
Python library and use it to integrate directly with your OS’s built-in
screen reader. Try out some of the examples in this chapter and compare
the behavior with a real browser.
14-10 The zoom CSS property. Add support for
the zoom
CSS property. This exposes the same functionality as the zoom
accessibility feature to web developers, plus it allows applying it only
to designated HTML subtrees.
Supporting Embedded Content
While our browser can render complex styles, visual effects, and animations, all of those apply basically just to text. Yet web pages contain a variety of non-text embedded content, from images to other web pages. Support for embedded content has powerful implications for browser architecture, performance, security, and open information access, and has played a key role throughout the web’s history.
Images
Images are certainly the most popular kind of embedded content on the
web,So it’s a little
ironic that images only make their appearance in Chapter 15 of this
book! It’s because Tkinter doesn’t support many image formats or proper
sizing and clipping, so I had to wait for the introduction of
Skia. dating back to early
1993.This history is
also the
reason behind a lot of inconsistencies, like src versus
href or img versus
image. They’re included on web pages via the
<img> tag, which looks like this:
<img src="https://browser.engineering/im/hes.jpg">This particular example renders as shown in Figure 1.
Luckily, implementing images isn’t too hard, so let’s just get started. There are four steps to displaying images in our browser:
- Download the image from a URL.
- Decode the image into a buffer in memory.
- Lay the image out on the page.
- Paint the image in the display list.
Let’s start with downloading images from a URL. Naturally, that
happens over HTTP, which we already have a request function
for. However, while all of the content we’ve downloaded so far—HTML,
CSS, and JavaScript—has been textual, images typically use binary data
formats. We’ll need to extend request to support binary
data.
The change is pretty minimal: instead of passing the "r"
flag to makefile, pass a "b" flag indicating
binary mode:
class URL:
def request(self, referrer, payload=None):
# ...
response = s.makefile("b")
# ...Now every time we read from response, we will get
bytes of binary data, not a str with textual
data, so we’ll need to change some HTTP parser code to explicitly
decode the data:
class URL:
def request(self, referrer, payload=None):
# ...
statusline = response.readline().decode("utf8")
# ...
while True:
line = response.readline().decode("utf8")
# ...
# ...Note that I didn’t add a decode call when we
read the body; that’s because the body might actually be binary data,
and we want to return that binary data directly to the browser. Now,
every existing call to request, which wants textual data,
needs to decode the response. For example, in
load, you’ll want to do something like this:
class Tab:
def load(self, url, payload=None):
# ...
headers, body = url.request(self.url, payload)
body = body.decode("utf8", "replace")
# ...By passing replace as the second argument to
decode, I tell Python to replace any invalid characters by
a special � character instead of throwing an exception.
Make sure to make this change everywhere in your browser that you
call request, including inside
XMLHttpRequest_send and in several other places in
load.
When we download images, however, we won’t call
decode; we’ll just use the binary data directly.
class Tab:
def load(self, url, payload=None):
# ...
images = [node
for node in tree_to_list(self.nodes, [])
if isinstance(node, Element)
and node.tag == "img"]
for img in images:
src = img.attributes.get("src", "")
image_url = url.resolve(src)
assert self.allowed_request(image_url), \
"Blocked load of " + str(image_url) + " due to CSP"
header, body = image_url.request(url)Once we’ve downloaded the image, we need to turn it into a Skia
Image object. That requires the following code:
class Tab:
def load(self, url, payload=None):
for img in images:
# ...
img.encoded_data = body
data = skia.Data.MakeWithoutCopy(body)
img.image = skia.Image.MakeFromEncoded(data)There are two tricky steps here: the requested data is turned into a
Skia Data object using the MakeWithoutCopy
method, and then into an image with MakeFromEncoded.
Because we used MakeWithoutCopy, the Data
object just stores a reference to the existing body and
doesn’t own that data. That’s essential, because encoded image data can
be large—maybe megabytes—and copying that data wastes memory and time.
But that also means that the data will become invalid if
body is ever garbage-collected; that’s why I save the
body in an encoded_data field.This is a bit of a hack.
Perhaps a better solution would be to write the response directly into a
Skia Data object using the writable_data API.
That would require some refactoring of the rest of the browser which is
why I’m choosing to avoid it.
These download and decode steps can both fail; if that happens we’ll load a “broken image” placeholder (I used one from Wikipedia):
BROKEN_IMAGE = skia.Image.open("Broken_Image.png")
class Tab:
def load(self, url, payload=None):
for img in images:
try:
# ...
except Exception as e:
print("Image", img.attributes.get("src", ""),
"crashed", e)
img.image = BROKEN_IMAGENow that we’ve downloaded and saved the image, we need to use it.
That just requires calling Skia’s drawImageRect
function:
class DrawImage(PaintCommand):
def __init__(self, image, rect):
super().__init__(rect)
self.image = image
def execute(self, canvas):
canvas.drawImageRect(self.image, self.rect)The internals of drawImageRect, however, are a little
complicated and worth expanding on. Recall that the Image
object is created using a MakeFromEncoded method. That name
reminds us that the image we’ve downloaded isn’t raw image bytes. In
fact, all of the image formats you know—JPG, PNG, and the many more
obscure ones—encode the image data using various sophisticated
algorithms. The image therefore needs to be decoded before it
can be used.And with
much more complicated algorithms than just utf8
conversion.
Skia applies a variety of clever optimizations to decoding, such as directly decoding the image to its eventual size and caching the decoded image as long as possible.There’s also an HTML API to control decoding, so that the web page author can indicate when to pay that cost. That’s because raw image data can be quite large:Decoding costs both a lot of memory and also a lot of time, since just writing out all of those bytes can take a big chunk of our render budget. Optimizing image handling is essential to a performant browser. a pixel is usually stored as 4 bytes, so a 12 megapixel camera (as you can find on phones these days) produces 48 megabytes of raw data for a single image.
Because image decoding can be so expensive, Skia also has several algorithms available for decoding, some of which are faster but result in a worse-looking image.Image formats like JPEG are also lossy, meaning that they don’t faithfully represent all of the information in the original picture, so there’s a time/quality trade-off going on before the file is saved. Typically these formats try to drop “noisy details” that a human is unlikely to notice, just like different resizing algorithms might. For example, there’s the fast, simple “nearest neighbor” algorithm and the slower but higher-quality “bilinear” or even “Lanczos” algorithms.Specifically, these algorithms decide how to decode an image when the image size and the destination size are different and the image therefore needs to be resized. The faster algorithms tend to result in choppier, more jagged images.
To give web page authors control over this performance bottleneck,
there’s an image-rendering
CSS property that indicates which algorithm to use. Let’s add that as an
argument to DrawImage:
def parse_image_rendering(quality):
if quality == "high-quality":
return skia.FilterQuality.kHigh_FilterQuality
elif quality == "crisp-edges":
return skia.FilterQuality.kLow_FilterQuality
else:
return skia.FilterQuality.kMedium_FilterQuality
class DrawImage(PaintCommand):
def __init__(self, image, rect, quality):
# ...
self.quality = parse_image_rendering(quality)
def execute(self, canvas):
paint = skia.Paint(
FilterQuality=self.quality,
)
canvas.drawImageRect(self.image, self.rect, paint)But to talk about where this argument comes from, or more generally to actually see downloaded images in our browser, we first need to add images into our browser’s layout tree.
The HTTP Content-Type header lets the web server tell
the browser whether a document contains text or binary data. The header
contains a value called a MIME
type, such as text/html, text/css, and
text/javascript for HTML, CSS, and JavaScript;
image/png and image/jpeg for PNG and JPEG
images; and many
others for various font, video, audio, and data formats.“MIME” stands for Multipurpose
Internet Mail Extensions, and was originally intended for enumerating
all of the acceptable data formats for email attachments. These days the
loop has basically closed: most email clients are now “webmail” clients,
accessed through your browser, and most emails are now HTML, encoded
with the text/html MIME type, though typically there is
still a plain-text option. Interestingly, we didn’t need
to specify the image format in the code above. That’s because many image
formats start with “magic
bytes”; for example, PNG files always start with byte 137 followed
by the letters “PNG”. These magic bytes are often more reliable than
web-server-provided MIME types, so such “format sniffing” is common
inside browsers and their supporting libraries.
Embedded layout
Based on your experience with prior chapters, you can probably guess
how to add images to our browser’s layout and paint process. We’ll need
to create an ImageLayout class; add a new
image case to BlockLayout’s
recurse method; and generate a DrawImage
command from ImageLayout’s paint method.
As we do this, you might recall doing something very similar for
<input> elements. In fact, text areas and buttons are
very similar to images: both are leaf nodes of the DOM, placed into
lines, affected by text baselines, and painting custom content.Images aren’t quite like
text because a text node is potentially an entire run of text,
split across multiple lines, while an image is an atomic
inline. The other types of embedded content in this chapter are also
atomic inlines. Since they are so similar, let’s try to
reuse the same code for both.
Let’s split the existing InputLayout into a superclass
called EmbedLayout, containing most of the existing code,
and a new subclass with the input-specific code,
InputLayout:In a real browser, input elements are usually called
widgets because they have a lot of special
rendering rules that sometimes involve CSS.
class EmbedLayout:
def __init__(self, node, parent, previous, frame):
# ...
def layout(self):
self.zoom = self.parent.zoom
self.font = font(self.node.style, self.zoom)
if self.previous:
space = self.previous.font.measureText(" ")
self.x = \
self.previous.x + space + self.previous.width
else:
self.x = self.parent.xclass InputLayout(EmbedLayout):
def __init__(self, node, parent, previous):
super().__init__(node, parent, previous)
def layout(self):
super().layout()The idea is that EmbedLayout should provide common
layout code for all kinds of embedded content, while its subclasses like
InputLayout should provide the custom code for that type of
content. Different types of embedded content might have different widths
and heights, so that should happen in each subclass, as should the
definition of paint:
class InputLayout(EmbedLayout):
def layout(self):
# ...
self.width = dpx(INPUT_WIDTH_PX, self.zoom)
self.height = linespace(self.font)
self.ascent = -self.height
self.descent = 0
def paint(self):
# ...ImageLayout can now inherit most of its behavior from
EmbedLayout, but take its width and height from the image
itself:
class ImageLayout(EmbedLayout):
def __init__(self, node, parent, previous):
super().__init__(node, parent, previous)
def layout(self):
super().layout()
self.width = dpx(self.node.image.width(), self.zoom)
self.img_height = dpx(self.node.image.height(), self.zoom)
self.height = max(self.img_height, linespace(self.font))
self.ascent = -self.height
self.descent = 0Notice that the height of the image depends on the font size of the
element. Though odd, this is how image layout actually works: a line
with a single, very small, image on it will still be tall enough to
contain text.In fact, a
page with only a single image and no text or CSS at all still has its
layout affected by a font—the default font. This is a common source of
confusion for web developers. In a real browser, it can be avoided by
forcing an image into a block or other layout mode via the
display CSS property. The underlying reason
for this is because, as a type of inline layout, images are designed to
flow along with related text, which means the bottom of the image should
line up with the text
baseline. That’s also why we save img_height in the
code above.
Also, in the code above I introduced new ascent and
descent fields on EmbedLayout subclasses. This
is meant to be used in LineLayout layout in place of the
existing layout code for ascent and descent. It also requires
introducing those fields on TextLayout:
class LineLayout:
def layout(self):
# ...
max_ascent = max([-child.ascent
for child in self.children])
baseline = self.y + max_ascent
for child in self.children:
if isinstance(child, TextLayout):
child.y = baseline + child.ascent / 1.25
else:
child.y = baseline + child.ascent
max_descent = max([child.descent
for child in self.children])
self.height = max_ascent + max_descent
class TextLayout:
def layout(self):
# ...
self.ascent = self.font.getMetrics().fAscent * 1.25
self.descent = self.font.getMetrics().fDescent * 1.25Painting an image is also straightforward:
class ImageLayout(EmbedLayout):
def paint(self):
cmds = []
rect = skia.Rect.MakeLTRB(
self.x, self.y + self.height - self.img_height,
self.x + self.width, self.y + self.height)
quality = self.node.style.get("image-rendering", "auto")
cmds.append(DrawImage(self.node.image, rect, quality))
return cmdsNow we need to create ImageLayouts in
BlockLayout. Input elements are created in an
input method, so we create a largely similar
image method. But input is itself largely a
duplicate of word, so this would be a lot of duplication.
The only part of these methods that differs is the part that computes
the width of the new inline child; most of the rest of the logic is
shared.
Let’s instead refactor the shared code into new methods which
text, image, and input can call.
First, all of these methods need a font to determine how much spaceYes, this is how real browsers
do it too. to leave after the inline; let’s make a
function for that:
def font(style, zoom):
weight = style["font-weight"]
variant = style["font-style"]
size = float(style["font-size"][:-2]) * 0.75
font_size = dpx(size, zoom)
return get_font(font_size, weight, variant)There’s also shared code that handles line layout; let’s put that
into a new add_inline_child method. We’ll need to pass in
the HTML node, the element, and the layout class to instantiate (plus a
word parameter that’s just for
TextLayouts):
class BlockLayout:
def add_inline_child(self, node, w, child_class, word=None):
if self.cursor_x + w > self.x + self.width:
self.new_line()
line = self.children[-1]
previous_word = line.children[-1] if line.children else None
if word:
child = child_class(node, word, line, previous_word)
else:
child = child_class(node, line, previous_word)
line.children.append(child)
self.cursor_x += w + \
font(node.style, self.zoom).measureText(" ")We can redefine word and input in a
satisfying way now:
class BlockLayout:
def word(self, node, word):
node_font = font(node.style, self.zoom)
w = node_font.measureText(word)
self.add_inline_child(node, w, TextLayout, word)
def input(self, node):
w = dpx(INPUT_WIDTH_PX, self.zoom)
self.add_inline_child(node, w, InputLayout) Adding image is easy:
class BlockLayout:
def recurse(self, node):
# ...
elif node.tag == "img":
self.image(node)
def image(self, node):
w = dpx(node.image.width(), self.zoom)
self.add_inline_child(node, w, ImageLayout)And of course, images also get the same inline layout mode as input elements:
class BlockLayout:
def layout_mode(self):
# ...
elif self.node.tag in ["input", "img"]:
return "inline"
def should_paint(self):
return isinstance(self.node, Text) or \
(self.node.tag not in \
["input", "button", "img"])Now that we have ImageLayout nodes in our layout tree,
we’ll be painting DrawImage commands to our display list
and showing the image on the screen!
But what about our second output modality, screen readers? That’s
what the alt attribute is for. It works like this:
<img src="https://browser.engineering/im/hes.jpg"
alt="An operator using the Hypertext Editing System in 1969">Implementing this in AccessibilityNode is very easy:
class AccessibilityNode:
def __init__(self, node):
else:
# ...
elif node.tag == "img":
self.role = "image"
def build(self):
# ...
elif self.role == "image":
if "alt" in self.node.attributes:
self.text = "Image: " + self.node.attributes["alt"]
else:
self.text = "Image"As we continue to implement new features for the web platform, we’ll always need to think about how to make features work in multiple modalities.
Videos are similar to images, but demand more bandwidth, time, and
memory; they also have complications like digital
rights management (DRM). The <video> tag
addresses some of that, with built-in support for advanced video codecs,In video, it’s called a
“codec”, but in images it’s called a “format”–go figure.
DRM, and hardware acceleration. It also provides media controls like a
play/pause button and volume controls.
Modifying Image Sizes
So far, an image’s size on the screen is its size in pixels, possibly
zoomed.Note that zoom
already may cause an image to render at a size different than its
regular size, even before introducing the features in this
section. But in fact it’s generally valuable for authors
to control the size of embedded content. There are a number of ways to
do this,For example, the
width and height CSS properties (not to be
confused with the width and height
attributes!), which we met in Exercise 6-2. but one way is
the special width and height attributes.Images have these mostly for
historical reasons: they were invented before CSS
existed.
If both those attributes are present, things are pretty
easy: we just read from them when laying out the element, both in
image:
class BlockLayout:
def image(self, node):
if "width" in node.attributes:
w = dpx(int(node.attributes["width"]), self.zoom)
else:
w = dpx(node.image.width(), self.zoom)
# ...And in ImageLayout:
class ImageLayout(EmbedLayout):
def layout(self):
# ...
width_attr = self.node.attributes.get("width")
height_attr = self.node.attributes.get("height")
image_width = self.node.image.width()
image_height = self.node.image.height()
if width_attr and height_attr:
self.width = dpx(int(width_attr), self.zoom)
self.img_height = dpx(int(height_attr), self.zoom)
else:
self.width = dpx(image_width, self.zoom)
self.img_height = dpx(image_height, self.zoom)
# ...This works great, but it has a major flaw: if the ratio of
width to height isn’t the same as the
underlying image size, the image ends up stretched in weird ways.
Sometimes that’s on purpose but usually it’s a mistake. So browsers let
authors specify just one of width and
height, and compute the other using the image’s aspect
ratio.Despite it
being easy to implement, this feature of real web browsers only reached
all of them in 2021. Before that, developers resorted to things like the
padding-top
hack. Sometimes design oversights take a long time to
fix.
Implementing this aspect ratio tweak is easy:
class ImageLayout(EmbedLayout):
# ...
def layout(self):
# ...
aspect_ratio = image_width / image_height
if width_attr and height_attr:
# ...
elif width_attr:
self.width = dpx(int(width_attr), self.zoom)
self.img_height = self.width / aspect_ratio
elif height_attr:
self.img_height = dpx(int(height_attr), self.zoom)
self.width = self.img_height * aspect_ratio
else:
# ...
# ...Your browser should now be able to render the following example page correctly, as shown in Figure 2. When it’s scrolled down a bit you should see what’s shown in Figure 3 (notice the different aspect ratios). And scrolling to the end will show what appears in Figure 4, including the “broken image” icon.
Original size: <img src="/im/hes.jpg" alt="A computer operator ...">
<br>
Smaller: <img width=50 height=50 src="/im/hes.jpg">
<br>
Different aspect ratio:
<img width=50 height=100 src="/im/hes.jpg">
<br>
Larger:
<img width=1000 height=1000 src="/im/hes.jpg">
<br>
Larger with only width:
<img width=1000 src="/im/hes.jpg">
<br>
Smaller with only height:
<img height=50 src="/im/hes.jpg">
Broken image:
<img src="non-existent-image">
<script src="example15-img.js"></script>
<link rel="stylesheet" href="example15-img.css">


Our browser computes an aspect ratio from the loaded image
dimensions, but that’s not available before an image loads, which is a
problem in real browsers where images are loaded asynchronously and
where the image size can respond
to layout parameters. Not knowing the aspect ratio can cause the layout to shift when the image loads,
which can be frustrating for users. The aspect-ratio
property is one way web pages can address this issue.
Interactive Widgets
So far, our browser has two kinds of embedded content: images and
input elements. While both are important and widely used,As are variations like the <canvas>
element. Instead of loading an image from the network, JavaScript can
draw on a <canvas> element via an API. Unlike images,
<canvas> elements don’t have intrinsic sizes, but
besides that they are pretty similar in terms of layout.
they don’t offer quite the customizabilityThere’s actually ongoing work aimed at allowing web pages
to customize what input elements look like, and it builds on earlier
work supporting custom
elements and forms.
This problem is quite challenging, interacting with platform
independence, accessibility, scripting, and styling. and
flexibility that complex embedded content use cases like maps, PDFs,
ads, and social media controls require. So in modern browsers, these are
handled by embedding one web page within another using the
<iframe> element.Or via the embed and object tags,
for cases like PDFs. I won’t discuss those here.
Semantically, an <iframe> is similar to a
Tab inside a Tab—it has its own HTML document,
CSS, and scripts. And layout-wise, an <iframe> is a
lot like the <img> tag, with width and
height attributes. So implementing basic iframes just
requires handling these three significant differences:
Iframes have no browser chrome. So any page navigation has to happen from within the page (either through an
<a>element or a script), or as a side effect of navigation on the web page that contains the<iframe>element. Clicking on a link in an iframe also navigates the iframe, not the top-level page.Iframes can share a rendering event loop.For example, if an iframe has the same origin as the web page that embeds it, then scripts in the iframe can synchronously access the parent DOM. That means that it’d be basically impossible to put that iframe in a different thread or CPU process, and in practice it ends up in the same rendering event loop. In real browsers, cross-origin iframes are often “site isolated”, meaning that the iframe has its own CPU process for security reasons. In our browser we’ll just make all iframes (even nested ones—yes, iframes can include iframes!) use the same rendering event loop.
Cross-origin iframes are script-isolated from the containing page. That means that a script in the iframe can’t access the containing page’s variables or DOM, nor can scripts in the containing page access the iframe’s variables or DOM. Same-origin iframes, however, can.
We’ll get to these differences, but for now, let’s start working on
the idea of a Tab within a Tab. What we’re
going to do is split the Tab class into two pieces:
Tab will own the event loop and script environments,
Frames will do the rest.
It’s good to plan out complicated refactors like this in some detail.
A Tab will:
- interface between the
Browserand theFrames to handle events; - proxy communication between frames;
- kick off animation frames and rendering;
- paint and own the display list for all frames in the tab;
- construct and own the accessibility tree;
- commit to the browser thread.
And the new Frame class will:
- own the DOM, layout trees, and scroll offset for its HTML document;
- run style and layout on the its DOM and layout tree;
- implement loading and event handling (focus, hit testing, etc) for its HTML document.
Create these two classes and split the methods between them accordingly.
Naturally, every Frame will need a reference to its
Tab; it’s also convenient to have access to the parent
frame and the corresponding <iframe> element:
class Frame:
def __init__(self, tab, parent_frame, frame_element):
self.tab = tab
self.parent_frame = parent_frame
self.frame_element = frame_element
# ...Now let’s look at how Frames are created. The first
place is in Tab’s load method, which needs to
create the root frame:
class Tab:
def __init__(self, browser, tab_height):
# ...
self.root_frame = None
def load(self, url, payload=None):
self.history.append(url)
# ...
self.root_frame = Frame(self, None, None)
self.root_frame.load(url, payload)Note that the guts of load now live in the
Frame, because the Frame owns the HTML tree.
The Frame can also construct child
Frames, for <iframe> elements:
class Frame:
def load(self, url, payload=None):
# ...
iframes = [node
for node in tree_to_list(self.nodes, [])
if isinstance(node, Element)
and node.tag == "iframe"
and "src" in node.attributes]
for iframe in iframes:
document_url = url.resolve(iframe.attributes["src"])
if not self.allowed_request(document_url):
print("Blocked iframe", document_url, "due to CSP")
iframe.frame = None
continue
iframe.frame = Frame(self.tab, self, iframe)
# ...Since iframes can have subresources (and subframes!) and therefore be slow to load, we should load them asynchronously, just like scripts:
class Frame:
def load(self, url, payload=None):
for iframe in iframes:
# ...
task = Task(iframe.frame.load, document_url)
self.tab.task_runner.schedule_task(task)And since they are asynchronous, we need to record whether they have loaded yet, to avoid trying to render an unloaded iframe:
class Frame:
def __init__(self, tab, parent_frame, frame_element):
# ...
self.loaded = False
def load(self, url, payload=None):
self.loaded = False
...
self.loaded = TrueSo we’ve now got a tree of frames inside a single tab. But because we will sometimes need direct access to an arbitrary frame, let’s also give each frame an identifier, which I’m calling a window ID:
class Tab:
def __init__(self, browser, tab_height):
# ...
self.window_id_to_frame = {}class Frame:
def __init__(self, tab, parent_frame, frame_element):
# ...
self.window_id = len(self.tab.window_id_to_frame)
self.tab.window_id_to_frame[self.window_id] = selfNow that we have frames being created, let’s work on rendering those frames to the screen.
For quite a while, browsers also supported embedded content in the
form of plugins like Java applets or Flash. But there
were performance,
security, and accessibility problems because plugins typically
implemented their own rendering, sandboxing, and UI primitives. Over
time, new APIs have closed the gap between web-native content and
“non-web” plugins,For
example, in the last decade the <canvas> element has
gained support for hardware-accelerated 3D content, while WebAssembly can run
at near-native speed. and plugins have therefore become
less common. Personally, I think that’s a good thing: the web is about
making information accessible to everyone, and that requires open
standards, including for embedded content.
Iframe Rendering
Rendering is split between the Tab and its
Frames: the Frame does style and layout, while
the Tab does accessibility and paint.Why split the rendering
pipeline this way? Because the accessibility tree and display list are
ultimately transferred from the main thread to the browser thread, so
they get combined anyway. DOM, style, and layout trees, meanwhile, don’t
get passed between threads so don’t intermingle. We’ll
need to implement that split, and also add code to trigger each
Frame’s rendering from the Tab.
Let’s start with splitting the rendering pipeline. The main methods
here are still the Tab’s run_animation_frame
and render, which iterate over all loaded iframes:
class Tab:
def run_animation_frame(self, scroll):
# ...
for (window_id, frame) in self.window_id_to_frame.items():
if not frame.loaded:
continue
frame.js.dispatch_RAF(frame.window_id)
# ...
def render(self):
self.browser.measure.time('render')
for id, frame in self.window_id_to_frame.items():
if frame.loaded:
frame.render()
if self.needs_accessibility:
# ...
if self.needs_paint:
# ...
# ...In this code I used a new dispatch_RAF method:
class JSContext:
def dispatch_RAF(self):
self.interp.evaljs("window.__runRAFHandlers()")Note that the needs_accessibility,
pending_hover, and other flags are all still on the
Tab, because they relate to the Tab’s part of
rendering. Meanwhile, style and layout happen in the Frame
now:
class Frame:
def __init__(self, tab, parent_frame, frame_element):
# ...
self.needs_style = False
self.needs_layout = False
def set_needs_render(self):
self.needs_style = True
self.tab.set_needs_accessibility()
self.tab.set_needs_paint()
def set_needs_layout(self):
self.needs_layout = True
self.tab.set_needs_accessibility()
self.tab.set_needs_paint()
def render(self):
if self.needs_style:
# ...
if self.needs_layout:
# ...Again, these dirty bits move to the Frame because they
relate to the frame’s part of rendering.
Unlike images, iframes have no intrinsic
size: the layout size of an <iframe> element
does not depend on its content.There was an attempt to provide iframes with intrinsic
sizing in the past, but it was removed from the
HTML specification when no browser implemented it. This may change in the
future, as there are good use cases for a “seamless” iframe whose
layout is coordinated with its parent frame. That means
there’s a crucial extra bit of communication that needs to happen
between the parent and child frames: how wide and tall should a frame be
laid out? This is defined by the attributes and CSS of the
iframe element:
class BlockLayout:
def layout_mode(self):
# ...
elif self.node.tag in ["input", "img", "iframe"]:
return "inline"
def recurse(self, node):
else:
# ...
elif node.tag == "iframe" and \
"src" in node.attributes:
self.iframe(node)
# ...
def iframe(self, node):
if "width" in self.node.attributes:
w = dpx(int(self.node.attributes["width"]),
self.zoom)
else:
w = IFRAME_WIDTH_PX + dpx(2, self.zoom)
self.add_inline_child(node, w, IframeLayout, self.frame)
def should_paint(self):
return isinstance(self.node, Text) or \
(self.node.tag not in \
["input", "button", "img", "iframe"])The IframeLayout layout code is similar, inheriting from
EmbedLayout, but without the aspect ratio code:
class IframeLayout(EmbedLayout):
def __init__(self, node, parent, previous, parent_frame):
super().__init__(node, parent, previous, parent_frame)
def layout(self):
# ...
if width_attr:
self.width = dpx(int(width_attr) + 2, self.zoom)
else:
self.width = dpx(IFRAME_WIDTH_PX + 2, self.zoom)
if height_attr:
self.height = dpx(int(height_attr) + 2, self.zoom)
else:
self.height = dpx(IFRAME_HEIGHT_PX + 2, self.zoom)
self.ascent = -self.height
self.descent = 0The extra two pixels provide room for a border, one pixel on each side, later on.
Note that if its width isn’t specified, an iframe uses a
default
value, chosen a long time ago based on the average screen sizes of
the day:
IFRAME_WIDTH_PX = 300
IFRAME_HEIGHT_PX = 150Now, this code is run in the parent frame. We need to get this width and height over to the child frame, so that it can know its width and height during layout. So let’s add a field for that in the child frame:
class Frame:
def __init__(self, tab, parent_frame, frame_element):
# ...
self.frame_width = 0
self.frame_height = 0And we can set those when the parent frame is laid out:
class IframeLayout(EmbedLayout):
def layout(self):
# ...
if self.node.frame and self.node.frame.loaded:
self.node.frame.frame_height = \
self.height - dpx(2, self.zoom)
self.node.frame.frame_width = \
self.width - dpx(2, self.zoom)The conditional is only there to handle the (unusual) case of an iframe blocked by CSP.
You might be surprised that I’m not calling
set_needs_render on the child frame here. That’s a
shortcut: the width and height attributes can
only change through setAttribute, while zoom
can only change in zoom_by and reset_zoom. All
of those handlers, however, need to invalidate all frames, via a new
method to do so, instead of the old set_needs_render on
Tab which is now gone. Update all of these call sites to
call it (plus changes to dark mode, which affects style for all
frames):
class Tab:
def set_needs_render_all_frames(self):
for id, frame in self.window_id_to_frame.items():
frame.set_needs_render()The root frame, of course, fills the whole window:
class Tab:
def load(self, url, payload=None):
# ...
self.root_frame.frame_width = WIDTH
self.root_frame.frame_height = self.tab_heightNote that there’s a tricky dependency order here. We need the parent frame to do layout before the child frame, so the child frame has an up-to-date width and height when it does layout. That order is guaranteed for us by Python (3.7 or later), where dictionaries are sorted by insertion order, but if you’re following along in another language, you might need to sort frames before rendering them.
We’ve now got frames styled and laid out, and just need to paint
them. Unlike layout and style, all the frames in a tab produce a single,
unified display list, so we’re going to need to work recursively. We’ll
have the Tab paint the root Frame:
class Tab:
def render(self):
if self.needs_paint:
self.display_list = []
paint_tree(self.root_frame.document, self.display_list)
self.needs_paint = FalseMost of the layout tree’s paint methods don’t need to
change, but to paint an IframeLayout, we’ll need to paint
the child frame in paint_tree:
def paint_tree(layout_object, display_list):
cmds = layout_object.paint()
if isinstance(layout_object, IframeLayout) and \
layout_object.node.frame and \
layout_object.node.frame.loaded:
paint_tree(layout_object.node.frame.document, cmds)
else:
for child in layout_object.children:
paint_tree(child, cmds)
cmds = layout_object.paint_effects(cmds)
display_list.extend(cmds)Before putting those commands in the display list, though, we need to add a border, clip iframe content that exceeds the visual area available, and transform the coordinate system:
class IframeLayout(EmbedLayout):
def paint_effects(self, cmds):
# ...
diff = dpx(1, self.zoom)
offset = (self.x + diff, self.y + diff)
cmds = [Transform(offset, rect, self.node, cmds)]
inner_rect = skia.Rect.MakeLTRB(
self.x + diff, self.y + diff,
self.x + self.width - diff, self.y + self.height - diff)
internal_cmds = cmds
internal_cmds.append(Blend(1.0, "destination-in", None, [
DrawRRect(inner_rect, 0, "white")]))
cmds = [Blend(1.0, "source-over", self.node, internal_cmds)]
paint_outline(self.node, cmds, rect, self.zoom)
cmds = paint_visual_effects(self.node, cmds, rect)
return cmdsThe Transform shifts over the child frame contents so
that its top-left corner starts in the right place,This book doesn’t go into the
details of the CSS
box model, but the width and height
attributes of an iframe refer to the content box, and adding
the border width yields the border box. As a result, what we’ve
implemented is somewhat incorrect. ClipRRect
clips the contents of the iframe to the inside of the border, and
paint_outline adds the border. To trigger the outline, just
add this to the browser CSS file:
iframe { outline: 1px solid black; }Finally, let’s also add iframes to the accessibility tree. Like the
display list, the accessibility tree is global across all frames. We can
have iframes create iframe nodes:
class AccessibilityNode:
def __init__(self, node):
else:
elif node.tag == "iframe":
self.role = "iframe"To build such a node, we just recurse into the
frame:
class AccessibilityNode:
def build_internal(self, child_node):
if isinstance(child_node, Element) \
and child_node.tag == "iframe" and child_node.frame \
and child_node.frame.loaded:
child = AccessibilityNode(child_node.frame.nodes)
# ... So we’ve now got iframes showing up on the screen. The next step is interacting with them.
Before iframes, there were the <frameset>
and <frame> elements. A
<frameset> replaces the <body> tag
and splits the browser window among multiple
<frame>s; this was an early alternative layout system
to the one presented in this book. Frames had confusing navigation and
accessibility, and lacked the flexibility of
<iframe>s, so aren’t used much these days. The name
“iframe” references these elements in a way—it’s short for “inline
frame”.
Iframe Input Events
Now that we’ve got iframes rendering to the screen, let’s close the loop with user input. We want to add support for clicking on things inside an iframe, and also for tabbing around or scrolling inside one.
At a high level, event handlers just delegate to the root frame:
class Tab:
def click(self, x, y):
self.render()
self.root_frame.click(x, y)When an iframe is clicked, it passes the click through to the child frame, and immediately returns afterward, because iframes capture click events. Note how I subtracted the absolute x and y offsets of the iframe from the (absolute) x and y click positions when recursing into the child frame:
class Frame:
def click(self, x, y):
# ...
while elt:
# ...
elif elt.tag == "iframe":
abs_bounds = \
absolute_bounds_for_obj(elt.layout_object)
border = dpx(1, elt.layout_object.zoom)
new_x = x - abs_bounds.left() - border
new_y = y - abs_bounds.top() - border
elt.frame.click(new_x, new_y)
returnNow, clicking on <a> elements will work, which
means that you can now cause a frame to navigate to a new page. And
because a Frame has all the loading and navigation logic
that Tab used to have, it just works without any more
changes!
You should now be able to load an iframe example. It should look like the image shown in Figure 5.

Repeatedly clicking on the link on that page will add another recursive iframe. After clicking twice it should look like Figure 6.

Let’s get the other interactions working as well, starting with
focusing an element. You can focus on only one element per tab,
so we will still store the focus on the Tab,
but we’ll need to store the iframe the focused element is on too:
class Tab:
def __init__(self, browser, tab_height):
self.focus = None
self.focused_frame = NoneWhen an iframe tries to focus on an element, it sets itself as the focused iframe, but before it does that, it needs to un-focus the previously focused iframe:
class Frame:
def focus_element(self, node):
# ...
if self.tab.focused_frame and self.tab.focused_frame != self:
self.tab.focused_frame.set_needs_render()
self.tab.focused_frame = self
# ...We need to re-render the previously focused iframe so that it stops drawing the focus outline.
Another interaction is pressing Tab to cycle through
focusable elements in the current frame. Let’s move the
advance_tab logic into Frame and just dispatch
to it from the Tab:This is not a particularly user-friendly implementation of
tab cycling when multiple frames are involved; see Exercise 15-9 for a
better version.
class Tab:
def advance_tab(self):
frame = self.focused_frame or self.root_frame
frame.advance_tab()Do the same thing for keypress and enter,
which are used for interacting with text inputs and buttons.
Another big interaction we need to support is scrolling. We’ll store
the scroll offset in each Frame:
class Frame:
def __init__(self, tab, parent_frame, frame_element):
self.scroll = 0Now, as you might recall from Chapter
13, scrolling happens both inside Browser and inside
Tab, to improve responsiveness. That was already quite
complicated, so to keep things simple we’ll only support threaded
scrolling on the root frame. We’ll need a new commit parameter so the
browser thread knows whether the root frame is focused:
class CommitData:
def __init__(self, url, scroll, root_frame_focused, height,
display_list, composited_updates, accessibility_tree, focus):
# ...
self.root_frame_focused = root_frame_focused
class Tab:
def run_animation_frame(self, scroll):
root_frame_focused = not self.focused_frame or \
self.focused_frame == self.root_frame
# ...
commit_data = CommitData(
# ...
root_frame_focused,
# ...
)
# ...The Browser thread will save this information in
commit and use it when the user requests a scroll:
class Browser:
def commit(self, tab, data):
# ...
self.root_frame_focused = data.root_frame_focused
def handle_down(self):
self.lock.acquire(blocking=True)
if self.root_frame_focused:
# ...
task = Task(self.active_tab.scrolldown)
self.active_tab.task_runner.schedule_task(task)
self.lock.release()When a tab is asked to scroll, it then scrolls the focused frame:
class Tab:
def scrolldown(self):
frame = self.focused_frame or self.root_frame
frame.scrolldown()
self.set_needs_paint()If a frame other than the root frame is scrolled, we’ll just set
needs_composite so the browser has to re-raster from
scratch:
class Tab:
def run_animation_frame(self, scroll):
# ...
for (window_id, frame) in self.window_id_to_frame.items():
if frame == self.root_frame: continue
if frame.scroll_changed_in_frame:
needs_composite = True
frame.scroll_changed_in_frame = False
# ...There’s one more subtlety to scrolling. After we scroll, we want to
clamp the scroll position, to prevent the user scrolling past
the last thing on the page. Right now clamp_scroll uses the
window height to determine the maximum scroll amount; let’s move that
function inside Frame so it can use the current frame’s
height:
class Frame:
def scrolldown(self):
self.scroll = self.clamp_scroll(self.scroll + SCROLL_STEP)
def clamp_scroll(self, scroll):
height = math.ceil(self.document.height + 2*VSTEP)
maxscroll = height - self.frame_height
return max(0, min(scroll, maxscroll))Make sure to use the clamp_scroll method everywhere. For
example, in scroll_to:
class Frame:
def scroll_to(self, elt):
# ...
self.scroll = self.clamp_scroll(new_scroll)There are also a number of accessibility hover interactions that we need to support. This is hard, because the accessibility interactions happen in the browser thread, which has limited information:
The accessibility tree doesn’t know where the iframe is, so it doesn’t know how to transform the hover coordinates when it goes into a frame.
It also doesn’t know how big the iframe is, so it doesn’t ignore things that are clipped outside an iframe’s bounds.Observe that frame-based
clickalready works correctly, because we don’t recurse into iframes unless the click intersects theiframeelement’s bounds. And before iframes, we didn’t need to do that, because the SDL window system already did it for us.It also doesn’t know how far a frame has scrolled, so it doesn’t adjust for scrolled frames.
We’ll make a subclass of AccessibilityNode to store this
information:
class FrameAccessibilityNode(AccessibilityNode):
passWe’ll create one of those below each iframe node:
class AccessibilityNode:
def build_internal(self, child_node):
if isinstance(child_node, Element) \
and child_node.tag == "iframe" and child_node.frame \
and child_node.frame.loaded:
child = FrameAccessibilityNode(child_node)Hit testing FrameAccessibilityNodes will use the frame’s
bounds to ignore clicks outside the frame bounds, and adjust clicks
against the frame’s coordinates (note how we subtract off the zoomed
border of the frame):
class FrameAccessibilityNode(AccessibilityNode):
def __init__(self, node, parent=None):
super().__init__(node, parent)
self.scroll = self.node.frame.scroll
self.zoom = self.node.layout_object.zoom
def hit_test(self, x, y):
bounds = self.bounds[0]
if not bounds.contains(x, y): return
new_x = x - bounds.left() - dpx(1, self.zoom)
new_y = y - bounds.top() - dpx(1, self.zoom) + self.scroll
node = self
for child in self.children:
res = child.hit_test(new_x, new_y)
if res: node = res
return nodeHit testing should now work, but the bounds of the hovered node when
drawn to the screen are still wrong. For that, we’ll need a method that
returns the absolute screen rect of an AccessibilityNode.
And that method in turn needs parent pointers to walk up the
accessibility tree, so let’s add that first:
class AccessibilityNode:
def __init__(self, node, parent=None):
# ...
self.parent = parent
def build_internal(self, child_node):
if isinstance(child_node, Element) \
and child_node.tag == "iframe" and child_node.frame \
and child_node.frame.loaded:
child = FrameAccessibilityNode(child_node, self)
else:
child = AccessibilityNode(child_node, self)
# ...And now we’re ready for the method to map to absolute coordinates.
This loops over all bounds Rects and maps them up to the
root. Note that there is a special case for
FrameAccessibilityNode, because its self-bounds are in the
coordinate space of the frame containing the iframe.
class AccessibilityNode:
def absolute_bounds(self):
abs_bounds = []
for bound in self.bounds:
abs_bound = bound.makeOffset(0.0, 0.0)
if isinstance(self, FrameAccessibilityNode):
obj = self.parent
else:
obj = self
while obj:
obj.map_to_parent(abs_bound)
obj = obj.parent
abs_bounds.append(abs_bound)
return abs_boundsThis method calls map_to_parent to adjust the bounds.
For most accessibility nodes we don’t need to do anything, because they
are in the same coordinate space as their parent:
class AccessibilityNode:
def map_to_parent(self, rect):
passA FrameAccessibilityNode, on the other hand, adjusts for
the iframe’s postion and clipping:
class FrameAccessibilityNode(AccessibilityNode):
def map_to_parent(self, rect):
bounds = self.bounds[0]
rect.offset(bounds.left(), bounds.top() - self.scroll)
rect.intersect(bounds)You should now be able to hover on nodes and have them read out by our accessibility subsystem.
Alright, we’ve now got all of our browser’s forms of user interaction properly recursing through the frame tree. It’s time to add more capabilities to iframes.
Our browser can only scroll the root frame on the browser thread, but real browsers have put in a lot of work to make scrolling happen on the browser thread as much as possible, including for iframes. The hard part is handling the many obscure combinations of containing blocks, stacking orders, scroll bars, transforms, and iframes: with scrolling on the browser thread, all of these complex interactions have to be communicated from the main thread to the browser thread, and correctly interpreted by both sides.
Iframe Scripts
We’ve now got users interacting with iframes—but what about scripts
interacting with them? Of course, each frame can already run
scripts—but right now, each Frame has its own
JSContext, so these scripts can’t really interact with each
other. Instead same-origin iframes should run in the same
JavaScript context and should be able to access each other’s globals,
call each other’s functions, and modify each other’s DOMs, as shown in
Figure 7. Let’s implement that.
For two frames’ JavaScript environments to interact, we’ll need to
put them in the same JSContext. So, instead of each
Frame having a JSContext of its own, we’ll
want to store JSContexts on the Tab, in a
dictionary that maps origins to JavaScript contexts:
class Tab:
def __init__(self, browser, tab_height):
# ...
self.origin_to_js = {}
def get_js(self, url):
origin = url.origin()
if origin not in self.origin_to_js:
self.origin_to_js[origin] = JSContext(self, origin)
return self.origin_to_js[origin]Each Frame will then ask the Tab for its
JavaScript context:
class Frame:
def load(self, url, payload=None):
# ...
self.js = self.tab.get_js(url)
# ...So we’ve got multiple pages’ scripts using one JavaScript context.
But now we’ve got to keep their variables in their own namespaces
somehow. The key is going to be the window global, of type
Window. In the browser, this refers to the global
object, and instead of writing a global variable like
a, you can always write window.a instead.There are various
proposals to expose multiple global namespaces as a JavaScript API.
It would definitely be convenient to have that capability in this
chapter, to avoid having to write window
everywhere! To keep our implementation simple, in our
browser, scripts will always need to reference variable and functions
via window.This also means that all global variables in a script need
to do the same, even if they are not browser APIs. We’ll
need to do the same in our runtime:
window.console = { log: function(x) { call_python("log", x); } }
// ...
window.Node = function(handle) { this.handle = handle; }
// ...Do the same for every function or variable in the
runtime.js file. If you miss one, you’ll get errors like
this:
dukpy.JSRuntimeError: ReferenceError: identifier 'Node'
undefined
duk_js_var.c:1258
eval src/pyduktape.c:1 preventsyieldIf you see this error, it means you need to find where you need to
write window.Node instead of Node. You’ll also
need to modify EVENT_DISPATCH_JS to prefix classes with
window:
EVENT_DISPATCH_JS = \
"new window.Node(dukpy.handle)" + \
".dispatchEvent(new window.Event(dukpy.type))"Demos from previous chapters will need to be similarly fixed up
before they work. For example, setTimeout might need to
change to window.setTimeout.
To get multiple frames’ scripts to play nice inside one JavaScript
context, we’ll create multiple Window objects:
window_1, window_2, and so on. Before running
a frame’s scripts, we’ll set window to that frame’s
Window object, so that the script uses the correct
Window.Some
JavaScript engines support an API for changing the global object, but
the DukPy library that we’re using isn’t one of them. There is
a standard JavaScript operator called with which sort of
does this, but the rules are complicated and not quite what we need
here. It’s also not recommended these days.
So to begin with, let’s define the Window class when we
create a JSContext:
class JSContext:
def __init__(self, tab, url_origin):
self.url_origin = url_origin
# ...
self.interp.evaljs("function Window(id) { this._id = id };")Now, when a frame is created and wants to use a
JSContext, it needs to ask for a window object
to be created first:
class JSContext:
def add_window(self, frame):
code = "var window_{} = new Window({});".format(
frame.window_id, frame.window_id)
self.interp.evaljs(code)
class Frame:
def load(self, url, payload=None):
# ...
self.js = self.tab.get_js(url)
self.js.add_window(self)
# ...Before running any JavaScript, we’ll want to change which window the
window global refers to:
class JSContext:
def wrap(self, script, window_id):
return "window = window_{}; {}".format(window_id, script)We can use this to, for example, set up the initial runtime
environment for each Frame:
class JSContext:
def add_window(self, frame):
# ...
self.interp.evaljs(self.wrap(RUNTIME_JS, frame.window_id))We’ll need to call wrap any time we use
evaljs, which also means we’ll need to add a window ID
argument to a lot of methods. For example, in run we’ll add
a window_id parameter:
class JSContext:
def run(self, script, code, window_id):
try:
code = self.wrap(code, window_id)
self.interp.evaljs(code)
except dukpy.JSRuntimeError as e:
print("Script", script, "crashed", e)And we’ll pass that argument from the load method:
class Frame:
def load(self, url, payload=None):
for script in scripts:
# ...
task = Task(self.js.run, script_url, body,
self.window_id)
# ...The same holds for various dispatching APIs. For example, to dispatch
an event, we’ll need the window_id:
class JSContext:
def dispatch_event(self, type, elt, window_id):
# ...
code = self.wrap(EVENT_DISPATCH_JS, window_id)
do_default = self.interp.evaljs(code,
type=type, handle=handle)Likewise, we’ll need to pass a window ID argument in
click, submit_form, and keypress;
I’ve omitted those code fragments. Note that you should have modified
your runtime.js file to store the LISTENERS on
the window object, meaning each Frame will
have its own set of event listeners to dispatch to:
window.LISTENERS = {}
// ...
window.Node.prototype.dispatchEvent = function(evt) {
var type = evt.type;
var handle = this.handle
var list = (window.LISTENERS[handle] &&
window.LISTENERS[handle][type]) || [];
for (var i = 0; i < list.length; i++) {
list[i].call(this, evt);
}
return evt.do_default;
}Do the same for requestAnimationFrame, passing around a
window ID and wrapping the code so that it correctly references
window.
For calls from JavaScript into the browser, we’ll need JavaScript to pass in the window ID it’s calling from:
window.document = { querySelectorAll: function(s) {
var handles = call_python("querySelectorAll", s, window._id);
return handles.map(function(h) { return new window.Node(h) });
}}Then on the browser side we can use that window ID to get the
Frame object:
class JSContext:
def querySelectorAll(self, selector_text, window_id):
frame = self.tab.window_id_to_frame[window_id]
selector = CSSParser(selector_text).selector()
nodes = [node for node
in tree_to_list(frame.nodes, [])
if selector.matches(node)]
return [self.get_handle(node) for node in nodes]We’ll need something similar in innerHTML and
style because we need to call set_needs_render
on the relevant Frame.
Finally, for setTimeout and XMLHttpRequest,
which involve a call from JavaScript into the browser and later a call
from the browser into JavaScript, we’ll likewise need to pass in a
window ID from JavaScript, and use that window ID when calling back into
JavaScript. I’ve omitted many of the code changes in this section
because they are quite repetitive. You can find all of the needed
locations by searching your codebase for evaljs.
So now we’ve isolated different frames. Next, let’s let them interact.
Same-origin iframes can access each other’s state, but cross-origin
ones can’t. But the obscure domain
property lets an iframe change its origin, moving itself in or out of
same-origin status in some cases. I personally think it’s a misfeature:
it’s hard to implement securely, and interferes with various sandboxing
techniques; I hope it is eventually removed from the web. Instead, there
are various
headers where an iframe can opt into less sharing in order to get
better security and performance.
Communicating Between Frames
We’ve now managed to run multiple Frames’ worth of
JavaScript in a single JSContext, and isolated them
somewhat so that they don’t mess with each others’ state. But the whole
point of this exercise is to allow some interaction between
same-origin frames. Let’s do that now.
The simplest way two frames can interact is that they can get access
to each other’s state via the parent attribute on the
Window object. If the two frames have the same origin, that
lets one frame call methods, access variables, and modify browser state
for the other frame. Because we’ve had these same-origin frames share a
JSContext, this isn’t too hard to implement. Basically,
we’ll need a way to go from a window ID to its parent frame’s window
ID:
class JSContext:
# ...
def parent(self, window_id):
parent_frame = \
self.tab.window_id_to_frame[window_id].parent_frame
if not parent_frame:
return None
return parent_frame.window_idOn the JavaScript side, we now need to look up the
Window object given its window ID. There are lots of ways
you could do this, but the easiest is to have a global map:
class JSContext:
def __init__(self, tab, url_origin):
# ...
self.interp.evaljs("WINDOWS = {}")We’ll add each window to the global map as it’s created:
class JSContext:
def add_window(self, frame):
# ...
self.interp.evaljs("WINDOWS[{}] = window_{};".format(
frame.window_id, frame.window_id))Now window.parent can look up the correct
Window object in this global map:
Object.defineProperty(Window.prototype, 'parent', {
configurable: true,
get: function() {
var parent_id = call_python('parent', window._id);
if (parent_id != undefined) {
var parent = WINDOWS[parent_id];
if (parent === undefined) parent = new Window(parent_id);
return parent;
}
}
});Note that it’s possible for the lookup in WINDOWS to
fail, if the parent frame is not in the same origin as the current one
and therefore isn’t running in the same JSContext. In that
case, this code returns a fresh Window object with that id.
But iframes are not allowed to access each others’ documents across
origins (or call various other APIs that are unsafe), so add a method
that checks for this situation and raises an exception:
class JSContext:
def throw_if_cross_origin(self, frame):
if frame.url.origin() != self.url_origin:
raise Exception(
"Cross-origin access disallowed from script")Then use this method in all JSContext methods that
access documents:Note
that in a real browser this is woefully inadequate security. A real
browser would need to very carefully lock down the entire
runtime.js code and audit every single JavaScript API with
a fine-toothed comb.
class JSContext:
def querySelectorAll(self, selector_text, window_id):
frame = self.tab.window_id_to_frame[window_id]
self.throw_if_cross_origin(frame)
# ...
def setAttribute(self, handle, attr, value, window_id):
frame = self.tab.window_id_to_frame[window_id]
self.throw_if_cross_origin(frame)
# ...
def innerHTML_set(self, handle, s, window_id):
frame = self.tab.window_id_to_frame[window_id]
self.throw_if_cross_origin(frame)
# ...
def style_set(self, handle, s, window_id):
frame = self.tab.window_id_to_frame[window_id]
self.throw_if_cross_origin(frame)
# ...So same-origin iframes can communicate via parent. But
what about cross-origin iframes? It would be insecure to let them access
each other’s variables or call each other’s methods, so instead browsers
allow a form of message
passing, a technique for structured communication between two
different event loops that doesn’t require any shared state or
locks.
Message-passing in JavaScript works like this: you call the postMessage
API on the Window object you’d like to talk to, with
the message itself as the first parameter and * as the
second:The second
parameter has to do with origin restrictions; see Exercise
15-8.
window.parent.postMessage("...", '*')This will send the first argumentIn a real browser, you can also pass data that is not a
string, such as numbers and objects. This works via a
serialization algorithm called structured
cloning, which converts most JavaScript objects (though not, for
example, DOM nodes) to a sequence of bytes that the receiver frame can
convert back into a JavaScript object. DukPy doesn’t support structured
cloning natively for objects, so our browser won’t support this
either. to the parent frame, which can receive the message
by handling the message event on its Window
object:
window.addEventListener("message", function(e) {
console.log(e.data);
});Note that in this second code snippet, window is the
receiving Window, a different Window from the
window in the first snippet.
Let’s implement postMessage, starting on the
receiver side. Since this event happens on the
Window, not on a Node, we’ll need a new
WINDOW_LISTENERS array:
window.WINDOW_LISTENERS = {}Each listener will be called with a MessageEvent
object:
window.MessageEvent = function(data) {
this.type = "message";
this.data = data;
}The event listener and dispatching code is the same as for
Node, except it’s on Window and uses
WINDOW_LISTENERS. You can just duplicate those methods:
Window.prototype.addEventListener = function(type, listener) {
// ...
}
Window.prototype.dispatchEvent = function(evt) {
// ...
}That’s everything on the receiver side; now let’s do the sender side.
First, let’s implement the postMessage API itself. Note
that this is the receiver or target window:
Window.prototype.postMessage = function(message, origin) {
call_python("postMessage", this._id, message, origin)
}In the browser, postMessage schedules a task on the
Tab:
class JSContext:
def postMessage(self, target_window_id, message, origin):
task = Task(self.tab.post_message,
message, target_window_id)
self.tab.task_runner.schedule_task(task)Scheduling the task is necessary because postMessage is
an asynchronous API; sending a synchronous message might involve
synchronizing multiple JSContexts or even multiple
processes, which would add a lot of overhead and probably result in
deadlocks.
The task finds the target frame and calls a dispatch method:
class Tab:
def post_message(self, message, target_window_id):
frame = self.window_id_to_frame[target_window_id]
frame.js.dispatch_post_message(
message, target_window_id)Which then calls into the JavaScript dispatchEvent
method we just wrote:
POST_MESSAGE_DISPATCH_JS = \
"window.dispatchEvent(new window.MessageEvent(dukpy.data))"
class JSContext:
def dispatch_post_message(self, message, window_id):
self.interp.evaljs(
self.wrap(POST_MESSAGE_DISPATCH_JS, window_id),
data=message)You should now be able to use postMessage to send
messages between frames,In the
iframe demo, for example, you should see “Message received from
iframe: This is the contents of postMessage.” printed to the console.
(This particular example uses a same-origin postMessage.
You can test cross-origin locally by starting two local HTTP servers on
different ports, then changing the URL of the
example15-img.html iframe document to point to the second
port.) including cross-origin frames running in different
JSContexts, in a secure way.
Ads are commonly served with iframes and are big users of the web’s sandboxing, embedding, and animation primitives. This means they are a challenging source of performance and user experience problems. For example, ad analytics are important to the ad economy, but involve running a lot of code and measuring lots of data. Some web APIs, such as Intersection Observer, basically exist to make analytics computations more efficient. And, of course, ad blockers are probably the most popular browser extensions.
Isolation and Timing
Iframes add a whole new layer of security challenges atop what we
discussed in Chapter 10. The power to embed
one web page into another creates a commensurate security risk when the
two pages don’t trust each other—both in the case of embedding an
untrusted page into your own page, and the reverse, where an attacker
embeds your page into their own, malicious one. In both cases, we want
to protect your page from any security or privacy risks caused by the
other frame.Websites can
protect themselves from being iframed via the
X-Frame-Options header.
The starting point is that cross-origin iframes can’t access each other directly through JavaScript. That’s good—but what if a bug in the JavaScript engine, like a buffer overrun, lets an iframe circumvent those protections? Unfortunately, bugs like this are common enough that browsers have to defend against them. For example, browsers these days run frames from different origins in different operating system processes, and use operating system features to limit how much access those processes have.
Other parts of the browser mix content from multiple frames, like our
browser’s Tab-wide display list. That means that a bug in
the rasterizer could allow one frame to take over the rasterizer and
then read data that ultimately came from another frame. This might seem
like a rather complex attack, but it has happened before, so modern
browsers use sandboxing
techniques to prevent it. For example, Chromium can place the rasterizer
in its own process and use a Linux feature called seccomp
to limit what system calls that process can make. Even if a bug
compromised the rasterizer, that rasterizer wouldn’t be able to
exfiltrate data over the network, preventing private data from
leaking.
These isolation and sandboxing features may seem “straightforward”, in the same sense that the browser thread we added in Chapter 12 is “straightforward”. In practice, the many browser APIs mean the implementation is full of subtleties and ends up being extremely complex. Chromium, for example, took many years to ship the first implementation of site isolation.
Site isolation has become much more important in recent years, due to the CPU cache timing attacks called spectre and meltdown. In short, these attacks allow an attacker to read arbitrary locations in memory—including another frame’s data, if the two frames are in the same process—by measuring the time certain CPU operations take. Placing sensitive content in different CPU processes (which come with their own memory address spaces) is a good protection against these attacks.
That said, these kinds of timing attacks can be subtle, and
there are doubtless more that haven’t been discovered yet. To try to
dull this threat, browsers currently prevent access to
high-precision timers that can provide the accurate timing data
typically required for timing attacks. For example, browsers reduce the
accuracy of APIs like Date.now or
setTimeout.
Worse yet, there are browser APIs that don’t seem like timers but can
be used as such.For
example, the SharedArrayBuffer
API lets two JavaScript threads run concurrently and share memory, which
can be used to construct
a clock. These APIs are useful, so browsers don’t
quite want to remove them, but there is also no way to make them “less
accurate”, since they are not a clock to begin with. Browsers now
require certain
optional HTTP headers to be present in the parent and child
frames’ HTTP responses in order to allow use of
SharedArrayBuffer in particular, though this is not a
perfect solution.
The SharedArrayBuffer issue caused problems when I added
JavaScript support to the embedded browser widgets on the book’s website. I was using
SharedArrayBuffer to allow synchronous calls from a
JSContext to the browser, and that required APIs that
browsers restrict for security reasons. Setting the security headers
wouldn’t work, because Chapter 14 embeds a Youtube video, and as I’m
writing this YouTube doesn’t send those headers. In the end, I worked
around the issue by not embedding the browser widget and asking the
reader to open a new browser window.
Summary
This chapter introduced how the browser handles embedded content use cases like images and iframes. Reiterating the main points:
- Non-HTML embedded content—images, video, canvas, iframes, input elements, and plugins—can be embedded in a web page.
- Embedded content comes with its own performance concerns—like image decoding time—and necessitates custom optimizations.
- Iframes are a particularly important kind of embedded content, having over time replaced browser plugins as the standard way to easily embed complex content into a web page.
- Iframes introduce all the complexities of the web—rendering, event handling, navigation, security—into the browser’s handling of embedded content. However, this complexity is justified, because they enable important cross-origin use cases like ads, videos, and social media buttons.
And, as we hope you saw in this chapter, none of these features are too difficult to implement, though—as you’ll see in the exercises—implementing them well requires a lot of attention to detail.
Click here to try this chapter’s browser.
Outline
The complete set of functions, classes, and methods in our browser should now look something like this:
COOKIE_JAR
class URL:
def __init__(url)
def request(referrer, payload)
def resolve(url)
def origin()
def __str__()
class Text:
def __init__(text, parent)
def __repr__()
class Element:
def __init__(tag, attributes, parent)
def __repr__()
def print_tree(node, indent)
def tree_to_list(tree, list)
def is_focusable(node)
def get_tabindex(node)
class HTMLParser:
SELF_CLOSING_TAGS
HEAD_TAGS
def __init__(body)
def parse()
def get_attributes(text)
def add_text(text)
def add_tag(tag)
def implicit_tags(tag)
def finish()
class CSSParser:
def __init__(s)
def whitespace()
def literal(literal)
def word()
def ignore_until(chars)
def pair(until)
def selector()
def body()
def parse()
def until_chars(chars)
def simple_selector()
def media_query()
class TagSelector:
def __init__(tag)
def matches(node)
class DescendantSelector:
def __init__(ancestor, descendant)
def matches(node)
class PseudoclassSelector:
def __init__(pseudoclass, base)
def matches(node)
FONTS
def get_font(size, weight, style)
def font(style, zoom)
def linespace(font)
NAMED_COLORS
def parse_color(color)
def parse_blend_mode(blend_mode_str)
def parse_transition(value)
def parse_transform(transform_str)
def parse_outline(outline_str)
def parse_image_rendering(quality)
REFRESH_RATE_SEC
class MeasureTime:
def __init__()
def time(name)
def stop(name)
def finish()
class Task:
def __init__(task_code)
def run()
class TaskRunner:
def __init__(tab)
def schedule_task(task)
def set_needs_quit()
def clear_pending_tasks()
def start_thread()
def run()
def handle_quit()
DEFAULT_STYLE_SHEET
INHERITED_PROPERTIES
def style(node, rules, frame)
def cascade_priority(rule)
def diff_styles(old_style, new_style)
class NumericAnimation:
def __init__(old_value, new_value, num_frames)
def animate()
def dpx(css_px, zoom)
WIDTH, HEIGHT
HSTEP, VSTEP
INPUT_WIDTH_PX
IFRAME_WIDTH_PX, IFRAME_HEIGHT_PX
BLOCK_ELEMENTS
class DocumentLayout:
def __init__(node, frame)
def layout(width, zoom)
def should_paint()
def paint()
def paint_effects(cmds)
class BlockLayout:
def __init__(node, parent, previous, frame)
def layout_mode()
def layout()
def recurse(node)
def add_inline_child(node, w, child_class, frame, word)
def new_line()
def word(node, word)
def input(node)
def image(node)
def iframe(node)
def self_rect()
def should_paint()
def paint()
def paint_effects(cmds)
class LineLayout:
def __init__(node, parent, previous)
def layout()
def should_paint()
def paint()
def paint_effects(cmds)
class TextLayout:
def __init__(node, word, parent, previous)
def layout()
def should_paint()
def paint()
def paint_effects(cmds)
def self_rect()
class EmbedLayout:
def __init__(node, parent, previous, frame)
def layout()
def should_paint()
class InputLayout:
def __init__(node, parent, previous, frame)
def layout()
def paint()
def paint_effects(cmds)
def self_rect()
class ImageLayout:
def __init__(node, parent, previous, frame)
def layout()
def paint()
def paint_effects(cmds)
class IframeLayout:
def __init__(node, parent, previous, parent_frame)
def layout()
def paint()
def paint_effects(cmds)
BROKEN_IMAGE
class PaintCommand:
def __init__(rect)
class DrawText:
def __init__(x1, y1, text, font, color)
def execute(canvas)
class DrawRect:
def __init__(rect, color)
def execute(canvas)
class DrawRRect:
def __init__(rect, radius, color)
def execute(canvas)
class DrawLine:
def __init__(x1, y1, x2, y2, color, thickness)
def execute(canvas)
class DrawOutline:
def __init__(rect, color, thickness)
def execute(canvas)
class DrawCompositedLayer:
def __init__(composited_layer)
def execute(canvas)
class DrawImage:
def __init__(image, rect, quality)
def execute(canvas)
class VisualEffect:
def __init__(rect, children, node)
class Blend:
def __init__(opacity, blend_mode, node, children)
def execute(canvas)
def map(rect)
def unmap(rect)
def clone(child)
class Transform:
def __init__(translation, rect, node, children)
def execute(canvas)
def map(rect)
def unmap(rect)
def clone(child)
def local_to_absolute(display_item, rect)
def absolute_bounds_for_obj(obj)
def absolute_to_local(display_item, rect)
def map_translation(rect, translation, reversed)
def paint_tree(layout_object, display_list)
def paint_visual_effects(node, cmds, rect)
def paint_outline(node, cmds, rect, zoom)
def add_parent_pointers(nodes, parent)
class CompositedLayer:
def __init__(skia_context, display_item)
def can_merge(display_item)
def add(display_item)
def composited_bounds()
def absolute_bounds()
def raster()
SPEECH_FILE
class AccessibilityNode:
def __init__(node, parent)
def compute_bounds()
def build()
def build_internal(child_node)
def contains_point(x, y)
def hit_test(x, y)
def map_to_parent(rect)
def absolute_bounds()
class FrameAccessibilityNode:
def __init__(node, parent)
def build()
def hit_test(x, y)
def map_to_parent(rect)
def speak_text(text)
EVENT_DISPATCH_JS
SETTIMEOUT_JS
XHR_ONLOAD_JS
POST_MESSAGE_DISPATCH_JS
RUNTIME_JS
class JSContext:
def __init__(tab, url_origin)
def run(script, code, window_id)
def add_window(frame)
def wrap(script, window_id)
def dispatch_event(type, elt, window_id)
def dispatch_post_message(message, window_id)
def dispatch_settimeout(handle, window_id)
def dispatch_xhr_onload(out, handle, window_id)
def dispatch_RAF(window_id)
def throw_if_cross_origin(frame)
def get_handle(elt)
def querySelectorAll(selector_text, window_id)
def getAttribute(handle, attr)
def setAttribute(handle, attr, value, window_id)
def innerHTML_set(handle, s, window_id)
def style_set(handle, s, window_id)
def XMLHttpRequest_send(...)
def setTimeout(handle, time, window_id)
def requestAnimationFrame()
def parent(window_id)
def postMessage(target_window_id, message, origin)
SCROLL_STEP
class Frame:
def __init__(tab, parent_frame, frame_element)
def allowed_request(url)
def load(url, payload)
def render()
def clamp_scroll(scroll)
def set_needs_render()
def set_needs_layout()
def advance_tab()
def focus_element(node)
def activate_element(elt)
def submit_form(elt)
def keypress(char)
def scrolldown()
def scroll_to(elt)
def click(x, y)
class Tab:
def __init__(browser, tab_height)
def load(url, payload)
def run_animation_frame(scroll)
def render()
def get_js(url)
def allowed_request(url)
def raster(canvas)
def clamp_scroll(scroll)
def set_needs_render()
def set_needs_layout()
def set_needs_paint()
def set_needs_render_all_frames()
def set_needs_accessibility()
def scrolldown()
def click(x, y)
def go_back()
def submit_form(elt)
def keypress(char)
def focus_element(node)
def activate_element(elt)
def scroll_to(elt)
def enter()
def advance_tab()
def zoom_by(increment)
def reset_zoom()
def set_dark_mode(val)
def post_message(message, target_window_id)
class Chrome:
def __init__(browser)
def tab_rect(i)
def paint()
def click(x, y)
def keypress(char)
def enter()
def blur()
def focus_addressbar()
class CommitData:
def __init__(...)
class Browser:
def __init__()
def schedule_animation_frame()
def commit(tab, data)
def render()
def composite_raster_and_draw()
def composite()
def get_latest(effect)
def paint_draw_list()
def raster_tab()
def raster_chrome()
def update_accessibility()
def draw()
def speak_node(node, text)
def speak_document()
def set_needs_accessibility()
def set_needs_animation_frame(tab)
def set_needs_raster_and_draw()
def set_needs_raster()
def set_needs_composite()
def set_needs_draw()
def clear_data()
def new_tab(url)
def new_tab_internal(url)
def set_active_tab(tab)
def schedule_load(url, body)
def clamp_scroll(scroll)
def handle_down()
def handle_click(e)
def handle_key(char)
def handle_enter()
def handle_tab()
def handle_hover(event)
def handle_quit()
def toggle_dark_mode()
def increment_zoom(increment)
def reset_zoom()
def focus_content()
def focus_addressbar()
def go_back()
def cycle_tabs()
def toggle_accessibility()
def mainloop(browser)
Exercises
15-1 Canvas element. Implement the <canvas>
element, the 2D aspect of the getContext
API, and some of the drawing commands on CanvasRenderingContext2D.
Canvas layout is just like an iframe, including its default width and
height. You should allocate a Skia surface of an appropriate size when
getContext("2d") is called, and implement some of the APIs
that draw to the canvas.Note that the Canvas APIs raster each drawing command
immediately, instead of waiting until the rest of the page is rastered.
This is called immediate mode rendering—as opposed to the retained
mode used by HTML. Immediate mode means the web developer
decides when to incur the rasterization time. It should be
straightforward to translate most API methods to their Skia
equivalent.
15-2 Background images. Elements can have a background-image.
Implement the basics of this CSS property: a url(...) value
for the background-image property. Avoid loading the image
if the background-image property does not actually end up
used on any element. For a bigger challenge, also allow the web page to
set the size of the background image with the background-size
CSS property.
15-3 object-fit. Implement the object-fit
CSS property. It determines how the image within an
<img> element is sized relative to its container
element. This will require clipping images with a different aspect
ratio.
15-4 Lazy loading. Downloading images can use quite a bit of
data.In the early days
of the web, computer networks were slow enough that browsers had a user
setting to disable downloading of images until the user expressly asked
for them. While browsers default to downloading all images
on the page immediately, the loading
attribute on img elements can instruct a browser to
only download images if they are close to the visible area of the page.
This kind of optimization is generally called lazy
loading. Implement loading. Make sure the page is laid
out correctly both before and after the image finishes loading.
15-5 Iframe aspect ratio. Implement the aspect-ratio
CSS property and use it to provide an implicit sizing to iframes and
images when only one of width or height is
specified (or when the image is not yet loaded, if you do Exercise
15-4).
15-6 Image placeholders. Building on top of lazy loading,
implement placeholder styling of images that haven’t loaded yet. This is
done by setting a 0×0 sizing, unless width or
height is specified. Also add support for hiding the
“broken image” if the alt attribute is missing or
empty.That’s because if
alt text is provided, the browser can assume the image is
important to the meaning of the website, and so it should tell the user
that they are missing out on some of the content if it fails to load.
But otherwise, the broken image icon is probably just ugly
clutter.
15-7 Media queries. Implement the width
media query. Make sure it works inside iframes. Also make sure it works
even when the width of an iframe is changed by its parent frame.
15-8 Target origin for postMessage. Implement
the targetOrigin parameter to postMessage.
This parameter is a string which indicates the frame origins that are
allowed to receive the message.
15-9 Multi-frame focus. In our browser, pressing
Tab cycles through the elements in the focused frame. But
this means it’s impossible to access focusable elements in other frames
by keyboard alone. Fix it to move between frames after iterating through
all focusable elements in one frame.
15-10 Iframe history. Ensure that iframes affect browser history. For example, if you click on a link inside an iframe, and then hit the back button, it should go back inside the iframe. Make sure that this works even when the user clicks links in multiple frames in various orders.It’s debatable whether this is a good feature of iframes, as it causes a lot of confusion for web developers who embed iframes they don’t plan on navigating.
15-11 Iframes added or removed by script. The
innerHTML API can cause iframes to be added or removed, but
our browser doesn’t load or unload them when this happens. Fix this: new
iframes should be loaded and old ones unloaded.
15-12 X-Frame-Options. Implement this
header, which disallows a web page from appearing in an iframe.
Reusing Previous Computations
Compositing (see Chapter 13) makes animations smoother, but it doesn’t help with interactions that affect layout, like text editing or DOM modifications. Luckily, we can avoid redundant layout work by treating the layout tree as a kind of cache, and only recomputing the parts that change. This invalidation technique is traditionally complex and bug-prone, but we’ll use a principled approach and simple abstractions to make it manageable.
Editing Content
In Chapter 13, we used compositing to smoothly animate CSS properties
like transform or opacity. But we couldn’t
animate layout-inducing properties like width or
font-size this way because they change not only the
display list but also the layout tree. And while it’s
best to avoid animating layout-inducing properties, many user
interactions that change the layout tree need to be responsive.
One good example is editing text. People type pretty quickly, so even
a few frames’ delay is distracting. But editing changes the HTML tree
and therefore the layout tree. Rebuilding the layout tree from scratch,
which our browser currently does, can be very slow on complex pages.
Try, for example, loading the web version of
this chapter in our browser and typing into the input box that
appears after this paragraph … You’ll find that it is much too
slow—1.7 seconds just in render (see Figure 1)!Trace here.

Typing into input elements could be special-cased,The input element
doesn’t change size as you type, and the text in the input
element doesn’t get its own layout object, so typing into an
input element doesn’t really have to induce layout, just
paint. but there are other text editing APIs that can’t
be. For example, the contenteditable attribute makes any
element editable.The
contenteditable attribute can turn any element on any page
into a living document. It’s how we implemented the “typo” feature for
this book: type Ctrl-E (or Cmd-E on a Mac) to
turn it on. The source code is on the website; see
the typo_mode function for the contenteditable
attribute.
Click on this formatted text to edit it, including rich text!
Let’s implement the most basic possible version of
contenteditable in our browser—it’s a useful feature and
also a good test of invalidation. To begin with, we need to make
elements with a contenteditable property focusable:Actually, in real browsers,
contenteditable can be set to true or
false, and false is useful in case you want to
have a non-editable element inside an editable one. But I’m not going to
implement that in our browser.
def is_focusable(node):
# ...
elif "contenteditable" in node.attributes:
return True
# ...Once we’re focused on an editable node, typing should edit it. A real browser would handle cursor movement and all kinds of complications, but I’ll keep it simple and just add each character to the last text node in the editable element. First we need to find that text node:
class Frame:
def keypress(self, char):
# ...
elif self.tab.focus and \
"contenteditable" in self.tab.focus.attributes:
text_nodes = [
t for t in tree_to_list(self.tab.focus, [])
if isinstance(t, Text)
]
if text_nodes:
last_text = text_nodes[-1]
else:
last_text = Text("", self.tab.focus)
self.tab.focus.children.append(last_text)Note that if the editable element has no text children, we create a new one. Then we add the typed character to this element:
class Frame:
def keypress(self, char):
elif self.tab.focus and \
"contenteditable" in self.tab.focus.attributes:
# ...
last_text.text += char
self.set_needs_render()This is enough to make editing work, but it’s convenient to also draw
a cursor to confirm that the element is focused and show where edits
will go. Let’s do that in BlockLayout:
class BlockLayout:
def paint(self):
# ...
if self.node.is_focused \
and "contenteditable" in self.node.attributes:
text_nodes = [
t for t in tree_to_list(self, [])
if isinstance(t, TextLayout)
]
if text_nodes:
cmds.append(DrawCursor(text_nodes[-1],
text_nodes[-1].width))
else:
cmds.append(DrawCursor(self, 0))
# ...Here, DrawCursor is just a wrapper around
DrawLine:
def DrawCursor(elt, offset):
x = elt.x + offset
return DrawLine(x, elt.y, x, elt.y + elt.height, "red", 1)We might as well also use this wrapper in
InputLayout:
class InputLayout(EmbedLayout):
def paint(self):
if self.node.is_focused and self.node.tag == "input":
cmds.append(DrawCursor(self, self.font.measureText(text)))You can now edit the examples on this chapter’s page in your browser—but each key stroke will take more than a second, making for a frustrating editing experience. So let’s work on speeding that up.
Text editing is exceptionally
hard if you include tricky concepts like caret affinity (which line
the cursor is on, if a long line is wrapped in the middle of a word),
Unicode handling, bidirectional text, and
mixing text formatting with editing. So it’s a good thing browsers
implement all this complexity and hide it behind
contenteditable.
Why Invalidation?
Fundamentally, the reason editing this page is slow in our browser is
that it’s pretty big. After all, it’s not handling the keypress that’s
slow: appending a character to a Text node takes almost no
time. What takes time is re-rendering the whole page afterward.
We want interactions to be fast, even on large, complex pages, so we want re-rendering the page to take time proportional to the size of the change, and not proportional to the size of the page. I call this the principle of incremental performance, and it’s crucial for handling large and complex web applications. Not only does it make text editing fast, it also means that developers can think about performance one change at a time, without considering the contents of the whole page. Incremental performance is therefore necessary for complex applications.
But the principle of incremental performance also really constrains our browser implementation. For example, even traversing the whole layout tree would take time proportional to the whole page, not the change being made, so we can’t even afford to do that.
To achieve incremental performance, we’re going to need to think of
the initial render and later re-renders differently.While initial and later
renders are in some ways conceptually different, they’ll use the same
code path. Basically, the initial render will be one big change from no
page to the initial page, while later re-renders will handle smaller
changes. After all, a page could use innerHTML to replace
the whole page; that would be a big change, and rendering it would take
time proportional to the whole page, because the change is the size of
the whole page! The point is: all of these will ultimately use the same
code path. When the page is first loaded, rendering will
take time proportional to the size of the page. But we’ll treat that
initial render as a cache. Later renders will invalidate and
recompute parts of that cache, taking time proportional to the size of
the change, but won’t touch most of the page.I’m sure there are all sorts
of performance improvements possible without implementing the
invalidation techniques from this chapter, but invalidation is still
essential for incremental performance, which is a kind of asymptotic
guarantee that micro-optimization alone won’t achieve. In
a real browser, every step of the rendering pipeline needs to be
incremental, but this chapter focuses on layout.Why layout? Because layout is
both important and complex enough to demonstrate most of the core
challenges and techniques.
The key to this cache-and-invalidate approach will be tracking the
effects of changes. When one part of the page, like a style
attribute, changes, other things that depend on it, like that element’s
size, change as well. So we’ll need to construct a detailed
dependency graph, down to the level of each layout field, and
use that graph to determine what to recompute. It will be similar to our
needs_style and needs_layout flags, scaled way
up. Most of this chapter is thus about tracking dependencies in the
dependency graph, and building abstractions to help us do that. To use
those abstractions, we’ll need to refactor our layout engine
significantly. But incrementalizing layout will allow us to skip the two
most expensive parts of layout: building the layout tree and traversing
it to compute layout fields. When we’re done, re-layout will take under
a millisecond for small changes like text editing.
The principle of incremental performance is part of what makes browsers a good platform. Remember that the web is declarative: web pages only concern themselves with describing how the page looks, and it’s up to the browser to implement that description. To us browser engineers, that creates a whole bunch of complexity. But think about the web as a whole—it involves not just browser engineers, but web developers and users as well. Implementing complex invalidation algorithms in the browser lets web developers focus on making more interesting applications and gives users a better, more responsive experience. The declarative web makes it possible for the invalidation algorithms to be written once and then automatically benefit everyone.
Idempotence
If we want to implement this caching-and-invalidation idea, the first roadblock is that our browser rebuilds the layout tree from scratch every time the layout phase runs:
class Frame:
def render(self):
if self.needs_layout:
self.document = DocumentLayout(self.nodes, self)
self.document.layout(self.frame_width, self.tab.zoom)
# ...By starting over with a new DocumentLayout, we ignore
all of the old layout information and start from scratch; we are
essentially invalidating the whole tree. So our first
optimization has to be avoiding that, reusing as many layout objects as
possible. That both saves time allocating memory and makes the
caching-and-invalidation approach possible by keeping around the old
layout information.
But before jumping right to coding, let’s review how layout objects
are created. Search your browser code for Layout, which all
layout class names end with. You should see that layout objects are
created in just a few places:
DocumentLayoutobjects are created by theFrameinrender;BlockLayoutobjects are created by either:- a
DocumentLayout, inlayout, or - a
BlockLayout, inlayout;
- a
LineLayoutobjects are created byBlockLayoutinnew_line;- all others are created by
BlockLayoutinadd_inline_child.
Let’s start with DocumentLayout. It’s created in
render, and its two parameters, nodes and
self, are the same every time. This means that identical
DocumentLayouts are created each time.This wouldn’t be true if the
DocumentLayout constructor had side-effects or read global
state, but it doesn’t do that. That’s wasteful; let’s
create the DocumentLayout just once, in
load:
class Frame:
def load(self, url, payload=None):
# ...
self.document = DocumentLayout(self.nodes, self)
self.set_needs_render()
def render(self):
if self.needs_layout:
self.document.layout(self.frame_width, self.tab.zoom)
# ...Moving on, let’s look at where DocumentLayout constructs
a BlockLayout:
class DocumentLayout:
def layout(self, width, zoom):
child = BlockLayout(self.node, self, None, self.frame)
# ...Once again, the constructor parameters cannot change, so again we can skip reconstructing this layout object, like so:
class DocumentLayout:
def layout(self, width, zoom):
if not self.children:
child = BlockLayout(self.node, self, None, self.frame)
else:
child = self.children[0]
# ...But don’t run your browser with these changes just yet! By reusing
layout objects, we end up running layout multiple times on
the same object. That’s not how layout is intended to work,
and it causes all sorts of weird behavior. For example, after the
DocumentLayout creates its child BlockLayout,
it appends it to the children array:
class DocumentLayout:
def layout(self, width, zoom):
# ...
self.children.append(child)
# ...But we don’t want to append the same child more than
once!
The issue here is called idempotence: repeated calls to
layout shouldn’t repeatedly change state. More formally, a
function is idempotent if calling it twice in a row with the same inputs
and dependencies yields the same result. Assigning a field is
idempotent: assigning the same value for a second time is a no-op. But
methods like append aren’t idempotent.
We’ll need to fix any non-idempotent method calls. In
DocumentLayout, we can switch from append to
assignment:
class DocumentLayout:
def layout(self, width, zoom):
# ...
self.children = [child]
# ...BlockLayout also calls append on its
children array. We can fix that by resetting the
children array in layout. I’ll put separate
reset code in the block and inline cases:
class BlockLayout:
def layout(self):
if mode == "block":
self.children = []
# ...
else:
self.children = []
# ...This makes the BlockLayout’s layout
function idempotent because each call will start over from a new
children array.
Before we try running our browser, let’s read through all of the
other layout methods, noting any subroutine calls that
might not be idempotent. I found:If you’ve being doing exercises throughout this book, there
might be more, in which case there might be more calls. In any case, the
core idea is replacing non-idempotent calls with idempotent
ones.
- In
new_line,BlockLayoutwill append to itschildrenarray. - In
add_inline_child,BlockLayoutwill append to thechildrenarray of someLineLayoutchild. - In
add_inline_child,BlockLayoutwill callget_font, as will theTextLayoutandInputLayoutmethods. - Basically every layout method calls
dpx.
The new_line and add_inline_child methods
are only called through layout, which resets the
children array, so they don’t break idempotency. The
get_font function acts as a cache, so multiple calls return
the same font object, maintaining idempotency. And dpx just
does math, so it always returns the same result given the same inputs.
In other words all of our layout methods are now
idempotent.
It’s therefore safe to call layout multiple times on the
same object—which is exactly what we’re now doing. More generally, since
it doesn’t matter how many times an idempotent function is
called, we can skip redundant calls! That makes idempotency the
foundation for the rest of this chapter, which is all about skipping
redundant work.
HTTP also features a notion
of idempotency, but that notion is subtly different from the one
we’re discussing here because HTTP involves both a client and a server.
In HTTP, idempotence only covers the effects of a request on the server
state, not the response. So, for example, requesting the same page twice
with GET might result in different responses (if the page
has changed) but the request is still idempotent because it didn’t make
any change to the server. And HTTP idempotence also only covers
client-visible state, so for example it’s possible that the first
GET request goes to cache while the second doesn’t, or it’s
possible that each one adds a separate log entry.
Dependencies
So far, we’re only reusing two layout objects: the
DocumentLayout, and the root BlockLayout.
Let’s look at the other BlockLayouts, created here:
class BlockLayout:
def layout(self):
self.children = []
# ...
if mode == "block":
previous = None
for child in self.node.children:
next = BlockLayout(child, self, previous, self.frame)
self.children.append(next)
previous = next
# ...This code is a little more complicated than the code that creates the
root BlockLayout: the child and
previous arguments come from node.children,
and that children array can change—as a result of
contenteditable edits or innerHTML calls.Or any other exercises and
extensions that you’ve implemented. Moreover, in order to
even run this code, the node’s layout_mode has to be
block, and layout_mode itself also reads the
node’s children.It also looks at the node’s tag and the node’s
children’s tags, but tags can’t change, so we
don’t need to think about them as dependencies. In invalidation we care
only about dependencies that can change. This makes it
harder to know when we need to recreate the
BlockLayouts.
Recall that idempotency means that calling a function again with
the same inputs and dependencies yields the same result. Here, the
inputs can change, so we can only avoid redundant re-execution if
the node’s children field hasn’t changed. So we need a
way of knowing whether that children field has changed.
We’re going to use a dirty flag:
class BlockLayout:
def __init__(self, node, parent, previous, frame):
# ...
self.children_dirty = TrueWe’ve seen dirty flags before—like needs_layout and
needs_draw—but layout is more complex and we’re going to
need to think about dirty flags a bit more rigorously.
Every dirty flag protects a certain field; this one protects
a BlockLayout’s children field. A dirty flag
has a certain life cycle: it can be set, checked, and reset. The dirty
flag starts out True, and is set to True when
an input or dependency of the field changes, marking the protected
field as unusable. Then, before using the protected field, the
dirty flag must be checked. The flag is reset to False only
when the protected field is recomputed.
So let’s analyze the children_dirty flag in this way.
Dirty flags have to be set if any dependencies of the fields
they protect change. In this case, the dirty flag protects the
children field of a BlockLayout, which in turn
depends on the children field of the associated
Element. That means that any time an Element’s
children field is modified, we need to set the dirty flag
for the associated BlockLayout:
class JSContext:
def innerHTML_set(self, handle, s, window_id):
# ...
obj = elt.layout_object
while not isinstance(obj, BlockLayout):
obj = obj.parent
obj.children_dirty = TrueLikewise, we need to set the dirty flag any time we edit a
contenteditable element, since that can also affect the
children of a node:
class Frame:
def keypress(self, char):
elif self.tab.focus and \
"contenteditable" in self.tab.focus.attributes:
# ...
obj = self.tab.focus.layout_object
while not isinstance(obj, BlockLayout):
obj = obj.parent
obj.children_dirty = TrueIt’s important that all dependencies of the protected field set the dirty bit. This can be challenging, since it requires being vigilant about which fields depend on which others. But if we do forget to set the dirty bit, we’ll sometimes fail to recompute the protected fields, which means we’ll display the page incorrectly. Typically these bugs look like unpredictable layout glitches, and they can be very hard to debug—so we need to be careful.
Anyway, now that we’re setting the dirty flag, the next step is
checking it before using the protected field. BlockLayout
uses its children field in three places: to recursively
call layout on all its children, to compute its
height, and to paint itself. Let’s add a check
in each place:
class BlockLayout:
def layout(self):
# ...
assert not self.children_dirty
for child in self.children:
child.layout()
assert not self.children_dirty
self.height = sum([child.height for child in self.children])
def paint(self, display_list):
assert not self.children_dirty
# ...It’s tempting to skip these assertions, since they should never be triggered, but coding defensively like this catches bugs earlier and makes them easier to debug. It’s very easy to invalidate fields in the wrong order, or skip a computation when it’s actually important, and you’d rather that trigger a crash rather than a subtly incorrect rendering—at least when debugging a toy browser!Real browsers prefer not to crash, however—better a slightly wrong page than a browser that is crashing all the time. So in release mode browsers turn off these assertions, or at least make them not crash the browser.
Finally, when the field is recomputed we need to reset the dirty
flag. Here, we reset the flag when we’ve recomputed the
children array:
class BlockLayout:
def layout(self):
if mode == "block":
# ...
self.children_dirty = False
else:
# ...
self.children_dirty = FalseNow that we have all three parts of the dirty flag done, you should
be able to run your browser and test it on this chapter’s
page. Even when you edit text or call innerHTML, you
shouldn’t see any assertion failures. Work incrementally and test
often—it makes debugging easier.
Now that the children_dirty flag works correctly, we can
rely on it to avoid redundant work. If children isn’t
dirty, we don’t need to recreate the BlockLayout
children:
class BlockLayout:
def layout(self):
if mode == "block":
if self.children_dirty:
# ...
self.children_dirty = FalseIf you add a print statement inside that inner-most
if, you’ll see console output every time
BlockLayout children are created. Try that out while
editing text: it shouldn’t happen at all, and editing will be slightly
smoother.
If you’ve heard Phil Karlton’s saying that “the two hardest problems in computer science are cache invalidation and naming things”, you know that managing more and more dirty flags creates increasing complexity. Phil worked at Netscape at one point (officially as “Principal Curmudgeon”) so I like to imagine him saying that quote while talking about layout invalidation.
Protected Fields
Dirty flags like children_dirty are the traditional
approach to layout invalidation, but they have downsides. Using them
correctly means paying attention to the dependencies between fields and
knowing when each field is read from and written to. And it’s easy to
forget to check or set a dirty flag, which leads to hard-to-find bugs.
In our simple browser it could probably be done, but a real browser’s
layout system is much more complex, and mistakes become almost
impossible to avoid.
A better approach exists. First of all, let’s try to combine the dirty flag and the field it protects into a single object:
class ProtectedField:
def __init__(self):
self.value = None
self.dirty = TrueThat clarifies which dirty flag protects which field. Let’s replace
our existing dirty flag with a ProtectedField:
class BlockLayout:
def __init__(self, node, parent, previous, frame):
# ...
self.children = ProtectedField()
# ...Next, let’s add methods for each step of the dirty flag life cycle.
I’ll say that we mark a protected field to set its dirty
flag:
class ProtectedField:
def mark(self):
if self.dirty: return
self.dirty = TrueNote the early return: marking an already dirty field doesn’t do
anything. That’ll become relevant later. Now call mark in
innerHTML_set and keypress:
class JSContext:
def innerHTML_set(self, handle, s, window_id):
# ...
obj.children.mark()
class Frame:
def keypress(self, char):
elif self.tab.focus and \
"contenteditable" in self.tab.focus.attributes:
# ...
obj.children.mark()Before “get”-ting a ProtectedField’s value,
let’s check the dirty flag:
class ProtectedField:
def get(self):
assert not self.dirty
return self.valueNow we can use get to read the children
field in layout and in lots of other places besides:
class BlockLayout:
def layout(self):
# ...
for child in self.children.get():
child.layout()
self.height = \
sum([child.height for child in self.children.get()])The nice thing about get is that it makes the dirty flag
operations automatic, and therefore impossible to forget. It also makes
the code a little nicer to read.
Finally, to reset the dirty flag, let’s make the caller pass in a new
value when “set”-ting the field. This guarantees that the
dirty flag and the value are updated together:
class ProtectedField:
def set(self, value):
self.value = value
self.dirty = FalseUnfortunately, using set will require a bit of
refactoring. For example, in BlockLayout, we’ll need to
build the children array in a local variable and then set
the children field at the end:
class BlockLayout:
def layout(self):
if mode == "block":
if self.children.dirty:
children = []
previous = None
for child in self.node.children:
next = BlockLayout(
child, self, previous, self.frame)
children.append(next)
previous = next
self.children.set(children)But the benefit is that set, much like get,
automates the dirty flag operations, making them hard to mess up. That
makes it possible to think about more complex and ambitious invalidation
algorithms in order to make layout faster.
Under-invalidation is the technical name for forgetting to set the dirty flag on a field when you change a dependency. It often causes a bug where a particular change needs to happen multiple times to finally “take”. In other words, this kind of bug creates accidental non-idempotency! These bugs are hard to find because they typically only show up if you make a very specific sequence of changes.
Recursive Invalidation
Let’s leverage the ProtectedField class to avoid
recreating all of the LineLayouts and their children every
time inline layout happens. It all starts here:
class BlockLayout:
def layout(self):
if mode == "block":
# ...
else:
self.children = []
self.new_line()
self.recurse(self.node)The new_line and recurse methods, and the
helpers they call like word, input,
iframe, image, and
add_inline_child, handle line wrapping: they check widths,
create new lines, and so on. We’d like to skip all that if the
children field isn’t dirty, but this will be a bit more
challenging than for block layout mode: lots of different fields are
read during line wrapping, and the children field depends
on all of them.
Converting all of those fields into ProtectedFields will
be a challenging project. We’ll take it bit by bit, starting with
zoom, which almost every method reads.
Zoom is initially set in DocumentLayout:
class DocumentLayout:
def __init__(self, node, frame):
# ...
self.zoom = ProtectedField()
# ...
def layout(self, width, zoom):
# ...
self.zoom.set(zoom)
# ...Each BlockLayout also has its own zoom
field, which we can protect:
class BlockLayout:
def __init__(self, node, parent, previous, frame):
# ...
self.zoom = ProtectedField()
# ...However, in BlockLayout, the zoom value
comes from its parent’s zoom field. We might be tempted to
write something like this:
class BlockLayout:
def layout(self):
parent_zoom = self.parent.zoom.get()
self.zoom.set(parent_zoom)
# ...However, recall that with dirty flags we must always think about
invalidating them (with mark), checking them (with
get), and resetting them (with set). We’ve
added get and set, but who marks the
zoom dirty flag?Without marking them when they change, we will incorrectly
skip too much layout work.
We mark a field’s dirty flag when its dependency changes. For
example, innerHTML_set and keypress change the
HTML tree, which the layout tree’s children field depends
on, so those handlers call mark on the
children field. Since a child’s zoom field
depends on its parents’ zoom field, we need to mark all the
children when the zoom field changes. So in
DocumentLayout, we have to do:
class DocumentLayout:
def layout(self, width, zoom):
# ...
self.zoom.set(zoom)
child.zoom.mark()
# ...Similarly, in BlockLayout, which has multiple children,
we must do:
class BlockLayout:
def layout(self):
# ...
for child in self.children.get():
child.zoom.mark()But now we’re back to manually calling methods and trying to make
sure we don’t forget a call. What we need is something seamless:
set-ting a field should automatically mark all the fields
that depend on it.
To do that, each ProtectedField will need to track all
fields that depend on it, called its invalidations:
class ProtectedField:
def __init__(self):
# ...
self.invalidations = set()For example, we can add the child’s zoom field to its
parent’s zoom field’s invalidations:
class BlockLayout:
def __init__(self, node, parent, previous, frame):
# ...
self.parent.zoom.invalidations.add(self.zoom)Then, to automate the mark call, let’s add a
notify method to mark each invalidation:
class ProtectedField:
def notify(self):
for field in self.invalidations:
field.mark()Then set can automatically call notify:
class ProtectedField:
def set(self, value):
self.notify()
self.value = value
self.dirty = FalseThat’s progress, but it’s still possible to forget to add the
invalidation in the first place. We can automate it a little further.
Think: why does the child’s zoom need to depend on
its parent’s? It’s because we get the parent’s
zoom when computing the child’s. So adding the invalidation
can happen as part of get! Let’s make a variant of
get called read with a notify
parameter for the field to invalidate if the field being read
changes:
class ProtectedField:
def read(self, notify):
self.invalidations.add(notify)
return self.get()Now the zoom computation just needs to use
read, and all of the marking and dependency logic will be
handled automatically:
class BlockLayout:
def layout(self):
parent_zoom = self.parent.zoom.read(notify=self.zoom)
self.zoom.set(parent_zoom)In fact, this pattern where we just copy our parent’s value is pretty common, so let’s add a shortcut for it:
class ProtectedField:
def copy(self, field):
self.set(field.read(notify=self))
class BlockLayout:
def layout(self):
self.zoom.copy(self.parent.zoom)
# ...BlockLayout also reads from the zoom field
inside the input, image, iframe,
word, and add_inline_child methods, which are
all part of computing the children field. In those methods,
we can use read to both get the zoom value and also
invalidate the children field if the zoom value ever
changes:
class BlockLayout:
def input(self, node):
zoom = self.zoom.read(notify=self.children)
# ...Do the same in each of the other methods mentioned above. Also, go
and protect the zoom field on every other layout object
type (there are now quite a few!) using copy in place of
writes and read in place of gets. Run your
browser and make sure that nothing crashes, even when you increase or
decrease the zoom level, to make sure you got it right.
Now—protecting the zoom field did not speed our browser
up. We’re still copying the zoom level around, plus we’re now doing some
extra work checking dirty flags and updating invalidations. But
protecting the zoom field means we can invalidate
children, and other fields that depend on it, when the zoom
level changes, which will help tell us when we have to rebuild
LineLayout and TextLayout elements.
Real browsers don’t use automatic dependency-tracking like
ProtectedField (for now at least). One reason is
performance: ProtectedField adds lots of objects and method
calls, and it’s easy to accidentally make performance worse by
over-using it. It’s also possible to create cascading work by
invalidating too many protected fields. Finally, most browser engine
code bases have a lot of historical code, and it takes a lot of time to
refactor them to use new approaches.
Protecting Widths
Another field that line wrapping depends on is width.
Let’s convert that to a ProtectedField, using the new
read method along the way. Like zoom,
width is initially set in DocumentLayout:
class DocumentLayout:
def __init__(self, node, frame):
# ...
self.width = ProtectedField()
# ...
def layout(self, width, zoom):
# ...
self.width.set(width - 2 * dpx(HSTEP, zoom))
# ...Then, BlockLayout copies it from the parent:
class BlockLayout:
def __init__(self, node, parent, previous, frame):
# ...
self.zoom = ProtectedField()
# ...
def layout(self):
# ...
self.width.copy(self.parent.width)
# ...The width field is read during line wrapping. For
example, add_inline_child needs it to determine whether to
add a new line. We’ll use read to set up that
dependency:
class BlockLayout:
def add_inline_child(self, node, w, child_class,
frame, word=None):
width = self.width.read(notify=self.children)
if self.cursor_x + w > width:
self.new_line()
# ...While we’re here, note that the decision for whether or not to add a
new line also depends on w, which is an input to
add_inline_child. If you look through
add_inline_child’s callers, you’ll see that most of the
time, this argument just depends on zoom, but in
word it depends on a font object:
class BlockLayout:
def word(self, node, word):
zoom = self.zoom.read(notify=self.children)
node_font = font(node.style, zoom)
w = node_font.measureText(word)
self.add_inline_child(
node, w, TextLayout, self.frame, word)Note that the font depends on the node’s style, which
can change, for example via the style_set function. To
handle this, we’ll need to protect style:
class Element:
def __init__(self, tag, attributes, parent):
# ...
self.style = ProtectedField()
# ...
class Text:
def __init__(self, text, parent):
# ...
self.style = ProtectedField()
# ...The style field is computed in the style
method, which computes a new style dictionary over multiple
phases. Let’s build that new dictionary in a local variable, and
set it at the end:
def style(node, rules, frame):
old_style = node.style.value
new_style = {}
# ...
node.style.set(new_style)
for child in node.children:
style(child, rules, frame)Inside style, one code path reads from the parent node’s
style. We need to mark dependencies in these cases:
def style(node, rules, frame):
for property, default_value in INHERITED_PROPERTIES.items():
if node.parent:
parent_style = node.parent.style.read(notify=node.style)
new_style[property] = parent_style[property]
else:
new_style[property] = default_valueThen style_set can mark the style
field:We would ideally
make the style attribute a protected field, and have the
style field depend on it, but I’m taking a short-cut in the
interest of simplicity.
class JSContext:
def style_set(self, handle, s, window_id):
# ...
elt.style.mark()Finally, in word (and also in similar code in
add_inline_child) we can depend on the style
field:
class BlockLayout:
def word(self, node, word):
# ...
style = self.children.read(node.style)
node_font = font(style, zoom)
# ...Make sure all other uses of the style field use either
read or get; it should be pretty clear which
is which.
We’ve now protected all of the fields read during line wrapping. That
means the children field’s dirty flag now correctly tracks
whether line-wrapping can be skipped. Let’s make use of that:
class BlockLayout:
def layout(self):
# ...
if mode == "block":
if self.children.dirty:
# ...
else:
if self.children.dirty:
# ...We also need to make sure we now only modify children
via set. That’s a problem for add_inline_child
and new_line, which currently append to the
children field. There are a couple of possible fixes, but
in the interests of expediency,Perhaps the nicest design would thread a local
children variable through all of the methods involved in
line layout, similar to tree_to_list. I’m
going to use a second, unprotected field, temp_children, to
build the list of children, and then set it as the new
value of the children field at the end:
class BlockLayout:
def layout(self):
# ...
if mode == "block":
# ...
else:
if self.children.dirty:
self.temp_children = []
self.new_line()
self.recurse(self.node)
self.children.set(self.temp_children)
self.temp_children = NoneNote that I reset temp_children once we’re done with it,
to make sure that no other part of the code accidentally uses it. This
way, new_line can modify temp_children, which
will eventually become the value of children:
class BlockLayout:
def new_line(self):
self.previous_word = None
self.cursor_x = 0
last_line = self.temp_children[-1] \
if self.temp_children else None
new_line = LineLayout(self.node, self, last_line)
self.temp_children.append(new_line)You’ll want to do something similar in
add_inline_child:
class BlockLayout:
def add_inline_child(self, node, w, child_class,
frame, word=None):
# ...
line = self.temp_children[-1]
# ...Thanks to these fixes, our browser now avoids rebuilding any part of
the layout tree unless it changes, and that should make re-layout
somewhat faster. If you’ve been going through and adding the appropriate
read and get calls, your browser should be
close to working. There’s one tricky case: tree_to_list,
which might deal with both protected and unprotected
children fields. I fixed this with a type test:
def tree_to_list(tree, list):
# ...
children = tree.children
if isinstance(children, ProtectedField):
children = children.get()
for child in children:
tree_to_list(child, list)
# ...With all of these changes made, your browser should work again, and it should now skip line layout for most elements.
Note that we have quite a few protected fields now, but we only skip
recomputing children based on dirty flags. That’s because
recomputing children is slow, but most other fields are
really fast to compute. Checking dirty flags takes time and adds code
clutter, so we only want to do it when it’s worth it.
In real browsers, the layout phase is sometimes split in two, first constructing a layout tree and then a separate fragment tree.This book doesn’t separate out the fragment tree because our layout algorithm is simple enough not to need it. In Chromium, the fragment tree is immutable, and invalidation is done by comparing the previous and new fragment trees instead of by using dirty flags, though the effect of that is pretty similar to what this book describes.
Widths for Inline Elements
At this point, BlockLayout has a protected
width field, but other layout object types do not. Let’s
fix that, because we’ll need it later. LineLayout is pretty
easy:
class LineLayout:
def __init__(self, node, parent, previous):
# ...
self.width = ProtectedField()
# ...
def layout(self):
# ...
self.width.copy(self.parent.width)
# ...In TextLayout, we again need to handle font
(and hence have width depend on style):
class TextLayout:
def __init__(self, node, word, parent, previous):
# ...
self.width = ProtectedField()
# ...
def layout(self):
# ...
style = self.width.read(self.node.style)
zoom = self.width.read(self.zoom)
self.font = font(style, zoom)
self.width.set(self.font.measureText(self.word))
# ...In EmbedLayout, we just need to protect the
width field:
class EmbedLayout:
def __init__(self, node, parent, previous, frame):
# ...
self.width = ProtectedField()
# ...There’s also a reference to width in the
layout method for computing x positions. For
now you can just use get here.
Finally, there are the various types of replaced content. In
InputLayout, the width only depends on the zoom level:
class InputLayout(EmbedLayout):
def layout(self):
# ...
zoom = self.zoom.read(notify=self.width)
self.width.set(dpx(INPUT_WIDTH_PX, zoom))
# ...IframeLayout and ImageLayout are very
similar, with the width depending on the zoom level and also the
element’s width and height attributes. So,
we’ll need to invalidate the width field if those
attributes are changed from JavaScript:
class JSContext:
def setAttribute(self, handle, attr, value, window_id):
# ...
obj = elt.layout_object
if isinstance(obj, IframeLayout) or \
isinstance(obj, ImageLayout):
if attr == "width" or attr == "height":
obj.width.mark()Otherwise, IframeLayout and ImageLayout are
handled just like InputLayout. Search your code to make
sure you’re always interacting with width via methods like
get and read, and check that your browser
works, including testing user interactions like
contenteditable.
The ProtectedField class defined here is a type of monad,
a programming pattern used in programming languages like Haskell. In brief, monads describe
ways of connecting steps in a computation, though the specifics are famously
confusing. Luckily, in this chapter we don’t really need to think
about monads in general, just ProtectedField.
Invalidating Layout Fields
While we’re here, let’s take a moment to protect all of the other
layout fields, including x, y, and
height. Once we’ve done that, we’ll be ready to talk about
speeding up layout even further by skipping unnecessary traversals.
As with width, let’s start with
DocumentLayout and BlockLayout. First,
x and y positions. In
DocumentLayout, just use set:
class DocumentLayout:
def __init__(self, node, frame):
# ...
self.x = ProtectedField()
self.y = ProtectedField()
# ...
def layout(self, width, zoom):
# ...
self.x.set(dpx(HSTEP, zoom))
self.y.set(dpx(VSTEP, zoom))
# ...A BlockLayout’s x position is just its
parent’s x position, so we can just copy it
over:
class BlockLayout:
def __init__(self, node, parent, previous, frame):
# ...
self.x = ProtectedField()
# ...
def layout(self):
# ...
self.x.copy(self.parent.x)
# ...However, the y position sometimes refers to the
previous sibling:
class BlockLayout:
def __init__(self, node, parent, previous, frame):
# ...
self.y = ProtectedField()
def layout(self):
# ...
if self.previous:
prev_y = self.previous.y.read(notify=self.y)
prev_height = self.previous.height.read(notify=self.y)
self.y.set(prev_y + prev_height)
else:
self.y.copy(self.parent.y)
# ...Let’s also do heights. For DocumentLayout,
we just read the child’s height:
class DocumentLayout:
def __init__(self, node, frame):
# ...
self.height = ProtectedField()
# ...
def layout(self, width, zoom):
# ...
self.height.copy(child.height)BlockLayout is similar, except it loops over multiple
children:
class BlockLayout:
def __init__(self, node, parent, previous, frame):
# ...
self.height = ProtectedField()
# ...
def layout(self):
# ...
children = self.children.read(notify=self.height)
new_height = sum([
child.height.read(notify=self.height)
for child in children
])
self.height.set(new_height)Note that in this last code block, we first read the
children field, then iterate over the list of children and
read each of their height fields. The
height field, unlike the previous layout fields, depends on
the children’s fields, not the parent’s (see Figure 2).
So that’s all the layout fields on BlockLayout and
DocumentLayout. Do go through and fix up these layout
types’ paint methods (and also the DrawCursor
helper)—but note that the browser won’t quite run right now, because the
BlockLayout assumes its children’s height
fields are protected, but if those fields are LineLayouts
they aren’t. Let’s get to that next.
Dirty flags aren’t the only way to achieve incremental performance; another option is to keep track of deltas. For example, in the Adapton project, each computation that converts inputs to outputs can also convert input deltas to output deltas. Operational Transform, the collaboration technology behind Google Docs, also works using this principle, as does differential dataflow in databases. However, dirty flags can be implemented with much less memory overhead, which makes them a better fit in browsers.
Protecting Inline Layout
We need to protect LineLayouts’,
TextLayouts’, and EmbedLayouts’ fields too,
and their layout methods work a little differently. Yes,
each of these layout objects has x, y, and
height fields, but they also compute font,
ascent, and descent fields that are used by
other layout objects. We’ll have to protect all of these. Since we now
have quite a bit of ProtectedField experience, we’ll do all
the fields in one go.
Let’s start with TextLayout:
class TextLayout:
def __init__(self, node, word, parent, previous):
# ...
self.x = ProtectedField()
self.y = ProtectedField()
self.height = ProtectedField()
self.font = ProtectedField()
self.ascent = ProtectedField()
self.descent = ProtectedField()
# ...We’ll need to compute these fields in layout. All of the
font-related ones are fairly straightforward:
class TextLayout:
def layout(self):
# ...
zoom = self.zoom.read(notify=self.font)
style = self.node.style.read(notify=self.font)
self.font.set(font(style, zoom))
f = self.font.read(notify=self.width)
self.width.set(f.measureText(self.word))
f = self.font.read(notify=self.ascent)
self.ascent.set(f.getMetrics().fAscent * 1.25)
f = self.font.read(notify=self.descent)
self.descent.set(f.getMetrics().fDescent * 1.25)
f = self.font.read(notify=self.height)
self.height.set(linespace(f) * 1.25)Note that I’ve changed width to read the
font field instead of directly reading zoom
and style. It does look a bit odd to compute
f repeatedly, but remember that each of those
read calls establishes a dependency for one layout field
upon another. I like to think of each f as being scoped to
its field’s computation.
We also need to compute the x position of a
TextLayout. That can use the previous sibling’s font,
x position, and width:
class TextLayout:
def layout(self):
# ...
if self.previous:
prev_x = self.previous.x.read(notify=self.x)
prev_font = self.previous.font.read(notify=self.x)
prev_width = self.previous.width.read(notify=self.x)
self.x.set(
prev_x + prev_font.measureText(' ') + prev_width)
else:
self.x.copy(self.parent.x)EmbedLayout is basically identical. As for its
subclasses, here’s InputLayout:
class InputLayout(EmbedLayout):
def layout(self):
super().layout()
zoom = self.zoom.read(notify=self.width)
self.width.set(dpx(INPUT_WIDTH_PX, zoom))
font = self.font.read(notify=self.height)
self.height.set(linespace(font))
height = self.height.read(notify=self.ascent)
self.ascent.set(-height)
self.descent.set(0)And here’s ImageLayout; it has an
img_height field, which I’m going to treat as an
intermediate step in computing height and not protect:
class ImageLayout(EmbedLayout):
def layout(self):
# ...
font = self.font.read(notify=self.height)
self.height.set(max(self.img_height, linespace(font)))
height = self.height.read(notify=self.ascent)
self.ascent.set(-height)
self.descent.set(0)Finally, here’s how IframeLayout computes its height,
which is straightforward:
class IframeLayout(EmbedLayout):
def layout(self):
# ...
zoom = self.zoom.read(notify=self.height)
if height_attr:
self.height.set(dpx(int(height_attr) + 2, zoom))
else:
self.height.set(dpx(IFRAME_HEIGHT_PX + 2, zoom))
# ...We also need to invalidate the height field if the
height attribute changes:
class JSContext:
def setAttribute(self, handle, attr, value, window_id):
if isinstance(obj, IframeLayout) or \
isinstance(obj, ImageLayout):
if attr == "width" or attr == "height":
# ...
obj.height.mark()So that covers all of the inline layout objects. All that’s left is
LineLayout. Here are x and y:
class LineLayout:
def __init__(self, node, parent, previous):
# ...
self.x = ProtectedField()
self.y = ProtectedField()
# ...
def layout(self):
# ...
self.x.copy(self.parent.x)
if self.previous:
prev_y = self.previous.y.read(notify=self.y)
prev_height = self.previous.height.read(notify=self.y)
self.y.set(prev_y + prev_height)
else:
self.y.copy(self.parent.y)
# ...However, height is a bit complicated: it computes the
maximum ascent and descent across all children and uses that to set the
height and the children’s y. I think the
simplest way to handle this code is to add ascent and
descent fields to the LineLayout to store the
maximum ascent and descent, and then have the height and
the children’s y field depend on those.
Let’s do that, starting with declaring the protected fields:
class LineLayout:
def __init__(self, node, parent, previous):
# ...
self.ascent = ProtectedField()
self.descent = ProtectedField()Then, in layout, we’ll first handle the case of no
children:
class LineLayout:
def layout(self):
# ...
if not self.children:
self.height.set(0)
returnNote that we don’t need to read the
children field because in LineLayout it isn’t
protected; it’s filled in by BlockLayout when the
LineLayout is created, and then never modified.
Next, let’s compute the maximum ascent and descent:
class LineLayout:
def layout(self):
# ...
self.ascent.set(max([
-child.ascent.read(notify=self.ascent)
for child in self.children
]))
self.descent.set(max([
child.descent.read(notify=self.descent)
for child in self.children
]))Next, we can recompute the y position of each child:
class LineLayout:
def layout(self):
# ...
for child in self.children:
new_y = self.y.read(notify=child.y)
new_y += self.ascent.read(notify=child.y)
new_y += child.ascent.read(notify=child.y)
child.y.set(new_y)Finally, we recompute the line’s height:
class LineLayout:
def layout(self):
# ...
max_ascent = self.ascent.read(notify=self.height)
max_descent = self.descent.read(notify=self.height)
self.height.set(max_ascent + max_descent)As a result of these changes, every layout object field is now
protected. Just like before, make sure all uses of these fields use
read and get and that your browser still runs,
including during contenteditable. You will likely now need
to fix a few uses of height and y inside
Frame and Tab, like for clamping scroll
offsets.
Just before writing this section, IThis is Chris speaking. spent weeks weeding out some under-invalidation bugs in Chrome’s accessibility code. At first, the bugs would only occur on certain overloaded automated test machines! It turns out that on those machines, the HTML parser would yieldIn a real browser, HTML parsing doesn’t happen in one go, but often is broken up into multiple event loop tasks. This leads to better web page loading performance, and is the reason you’ll often see web pages render only part of the HTML at first when loading large web pages (including this book!). more often, triggering different and incorrect rendering paths. Deep bugs like this take untold hours to track down, which is why it’s so important to use robust abstractions to avoid them in the first place.
Skipping No-op Updates
We’ve got quite a number of layout fields now, so let’s see how much
invalidation is actually going on. Add a print statement
inside the set method on ProtectedFields to
see which fields are getting recomputed:
class ProtectedField:
def set(self, value):
if self.value != None:
print("Change", self)
self.notify()
self.value = value
self.dirty = FalseThe if check avoids printing during initial page layout,
so it will only show how well our invalidation optimizations are
working. The fewer prints you see, the fewer fields change and the more
work we should be able to skip.
Try editing some text with contenteditable on a large
web page (like this chapter)—you’ll see a screenful of output,
thousands of lines of printed nonsense. It’s a little hard to understand
why, so let’s add a nice printable form for
ProtectedFields, plus a new name parameter for
debugging purposes:Note
that I print the node, not the layout object, because layout objects’
printable forms print layout field values, which might be dirty and
unreadable.
class ProtectedField:
def __init__(self, obj, name):
self.obj = obj
self.name = name
# ...
def __repr__(self):
return "ProtectedField({}, {})".format(
self.obj.node if hasattr(self.obj, "node") else self.obj,
self.name)Name all of your ProtectedFields, like this:
class DocumentLayout:
def __init__(self, node, frame):
# ...
self.zoom = ProtectedField(self, "zoom")
self.width = ProtectedField(self, "width")
self.height = ProtectedField(self, "height")
self.x = ProtectedField(self, "x")
self.y = ProtectedField(self, "y")If you look at your output again, you should now see two phases.
First, there’s a lot of style re-computation:
Change ProtectedField(<body>, style)
Change ProtectedField(<header>, style)
Change ProtectedField(<h1 class="title">, style)
Change ProtectedField('Reusing Previous Computations', style)
Change ProtectedField(<a href="...">, style)
Change ProtectedField('Twitter', style)
Change ProtectedField(' ·\n', style)
...Then, we recompute four layout fields repeatedly:
Change ProtectedField(<html lang="en-US" xml:lang="en-US">, zoom)
Change ProtectedField(<html lang="en-US" xml:lang="en-US">, zoom)
Change ProtectedField(<head>, zoom)
Change ProtectedField(<head>, children)
Change ProtectedField(<head>, height)
Change ProtectedField(<body>, zoom)
Change ProtectedField(<body>, y)
Change ProtectedField(<header>, zoom)
Change ProtectedField(<header>, y)
...Let’s fix these. First, let’s tackle style. The reason
style is being recomputed repeatedly is just that we
recompute it even if it isn’t dirty. Let’s skip if it’s not:
def style(node, rules, frame):
if node.style.dirty:
# ...
for child in node.children:
style(child, rules, frame)There should now be barely any style re-computation at all. But what
about those layout field re-computations? Why are those happening? Well,
the very first field being recomputed here is zoom, which
itself traces back to DocumentLayout:
class DocumentLayout:
def layout(self, width, zoom):
self.zoom.set(zoom)
# ...Every time we lay out the page, we set the zoom
parameter, and we have to do that because the user might have zoomed in
or out. But every time we set a field, that notifies every
dependant field. The combination of these two things means we are
recomputing the zoom field, and everything that depends on
zoom, on every frame.
What makes this all wasteful is that zoom usually
doesn’t change. So we should notify dependants only if the value didn’t
change:
class ProtectedField:
def set(self, value):
if value != self.value:
self.notify()
# ...This change is safe, because if the new value is the same as the old value, any downstream computations don’t actually need to change. This small tweak should reduce the number of field changes down to the minimum:
Change ProtectedField(<html lang="en-US" xml:lang="en-US">, zoom)
Change ProtectedField(<div class="demo" ...>, children)
Change ProtectedField(<div class="demo" ...>, height)All that’s happening here is recreating the
contenteditable element’s children (which we
have to do, to incorporate the new text) and checking that its
height didn’t change (necessary in case we wrapped onto
more lines).
Editing should also now feel snappier—about 0.6 seconds instead of the original 1.7 (see Figure 3). Better, but still not good:Trace here.

The caching and invalidation we’re doing in browser layout has analogs throughout computer science. For example, some databases use incremental view maintenance to cache and update the results of common queries as database entries are added or modified. Build systems like Make also attempt to recompile only changed objects, and spreadsheets attempt to recompute only formulas that might have changed. The specific trade-offs browsers require may be unusual, but the problems and core algorithms are universal.
Skipping Traversals
Now that all of the layout fields are protected, we can check if any of them need to be recomputed by checking their dirty bits. But to check all of those dirty bits, we’d need to visit every layout object, which can take a long time. Instead, we should use dirty bits to minimize the number of layout objects we need to visit.
The basic idea revolves around the question: do we even need to call
layout on a given node? The layout method does
three things: create child layout objects, compute layout properties,
and recurse into more calls to layout. Those steps can be
skipped if:
- we don’t need to create child layout objects, meaning the
childrenfield isn’t dirty; - we don’t need to recompute layout fields, because they aren’t dirty; and
- we don’t need to recursively call
layout.
There’s no dirty flag yet for the last condition, so let’s add one.
I’ll call it has_dirty_descendants because it tracks
whether any descendant has a dirty ProtectedField:In some code bases, you will
see these called ancestor dirty flags instead. It’s the same
thing, just following the flow of dirty bits instead of the flow of
control.
class BlockLayout:
def __init__(self, node, parent, previous, frame):
# ...
self.has_dirty_descendants = FalseAdd this to every other kind of layout object, too.
Now we need to set the has_dirty_descendants flag if any
dirty flag is set. We can do that with an additional (and optionalIt’s optional because only
ProtectedFields on layout objects need this
feature.) parent parameter to a
ProtectedField.
class ProtectedField:
def __init__(self, obj, name, parent=None):
# ...
self.parent = parentMake sure to pass this parameter for each ProtectedField
in each layout object type. Here’s BlockLayout, for
example:
class BlockLayout:
def __init__(self, node, parent, previous, frame):
# ...
self.children = ProtectedField(self, "children", self.parent)
self.zoom = ProtectedField(self, "zoom", self.parent)
self.width = ProtectedField(self, "width", self.parent)
self.height = ProtectedField(self, "height", self.parent)
self.x = ProtectedField(self, "x", self.parent)
self.y = ProtectedField(self, "y", self.parent)Then, whenever mark or notify is called, we
set the descendant bits by walking the parent chain:
class ProtectedField:
def set_ancestor_dirty_bits(self):
parent = self.parent
while parent and not parent.has_dirty_descendants:
parent.has_dirty_descendants = True
parent = parent.parent
def mark(self):
# ...
self.set_ancestor_dirty_bits()Note that the while loop exits early if the descendants
bit is already set. That’s because whoever set that bit already
set all the ancestors’ descendant dirty bits.This optimization is important
in real browsers. Without it, repeatedly invalidating the same object
would walk up the tree to the root repeatedly, violating the principle
of incremental performance.
We’ll need to clear the descendant bits after
layout:
class BlockLayout:
def layout(self):
# ...
for child in self.children.get():
child.layout()
self.has_dirty_descendants = False Now that we have descendant dirty flags, let’s use them to skip
layout, including recursive calls:
class BlockLayout:
def layout(self):
if not self.layout_needed(): return
# ...Here, the layout_needed method just checks all of the
dirty bits:
class BlockLayout:
def layout_needed(self):
if self.zoom.dirty: return True
if self.width.dirty: return True
if self.height.dirty: return True
if self.x.dirty: return True
if self.y.dirty: return True
if self.children.dirty: return True
if self.has_dirty_descendants: return True
return FalseDo the same for every other type of layout object. In
DocumentLayout, you do need to be a little careful, since
it receives the frame width and zoom level as an argument; you have to
mark those fields of DocumentLayout if the
corresponding Frame variables change:We need to mark the root
layout object’s width because the frame_width
is passed into DocumentLayout’s layout method
as the width parameter. We could have protected the
frame_width field instead, and then this mark
would happen automatically; I’m skipping that for expediency, but it
would have been a bit safer.
class IframeLayout(EmbedLayout):
def layout(self):
if self.node.frame and self.node.frame.loaded:
# ...
self.node.frame.document.width.mark()The zoom level changes in Tab:
class Tab:
def zoom_by(self, increment):
# ...
for id, frame in self.window_id_to_frame.items():
frame.document.zoom.mark()
def reset_zoom(self):
# ...
for id, frame in self.window_id_to_frame.items():
frame.document.zoom.mark()Skipping unneeded layout methods should provide a
noticable speed bump, with small layouts now taking about 7 ms to update
layout and editing now substantially smoother.It might also be pretty laggy
on large pages due to the composite–raster–draw cycle being fairly slow,
depending on which exercises you implemented in Chapter
13.Trace
here.

However, Figure 4 shows that paint is still slow, and
render overall is still about 230 ms. Making a browser fast
requires optimizing everything! I won’t implement it, but paint can be
made a lot faster too—see Exercise 16-10.
ProtectedField is similar to the observer
pattern, where one piece of code runs a callback when a piece of
state changes. This pattern is common
in UI frameworks. Usually these observers eagerly recompute
dependent results, but our callbacks—mark and
notify—simply set a dirty bit to be cleaned up later. That
means our invalidation algorithm is a kind of lazy
observer. Laziness helps performance by batching updates.
Granular Style Invalidation
Unfortunately, in the process of adding invalidation, we have
inadvertently broken smooth animations. Here’s the basic issue: suppose
an element’s opacity or transform property
changes, for example through JavaScript. That property isn’t
layout-inducing, so it should be animated entirely through
compositing. However, changing any style property invalidates the
Element’s style field, and that in turn
invalidates the children field, causing the layout tree to
be rebuilt. That’s no good.
Ultimately the core problem here is over-invalidation caused
by ProtectedFields that are too coarse-grained. The
children field, for example, doesn’t depend on the whole
style dictionary, just a few font-related fields in it. We
need style to be a dictionary of
ProtectedFields, not a ProtectedField of a
dictionary:
class Element:
def __init__(self, tag, attributes, parent):
# ...
self.style = dict([
(property, ProtectedField(self, property))
for property in CSS_PROPERTIES
])
# ...Make the same change in Text. The
CSS_PROPERTIES dictionary contains each CSS property that
we support, plus their default value:
CSS_PROPERTIES = {
"font-size": "inherit", "font-weight": "inherit",
"font-style": "inherit", "color": "inherit",
"opacity": "1.0", "transition": "",
"transform": "none", "mix-blend-mode": None,
"border-radius": "0px", "overflow": "visible",
"outline": "none", "background-color": "transparent",
"image-rendering": "auto",
}When setting the style property from JavaScript, I’ll
invalidate all of the fields by calling a new dirty_style
function:
def dirty_style(node):
for property, value in node.style.items():
value.mark()
class JSContext:
def style_set(self, handle, s, window_id):
# ...
dirty_style(elt)
# ...But that’s not all. There is also other code that invalidates style,
in particular code that can affect a pseudo-class such as
:focus.
class Frame:
def focus_element(self, node):
# ...
if self.tab.focus:
# ...
dirty_style(self.tab.focus)
if node:
#...
dirty_style(node)Similarly, in style, we will need to recompute a node’s
style if any of their style properties are dirty:
def style(node, rules, frame):
needs_style = any([field.dirty for field in node.style.values()])
if needs_style:
# ...
for child in node.children:
style(child, rules, frame)To match the existing code, I’ll make old_style and
new_style just map properties to values:
def style(node, rules, frame):
if needs_style:
old_style = dict([
(property, field.value)
for property, field in node.style.items()
])
new_style = CSS_PROPERTIES.copy()
# ...Then, when we resolve inheritance, we specifically have one field of our style depend on one field of the parent’s style:
def style(node, rules, frame):
if needs_style:
for property, default_value in INHERITED_PROPERTIES.items():
if node.parent:
parent_field = node.parent.style[property]
parent_value = \
parent_field.read(notify=node.style[property])
new_style[property] = parent_valueLikewise when resolving percentage font sizes:
def style(node, rules, frame):
if needs_style:
if new_style["font-size"].endswith("%"):
if node.parent:
parent_field = node.parent.style["font-size"]
parent_font_size = \
parent_field.read(notify=node.style["font-size"])Then, once the new_style is all computed, we
individually set every field of the node’s style:
def style(node, rules, frame):
if needs_style:
# ...
for property, field in node.style.items():
field.set(new_style[property])Now we just need to update the rest of the browser to use the
granular style fields. Mostly, this means replacing
style.get()[property] with
style[property].get():
def paint_visual_effects(node, cmds, rect):
opacity = float(node.style["opacity"].get())
blend_mode = node.style["mix-blend-mode"].get()
translation = parse_transform(node.style["transform"].get())
if node.style["overflow"].get() == "clip":
border_radius = float(node.style["border-radius"].get()[:-2])
# ...
# ...However, the font method needs a little bit of work.
Until now, we’ve read the node’s style and passed that to
font:
class BlockLayout:
def word(self, node, word):
zoom = self.children.read(self.zoom)
style = self.children.read(node.style)
node_font = font(style, zoom)
# ...That won’t work anymore, because now we need to read three different
properties of style. To keep things compact, I’m going to
rewrite font to pass in the field to invalidate as an
argument:
def font(css_style, zoom, notify):
weight = css_style['font-weight'].read(notify)
style = css_style['font-style'].read(notify)
try:
size = float(css_style['font-size'].read(notify)[:-2]) * 0.75
except:
size = 16
font_size = dpx(size, zoom)
return get_font(font_size, weight, style)Now we can simply pass self.children in for the
notify parameter when requesting a font during line
breaking:
class BlockLayout:
def word(self, node, word):
zoom = self.zoom.read(notify=self.children)
node_font = font(node.style, zoom, notify=self.children)
# ...Likewise, we pass in the font field if that’s what we’re
computing:
class TextLayout:
def layout(self):
if self.font.dirty:
zoom = self.zoom.read(notify=self.font)
self.font.set(font(
self.node.style, zoom, notify=self.font))Make sure to update all other uses of the font method to
this new interface. This “destination-passing style” is a common way to
add invalidation to helper methods.
Finally, now that we’ve added granular invalidation to
style, we can invalidate just the animating property when
handling animations:
class Tab:
def run_animation_frame(self, scroll):
for (window_id, frame) in self.window_id_to_frame.items():
for node in tree_to_list(frame.nodes, []):
for (property_name, animation) in \
node.animations.items():
value = animation.animate()
if value:
node.style[property_name].set(value)
# ...When a property like opacity or transform
is changed, it won’t invalidate any layout fields (because these
properties don’t affect any layout fields) and so animations will once
again skip layout entirely.
CSS styles depend on which elements a selector matches, and as the
page changes, that may also need to be invalidated.Our browser supports so few
CSS selectors and so few DOM APIs that it wouldn’t make sense to
implement such an advanced invalidation technique, but for real browsers
it is quite important. Browsers have clever algorithms to
avoid redoing selector matching for every selector on the page. For
example, Chromium constructs invalidation
sets for each selector, which tell it which selector-element
matches to recheck. New selectors such as :has() require more
complicated invalidation strategies, but this complexity is
necessary for fast re-styles.
Analyzing Dependencies
Layout is now pretty fast and correct thanks to the
ProtectedField abstraction. However, because most of our
dependencies are established implicitly, by read, it’s hard
to tell which fields will ultimately get invalidated from any given
operation. That makes it hard to understand which operations are fast
and which are slow, especially as we add new style and layout features.
This auditability concern happens in real browsers, too. After
all, real browsers are millions, not thousands, of lines long, and
support thousands of CSS properties. Their dependency graphs are
dramatically more complex than our browser’s.
We’d therefore like to make it easier to see the dependency graph, though see Figure 5 for an idea of the scale of the task. And along the way we can centralize invariants about the shape of that graph. That will harden our browser against accidental bugs in the future and also improve performance.
An easy first step is explicitly listing the dependencies of each
ProtectedField. We can make this an optional constructor
parameter:
class ProtectedField:
def __init__(self, obj, name, parent=None, dependencies=None):
# ...
if dependencies != None:
for dependency in dependencies:
dependency.invalidations.add(self)Moreover, if the dependencies are passed in the constructor, we can
“freeze” the ProtectedField, so that read no
longer adds new dependencies, just checks that they were declared:
class ProtectedField:
def __init__(self, obj, name, parent=None, dependencies=None):
# ...
self.frozen_dependencies = (dependencies != None)
if dependencies != None:
for dependency in dependencies:
dependency.invalidations.add(self)
def read(self, notify):
if notify.frozen_dependencies:
assert notify in self.invalidations
else:
self.invalidations.add(notify)
return self.get()For example, in DocumentLayout, we can now be explicit
about the fact that its fields have no external dependencies, and thus
have to be marked explicitly:I didn’t even notice that
myself until I wrote this section!
class DocumentLayout:
def __init__(self, node, frame):
# ...
self.zoom = ProtectedField(self, "zoom", None, [])
self.width = ProtectedField(self, "width", None, [])
self.x = ProtectedField(self, "x", None, [])
self.y = ProtectedField(self, "y", None, [])
self.height = ProtectedField(self, "height")But note that height is missing the dependencies
parameter. A DocumentLayout’s height depends on its child’s
height, and that child doesn’t exist until layout is
called. “Downward” dependencies like this mean we can’t freeze every
ProtectedField when it’s constructed. But every protected
field we freeze makes the dependency graph easier to audit.
We can also freeze the zoom, width,
x, and y fields in BlockLayout.
For y, the dependencies differ based on whether or not the
layout object has a previous sibling:
class BlockLayout:
def __init__(self, node, parent, previous, frame):
# ...
if self.previous:
y_dependencies = [self.previous.y, self.previous.height]
else:
y_dependencies = [self.parent.y]
self.y = ProtectedField(
self, "y", self.parent, y_dependencies)
# ...We can’t freeze height for BlockLayout, for
the same reason as DocumentLayout, in the constructor. But
we can freeze it as soon as the children field is
computed. Let’s add a set_dependencies method to do
that:This is dynamic,
just like calls to read, but at least we’re centralizing
dependencies in one place. Plus, listing the dependencies explicitly and
then checking them later is a kind of defense
in depth against invalidation bugs.
class ProtectedField:
def set_dependencies(self, dependencies):
for dependency in dependencies:
dependency.invalidations.add(self)
self.frozen_dependencies = TrueNow we can freeze height in
DocumentLayout:
class DocumentLayout:
def layout(self, width, zoom):
if not self.children:
child = BlockLayout(self.node, self, None, self.frame)
self.height.set_dependencies([child.height])Similarly, in BlockLayout:
class BlockLayout:
def layout(self):
# ...
if mode == "block":
if self.children.dirty:
# ...
self.children.set(children)
height_dependencies = \
[child.height for child in children]
height_dependencies.append(self.children)
self.height.set_dependencies(height_dependencies)
else:
if self.children.dirty:
# ...
self.children.set(self.temp_children)
height_dependencies = \
[child.height for child in self.temp_children]
height_dependencies.append(self.children)
self.height.set_dependencies(height_dependencies)The other layout objects can also freeze their fields. In
TextLayout, EmbedLayout, and its subclasses we
can freeze everything:
class TextLayout:
def __init__(self, node, word, parent, previous):
# ...
self.zoom = ProtectedField(self, "zoom", self.parent,
[self.parent.zoom])
self.font = ProtectedField(self, "font", self.parent,
[self.zoom,
self.node.style['font-weight'],
self.node.style['font-style'],
self.node.style['font-size']])
self.width = ProtectedField(self, "width", self.parent,
[self.font])
self.height = ProtectedField(self, "height", self.parent,
[self.font])
self.ascent = ProtectedField(self, "ascent", self.parent,
[self.font])
self.descent = ProtectedField(self, "descent", self.parent,
[self.font])
if self.previous:
x_dependencies = [self.previous.x, self.previous.font,
self.previous.width]
else:
x_dependencies = [self.parent.x]
self.x = ProtectedField(self, "x", self.parent,
x_dependencies)
self.y = ProtectedField(self, "y", self.parent,
[self.ascent, self.parent.y, self.parent.ascent])In LineLayout, due to the somewhat complicated way a
line is created and then laid out, we need to delay freezing
ascent and descent until the first time
layout is called:
class LineLayout:
def __init__(self, node, parent, previous):
# ...
self.initialized_fields = False
self.ascent = ProtectedField(self, "ascent", self.parent)
self.descent = ProtectedField(self, "descent", self.parent)
# ...
def layout(self):
if not self.initialized_fields:
self.ascent.set_dependencies(
[child.ascent for child in self.children])
self.descent.set_dependencies(
[child.descent for child in self.children])
self.initialized_fields = True
# ...The last layout class is EmbedLayout. The dependencies
there are straightforward except for two things: first, just like for
TextLayout, x depends on the previous
x if present, and second, height depends on
width because of aspect ratios:
class EmbedLayout:
def __init__(self, node, parent, previous, frame):
# ...
self.zoom = ProtectedField(self, "zoom", self.parent,
[self.parent.zoom])
self.font = ProtectedField(self, "font", self.parent,
[self.zoom,
self.node.style['font-weight'],
self.node.style['font-style'],
self.node.style['font-size']])
self.width = ProtectedField(self, "width", self.parent,
[self.zoom])
self.height = ProtectedField(self, "height", self.parent,
[self.zoom, self.font, self.width])
self.ascent = ProtectedField(self, "ascent", self.parent,
[self.height])
self.descent = ProtectedField(
self, "descent", self.parent, [])
if self.previous:
x_dependencies = \
[self.previous.x, self.previous.font,
self.previous.width]
else:
x_dependencies = [self.parent.x]
self.x = ProtectedField(
self, "x", self.parent, x_dependencies)
self.y = ProtectedField(self, "y", self.parent,
[self.ascent,self.parent.y, self.parent.ascent])We can even freeze all of the style fields! The only complication is
that innerHTML changes an element’s parent, so let’s create
the style dictionary dynamically. Initialize it to None in
the constructor:
class Element:
def __init__(self, tag, attributes, parent):
# ...
self.style = None
class Text:
def __init__(self, text, parent):
# ...
self.style = NoneThen set it the first time style is called:
def style(node, rules, frame):
if not node.style:
init_style(node)Inside init_style, we need to freeze the dependencies of
each style field. That’s easy: only inherited fields have any
dependencies:
def init_style(node):
node.style = dict([
(property, ProtectedField(node, property, None,
[node.parent.style[property]] \
if node.parent and \
property in INHERITED_PROPERTIES \
else []))
for property in CSS_PROPERTIES
])By freezing every layout and style field, except
children, we can get a good sense of our browser’s
dependency graph just by looking at layout object type constructors.
That’s nice, and helps us avoid cycles and long dependency chains as we
add more style and layout features.
But to obtain maximum performance, the kind you would need for a real
browser, there’s an additional benefit. All these fancy
ProtectedFields add a lot of overhead, mostly because they
take up more memory and require more function calls. In fact, this
chapter likely made your browser quite a bit slower on an
initial page load.For me, it’s about twice as slow. Some of
that can be improved by skipping asserts,If you run Python with the
-O command-line flag, Python will automatically skip
asserts. but it’s definitely not ideal.
Luckily, techniques like compile-time code generation and macros can
be used to turn ProtectedField objects into straight-line
code behind the scenes. Setting a particular ProtectedField
can set the dirty bits on statically known invalidations, the dirty bits
can be inlined into the layout objects, and the read
function can check that the dependency was declared at compile
time.Real browsers pull
tricks like that all the time, in order to be super fast but still
maintainable and readable. For example, Chromium has a fancy way of generating
optimized code for all of the style properties. Such
techniques are beyond the scope of this book, but I’ve left exploring it
to an advanced exercise.
Real browsers also use assertions to catch bugs, much like the
ProtectedField abstraction in this chapter. But to avoid
slowing down the browser for users, non-essential assertions are
“compiled out” in the release build, which is what end-users
run. The debug build is what browser engineers use when
debugging or developing new features, and also in automated tests. Debug
builds also compile in debugging features like sanitizers,
while release builds instead use heavyweight optimizations like
profile-guided optimization.
Summary
This chapter introduces the concept of partial style and layout through optimized cache invalidation. The main takeaways are:
- Caching and invalidation is a powerful way to speed up key browser interactions, and is therefore an essential technique in real browsers.
- Making rendering idempotent allows us to skip redundant work while guaranteeing that the page will look the same.
- A good browser aims for the principle of incremental performance: the cost of a change should be proportional to the size of the change, not the size of the page as a whole.
- Cache invalidation is difficult and error-prone, and justifies
careful abstractions like
ProtectedField. - Invalidation can be used to skip allocation, computation, and even traversals of objects.
Click here to try this chapter’s browser.
Outline
The complete set of functions, classes, and methods in our browser should now look something like this:
COOKIE_JAR
class URL:
def __init__(url)
def request(referrer, payload)
def resolve(url)
def origin()
def __str__()
class Text:
def __init__(text, parent)
def __repr__()
class Element:
def __init__(tag, attributes, parent)
def __repr__()
def print_tree(node, indent)
def tree_to_list(tree, list)
def is_focusable(node)
def get_tabindex(node)
class HTMLParser:
SELF_CLOSING_TAGS
HEAD_TAGS
def __init__(body)
def parse()
def get_attributes(text)
def add_text(text)
def add_tag(tag)
def implicit_tags(tag)
def finish()
class CSSParser:
def __init__(s)
def whitespace()
def literal(literal)
def word()
def ignore_until(chars)
def pair(until)
def selector()
def body()
def parse()
def until_chars(chars)
def simple_selector()
def media_query()
class TagSelector:
def __init__(tag)
def matches(node)
class DescendantSelector:
def __init__(ancestor, descendant)
def matches(node)
class PseudoclassSelector:
def __init__(pseudoclass, base)
def matches(node)
FONTS
def get_font(size, weight, style)
def font(css_style, zoom, notify)
def linespace(font)
NAMED_COLORS
def parse_color(color)
def parse_blend_mode(blend_mode_str)
def parse_transition(value)
def parse_transform(transform_str)
def parse_outline(outline_str)
def parse_image_rendering(quality)
REFRESH_RATE_SEC
class MeasureTime:
def __init__()
def time(name)
def stop(name)
def finish()
class Task:
def __init__(task_code)
def run()
class TaskRunner:
def __init__(tab)
def schedule_task(task)
def set_needs_quit()
def clear_pending_tasks()
def start_thread()
def run()
def handle_quit()
DEFAULT_STYLE_SHEET
CSS_PROPERTIES
INHERITED_PROPERTIES
def init_style(node)
def style(node, rules, frame)
def cascade_priority(rule)
def diff_styles(old_style, new_style)
class NumericAnimation:
def __init__(old_value, new_value, num_frames)
def animate()
def dirty_style(node)
class ProtectedField:
def __init__(obj, name, parent, dependencies, invalidations)
def set_dependencies(dependencies)
def set_ancestor_dirty_bits()
def mark()
def notify()
def set(value)
def get()
def read(notify)
def copy(field)
def __repr__()
def dpx(css_px, zoom)
WIDTH, HEIGHT
HSTEP, VSTEP
INPUT_WIDTH_PX
IFRAME_WIDTH_PX, IFRAME_HEIGHT_PX
BLOCK_ELEMENTS
class DocumentLayout:
def __init__(node, frame)
def layout(width, zoom)
def should_paint()
def paint()
def paint_effects(cmds)
def layout_needed()
class BlockLayout:
def __init__(node, parent, previous, frame)
def layout_mode()
def layout()
def recurse(node)
def add_inline_child(node, w, child_class, frame, word)
def new_line()
def word(node, word)
def input(node)
def image(node)
def iframe(node)
def self_rect()
def should_paint()
def paint()
def paint_effects(cmds)
def layout_needed()
class LineLayout:
def __init__(node, parent, previous)
def layout()
def should_paint()
def paint()
def paint_effects(cmds)
def layout_needed()
class TextLayout:
def __init__(node, word, parent, previous)
def layout()
def should_paint()
def paint()
def paint_effects(cmds)
def self_rect()
def layout_needed()
class EmbedLayout:
def __init__(node, parent, previous, frame)
def layout()
def should_paint()
def layout_needed()
class InputLayout:
def __init__(node, parent, previous, frame)
def layout()
def paint()
def paint_effects(cmds)
def self_rect()
class ImageLayout:
def __init__(node, parent, previous, frame)
def layout()
def paint()
def paint_effects(cmds)
class IframeLayout:
def __init__(node, parent, previous, parent_frame)
def layout()
def paint()
def paint_effects(cmds)
BROKEN_IMAGE
class PaintCommand:
def __init__(rect)
class DrawText:
def __init__(x1, y1, text, font, color)
def execute(canvas)
class DrawRect:
def __init__(rect, color)
def execute(canvas)
class DrawRRect:
def __init__(rect, radius, color)
def execute(canvas)
class DrawLine:
def __init__(x1, y1, x2, y2, color, thickness)
def execute(canvas)
class DrawOutline:
def __init__(rect, color, thickness)
def execute(canvas)
class DrawCompositedLayer:
def __init__(composited_layer)
def execute(canvas)
class DrawImage:
def __init__(image, rect, quality)
def execute(canvas)
def DrawCursor(elt, offset)
class VisualEffect:
def __init__(rect, children, node)
class Blend:
def __init__(opacity, blend_mode, node, children)
def execute(canvas)
def map(rect)
def unmap(rect)
def clone(child)
class Transform:
def __init__(translation, rect, node, children)
def execute(canvas)
def map(rect)
def unmap(rect)
def clone(child)
def local_to_absolute(display_item, rect)
def absolute_bounds_for_obj(obj)
def absolute_to_local(display_item, rect)
def map_translation(rect, translation, reversed)
def paint_tree(layout_object, display_list)
def paint_visual_effects(node, cmds, rect)
def paint_outline(node, cmds, rect, zoom)
def add_parent_pointers(nodes, parent)
class CompositedLayer:
def __init__(skia_context, display_item)
def can_merge(display_item)
def add(display_item)
def composited_bounds()
def absolute_bounds()
def raster()
SPEECH_FILE
class AccessibilityNode:
def __init__(node, parent)
def compute_bounds()
def build()
def build_internal(child_node)
def contains_point(x, y)
def hit_test(x, y)
def map_to_parent(rect)
def absolute_bounds()
class FrameAccessibilityNode:
def __init__(node, parent)
def build()
def hit_test(x, y)
def map_to_parent(rect)
def speak_text(text)
EVENT_DISPATCH_JS
SETTIMEOUT_JS
XHR_ONLOAD_JS
POST_MESSAGE_DISPATCH_JS
RUNTIME_JS
class JSContext:
def __init__(tab, url_origin)
def run(script, code, window_id)
def add_window(frame)
def wrap(script, window_id)
def dispatch_event(type, elt, window_id)
def dispatch_post_message(message, window_id)
def dispatch_settimeout(handle, window_id)
def dispatch_xhr_onload(out, handle, window_id)
def dispatch_RAF(window_id)
def throw_if_cross_origin(frame)
def get_handle(elt)
def querySelectorAll(selector_text, window_id)
def getAttribute(handle, attr)
def setAttribute(handle, attr, value, window_id)
def innerHTML_set(handle, s, window_id)
def style_set(handle, s, window_id)
def XMLHttpRequest_send(...)
def setTimeout(handle, time, window_id)
def requestAnimationFrame()
def parent(window_id)
def postMessage(target_window_id, message, origin)
SCROLL_STEP
class Frame:
def __init__(tab, parent_frame, frame_element)
def allowed_request(url)
def load(url, payload)
def render()
def clamp_scroll(scroll)
def set_needs_render()
def set_needs_layout()
def advance_tab()
def focus_element(node)
def activate_element(elt)
def submit_form(elt)
def keypress(char)
def scrolldown()
def scroll_to(elt)
def click(x, y)
class Tab:
def __init__(browser, tab_height)
def load(url, payload)
def run_animation_frame(scroll)
def render()
def get_js(url)
def allowed_request(url)
def raster(canvas)
def clamp_scroll(scroll)
def set_needs_render()
def set_needs_layout()
def set_needs_paint()
def set_needs_render_all_frames()
def set_needs_accessibility()
def scrolldown()
def click(x, y)
def go_back()
def submit_form(elt)
def keypress(char)
def focus_element(node)
def activate_element(elt)
def scroll_to(elt)
def enter()
def advance_tab()
def zoom_by(increment)
def reset_zoom()
def set_dark_mode(val)
def post_message(message, target_window_id)
class Chrome:
def __init__(browser)
def tab_rect(i)
def paint()
def click(x, y)
def keypress(char)
def enter()
def blur()
def focus_addressbar()
class CommitData:
def __init__(...)
class Browser:
def __init__()
def schedule_animation_frame()
def commit(tab, data)
def render()
def composite_raster_and_draw()
def composite()
def get_latest(effect)
def paint_draw_list()
def raster_tab()
def raster_chrome()
def update_accessibility()
def draw()
def speak_node(node, text)
def speak_document()
def set_needs_accessibility()
def set_needs_animation_frame(tab)
def set_needs_raster_and_draw()
def set_needs_raster()
def set_needs_composite()
def set_needs_draw()
def clear_data()
def new_tab(url)
def new_tab_internal(url)
def set_active_tab(tab)
def schedule_load(url, body)
def clamp_scroll(scroll)
def handle_down()
def handle_click(e)
def handle_key(char)
def handle_enter()
def handle_tab()
def handle_hover(event)
def handle_quit()
def toggle_dark_mode()
def increment_zoom(increment)
def reset_zoom()
def focus_content()
def focus_addressbar()
def go_back()
def cycle_tabs()
def toggle_accessibility()
def mainloop(browser)
Exercises
16-1 Emptying an element. Implement the replaceChildren
DOM method when called with no arguments. This method should delete
all the children of a given element. Make sure to handle invalidation
properly.
16-2 Protecting layout phases. Replace the
needs_style and needs_layout dirty flags by
making the document field on Frames a
ProtectedField. Make sure animations still work correctly:
animations of opacity or transform shouldn’t
trigger layout, while animations of other properties should.
16-3 Transferring children. Implement the replaceChildren
DOM method when called with multiple arguments. Here the arguments
are elements from elsewhere in the document,Unless you’ve implemented
Exercises 9-2 and 9-3, in which case they can also be “detached”
elements. which are then removed from their current parent
and then attached to this one. Make sure to handle invalidation
properly.
16-4 Descendant bits for style. Add descendant dirty flags
for style information, so that the style phase
doesn’t need to traverse nodes whose styles are unchanged.
16-5 Resizing the browser. Perhaps, back in Exericse 2-3,
you implemented support for resizing the browser. (And, most likely, you
dropped support for it when we switched to SDL.) Reimplement support for
resizing your browser; you’ll need to pass the
SDL_WINDOW_RESIZABLE flag to SDL_CreateWindow
and listen for SDL_WINDOWEVENT_RESIZED events. Make sure
invalidation works: resizing the window should resize the page. How much
does invalidation help make resizing fast? Test both vertical and
horizontal resizing.
16-6 Matching children. Add support for the
appendChild method if you haven’t already in Exercise
9-2. What’s interesting about appendChild is that, while it
does change a layout object’s children field, it
only does so by adding new children to the end. In this case, you can
keep all of the existing layout object children. Apply this
optimization, at least in the case of block-mode
BlockLayouts.
16-7 Invalidating previous. Add support for the
insertBefore method if you if you haven’t already in
Exercise 9-2. Like with appendChild, we want to skip
rebuilding layout objects if we can. However, this method can also
change the previous field of layout objects; protect that
field on all block-mode BlockLayouts and then avoid
rebuilding as much of the layout tree as possible.
16-8 :hover pseudo-class. There is a
:hover pseudo-class that identifies elements the mouse is
hovering
over. Implement it by sending mouse hover events to the active
Tab and hit testing to find out which element is being
hovered over. Try to avoid forcing
a layout in this hit test; one way to do that is to store a
pending_hover on the Tab and run the hit test
after layout during render, and then perform
another render to invalidate the hovered element’s style.
16-9 Optimizing away ProtectedField. As
mentioned in the last section of this chapter, creating all these
ProtectedField objects is way too expensive for a real
browser. See if you can find a way to avoid creating the objects
entirely. Depending on the language you’re using to implement your
browser, you might have compile-time macros available to help; in
Python, this might require refactoring to change the API shape of
ProtectedField to be functional rather than
object-oriented.
16-10 Optimizing paint. Even after making layout fast for text input, paint is still painfully slow. Fix that by storing the display list between frames, adding dirty bits for whether paint is needed for each layout object, and mutating the display list rather than recreating it every time.
What Wasn’t Covered
The last 16 chapters have, I hope, given you a solid understanding of all of the major components of a web browser, from the network requests it makes to the way it stores your data safely. With such a vast topic I had to leave a few things out. Here’s my list of the most important things not covered by this book, in no particular order.
JavaScript Execution
A large part of a modern web browser is a very-high-performance implementation of JavaScript. Today, every major browser not only runs JavaScript, but compiles it, in flight, to low-level machine code using runtime type analysis. Plus, techniques like hidden classes infer structure where JavaScript doesn’t provide any, lowering memory usage and garbage collection pressure. On top of all of that, modern browsers also execute WebAssembly, a hardware-independent bytecode format for many other programming languages to target, and which may one day be co-equal to JavaScript on the web.
This book skips building the JavaScript engine, instead using DukPy. I made this choice because, while JavaScript execution is central to a modern browser, it uses techniques fairly similar to the execution of other languages like Python, Lua, or Java. The best way to learn about the insides of a modern JavaScript engine is a book on programming language implementation.
Text & Graphics Rendering
Text rendering is much more complex than it may seem at the surface. Letters differ in widths and heights. Accents may need to be stacked atop characters. Characters may change shape when next to other characters, like for ligatures or for shaping (for cursive fonts). Sometimes languages are written right-to-left or top-to-bottom. Then there are typographic features, like kerning and variants. But the most complex of all is hinting, which is a little computer program embedded in a font that modifies it to better match the discrete pixel grid. Text rendering of course affects Skia, but it also affects layout, determining the size and position of content on the screen.
And more broadly, graphics in general is pretty complex! Our browser uses Skia, which is the actual rasterization engine used by Chromium and some other browsers. But we didn’t really talk at all about how Skia actually works, and it turns out to be pretty complex. It not only renders text but applies all sorts of blends and effects quickly and with high quality on basically all CPUs and GPUs. In a real browser this becomes even more complex, with fancy compositing systems, graphics process security sandboxing, and various platform-specific font and OS compositing integrations. And there is a whole lot of additional effort to implement lower-level JavaScript-exposed APIs like Canvas, WebGL, and WebGPU.
I skipped this topic in the book because high-quality implementations are available in libraries like Skia (for graphics) and Harfbuzz (for text), as well as various system libraries, so are arguably not browser-specific. But there is a depth here best served by a book on these specific subjects.
Connection Security & Privacy
Web browsers now ship with a sophisticated suite of cryptographic protocols with bewildering names like AES-GCM, ChaCha20, and HMAC-SHA512. These protocols protect against malicious actors with the ability to read or write network packets. At the broadest level, connection security is established via the TLS protocol (which cameos in Chapter 1) and is maintained by an ecosystem of cryptographers, certificate authorities, and open-source projects.
I chose to skip an in-depth discussion of TLS because this book’s irreverent attitude toward completeness and validation is incompatible with real security engineering. A minimal and incomplete version of TLS is a broken and insecure version of it, contrary to the intended goal and pedagogically counterproductive. The best way to learn about modern cryptography and network security is a book on that topic.
Privacy on the web is another important topic that I skipped. In some ways security and privacy are related (and certainly complement one other), but they are not the same. And privacy on the web is in flux, such as debates around third-party cookies, fingerprinting, and whether there should be APIs to help with advertising. I chose to skip this topic because many basic concepts remain unsettled: what the standards of privacy are and what role governments, browser developers, website authors, and users should play in them.
Network Caching and Media
Caching makes network requests faster by skipping most of them. What makes it more than a mere optimization, however, is the extent to which HTTP is designed to enable caching. Implementing a network cache deepens one’s understanding of HTTP significantly. That said, the networking portion of this book is long enough, and at no point in the book did the lack of a cache feel painful, so I decided to leave this topic out.
And since the majority of network bandwidth and battery life is today eaten up by video playback and video conferencing, there is a whole world of complexity in real-time video encoding, decoding and rendering. Real browsers have large teams devoted to these services and APIs, and many researchers across the world work on video compression. Video codecs are fascinating, but again not very browser-specific, so this book skips them entirely, and I advise reading a dedicated book about them.
Fancier Layout Modes
The layout algorithm used in real browsers is much more sophisticated
than that covered in the book, with features like floating layout,
positioned elements, flexible boxes, grids, tables, and more.
Implementing these layout modes is complex and requires care and
sophistication—especially if you want speed and incremental performance.
Important techniques here include multi-phase layoutWe do a little bit of
multi-phase layout in the book, with words in a line having their
x, width, and height computed in
the first phase and then their y computed in a separate
phase based on the baseline. But we don’t talk much about it as an
example of multi-phase layout, and real browsers have much more complex
sets of layout phases. and measure-layout phases, with
tricky caching strategies necessary to produce good performance.
I chose to skip fancier layout in this book because even the simple layout algorithm described here is quite complex, and real-world layout algorithms involve a lot of accidental complexity caused by old standards and backwards compatibility, which I didn’t want to talk much about.
Browser UIs and Developer Tools
A real browser has a much more complex and powerful “browser UI”—meaning the chrome around the web page, where you can enter URLs, see tabs, and so on—than our browser. In fact, a large fraction of a real browser team works just on this, and not on the “web platform” itself. The multi-process nature of a modern browser also makes it difficult to interact with synchronous OS APIs, as we saw with accessibility in Chapter 14. Plus, many browsers (desktop ones, at least) support powerful extension APIs that enable developers to extend the browser UI. To help with that, browser UIs are often implemented in HTML and rendered by the browser itself.
Also, it’d be almost impossible to build complex web apps without
some kind of debugging aid, so all real browsers have built-in
debuggers. Believe it or not, for quite a long time web developers just
did a lot of console.log
debugging (or even alert debugging, before there was an
easy way to see the console!). This changed in a big way with the
innovative Firebug
browser extension for Firefox, and eventually today’s integrated
developer tools. These developer tools have deep integration with the
browser engine itself to implement features like observing the styles of
elements in real time or pausing and stepping through JavaScript
execution.
I skipped this topic because many challenges in browser UI are the same as those of any other UI: design, usability, complexity, and so on. That would make for a tedious book. Even the debugger, conceptually quite interesting, is only useful if a substantial amount of UI work is done to make it usable. Unfortunately, I’m not aware of any book on developer tools, but many books will cover basic user interface development.
Testing
Real browsers have evolved an incredibly impressive array of testing techniques to ensure they maintain and improve quality over time. In total, they have batteries of hundreds of thousands of unit and integration tests. Recently, a lot of focus has been put on robust cross-browser tests that allow a single automated test to run on all browsers to verify that they all behave the same on the same input. And there are now yearly interoperability“Interop”, for short. benchmarks that measure how well browsers are doing against this goal for key features. Behind the scenes of testing is a whole world of code and infrastructure to efficiently run these tests continuously and provide extensive frameworks to make testing easy.
A Changing Landscape
The web is a dynamic, ever-changing place. The first web browser, in 1989, did not support colors, images, styling, or scripting. Three decades of market forces, implementation quirks, and the ever-expanding reach of the web then made browsers what they are today. Those forces are as strong as ever. Browsers continue to evolve!
Sooner or later this book will be obsolete.In one sense, the sooner the better, because it means the web is continuing to thrive! Whether it is WebAssembly or WebGPU, hardware access or new CSS features, integrated payments or AI assistants, I do expect the browser of the future to play many new and different roles in computing and our lives.
That said, many dedicated, talented engineers have devoted themselves to the web over its first three decades. The structure of the web embeds their ideas, inventions, and tastes. It embeds their values and hopes for computing. You and I, dear reader, walk in their footsteps and study their work. If, in a few years, this book is out-dated, I hope those values live on and those hopes are fulfilled.